
A good bird house has the right entrance-hole diameter for your target species, a floor size and cavity depth that match those dimensions, unobstructed drainage and ventilation, walls thick enough to buffer heat and cold, no toxic materials, and a design that lets you open the box for cleaning. Get those six things right and you have a genuinely useful nest box. Get even one wrong, wrong hole size, no drainage, the wrong wood, and you may waste a season or, worse, harm the birds you are trying to help.
What Makes a Good Bird House: Practical Nest Box Guide for Backyard Birders

Maya Thompson
12 Aug 2026
Are bird houses actually good? Benefits, risks, and safety
Nest boxes do real conservation work. For a concise evaluation of whether bird houses are good overall, see our guide titled are bird houses good. Secondary cavity-nesters, bluebirds, chickadees, wrens, tree swallows, titmice, nuthatches, kestrels, and small owls, all need existing holes in wood because they cannot excavate their own. Where dead snags have been removed from managed landscapes, nest sites become the limiting factor on local populations. Controlled field studies on Tree Swallows have confirmed higher reproductive output in boxes compared with the available natural cavities in forest-grassland landscapes, so the benefit is measurable, not just assumed.
That said, peer-reviewed reviews have also documented negative outcomes: elevated predation rates when boxes are poorly placed, increased parasitism from mites and blowfly larvae in boxes that are never cleaned, and in a handful of species-specific studies, reduced reproductive performance in artificial nest sites compared with natural cavities. Some researchers use the term 'ecological trap' to describe situations where birds preferentially use a nest site that actually lowers their fitness. The honest takeaway is that a well-designed, well-placed, and routinely maintained box is a net positive; a cheap, badly sited, never-cleaned box can be neutral at best and harmful at worst. For more on safety risks and best practices, see the guide titled “are bird houses safe for birds.”. The guidance throughout this article is aimed squarely at the first category. For a focused discussion of when nest boxes can do more harm than good, see Are Bird Houses Bad Are Bird Houses Bad?.
One more legal point worth knowing: once a native migratory bird starts building in your box, the nest is protected under the Migratory Bird Treaty Act administered by U.S. Fish and Wildlife Service. You generally cannot remove or disturb an active nest without a federal or state permit. Plan your cleaning and maintenance around the nesting season, not during it.
The six design criteria that matter most
Every good nest box, regardless of target species, addresses the same six design problems. Think of them as a checklist before you cut a single board.
Drainage
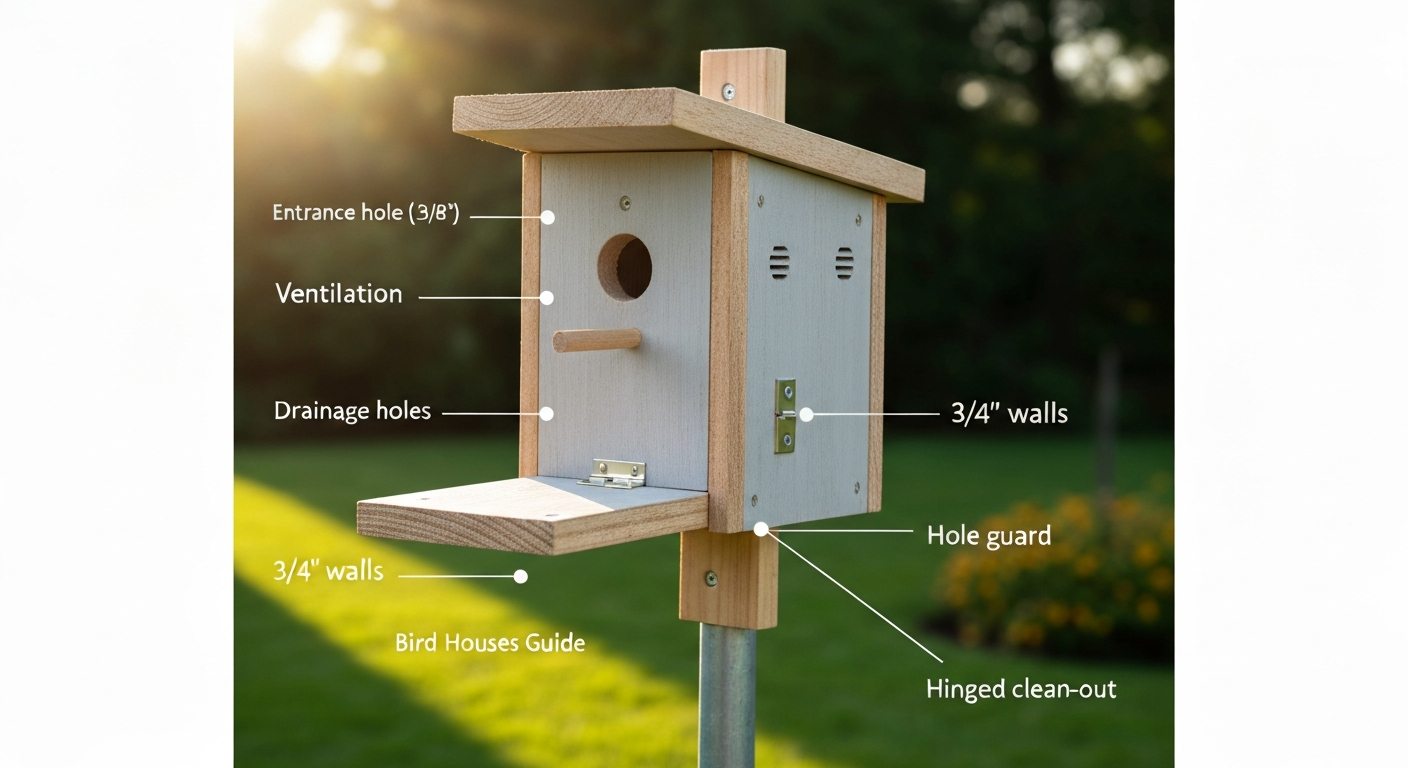
Rainwater and condensation will get inside any nest box eventually. Without drainage, a nest can become waterlogged, chilling eggs and nestlings and promoting mold. The standard fix is to drill three or four 3/8-inch holes in the corners of the floor, or simply clip the corners of the floor panel by about 1/4 inch before assembly. Either approach creates reliable drainage while keeping the floor structurally solid.
Ventilation
Stagnant, humid air inside a box raises parasite loads and, in summer, can push internal temperatures to lethal levels. The fix is cross-ventilation: drill two small holes (1/4 to 5/8 inch) near the top of each side wall so that air moves through the cavity even on calm days. A small gap left between the roof panel and the top of the back wall accomplishes the same thing. Position vents on side or back walls, never the front, so driving rain cannot funnel straight in. A roof overhang of at least 2 inches above the entrance hole keeps rain off the entrance and out of front-face vents.
Insulation and thermal buffering
Wall thickness matters more than most builders realize. Extension and wildlife habitat guides consistently call for 3/4-inch nominal lumber (which mills to about 11/16 inch actual thickness) as a minimum, and 3/4 inch is the target I recommend for any box you expect to last. Thicker walls slow heat gain in summer and hold warmth better during cold spring nights. Research has confirmed that surface color and reflectance materially affect peak internal temperature: a box painted a light, reflective color in a sunny climate can run several degrees cooler than an identical dark-painted box. See can bird houses get too hot for guidance on overheating risks and practical mitigation measures. If you are building for a hot region, use light exterior paint or a natural wood exterior and shade the box in the afternoon. For more tips on reducing internal temperatures, see our guide on how to cool off a bird house. Field and meta-analytic studies find that agriculture and hot temperatures interactively erode nest success of habitat-generalist birds across the United States, supporting the need for thermal buffering (shade, ventilation, reflective paint) blank" rel="noopener noreferrer">Agriculture and hot temperatures interactively erode the nest success of habitat generalist birds across the United States (Science/peer‑reviewed; dataset/analysis).
Predator resistance
Predation is the single largest cause of nest failure in artificial boxes. Three structural features make a meaningful difference. First, maximize the distance between the entrance hole and the nest floor: a deeper cavity forces a reaching raccoon or snake to extend further into the box, dramatically reducing success. Second, add a metal entrance plate (also called a hole guard) around the opening to prevent enlargement by squirrels or woodpeckers, which can let larger predators in. Third, mount the box on a smooth metal pole with a cone or stovepipe predator baffle rather than on a tree or wooden post. Reviews of predator-proofing interventions consistently show that the pole-plus-baffle combination reduces mammal predation more reliably than any single design modification to the box itself.
Entrance-hole sizing
Entrance diameter is the single most species-specific dimension in the whole design. A hole 1/8 inch too large lets in competing species; a hole too small simply excludes your target bird. Use a sharp hole saw or spade bit and check the finished diameter with a ruler before assembly. Acceptable tolerance is plus or minus 1/16 inch. The species-specific table below gives the numbers you need.
Clean-out access
Every nest box must open for annual cleaning. For guidance on appropriate nesting materials, bedding, and items to avoid, see our short guide on what to put in bird house. A hinged or pivoting front panel, a side panel secured with a single exterior screw, or a lift-off roof are all workable solutions. Whatever you choose, test it before you mount the box: if cleaning is inconvenient, it will not get done, and a parasite-loaded box from last year reduces occupancy and nestling survival in the next.
Material choices: wood, composite, PVC, metal, and ceramic
The material you build from affects temperature regulation, longevity, toxicity risk, and how the box ages. Here is a practical comparison.
| Material | Thermal performance | Longevity | Safety notes | Verdict |
|---|---|---|---|---|
| Untreated cedar / redwood / cypress | Excellent — breathes, buffers heat and cold | 10–20+ years with annual maintenance | Safe — no chemical leaching; avoid old CCA-treated stock | Best overall choice |
| Untreated pine / fir (exterior grade) | Good — slightly less rot-resistant than cedar | 5–12 years; needs a roof overhang for longevity | Safe if untreated; avoid pressure-treated or chemical preservatives | Good budget option |
| Exterior-grade plywood (waterproof glue) | Good — thick panels insulate reasonably well | 8–15 years with paint/sealant on exterior | Safe if glue is fully cured and exterior only is sealed; never use interior-grade plywood | Fine for larger boxes |
| Composite / engineered wood (e.g., hardboard) | Moderate — denser, holds heat slightly more than solid wood | Variable — quality depends heavily on brand; many are not moisture-tolerant | Check manufacturer safety data; some composites off-gas compounds when new | Use cautiously; solid wood is more reliable |
| PVC / plastic | Poor — conducts and retains heat; does not breathe | Very long (decades) if UV-stabilized | Inert chemically, but overheating is a real hazard without ventilation and shade | Avoid unless specifically ventilated and shaded |
| Metal (aluminum, galvanized steel) | Poor — conducts heat rapidly; can reach lethal internal temperatures in sun | Very long | Inert, but thermal risk is significant | Avoid for nest boxes |
| Ceramic / terracotta | Poor to moderate — heavy, slow heat transfer but very high peak temperature if unglazed and exposed | Very long if frost-resistant | Glazed ceramics may contain lead in older or imported pieces; difficult to add drainage or ventilation; cannot be easily cleaned; can overheat or freeze-crack | Not recommended for most applications |
A note on CCA pressure-treated wood: the EPA phased out chromated copper arsenate (CCA) treatment for most residential uses around 2003, but older stock occasionally circulates at salvage yards and estate sales. The arsenic compounds in CCA lumber can leach into the box interior and contact developing nestlings directly. Never use any pressure-treated or chemically preserved lumber inside a nest box. If you are uncertain whether a board is treated, do not use it.
On ceramic specifically: unglazed terracotta is porous and breathes somewhat, but adding proper drainage and ventilation holes without cracking the material is genuinely difficult, and a ceramic box in direct afternoon sun can heat to dangerous internal temperatures. Older glazed ceramic pieces from overseas markets sometimes test positive for lead in the glaze. If someone gives you a decorative ceramic bird house, treat it as garden art and place a functional wooden box nearby for actual nesting. For a deeper discussion, see our guide on whether ceramic bird houses are safe are ceramic bird houses safe.
Species-specific dimensions and entrance-hole sizes
The table below consolidates dimensions from U.S. wildlife agency guidance (USDA/Wildlife Habitat Management Institute). Mounting height is a suggested range from ground or water surface; local conditions may call for adjustment. For bluebirds specifically, Penn State Extension recommends mounting on a smooth metal pipe in open habitat and using a 1.5-inch entrance rather than the technically acceptable 1.375-inch minimum, because the slightly larger hole is more reliably used by bluebirds while still excluding European Starlings.
| Species | Floor size (inches) | Cavity depth (inches) | Entrance diameter (inches) | Entrance height above floor (inches) | Suggested mount height (feet) |
|---|---|---|---|---|---|
| Eastern Bluebird | 5 × 5 | 6 | 1 3/8 – 1 1/2 | 4–5 | 4–6 |
| Tree Swallow | 5 × 5 | 8 | 1 3/8 | 5–6 | 5–8 |
| House Wren | 4 × 4 | 6–8 | 1 1/8 | 4–6 | 5–10 |
| Black-capped Chickadee | 4 × 4 | 9 | 1 1/8 | 7 | 5–15 |
| Tufted Titmouse | 4 × 4 | 9 | 1 1/4 | 7 | 5–15 |
| White / Red-breasted Nuthatch | 4 × 4 | 8–10 | 1 1/4 | 6–8 | 12–20 |
| Screech-owl | 8 × 8 | 12–15 | 3 | 9–12 | 10–30 |
| American Kestrel | 8 × 8 | 12–15 | 3 | 9–12 | 10–30 |
| Barn Owl | 10 × 18 | 15–18 | 6 | 4 | 12–18 |
| House Sparrow (excluded — invasive) | — | — | Do not build for this species | — | — |
House Sparrows are non-native, invasive birds not protected by the Migratory Bird Treaty Act. They aggressively compete with and kill native cavity-nesters. Do not build boxes designed to attract them, and monitor active boxes to remove House Sparrow nests promptly and legally.
For Purple Martins, the Purple Martin Conservation Association recommends a minimum compartment interior of 6 by 6 inches, but larger compartments of approximately 7 by 12 inches improve thermal protection and nestling comfort noticeably. Starling-resistant entrance holes (SREH), which are horizontally elongated rather than round, are now standard in PMCA guidance because they exclude European Starlings more reliably than round holes at the traditional 2 1/8-inch diameter.
Which design should you build? A decision guide
Before you pull out a saw, answer four questions. Your answers will steer you to the right plan in the section that follows.
- What species are already in your area or likely to colonize? Check your regional eBird data or a local Audubon chapter list. Building for a species not present within a few miles is wishful thinking.
- What habitat type do you have? Open lawn or meadow suits bluebirds and tree swallows. Dense shrub or woodland edge suits wrens, chickadees, and titmice. Large open fields near structures suit kestrels. Mature forest with large trees suits screech-owls and larger owls.
- What is your predator pressure? High raccoon, snake, or House Sparrow pressure calls for a metal pole mount with a baffle, a metal entrance plate, and possibly a deeper cavity. Low-pressure rural sites are more forgiving, but a baffle costs almost nothing and should be standard.
- What is your climate zone? Hot southern summers (USDA zones 8–10) demand lighter-colored exterior paint, afternoon shade, and maximum ventilation. Cold northern winters (zones 3–5) favor thicker walls and a box orientation that catches morning sun to warm the cavity.
Use the answers like a flowchart. Open habitat plus native migratory songbirds in zones 4–7: build the bluebird/tree swallow box (Plan B below). Woodland or shrubby edge with small birds: build the small songbird box (Plan A). You want to attract a screech-owl or kestrel and have open mature habitat: build the raptor/owl box (Plan C). Hot climate adjustment: regardless of plan, use 3/4-inch cedar, paint exterior light gray or tan, add two 1/2-inch ventilation holes per side, and mount where the box is shaded after noon.
DIY plans: three nest-box builds with full dimensions
All three plans use 3/4-inch nominal (11/16-inch actual) untreated cedar or pine. Measurements below are finished dimensions of each panel. A single 1x6 cedar board (actual 3/4 x 5.5 inch) ripped and cross-cut efficiently yields Plans A and B with almost no waste. Plan C requires 1x10 or 1x12 stock.
Plan A: Small songbird box (wren, chickadee, titmouse, nuthatch)
This is the simplest box to build and a good starting project. The floor is 4 by 4 inches, which is the correct footprint for all four target species. Set your entrance hole to 1 1/8 inches for wrens and chickadees, or 1 1/4 inches for titmice and nuthatches. If you are unsure which species will use the box, drill 1 1/8 inches, chickadees and wrens will use it and titmice in some regions will manage as well.
| Panel | Width (inches) | Height / Length (inches) | Quantity | Notes |
|---|---|---|---|---|
| Floor | 4 | 4 | 1 | Clip or drill corners for drainage |
| Front | 4 | 10 | 1 | Drill entrance hole 7 inches from floor bottom; bevel or pivot for clean-out |
| Back | 4 | 14 | 1 | Extra length for mounting — drill two mounting holes top and bottom |
| Sides (left & right) | 4 | 10 (taper to 9 at front) | 2 | Angled top edge sheds water; drill 2x 1/4-inch vent holes near top |
| Roof | 6 | 7 | 1 | 2-inch overhang over front; slope back to front at ~10-degree angle |
- Cut all panels to the dimensions above. Mark the entrance hole center 7 inches from the bottom of the front panel.
- Drill the entrance hole with a sharp hole saw or spade bit. Check diameter with a ruler. Sand the inside edge smooth so feathers do not catch.
- Clip each corner of the floor panel at 45 degrees, removing about 1/4 inch, or drill a 3/8-inch hole near each corner.
- Drill two 1/4-inch vent holes in each side panel, positioned 1 inch down from the top edge and 1 inch in from each end.
- Assemble sides to the back panel first, using two 1 5/8-inch exterior-grade screws per joint. Predrill to avoid splitting cedar.
- Drop the floor in flush with the bottom edges of the sides and back. Secure with one screw per side.
- Attach the front panel. For clean-out access, drive only one screw at the top and one at the bottom on one side, then use a single pivot screw in the middle of the opposite side so the front swings open. Alternatively, omit the top screw and let the front hinge on the bottom screw, latching at the top with a nail or bent wire.
- Set the roof with a 2-inch overhang at the front and secure through the back panel and side tops with 1 5/8-inch screws. Do not glue the roof so it can be replaced if it warps.
Plan B: Bluebird/tree swallow box
This is the most-built nest box design in North America, with decades of monitoring data behind it. The 5 by 5 floor and 1 3/8-inch to 1 1/2-inch entrance follow both the USDA species table and Penn State Extension recommendations. Mount it on a metal conduit pipe (1/2-inch EMT is cheap and widely available) at 4 to 6 feet above ground in an open grassy area, at least 100 yards from woodland edges to reduce House Wren competition.
| Panel | Width (inches) | Height / Length (inches) | Quantity | Notes |
|---|---|---|---|---|
| Floor | 5 | 5 | 1 | Clip corners; floor sits 1/2 inch up from bottom of side panels to allow drainage clearance |
| Front | 5 | 11 | 1 | Entrance hole center 9 inches from floor; pivot or side-hinge for clean-out |
| Back | 5 | 16 | 1 | Extra length for pole mount; drill mounting holes top and bottom |
| Sides (left & right) | 5 | 11 (taper to 10 at front) | 2 | Drill 2x 3/8-inch vent holes near top on each side |
| Roof | 7 | 8 | 1 | 2.5-inch overhang at front; slight rearward slope |
- Cut all panels. Bluebird boxes are often built with a side-opening front panel for easy monitoring — this is strongly recommended because you will want to check nest progress weekly during the season.
- Mark the entrance hole center exactly 9 inches above the floor surface (not the bottom of the front panel). Drill at 1 3/8 inches for tree swallows or 1 1/2 inches for bluebirds. In areas where both species are present, 1 3/8 inches is the safe compromise.
- Clip floor corners or drill drainage holes as in Plan A.
- Drill 3/8-inch vent holes in side panels 1 inch down from the top edge.
- Assemble back, sides, and floor with 1 5/8-inch exterior screws, predrilling each joint.
- Attach the front panel with a pivot or hinge for clean-out access. A single 1 5/8-inch screw in the middle of one side, turned loosely, lets the front swing open. Add a small latch nail at the opposite side bottom to keep the front closed.
- Attach the roof. Leave a small gap (about 3/8 inch) between the back of the roof panel and the back wall top edge as an additional rear vent.
- Mount on 1/2-inch EMT conduit using a 1/2-inch pipe flange screwed to the back panel, or simply notch the back panel to drop over the pipe top. Install a cone baffle (minimum 18-inch diameter) at least 18 inches below the box.
Plan C: Raptor/owl box (screech-owl, kestrel)
This box uses the same basic construction logic as Plans A and B but scales up significantly. The 8 by 8 inch floor and 12 to 15 inch cavity depth match both screech-owl and kestrel requirements. The 3-inch entrance is the same for both species, which makes this a versatile box for woodland edges and open agricultural land. Use 3/4-inch cedar or exterior-grade plywood for the larger panels, solid 1x10 cedar boards are ideal.
| Panel | Width (inches) | Height / Length (inches) | Quantity | Notes |
|---|---|---|---|---|
| Floor | 8 | 8 | 1 | Drill 4x 1/2-inch drainage holes or clip corners by 1/2 inch |
| Front | 8 | 16 | 1 | Entrance hole center 13 inches from floor; side-hinge for clean-out |
| Back | 8 | 22 | 1 | Extra length for mounting; 3/8-inch mounting holes top and bottom |
| Sides (left & right) | 8 | 16 (taper to 14.5 at front) | 2 | Drill 3x 1/2-inch vent holes near top on each side |
| Roof | 10 | 11 | 1 | 2-inch overhang at front and both sides |
- Cut panels from 3/4-inch cedar or exterior plywood. For plywood, use a circular saw with a fine-tooth blade to minimize tearout.
- Mark the entrance hole center 13 inches above the floor surface. Drill at 3 inches using a hole saw — go slowly on the final pass to avoid splintering the exit side.
- Add 2 to 3 inches of dry wood shavings (not sawdust, not cedar shavings for owls — plain pine shavings are fine) to the floor before mounting. Neither screech-owls nor kestrels carry nesting material; they need some substrate.
- Assemble back, sides, and floor with 2-inch exterior screws. Predrill all joints in this larger box to prevent any splitting.
- Hinge one full side panel for clean-out access using two small zinc-coated hinges and a barrel bolt latch at the opposite edge.
- Attach the roof with a 2-inch front overhang. Secure with 2-inch screws through the roof into the side tops and back.
- Mount on a wooden post or metal pipe at 10 to 30 feet height, facing away from prevailing winds and with a clear flight path to the entrance. Attach a predator baffle to the mount below the box.
Tools and materials for each plan
The lists below cover everything you need. Substitutions are noted where they matter. All three plans share the same core tool set; Plans B and C add one or two items.
Core tool list (all three plans)
- Hand saw or circular saw with a 40-tooth crosscut blade
- Drill/driver with a 3/8-inch chuck
- Hole saw or spade bit set: 1 1/8, 1 1/4, 1 3/8, 1 1/2, and 3 inch sizes cover all species in this article
- Combination square and pencil
- Tape measure
- Clamps (two minimum — four is easier)
- Sandpaper: 80 grit and 120 grit
- Safety glasses and hearing protection
Materials list: Plans A and B (small songbird and bluebird box)
- One 8-foot length of 1x6 untreated cedar (actual 3/4 x 5.5 inch) — yields all panels for Plan A with stock left over for Plan B with one additional board
- For Plan B: add one 8-foot length of 1x6 cedar
- 1 5/8-inch exterior-grade deck screws (coated or stainless steel — 25 count is more than enough for both boxes)
- One small zinc-coated or stainless hinge (for pivot clean-out) or two small barrel hinges per box
- One small wire nail or bent finish nail per box as a latch
- Optional: one metal entrance plate (1 1/8, 1 1/4, or 1 3/8 inch as appropriate) — galvanized or aluminum
- Exterior-grade water-based primer and paint in a light color (off-white, light gray, or tan) for hot climates; leave natural or apply a single coat of raw linseed oil for temperate climates
- For Plan B mount: one 5-foot length of 1/2-inch EMT conduit, one 1/2-inch pipe flange, and one cone predator baffle (metal, minimum 18-inch diameter)
Materials list: Plan C (raptor/owl box)
- Two 8-foot lengths of 1x10 untreated cedar, or one 4x8 sheet of 3/4-inch exterior-grade plywood (CDX or better) with waterproof glue
- 2-inch exterior-grade coated or stainless deck screws (50 count)
- Two small zinc-coated or stainless zinc hinges for side clean-out panel
- One small barrel bolt latch
- 3-inch metal entrance plate (galvanized)
- 1 to 2 cups plain (unscented, untreated) pine wood shavings for floor substrate
- Exterior-grade water-based primer and light-colored exterior paint, or one coat of raw linseed oil on exterior surfaces only
- Mounting post: 4x4 rot-resistant wooden post (10 to 12 feet) or 1-inch EMT conduit with appropriate hardware; cone or stovepipe predator baffle
Safe finishes and what to avoid
On the exterior, water-based latex paint (fully dried and cured before mounting), raw linseed oil, or no finish at all are all acceptable. Never use oil-based paints, varnish, shellac, stains with biocides, or any sealant on interior surfaces. The inside of the box must stay bare wood so birds can grip the walls and so off-gassing chemicals do not contact developing nestlings. If you use exterior plywood, seal only the outer faces and edges, leave the interior raw.
Construction details, assembly tips, and predator-proofing
Cutting and joinery
Cedar splits easily along the grain if you drive screws without predrilling, especially near edges. Always predrill with a bit about 1/16 inch smaller than your screw shank diameter. Keep screws at least 3/4 inch from any edge. When ripping narrow pieces from wider boards, clamp a straightedge as a fence for a cleaner, safer cut. For the angled top edges on side panels (the taper that creates the roof slope), a simple bevel cut of about 5 to 10 degrees on a table saw or with a hand plane is all that is needed. A slight slope keeps water off the roof joint and away from the back wall.
Roughening the interior below the entrance
Fledglings need to climb to the entrance hole. Use a chisel, gouge, or the corner of a saw blade to cut four or five shallow horizontal grooves (about 1/16 inch deep) across the inside face of the front panel below the entrance hole, spaced about 1 inch apart. These act as ladders. This step is particularly important in deeper boxes (Plan C) where the climb from the floor to the entrance is 10 or more inches.
Ventilation and drainage: a simple diagram guide
Picture the box from the side. At the top of each side wall, two small holes sit just below where the roof meets the wall, these are your vents. At the bottom corners of the floor, four clipped corners or drilled holes provide drainage. The roof overhangs the front by at least 2 inches, creating a rain shadow over the entrance. The back-to-roof gap (if used) is at the rear, where driving rain almost never reaches. This arrangement creates a convective chimney effect: cooler air enters low (or through front gaps), warms inside, and exits through the high side vents and rear gap. In hot weather this passive airflow can reduce peak internal temperature by 5 to 10 degrees Fahrenheit compared with a sealed box of the same material.
Metal entrance plates (hole guards)
A metal entrance plate is a flat piece of aluminum or galvanized steel with a hole matching your entrance diameter, screwed flush over the drilled opening. It serves two purposes: it prevents squirrels and woodpeckers from enlarging the hole (which would admit predators and competing species), and it reinforces the area around the hole against wear. You can buy pre-made plates for common hole sizes or cut your own from 22-gauge sheet metal with aviation snips. Smooth all cut edges with a file before installing, sharp metal edges can injure birds.
Predator baffles: what actually works
The research on predator-proofing is clear: a smooth metal pole combined with a cone or stovepipe baffle below the box is far more effective than any modification to the box alone. A cone baffle should be at least 18 inches in diameter and mounted at least 18 inches below the box, with the pole passing through the center. Stovepipe baffles (a 24-inch length of 8-inch diameter metal stovepipe hung loosely around the pole below the box) work on the same principle: a climbing mammal cannot grip the smooth, wobbling cylinder. For snake predation, which is harder to prevent, maximum cavity depth (a deep box that forces a snake to extend far inside to reach eggs) combined with a mounted pole rather than a tree attachment is the best available field-tested strategy.
Placement, timing, and ongoing maintenance
Mount boxes before the breeding season: late February to early March in the Southeast and mid-Atlantic, late March to April in the upper Midwest and Northeast, and late March through April in most of the Mountain West. Boxes for owls and kestrels benefit from being up in autumn, since these species may roost in boxes over winter before committing to nesting. Face entrances generally east or southeast to catch the warm morning sun and avoid the prevailing afternoon wind and rain in most North American regions. Avoid facing entrances south in hot climates where afternoon sun exposure is a problem.
After the nesting season is completely over, typically by late August in most regions, open every box, remove all old nest material, and scrub the interior with a stiff brush and a dilute bleach solution (1 part bleach to 9 parts water). Rinse thoroughly and let the box dry completely before closing it for winter. This removes blow-fly larvae, mites, and pathogens that would otherwise survive to infest next year's clutch. Recheck fasteners, repaint or re-oil any weathered exterior surfaces, and confirm the predator baffle is still secure. This annual check takes about ten minutes per box and is the single most impactful maintenance action you can take.
FAQ
What are the core criteria that make a good bird house?
A good bird house provides safe, dry, thermally appropriate, and predator‑resistant shelter sized for target species. Key criteria: - Materials: untreated, rot‑resistant wood (cedar, redwood, cypress) or exterior‑grade plywood; avoid CCA/older pressure‑treated lumber and toxic finishes. - Drainage: multiple small drainage holes or clipped floor corners so water exits quickly. - Ventilation: vents near the top of side walls or a small gap under the roof for airflow without direct rain entry. - Insulation: 1/2"–3/4" wall thickness and shaded placement; light exterior colors/reflective coatings in hot climates. - Predator resistance: entrance tunnel depth, metal entrance plates, smooth pole mounting and predator baffles; avoid mounting on trees without baffles. - Entrance sizing and internal dimensions: species‑appropriate hole diameter, floor area, and depth (see species‑specific guidance). - Access for monitoring/cleaning: hinged side or roof panel for annual maintenance without disturbing active nests outside the breeding season.
Are bird houses beneficial or can they be harmful to birds and local ecology?
Both — nest boxes can be very beneficial for secondary cavity nesters where natural cavities are limiting, increasing local breeding opportunities and reproductive output. However, negative outcomes are documented: increased predation or parasitism if poorly placed or managed, attraction of non‑target or invasive species, altered reproductive ecology, and potential ecological traps in some contexts. The balance depends on species, design, placement, and active management (monitoring, sanitation, predator control). Use species‑appropriate designs, mount thoughtfully, inspect and clean annually, and monitor occupancy to reduce harms.
Which materials are safe and recommended — should I ever use metal, plastic, or ceramic boxes?
Best: untreated rot‑resistant wood (cedar, redwood, cypress) or exterior‑grade plywood with water‑proof glue. These breathe, insulate, and moderate temperature. Avoid: CCA/old pressure‑treated lumber and chemical preservatives. Metal and plastic boxes: generally discouraged because they conduct and retain heat and can overheat nestlings unless heavily insulated and shaded. Ceramic: not recommended for most uses — ceramics can overheat or crack, are heavy and breakable, and may lack ventilation. If you use alternative materials, add substantial insulation, ventilation, and shade, and monitor internal temperatures.
What entrance-hole diameters and internal box dimensions should I use for common species?
Use species‑specific dimensions (internal floor area × depth and entrance diameter). Common U.S. guidance (rounded): - Eastern Bluebird: floor 5"×5", depth ~6", entrance ≈1 3/8"–1 1/2". - Tree Swallow: floor 5"×5", depth ~8", entrance ≈1 3/8". - House Wren: floor 4"×4", depth 6–8", entrance ≈1 1/8". - Black‑capped Chickadee: floor 4"×4", depth ~9", entrance ≈1 1/8". - Tufted Titmouse: floor 4"×4", depth ~9", entrance ≈1 1/4". - Nuthatches (e.g., Red‑breasted): floor 4"×4", depth 8–10", entrance ≈1 1/4". - Screech Owl / Kestrel: floor ≈8"×8", depth 12–15", entrance ≈3" (mounting height varies). For communal species (Purple Martin) follow PMCA compartment sizing (~6"×6" minimum; larger compartments ~7"×12" preferred) and starling‑resistant entrance designs.
How should I place and mount nest boxes (height, orientation, distance from vegetation)?
Placement matters: - Height: species‑specific — small passerines (chickadees, wrens) often 5–15 ft; bluebirds and swallows 4–6 ft (bluebirds on open poles); kestrels and screech‑owls 10–20 ft or as recommended regionally. - Orientation: face entrance away from prevailing winds and direct late‑afternoon sun (often NE–E to avoid hot western sun), depending on climate. - Distance from vegetation: place boxes away from dense climbable vegetation and perches (at least a few feet clear around the box) to reduce predator access, except for species that prefer wooded edges. - Mounting: smooth metal poles with a predator baffle are preferred for many species; use proper mounting brackets when attaching to buildings (avoid allowing predators access) and avoid mounting on trees unless baffles and predator‑gap measures are used. - Landscape context: open habitat for bluebirds and swallows, woodland edges for chickadees and nuthatches, near water for martins and swallows where appropriate.
How do I prevent overheating inside nest boxes and keep them cool in hot regions?
Mitigation strategies: - Shade the box with natural canopy or an artificial sunshade; avoid direct western sun. - Use light‑colored, high‑reflectance exterior paint (thin coat) to reduce heat absorption. - Provide adequate ventilation (vents near top of sides, small gaps under roof) to promote airflow. - Use thicker walls/insulative wood; avoid metal/plastic. - Add a small, recessed overhanging roof to shield entrance and top. - Test internal temperature with a thermometer on hot days after installation; if temps rise to dangerous levels, add more shade, vents, or relocate. Regular monitoring during heat waves is prudent.
Next Articles
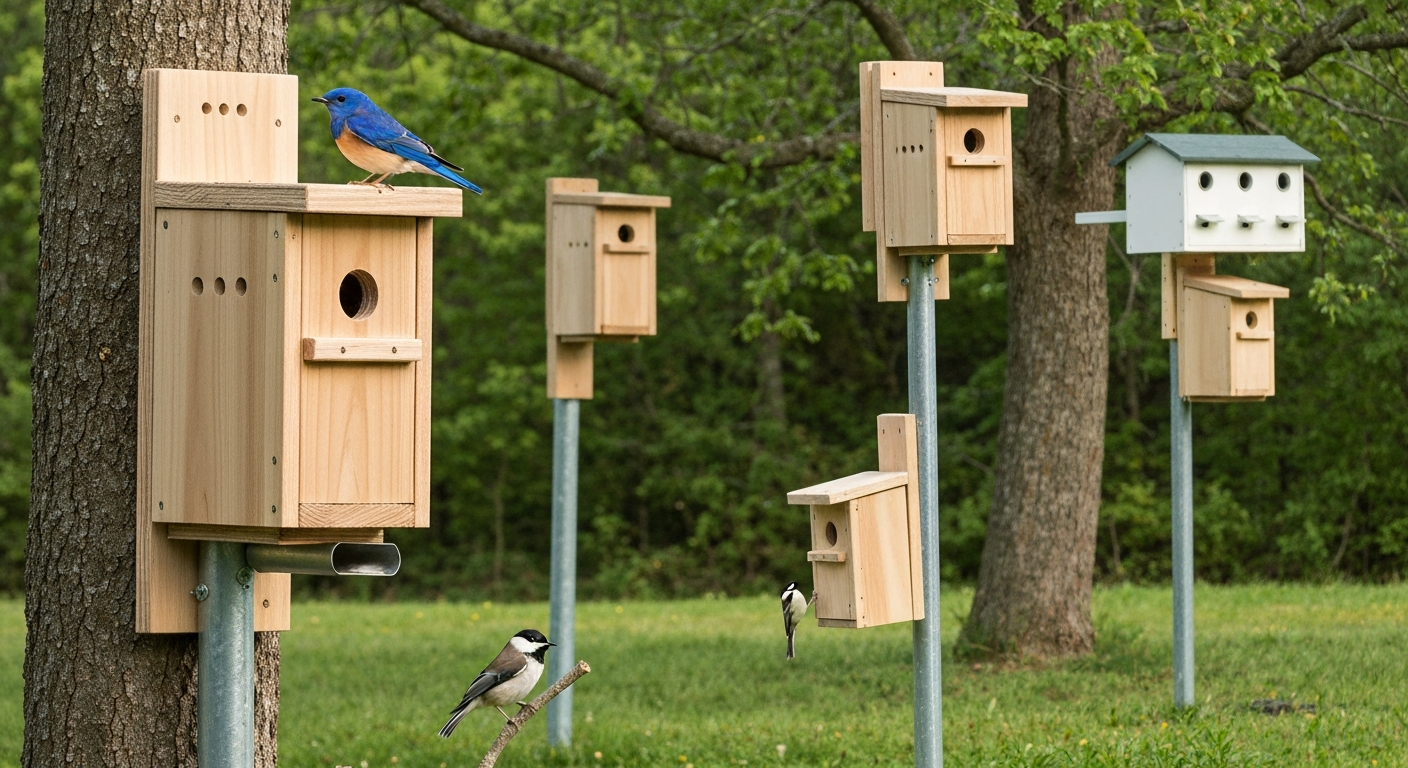
Are Bird Houses Safe for Birds? Practical Guide & Safety Tips
Are bird houses safe for birds? Practical, evidence-based guide to building, siting, and maintaining safe nest boxes.
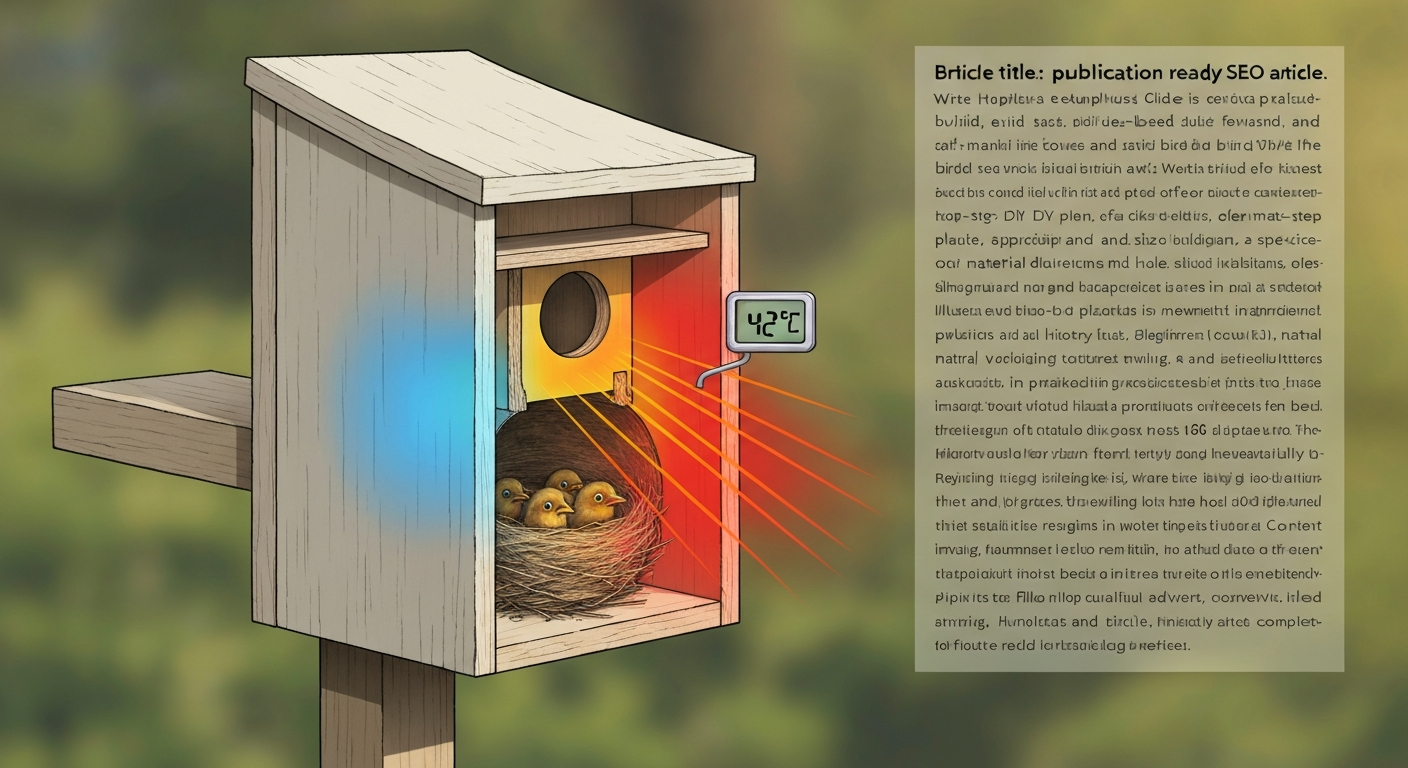
Can Bird Houses Get Too Hot? Prevention, Monitoring, Fixes
Can bird houses get too hot? Learn how to detect, prevent and fix overheating with venting, shade, monitoring.
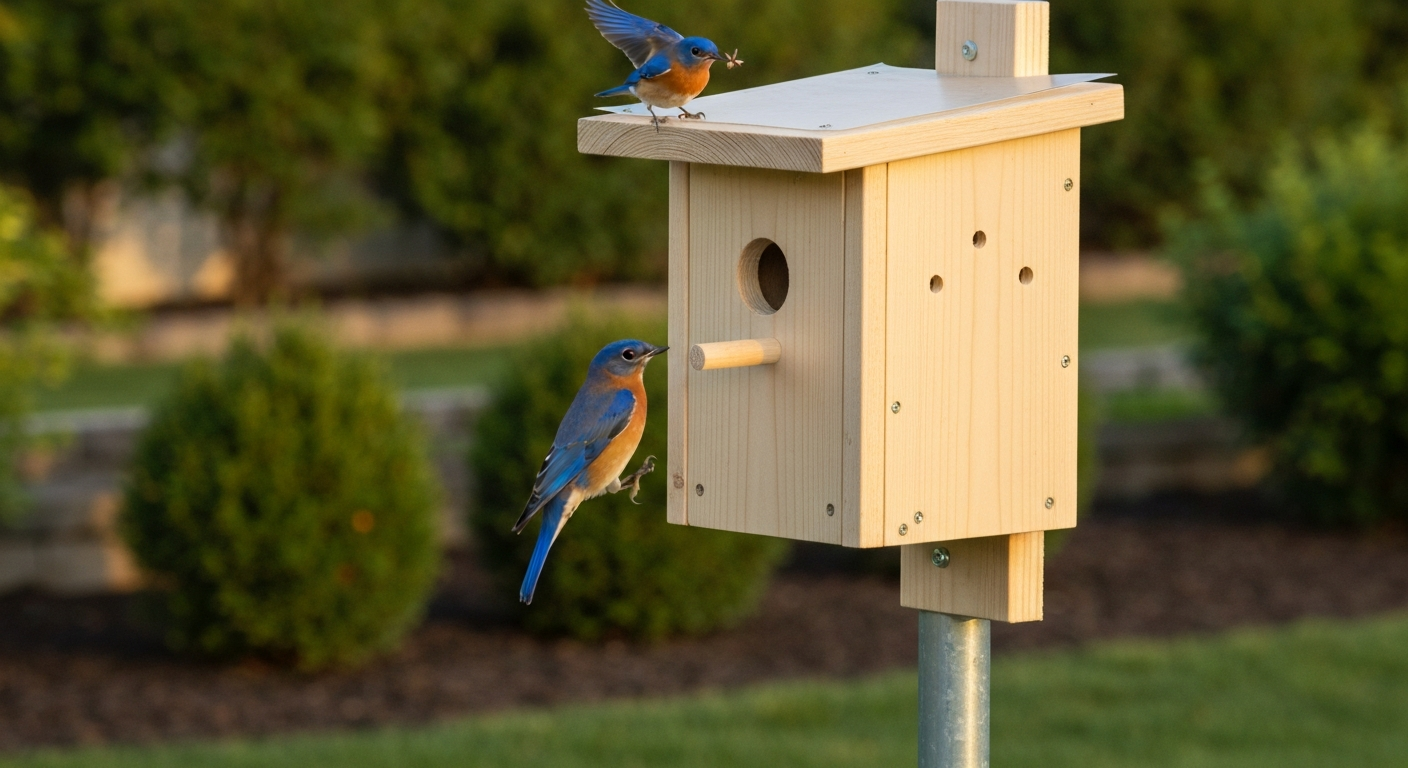
Are Bird Houses Bad? Safe Guide for Backyard Birders
Are bird houses bad? Clear, evidence-based guidance: species specs, safety, placement, maintenance, verdict & checklist.