
Birdhouses are not inherently bad, but they can absolutely cause harm if they are poorly designed, badly placed, or left dirty. A well-built, correctly sized, properly maintained nest box genuinely helps cavity-nesting birds, especially in yards and neighborhoods where hollow trees have been removed. The honest answer is that the box itself is neutral; what you do with it makes it beneficial or harmful. If you’re wondering whether bird houses are safe for birds, this guide explains when nest boxes help, when they can harm, and exactly how to make them safe for cavity-nesting species are bird houses safe for birds. If you're asking "are bird houses good", this guide explains when they help, when they harm, and how to make them safe.
Are Bird Houses Bad? Safe Guide for Backyard Birders

Maya Thompson
14 Jul 2026
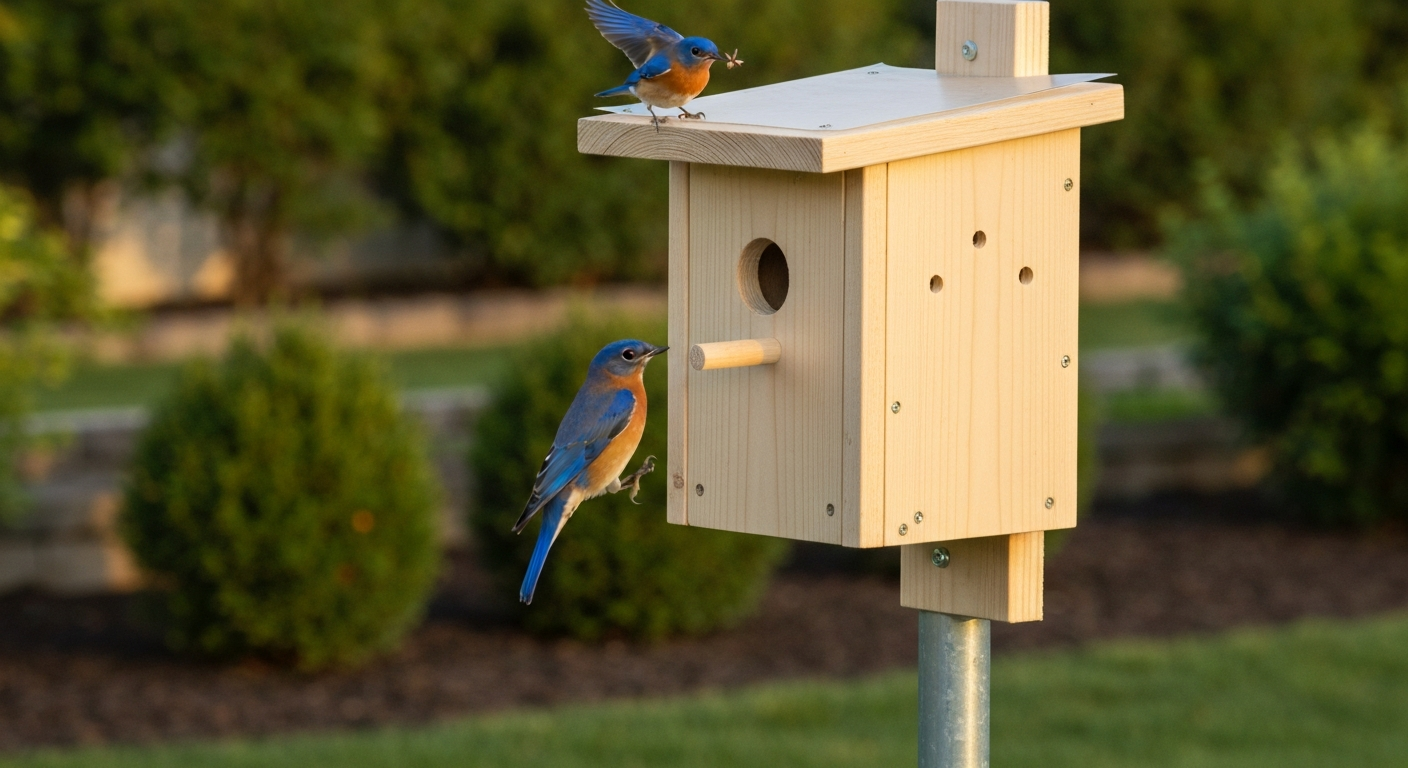
Who this guide is for and how to use it
This article is written for backyard birders who want to do right by the birds on their property, novice builders thinking about their first DIY nest box, and conservation-minded folks who already have a birdhouse and are wondering whether it is helping or hurting. If you are starting from scratch, read straight through. If you already have a box up and you are worried about it, jump to the troubleshooting section or the decision checklist near the end. Everything here is based on peer-reviewed research, NestWatch and extension-agency guidance, and my own hands-on experience building and monitoring nest boxes across multiple seasons.
The real benefits of putting up a birdhouse
Cavity-nesting birds, including bluebirds, chickadees, wrens, tree swallows, and many woodpecker species, depend on holes in dead or dying trees to raise their young. In managed landscapes, those trees get cut down, and competition for the remaining natural cavities is intense. A well-placed nest box fills that gap directly. Research confirms that nest boxes can meaningfully increase reproductive output for species like Tree Swallows in forest-grassland habitats where natural cavities are scarce, and multi-species studies in urban settings have found reproductive success in nest boxes to be similar to or better than natural cavities for several target species.
Beyond raw nesting success, a monitored birdhouse gives you a window into the breeding cycle that almost nothing else provides. Watching a pair of bluebirds carry food to nestlings, tracking fledge dates, and reporting observations to programs like Cornell Lab's NestWatch contributes to the long-term datasets researchers use to study climate effects on bird reproduction. That citizen-science value is real and ongoing.
When birdhouses actually do harm birds
Systematic reviews published in the past few years are unambiguous: artificial nest boxes can and do produce negative outcomes under certain conditions. The term researchers use is 'ecological trap,' meaning birds are attracted to a box that looks suitable but produces worse outcomes than no box at all. This happens for several specific reasons.
- Overheating: A dark-colored box mounted in full afternoon sun can reach interior temperatures high enough to kill nestlings or force early fledging. Microclimate studies confirm that surface color and placement drive temperature profiles decisively.
- Disease and parasite buildup: Ectoparasitic blowfly larvae (Protocalliphora spp.) build up in reused nests, and high larval loads have been linked to reduced nestling growth and, in some studies, higher mortality. Old nesting material left in a box concentrates this risk season after season.
- Predator magnets: A box mounted on a fence post near shrubs or low branches is easy for raccoons, rat snakes, and house cats to reach. Some predator-guard designs are also circumvented by determined animals, especially large rat snakes.
- Competitive mismatch: House Sparrows and European Starlings aggressively take over boxes intended for native species. A box that is the wrong size or placed in the wrong habitat helps invasive competitors more than target birds.
- Ecological traps from poor siting: Boxes placed in areas with high predation pressure or low food availability can attract birds to breed in locations where survival and fledging rates are genuinely worse than nearby natural sites. A Barn Owl nest-box study documented reduced offspring survival relative to natural sites as a clear example of this effect.
Should you put up a birdhouse? A simple decision guide
Before you mount anything, ask yourself these five questions. If you can answer yes to most of them, a birdhouse is likely to help. If you are shaking your head at several, fix those conditions first or skip the box for now.
- Do cavity-nesting birds already visit or nest near your yard? If you have never seen a bluebird, wren, or swallow, a box alone will not attract them.
- Can you mount the box on a smooth metal pole with a baffle, away from trees and fences that predators use to climb or jump from?
- Are you able to check the box every 5 to 7 days during nesting season and clean it thoroughly at least once per year?
- Is your yard free of or manageable for House Sparrows and Starlings?
- Can you place the box where it gets morning sun but is shaded from the hot afternoon sun, particularly if you live in a warm climate?
Species quick-reference: dimensions, hole sizes, and mounting heights
Getting the entrance hole right is the single most important design decision you will make. The wrong hole size lets in House Sparrows, Starlings, or larger predators. The right hole excludes competitors and makes the box genuinely species-specific. Floor dimensions and cavity depth matter too, because birds have evolved to use cavities of a certain size and will reject or abandon boxes that feel wrong.
| Species | Floor (inches) | Cavity depth (inches) | Entrance hole (inches/mm) | Mounting height (feet) |
|---|---|---|---|---|
| Eastern/Western Bluebird | 5 x 5 | 8–10 | 1.5" / 38 mm | 4–6 |
| Tree Swallow | 5 x 5 | 6–8 | 1.375" / 35 mm | 5–10 |
| Black-capped/Carolina Chickadee | 4 x 4 | 8–10 | 1.125" / 28 mm | 5–15 |
| House Wren | 4 x 4 | 6–8 | 1.125" / 28 mm | 5–10 |
| White-breasted Nuthatch | 4 x 4 | 8–10 | 1.25" / 32 mm | 12–20 |
| Downy/Hairy Woodpecker | 4 x 4 | 9–12 | 1.25"–1.5" / 32–38 mm | 8–20 |
| Purple Martin | 6 x 6 | 6 | 2.125" / 54 mm | 15–20 (colony) |
| American Kestrel | 8 x 8 | 12–15 | 3" / 76 mm | 10–30 |
| Eastern Screech-Owl | 8 x 8 | 12–15 | 3" / 76 mm | 10–30 |
| Barn Owl | 10 x 18 | 15–18 | 6" / 152 mm | 12–18 (barn/pole) |
Tolerances of plus or minus 1/16 inch on hole size are fine in practice. If you are unsure, err slightly smaller rather than larger: you can always enlarge a hole, but you cannot shrink it.
Materials and safety: what to build with (and what to avoid)
The material your box is made from affects interior temperature, durability, bird safety, and your own ease of working with it. Here is a direct rundown of the most common options.
Untreated wood (best overall choice)
Cedar, pine, and redwood are the standard materials for a reason. They are easy to cut, insulate reasonably well, and do not off-gas chemicals near nestlings. Cedar and redwood resist rot naturally and will last 10 or more years without any finish. Plain pine is fine if you seal the exterior only, never the interior. Wall thickness of at least 3/4 inch is important for insulation: thinner walls heat up and cool down faster, making the interior temperature more extreme.
Treated wood and plywood (use with caution or avoid)
Pressure-treated lumber, even the newer ACQ formulations that replaced arsenic-based CCA, should not be used for any interior surface or anywhere nestlings will contact it directly. The exterior of a base or mounting post can use treated wood since birds do not contact it. Exterior-grade plywood is acceptable for the box body if the interior faces are left unfinished and the exterior is painted or sealed, but the formaldehyde resins in cheaper plywood off-gas more than solid wood, so use a good-quality exterior ply and let it air out before mounting.
Plastic (generally avoid)
Thin plastic heats up dramatically in sun and provides almost no insulation. Callan et al.'s 2023 study comparing plastic prototypes found interior microclimate was harder to manage than with timber designs. Some thicker recycled-plastic lumber products (like Trex) are more stable, but they are heavy and expensive. For a beginner build, stick with wood.
Metal (avoid for main box body)
Metal conducts heat rapidly and a metal-sided box in direct sun can reach lethal interior temperatures very quickly. Metal is fine for hardware, mounting poles, hole guards, and baffles, but not for walls or roofs.
Ceramic and woodcrete (situational)
Ceramic birdhouses sold as decorative items are often not functional: drainage is poor, ventilation is absent, and the hole size is decorative rather than species-correct. However, woodcrete boxes (a mix of concrete and wood fibre, popular in European conservation programs) are a legitimate category. They are durable and thermally buffer temperature swings differently from plain timber, but research shows mixed effects on breeding success, and they can run warmer than timber early in the season. If you go this route, choose a product from a reputable conservation supplier with documented hole sizes and verified ventilation, not a garden-centre ornament.
| Material | Thermal performance | Durability | Safe for birds? | DIY-friendly? |
|---|---|---|---|---|
| Untreated cedar/redwood | Good insulation, stable | 10+ years | Yes | Yes |
| Untreated pine (3/4"+ wall) | Good insulation | 5–8 years (sealed exterior) | Yes | Yes |
| Pressure-treated lumber | Good insulation | Long | Interior surfaces: No | Avoid interior use |
| Exterior plywood | Moderate | 5–10 years | Good-quality only, aired out | Yes with care |
| Thin plastic | Poor, overheats easily | Long if UV-stable | Risk of overheating | Not recommended |
| Metal | Very poor, heats rapidly | Very long | No for walls/roof | Hardware/mounts only |
| Decorative ceramic | Poor drainage/ventilation | Moderate | Usually not suitable | No |
| Woodcrete/conservation boxes | Moderate, mixed data | Very long | Yes if properly designed | Buy from specialist |
Ventilation, drainage, and insulation: design features every safe birdhouse needs
These three features are non-negotiable in any functional nest box. Cornell Lab's NestWatch and university extension guides all say the same thing: drill at least four drainage holes of 3/8 to 1/2 inch in the floor, and add ventilation holes of roughly 1/4 inch near the top of each side wall. The floor holes let rainwater escape if it gets in; without them, a sudden downpour can drown eggs or nestlings. The side ventilation holes allow hot air to escape by convection: hot air rises and exits through the top vent holes while cooler outside air enters from the bottom gap around the entrance or from lower gaps. This convective flow can make a meaningful difference in interior temperature on a hot afternoon.
A recessed floor, where the floor sits about 1/4 inch above the bottom edge of the side walls, also improves drainage by preventing the floor from sitting in pooled water. An overhanging roof of at least 2 inches at the front deflects driving rain from the entrance hole. These are small details that take minutes to add at the build stage and can prevent real harm.
Insulation is different from ventilation and matters most at the extremes of the season. In early spring or at northern latitudes, a box that loses heat rapidly at night can chill eggs or newly hatched nestlings. Adding a layer of untreated wood shavings (not sawdust) to the floor in late winter gives early-nesting species like Eastern Bluebirds a thermal buffer. In hot climates or for late-season nests, shade is more important than insulation. A simple external shade panel, which is a thin board or piece of plywood screwed a few inches above the existing roof to create an air gap, can reduce interior temperatures by several degrees during peak afternoon heat.
Predator-proofing and anti-competition features
A predator visit does not just kill one clutch; it can cause birds to abandon a site for the rest of the season. The research is consistent that the most effective predator-proofing strategy is a combination of smooth metal pole mounting, a properly designed baffle, and keeping the box away from anything a predator can climb or jump from. A systematic review (Predator‑Proofing Avian Nestboxes: A Review of Interventions, Opportunities, and Challenges (Marcus et al., 2023/2024)) found that pole mounts with smooth metal poles plus baffles, entrance collars or tubes, predator guards, and placement away from launch points reduce mammal, bird, and snake access, though effectiveness varies and some guards are circumvented by persistent predators.
- Mount on a smooth metal conduit or EMT pole of at least 1 inch diameter: raccoons and squirrels cannot grip smooth metal as easily as wood or rough pipe.
- Add a torpedo or stovepipe baffle on the pole below the box: the standard stovepipe baffle (about 8 inches in diameter, 24 inches long) is widely considered the most reliable mammal deterrent for pole-mounted boxes.
- Keep the box at least 10 feet from any tree, fence, or structure that a predator could use as a launch point. Field trials show that proximity to climbable structures undermines nearly every guard design.
- Use a metal entrance-hole guard or tube: a 1 to 1.5 inch deep metal collar around the entrance hole prevents raccoons and squirrels from enlarging the hole and reaching in. Predator guard tubes extended 3 or more inches into the box also deter arm-reach predation.
- For snake control, a smooth metal pole combined with a stovepipe baffle is the most documented approach, though some persistent large rat snakes can still bypass guards. Placement away from tall grass and brush reduces snake traffic near the box base.
- To manage House Sparrows and Starlings, use strictly species-correct hole sizes: a 1.5 inch hole excludes Starlings from bluebird boxes; a 1.125 inch hole excludes House Sparrows from chickadee boxes. Never use perches below the entrance, as native cavity nesters do not need them and perches help House Sparrows hold position while attacking occupants.
Preventing and fixing overheating
Heat is one of the most underappreciated risks in nest boxes, and it is entirely preventable with good placement and a few simple design choices. Microclimate studies confirm that dark-colored boxes mounted in full western sun can reach interior temperatures substantially above ambient air temperature, high enough to cause heat stress or death in nestlings. Light-colored or natural wood exteriors reflect more solar radiation and consistently run cooler than dark-painted equivalents. If you’re wondering 'can bird houses get too hot', see our detailed guidance on preventing overheating in nest boxes and how placement, color, and ventilation affect interior temperatures.
- Orientation: face the entrance hole between north and east where possible. This gives morning sun (which birds appreciate for warmth) and avoids afternoon sun (which overheats the box). East-facing is often the best single choice.
- Paint color: use white or light tan exterior paint on the outside only. Never paint the interior. Light colors can reduce peak interior temperatures by several degrees compared to dark green or brown.
- Shade panels: screw a thin roof extension or a separate shade board 2 to 3 inches above the existing roof, creating an insulating air gap. This is the most effective passive cooling upgrade for an existing box.
- Ventilation upgrades: if your box lacks ventilation holes, drill four to six 1/4 inch holes near the top of the side walls. This takes five minutes and makes a real difference.
- Wall thickness: 3/4 inch minimum; 1 inch walls are measurably more thermally stable than 1/2 inch walls.
- Avoid reflective metal roofs in sunny locations: they heat up fast even if the walls are wood.
What to put inside a birdhouse (the answer is almost nothing)
This surprises a lot of people, but the right answer for most nest boxes is to leave the interior completely empty. For step-by-step guidance on what to put in a bird house, including acceptable floor substrates and materials to avoid, see our detailed guidance. Cavity-nesting birds build their own nests and do not need or want pre-filled material. Adding cotton fibers, dryer lint, or commercial nest material can mat around nestlings' legs or feet, restrict movement, and in wet conditions harbor mold and bacteria. The one practical exception is adding a thin layer (about 1 inch) of plain wood shavings, not cedar, not sawdust, to the floor of boxes intended for cavity excavators like chickadees, who expect to find a substrate they can work with. Eastern Bluebirds will ignore shavings but do not seem harmed by them. Do not add perches to the outside of the entrance hole. They provide no benefit to native cavity nesters and actively help House Sparrows defend and harass the box.
Cleaning and sanitation: the schedule that actually matters
Cleaning is not optional. Blowfly larvae, mites, and bacteria accumulate in used nests, and leaving old nesting material in place going into the next season concentrates those parasite loads for the next breeding pair. Cornell Lab's NestWatch recommends cleaning boxes when there is no sign of active breeding, and at minimum once per year, in late summer or autumn after the last brood has fledged.
- Wait until you are certain the nest is inactive: no adults visiting, no sounds from inside, at least a week since you last saw feeding activity.
- Open the box and remove all nesting material. Wear gloves and work outdoors or in good airflow.
- Inspect the interior for damage, cracks, wasp nests, or chewed wood that might indicate squirrel intrusion.
- Scrub the interior with a stiff brush to remove debris, dried droppings, and any waxy blowfly casings.
- Mix a disinfecting solution of 1 part household bleach to 10 parts water. Wipe all interior surfaces and the entrance hole area with this solution.
- Rinse with plain water and let the box dry completely, at least 24 hours in open air, before closing it back up.
- In late winter (about 4 to 6 weeks before your local nesting season begins), do a quick inspection: check that drainage holes are clear, roof is intact, and mounting is secure.
Seasonal and regional timing: when to put boxes up and take them down
Timing matters more than most beginners expect. Put the box up too late and you miss the nesting window entirely; leave it up poorly maintained through winter and it becomes a roosting site for House Sparrows who will claim it aggressively come spring.
| Region / Climate | Install or clean by | Primary nesting window | Post-season cleaning window |
|---|---|---|---|
| Northern US / Canada (zones 3–5) | Late February – early March | April – July | August – September |
| Mid-Atlantic / Midwest (zones 5–6) | Late January – mid-February | March – July | August – October |
| Pacific Northwest (zones 7–8) | Late January – February | March – June | July – September |
| Southern US / Gulf Coast (zones 8–9) | December – January | February – June | July – August |
| Southwest / Arid West (zones 7–10) | January – February | March – June | July – September |
| UK / Northern Europe | February | April – July (BTO guidance) | August – October |
In mild climates where cavity nesters may attempt a second or even third brood, clean the box promptly after each completed brood rather than waiting for autumn. Some species, particularly Eastern Bluebirds and Tree Swallows, will re-nest in the same box within weeks of fledging a first brood, so a quick clean between broods supports that opportunity. In the northern US and Canada, you can leave boxes up through winter as roosting shelter as long as you clean them before nesting season resumes.
Mounting, placement, and installation best practices
Where you put the box is at least as important as how you build it. Here are the placement principles I follow and that align with what the research supports.
- Poles over trees: mounting on a freestanding metal pole gives you control over predator-proofing that tree mounting never can. Trees provide raccoons, squirrels, and snakes with direct access; poles with baffles do not.
- Distance from feeders: place nest boxes at least 50 to 100 feet from active feeders. Feeders attract House Sparrows and increase foot traffic near the box, which stresses nesting birds and attracts competitors.
- Spacing between boxes: for most species, boxes should be at least 100 to 150 feet apart to reduce territorial competition. Tree Swallows are an exception and will nest in pairs if boxes are placed in pairs about 20 to 30 feet apart.
- Facing and shade: entrance hole facing between north and east in most of North America, adjusted for local prevailing wind and afternoon sun.
- Visibility: ideally the bird should have a clear flight path to the entrance, with open space of at least 10 to 15 feet in front of the entrance hole.
- Community and neighbor considerations: make sure the box is on your own property or that you have landowner permission. Inform neighbors if the box is near a shared fence to prevent interference.
- Height: follow species-specific guidelines (see the quick-reference table above). For general small songbirds, 5 to 8 feet is a practical compromise that makes monitoring and cleaning easier while remaining reasonably safe from ground predators.
How to build and install a basic nest box: step-by-step
This is a standard five-sided bluebird box design (Eastern or Western Bluebird) using 1x6 nominal pine or cedar. Actual lumber dimensions are 3/4 inch thick by 5.5 inches wide, so the floor works out to 5 x 5 inches, which is correct for bluebirds. This same box works for Tree Swallows with the hole reduced to 1.375 inches.
Cut list (from one 6-foot length of 1x6)
| Part | Dimensions | Quantity | Notes |
|---|---|---|---|
| Front | 5.5" x 10" | 1 | Drill 1.5" entrance hole, center, 7.5" from bottom |
| Back | 5.5" x 14" | 1 | Extra length for mounting screws top and bottom |
| Two sides | 5.5" x 10" | 2 | Cut top at 10–15 degree angle to shed rain |
| Floor | 4" x 5.5" | 1 | Notch corners or drill 4 x 3/8" drainage holes |
| Roof | 7" x 8" | 1 | Overhang front by 2" minimum; 7" depth sheds rain |
Assembly steps
- Cut all pieces to length. Sand any rough edges on the interior surfaces but leave them rough on the exterior for grip.
- Drill the entrance hole in the front piece using a 1.5 inch spade bit or hole saw. The center of the hole should be 7.5 inches from the bottom edge of the front panel.
- Drill four drainage holes of 3/8 inch diameter in the floor, one near each corner. Optionally cut 3/8 inch notches at each corner instead.
- Drill two ventilation holes of 1/4 inch diameter on each side piece, placed near the top edge, about 1 inch from the top and 1 inch from the front and back edges: four vent holes total.
- Attach the floor to the two side pieces using 1.5 inch exterior screws (two per side). The floor should be recessed about 1/4 inch above the bottom edge of the sides.
- Attach the front piece to the floor and side assembly. Use exterior screws or hot-dipped galvanized nails. If you want a hinged front for easy cleaning, attach the front with two screws at the top only and a single pivot screw at the bottom side so it swings open. Alternatively, hinge one side piece to open outward.
- Attach the back piece. This will extend above and below the box body to provide mounting surface. Pre-drill mounting holes at top and bottom of the back board.
- Attach the roof with exterior screws or a piano hinge at the rear. The roof should overhang the front by at least 2 inches and the sides by at least 1 inch.
- Apply exterior paint or wood sealant to all outer surfaces only. Do not paint the interior or the entrance hole edges. Light colors (white, light tan, light gray) are strongly preferred.
- Mount on a smooth metal pole (1 inch EMT conduit works well) at the target height for your species, with a stovepipe baffle installed on the pole below the box.
Materials and tools checklist
| Item | Specification | Notes / substitutions |
|---|---|---|
| Lumber | 1x6 x 6 ft, untreated pine or cedar | Redwood or white wood acceptable; avoid treated |
| Exterior screws | 1.5" and 2.5" coarse-thread, stainless or galv. | Hot-dipped galvanized nails work as substitute |
| Spade bit or hole saw | 1.5" (bluebird) or 1.375" (swallow) | Forstner bit gives cleaner edge |
| Drill and bits | Cordless drill, 3/8" and 1/4" bits | Any standard cordless or corded drill |
| Saw | Hand saw or circular saw | Miter saw makes angled cuts easier |
| Sandpaper | 80 grit | For interior edges only |
| Exterior paint or sealant | Light color, water-based exterior latex | Thompson's WaterSeal or similar for unpainted wood |
| Metal pole (EMT conduit) | 1" diameter, 8–10 ft length | Available at hardware stores for under $10 |
| Stovepipe baffle | 8" diameter, 24" length galvanized | Commercial predator guards also available |
| Pipe flange or anchor | 1" diameter, for ground installation | Alternatively drive pole 18" into ground |
For an intermediate build adding a metal entrance guard and a hinged roof with a piano hinge, add: one 1.5 inch metal hole guard plate (available from bluebird society suppliers), one 14-inch piano hinge with stainless screws, and one eye-hook and screw latch to keep the roof closed. Total hardware cost for a basic box is typically under $15 if you already have tools; the lumber and pole add another $10 to $20.
Troubleshooting common birdhouse problems
Overheating or nest abandonment in hot weather
If you find nestlings panting, huddled at the entrance hole, or dead without obvious injury in summer, overheating is likely. Immediately add a shade panel above the roof, reorient the box away from western sun if possible, and drill additional ventilation holes near the top of the side walls. For step-by-step tips on how to cool off a bird house, see the dedicated guide on how to cool off a bird house. If the box is dark-colored, paint it white at the end of the season. Do not move an active box mid-season unless nestlings are in immediate danger; the disruption can cause abandonment.
Predator attacks
Signs include a damaged or enlarged entrance hole, scattered nest material on the ground, or a nest with eggs or nestlings missing. Install or upgrade to a stovepipe baffle immediately. Add a metal entrance guard if one is not already present. If the box is tree-mounted, move it to a freestanding pole. Check the area for potential predator launch points within 10 feet and clear them if possible.
House Sparrows or Starlings taking over
House Sparrows build messy, deep nests of grass, feathers, and debris, often with a small interior tunnel. If you find this in a box intended for bluebirds or swallows, remove it promptly. Unlike native birds, House Sparrows are not protected under the Migratory Bird Treaty Act in the US, and nest removal is legal and recommended by most conservation organizations to protect native cavity nesters. Check hole size: if it allows Sparrows but your target species is smaller, reduce the hole with a metal guard plate drilled to the correct diameter. Starlings cannot fit through a 1.5 inch hole, so a correctly sized bluebird box is already effectively Starling-proof.
Parasite infestations (blowflies, mites)
Blowfly larvae are cream-colored, legless grubs found in the base of the nest material. Small numbers are normal and most nestlings survive them, but high loads in thin or stressed nestlings can matter. Long‑term variation in environmental conditions influences host–parasite fitness, with Protocalliphora blowflies sometimes causing reduced nestling growth and increased mortality under high larval loads Long‑term variation in environmental conditions influences host–parasite fitness, with Protocalliphora blowflies sometimes causing reduced nestling growth and increased mortality under high larval loads.. The best management is prompt post-brood cleaning, which removes the pupal casings that would otherwise overwinter in the box. Between-brood cleaning also helps. Do not apply pesticides inside an active nest box.
Wet or flooded nests
Water inside the box usually means drainage holes are blocked or missing, the roof is leaking, or the entrance hole is facing into driving rain. Clear blocked drainage holes with a small drill bit. Seal the roof junction with exterior caulk. If the box is oriented into prevailing storm winds, rotate it or add a rain shield.
Nest usurpation by native competitors
In some regions, Carolina Wrens, House Wrens, or even Tree Swallows will take over a box intended for another species. This is a natural interaction among native birds, and the management options are more limited. Adding a second box nearby may help by giving the competing species their own site. Check that hole size is correctly matched to your target species.
How to retrofit or modify an existing birdhouse
If you already have a box up that was not built to these standards, you can often fix it without starting over. Here is what to check and how to address each issue.
- Wrong hole size: drill out to the correct diameter using a spade bit, or add a metal entrance guard plate with the correct hole drilled into it, screwed over the existing hole.
- No drainage: use a 3/8 inch bit to drill four drainage holes in the floor. If the floor is inaccessible without disassembly, drill them through the lower side walls at floor level.
- No ventilation: drill four to six 1/4 inch holes near the top of the side walls. Five minutes of work.
- Box mounted on a tree or wood fence post: relocate to a smooth metal pole with a baffle. If relocation is not possible mid-season, wrap the tree or post with a wide sheet of smooth metal flashing from below the box down at least 24 inches as a temporary deterrent.
- Dark exterior color: repaint with light exterior latex at the end of the season. Do not paint over an active nest.
- No opening for cleaning: add a hinged or sliding side panel by cutting a panel free with a flush saw and reattaching with a hinge and a small hook latch.
- Decorative perch below entrance: remove it. Cut flush with a hand saw and sand smooth.
Decision checklist: should you install, modify, or skip?
Use this as your final go/no-go before mounting a new box or deciding what to do with one you already have.
| Question | Yes: proceed | No: fix this first |
|---|---|---|
| Is the hole size matched to your target species? | Good to go | Drill out or add metal guard plate |
| Does the box have drainage holes in the floor? | Good to go | Drill 4 x 3/8" holes before mounting |
| Does the box have ventilation holes near the top of the sides? | Good to go | Drill 4–6 x 1/4" holes |
| Is the exterior a light color or natural wood? | Good to go | Repaint exterior light before next season |
| Can you mount on a smooth metal pole with a baffle? | Good to go | Relocate from tree/post or add flashing |
| Is the box at least 10 ft from climbable structures? | Good to go | Move the box location |
| Can you clean the box at least once per year? | Good to go | Commit to annual cleaning or skip the box |
| Are House Sparrows a major problem in your yard? | No problem, proceed | Use strict hole sizing and monitor weekly |
| Is the entrance facing between north and east? | Good to go | Reorient before mounting if possible |
| Do cavity-nesting birds already visit your area? | Likely to be occupied | Box may sit empty; still worth trying |
If you already have a box up and answered no to several of these, do not panic. Most issues are fixable with a drill and 30 minutes. The blowfly and predation risks of a non-ideal box are real but manageable. An imperfect box that gets cleaned annually and has a baffle is still better for birds than no box in a landscape short on natural cavities.
Your action plan: what to do next
Here is the shortest path from reading this to actually helping birds in your yard. If you do not have a box yet, build or buy one sized for a species that is actually present near your yard, mount it on a metal pole with a baffle, face it between north and east, and commit to checking it weekly during nesting season and cleaning it in late summer. For a concise checklist of what makes a good bird house, see what makes a good bird house. If you already have a box, run through the decision checklist above and fix anything on the no list before the next nesting season starts. If you want to go deeper, look at what species you are trying to attract and match the hole size and cavity depth exactly to that species. Report what you find to NestWatch; your monitoring data genuinely contributes to conservation science. Birdhouses are not bad. Neglected, poorly designed, badly placed birdhouses are bad. The fix is almost always simple, cheap, and worth doing.
FAQ
Are bird houses bad for birds — do nest boxes harm or benefit birds?
Generally they can benefit birds when designed, sited, and maintained correctly. Peer-reviewed studies show nest boxes increase reproductive output for some species where natural cavities are scarce, but boxes can be harmful (ecological traps, higher predation, disease, overheating) if poorly designed, badly placed, or unmanaged. Outcomes are context- and species-dependent.
What's a short verdict: when are birdhouses safe, neutral, or harmful?
Safe: correct species-specific dimensions; good ventilation/drainage; predator protection; regular cleaning; placed where food/shelter is available. Neutral: used occasionally with limited impact when conditions are marginal. Harmful: wrong hole/size attracting non-targets, placed in high-predation or low-food areas, poor microclimate (overheating/flooding), or left dirty/infested — these can reduce survival and create ecological traps.
What species/size quick-reference should I use for common backyard birds?
Common targets (interior floor/external hole): Chickadee/Blue tit — box ~5x5x8 in, hole 1.125"/28 mm. Tree Swallow — floor ~5x5 in, hole ~1.375"/35 mm. Eastern/Western Bluebird — floor ~5x5–6x6 in, hole 1.5"/38 mm. House Wren — smaller box ~4–5 in depth, hole 1"/25 mm with baffles for competitors. Great Tit/Nuthatch (UK) — hole ~32 mm. Always consult local extension/species guides for exact internal volumes and mounting heights.
What materials are safe and what should I avoid?
Best: untreated, rot-resistant natural wood (pine, cedar, cypress) 3/4" (18–20 mm) thick for insulation. Acceptable: woodcrete (wood+concrete) or thicker-walled designs if you account for microclimate effects. Avoid: thin plywood/plastic that overheats, pressure-treated wood with toxic chemicals, toxic paints/solvents. Ceramic is rarely recommended because it conducts heat; it can be acceptable in cool, shaded climates with good insulation and ventilation but is generally less forgiving.
What are the key design features (ventilation, drainage, insulation, predator-proofing)?
Ventilation: two small upper-side holes or slots near top for airflow. Drainage: at least 4 floor holes (3/8"–1/2") or equivalent slots. Insulation: 3/4" wood or thicker walls; recessed floor and overhanging sloped roof to shed rain. Predator-proofing: mount on smooth metal pole or post with baffle, keep boxes 10–20 ft from branches/structures predators can launch from, use entrance-hole collars or extended tubes for small species; provide predator guards and avoid ground mounting.
How do I prevent and fix overheating?
Prevention: site boxes in morning sun with afternoon shade or dappled shade (avoid full sun in hot climates); paint exterior light colors; add ventilation and drainage; build thicker walls or double-walled/insulated designs; add a shaded roof extension or external shade. Fixes: increase ventilation holes, add reflective roof/cover, relocate to shadier spot, attach an external roof/awning, or add insulating layer. Monitor interior temps in heat waves and consider temporary shade netting.
Next Articles
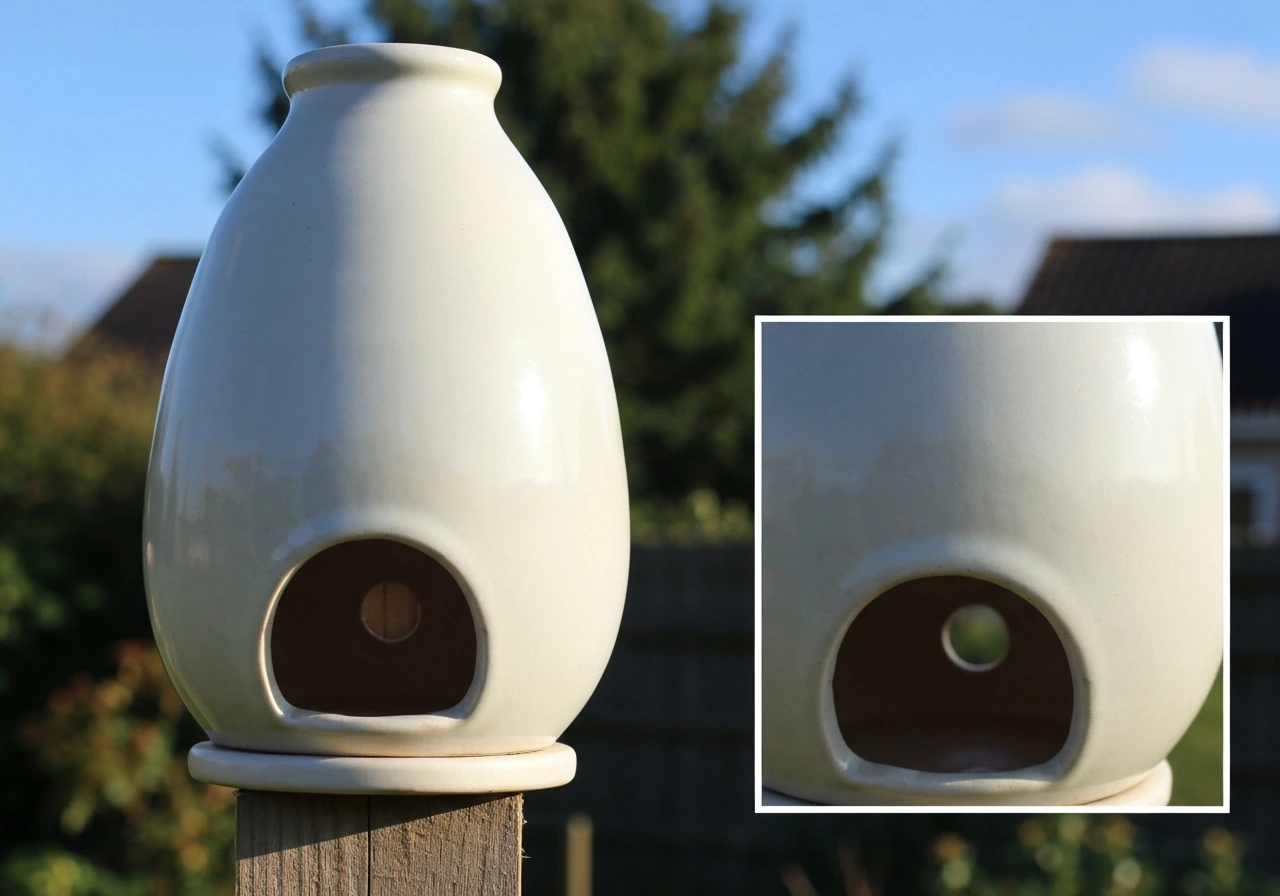
Are Ceramic Bird Houses Safe? Safety Checklist and Fixes
Checklist to assess whether ceramic bird houses are safe, covering glazes, fit, moisture, and fixes for DIYers.
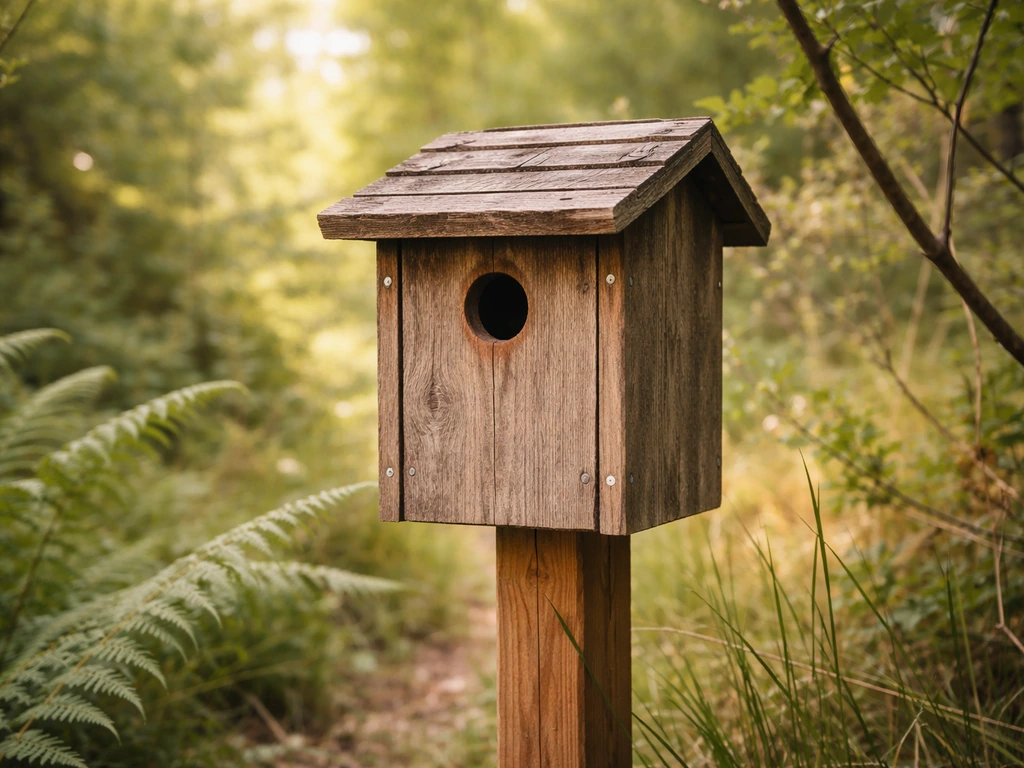
Are Bird Houses Good? When They Help Birds and When They Don’t
When bird houses are good for wildlife and birds, plus sizing, placement, materials, and cleaning to avoid harm.
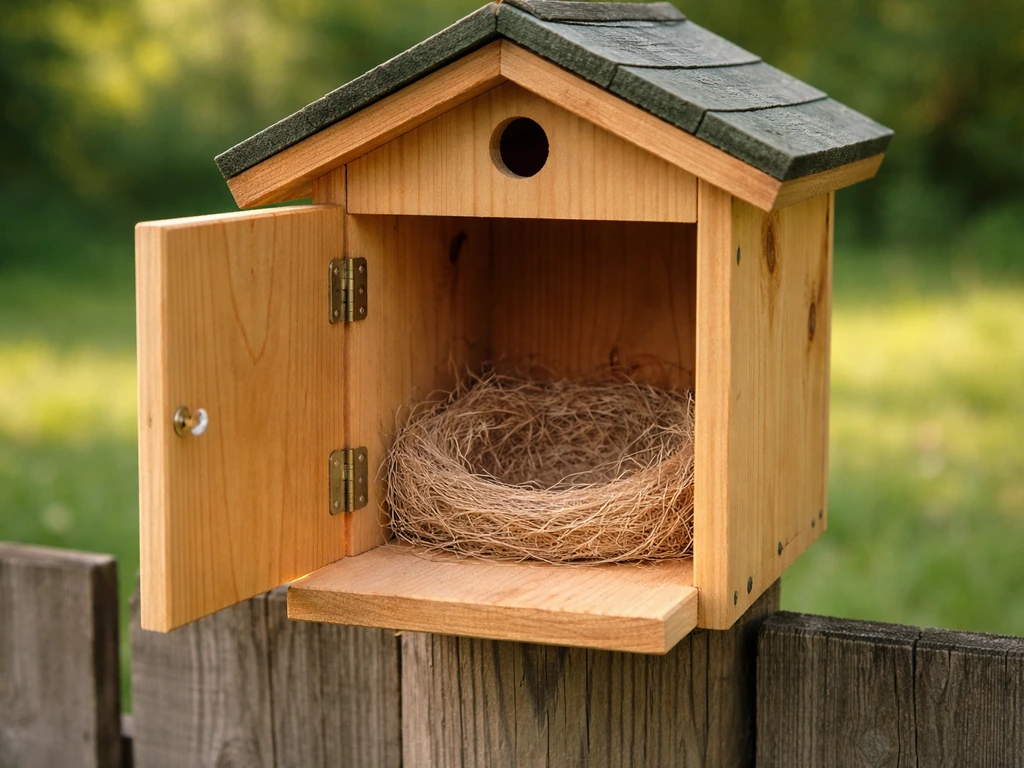
What to Put in a Bird House: Safe Nesting Setup Guide
What to put in a bird house: safe nest liner and floor setup, do and don’t lists, cleaning tips, maintenance for nesting