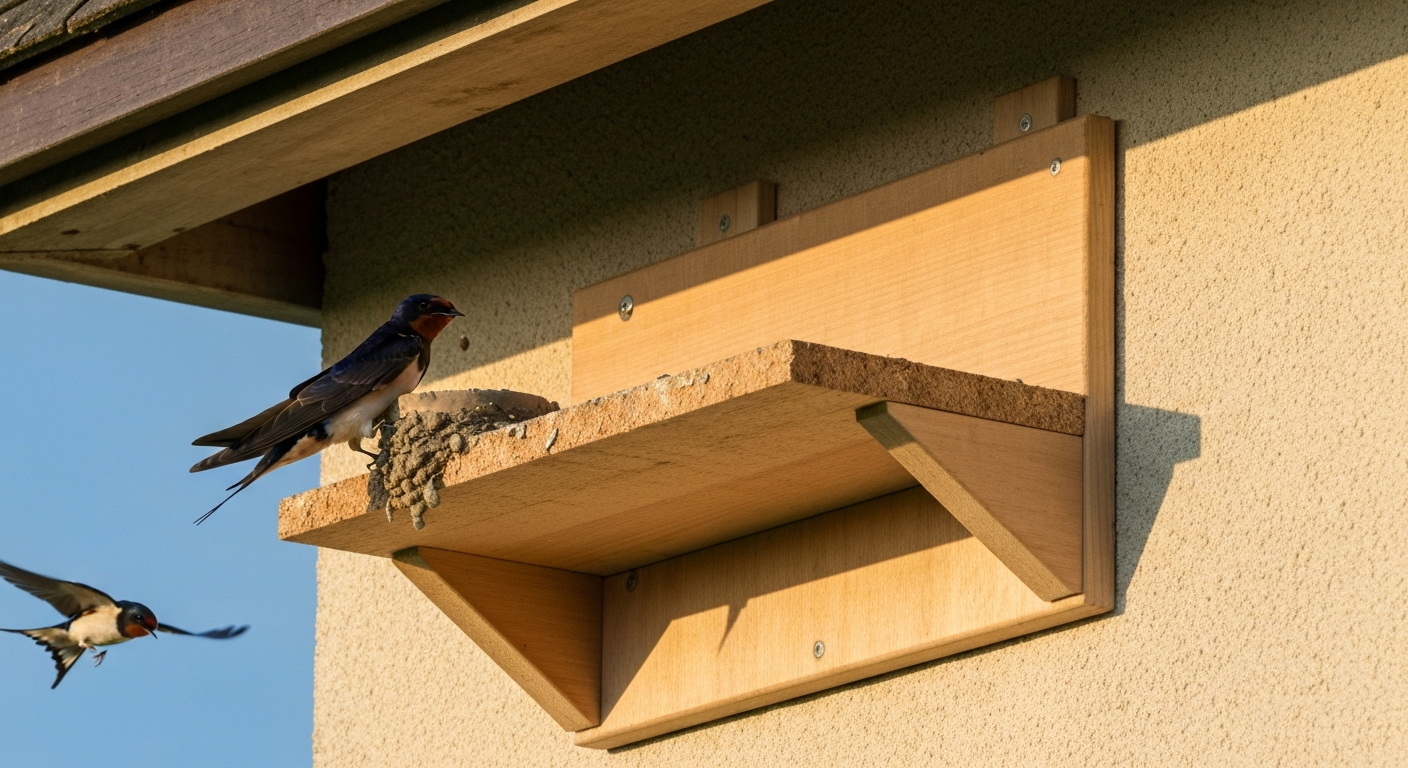
Barn swallows will not use a standard enclosed bird house with an entry hole. They are open-cup nesters, and the best structure you can build or install for them is a simple wall-mounted shelf box or a pre-formed mud-cup bracket fixed under a sheltered eave, at least 7 feet off the ground, facing away from prevailing weather. Get those basics right and you have a genuine chance of attracting a nesting pair, especially if you also provide a patch of wet mud nearby for nest construction.
Best bird house for barn swallow, DIY plans, placement & care

Maya Thompson
8 Aug 2026
What this guide covers and who it's for
This guide is written for backyard birders and beginner-to-intermediate DIYers who want to support barn swallows on their property but are not sure what to build, where to put it, or when. I'll walk you through why enclosed cavity boxes fail this species, what open-shelf and mud-cup structures actually work, two complete DIY plans with exact dimensions and step-by-step instructions, how to mount and site your structure for best results, how to keep House Sparrows out, and how to clean up safely between seasons. Unlike guides for cavity nesters such as finches or sparrows, everything here is tailored specifically to the barn swallow's biology and legal protections. If you're asking "do finches like bird houses?", many finch species do use standard enclosed bird houses. If you've been wondering why your existing bird house sits empty year after year despite swallows swooping around your yard, this article will explain exactly why and what to do instead.
Barn swallow biology and what it tells you about nest design
Barn swallows (Hirundo rustica) are aerial insectivores that spend almost their entire lives on the wing. They breed across North America from roughly April through August, depending on latitude, raising one to two broods of three to seven eggs per season. Incubation runs 12 to 17 days, and nestlings fledge in about 15 to 27 days. That means a productive pair can have young in the nest for six to eight weeks at a stretch, so any structure you build needs to be genuinely stable and weather-resistant.
The nest itself is a shallow mud cup: the birds collect mud pellets and press them into a shelf or horizontal beam surface, building up a rim and lining the bowl with grass, feathers, and soft plant material. The finished cup is roughly 3 inches (about 7.5 cm) across at the rim and about 2 inches (5 cm) deep. That shallow profile is the key design constraint for any artificial support you provide. In many parts of North America, human structures, specifically eaves, rafters, bridge undersides, and barn crossbeams, are now the dominant nesting substrate. Barn swallows have essentially traded cliff faces for agricultural and suburban buildings.
One behavioral detail that has big practical implications: barn swallows show strong nest-site fidelity, returning to the same spot in subsequent years and even reusing last year's cup. Studies have associated nest reuse with up to roughly 25% higher reproductive success in some populations, so preserving old nests between seasons (or leaving artificial cups in place year-round) is worth doing. They also tend to nest in loose colonies, with neighboring nests typically 2 to 4 meters apart, though partial visual obstructions can allow nests as close as 60 cm. If you have a long eave or barn wall, you can install multiple shelf units and potentially host several pairs.
Why the standard hole-box doesn't work for barn swallows
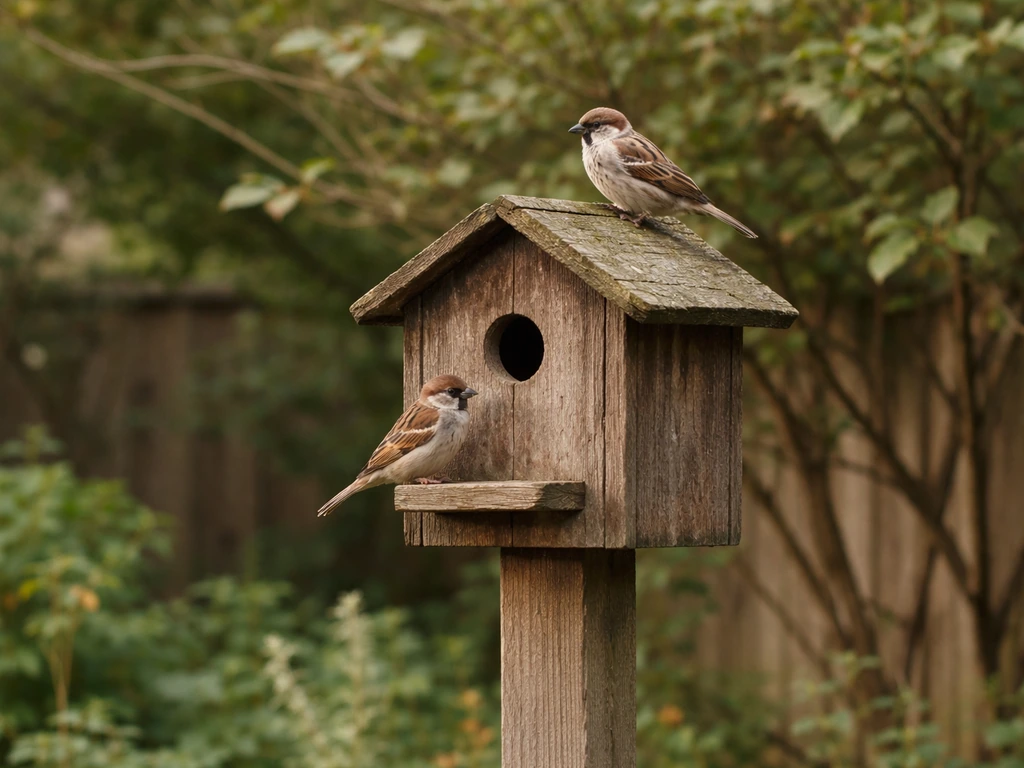
I get asked this all the time: 'I put up a bird house and nothing moved in, what went wrong?' For barn swallows, the answer is almost always that an enclosed cavity box is the wrong tool entirely. Barn swallows are not cavity nesters. They evolved to plaster mud cups onto open, sheltered ledges, not to enter a dark hole in a wooden box. Cornell Lab's NestWatch program is explicit on this point: open shelves or ledges, not standard cavity boxes, are the appropriate artificial structure for this species. An enclosed box with a round entry hole is better suited to species like house wrens, bluebirds, or, for smaller setups, finches and sparrows. If you want to compare with cavity-nester designs, see our short guide on what does a finch bird house look like for examples of typical finch and sparrow boxes. See our guide to the best bird house for finches for recommendations on enclosed boxes suited to those cavity‑nesting species. If you've been following guides written for those birds and wondering why swallows ignore your hardware, this is why.
There is also a competition problem. Enclosed boxes with entry holes actively attract House Sparrows and European Starlings, two aggressive, non-native species that will evict or outcompete native birds. For more on House Sparrows' attraction to nest boxes and how to deter them, see our article on do sparrows like bird houses. For practical tips on selecting and managing nest boxes to exclude competitors, see best bird house for sparrows for recommended designs and exclusion techniques. Installing closed boxes while trying to attract barn swallows is counterproductive on two levels: swallows won't use the box, and the wrong species will.
The right nest structures for barn swallows
There are four practical options, ranging from a five-minute scrap-wood project to a purchased cup insert. The common thread is that all of them provide a flat or slightly cupped horizontal surface under overhead cover.
- Open nest shelf (wall-mounted ledge): a flat plywood shelf screwed to a wall or rafter under an overhang. This is the simplest build and works well on barn walls, garage soffits, and under deck overhangs.
- Shelf box: a three-sided open-front box with a roof, back, and two partial side walls. It gives the birds a defined nesting space with a little more weather protection than a bare ledge. This is the design I recommend most, and it's the subject of DIY Plan 1 below.
- Mud-cup insert: a pre-formed or hand-shaped cup, typically made from a concrete/peat mix or stiff clay, that mimics the finished nest bowl. It can be glued or screwed directly to an eave or fitted inside a shelf box. DIY Plan 2 covers this option.
- Commercial swallow nest products: factory-made ceramic or concrete nest cups and open bracket shelves are available from wildlife supply retailers. They work on the same principle as the DIY versions and are a reasonable choice if you prefer not to build. Check that any product is made from non-toxic, weatherproof materials and has a rough interior surface for grip.
Artificial cup occupancy varies. An experimental study using 57 artificial mud cups under a pier reported annual occupancy rates of 23 to 46 percent when natural nests had been removed. A Parks Canada installation at Fort Rodd Hill NHS demonstrated strong results: in 2019, 12 nests on artificial ledges produced 67 percent of all fledglings at the site (42 chicks total from 16 nests). The takeaway is that artificial supports genuinely work when placement, design, and timing are right, but they are not a guaranteed overnight success. Patience, good siting, and nearby mud availability all matter.
Design principles every swallow nest structure should follow
Whether you build from scratch, adapt a scrap-wood shelf, or buy a commercial cup, these principles apply to all of them.
- Materials: untreated or naturally rot-resistant wood (cedar, redwood, or exterior-grade plywood) is ideal for shelf boxes. Avoid pressure-treated lumber near active nests; the preservative chemicals are not safe for nestlings. For mud-cup inserts, a 3:1 mix of peat and Portland cement is durable and non-toxic when fully cured.
- Rough interior surfaces: the nest-cup surface must be rough enough for mud to adhere. Lightly sand or score smooth plywood with a saw kerf grid (lines about 1/4 inch apart) before installation. Pre-formed concrete cups are naturally rough.
- Overhead cover: the structure must be sheltered from direct rain. A roof overhang of at least 4 inches beyond the nest platform is the minimum; 6 to 8 inches is better. In areas with heavy horizontal rain, partial side walls add protection.
- Ventilation and drainage: drill two or three 1/4-inch drain holes in the floor of any shelf box to prevent water pooling. Ventilation is less critical for open-front designs than for enclosed cavity boxes, but a small gap between the roof and back wall improves airflow in hot climates.
- No entry hole: there should be no round entry hole in the front. The front is fully open or fitted with a partial lower rail of no more than 1 inch height to help retain nesting material.
- Non-toxic finishes: leave the exterior wood unfinished or apply a water-based exterior stain to the outside surfaces only. Never paint or stain interior surfaces. Avoid oil-based paints, creosote, and wood preservatives with biocides.
- Color: natural wood tones or a light earth color on the exterior are preferred. Dark colors absorb heat and can overheat nestlings in hot climates.
- Partial visual obstructions between adjacent units: if installing multiple units on one wall, place a small 1-inch baffle board between units rather than spacing them in a completely open row. Research by Mercadante and Stanback shows birds settle more readily when they cannot see directly into a neighboring occupied nest.
Barn swallow shelf box vs. cavity bird house: a quick comparison
If you've previously built or used enclosed bird houses for finches, sparrows, or other cavity nesters, the table below shows the key differences. Understanding this will save you a frustrating season of waiting for a barn swallow to use the wrong box.
| Feature | Barn Swallow Shelf Box | Cavity Bird House (finch/sparrow) |
|---|---|---|
| Front opening | Fully open or minimal lower rail | Round entry hole, species-specific diameter |
| Nest type | Open mud cup on flat surface | Cup nest inside enclosed chamber |
| Entry hole size | None | 1 to 1.5 inches depending on species |
| Interior surface | Rough (scored or concrete) for mud adhesion | Smooth or lightly rough wood |
| Roof overhang | Critical, 4 to 8 inches minimum | Useful but less critical |
| Attracts House Sparrows? | Lower risk (no hole) | Higher risk (hole-nesting sparrows compete) |
| Typical mounting height | 7 to 16 feet | 5 to 10 feet depending on species |
| Reusable across seasons? | Yes, preserve old mud cup | Yes, clean out old nest annually |
| DIY complexity | Low to moderate | Low to moderate |
DIY Plan 1: Wall-mounted shelf box
This is my go-to recommendation for most backyard builders. It takes about an hour to assemble with basic hand tools, uses one piece of 1x8 cedar or exterior plywood, and can be mounted under an existing eave with two screws. The design is a three-sided open-front box: a back panel, a roof, and two partial side walls that provide wind protection without enclosing the front.
Materials and tools
- One 6-foot length of 1x8 cedar board (3/4 inch thick x 7.25 inches wide), or equivalent exterior-grade plywood
- Eight 1.5-inch exterior-grade wood screws (#8)
- Four 2.5-inch exterior screws for wall mounting
- Wood glue (exterior/waterproof formulation)
- Sandpaper or a handsaw for surface scoring
- Tape measure, pencil, speed square
- Hand saw or circular saw
- Drill with 1/8-inch pilot bit and #8 countersink bit
- 1/4-inch drill bit for drain holes
- Safety glasses and hearing protection if using power tools
Cut list
| Part | Dimensions (inches) | Quantity | Notes |
|---|---|---|---|
| Back panel | 7.25 wide x 9 tall | 1 | Full width of board |
| Roof | 7.25 wide x 8 deep | 1 | Overhangs front by ~4 inches when assembled |
| Side walls | 4 wide x 5 tall | 2 | Partial height, open front retained |
| Floor/platform | 7.25 wide x 4 deep | 1 | Flush with front edge of side walls |
Step-by-step construction
- Cut all pieces to the dimensions in the cut list. A miter box and handsaw work fine; a circular saw is faster. Double-check each piece against the cut list before moving on.
- Score the floor/platform surface. Use a handsaw to cut a crosshatch grid of shallow lines about 1/4 inch apart across the entire top face of the floor piece. This gives the mud a mechanical grip. Alternatively, rough the surface with coarse (60-grit) sandpaper.
- Drill drain holes. Using the 1/4-inch bit, drill three equally spaced drain holes through the floor, about 1/2 inch from the back edge. These prevent water from pooling if rain blows in.
- Assemble the sides to the back. Apply a thin bead of exterior wood glue along the back edge of each side wall, then position them flush with the back panel's outer face, one on each side. The side walls sit at the bottom of the back panel with their bottom edges flush with where the floor will sit. Drill pilot holes and drive two 1.5-inch screws per side through the back panel into each side wall.
- Attach the floor. Run a bead of glue along the bottom edge of each side wall and the bottom edge of the back panel. Slide the floor into place, flush with the front face of the side walls. Drill pilot holes and drive screws up through the floor into the side walls (one per side) and two screws up through the floor into the back panel.
- Attach the roof. The roof overhangs the front of the box by approximately 4 inches. Apply glue to the top edge of the back panel and the top edges of the side walls. Position the roof so its back edge is flush with the back face of the back panel. Drive two screws down through the roof into the top of the back panel.
- Check the assembly. Make sure the front is fully open, no boards block entry. Confirm drain holes are clear. Let glue cure for at least two hours before mounting.
- Optional: apply a water-based exterior stain in a natural wood or earth tone to outside surfaces only. Do not coat the interior floor where the nest will sit.
- Mount the box. Choose your location (see siting guidance below). Hold the box at the desired height with the back panel flat against the wall or rafter. Drive two 2.5-inch exterior screws through the back panel and into a wall stud or solid beam. The screws should be near the top and bottom of the back panel to resist torque.
- Add a mud source within 30 to 50 feet of the box: a shallow tray or depression kept moist, with bare garden soil or a clay-loam mix. This is one of the most impactful things you can do to encourage early adoption.
Diagram note: the finished box looks like a shallow open cubby roughly 7 inches wide, 4 inches deep, and 5 inches tall at the front opening, with a roof that extends 4 inches beyond the front edge. The roof slopes very slightly toward the front (tilt the back 1/4 inch higher than the front) to shed rain. The two partial side walls protect the nest from crosswinds but leave the front completely open.
DIY Plan 2: Mud-cup insert for eaves or shelf box
This is the quicker alternative, especially useful if you already have a suitable horizontal beam or eave board and just want to provide a ready-made cup shape that jump-starts the swallows' nest-building effort. Some birders also drop one of these cups into the floor of the shelf box from Plan 1. The cup is cast from a peat-Portland cement mix, which is durable, non-toxic when cured, and naturally rough.
Materials
- 1 cup dry peat moss (fine-grade horticultural peat, broken up)
- 1/3 cup Portland cement (Type I, not rapid-set)
- Water (add slowly to achieve a thick, moldable consistency)
- One small plastic bowl or a half-coconut shell, approximately 3.5 inches in internal diameter, to use as a mold
- Cooking spray or petroleum jelly to coat the mold interior
- Two 1.5-inch exterior screws or construction adhesive for mounting
- Disposable gloves and safety glasses (cement is caustic when wet)
- Mixing container (an old yogurt tub works)
Dimensions
The finished cup should be approximately 3.5 inches (9 cm) in outer diameter at the rim, 3 inches (7.5 cm) in inner diameter, and about 2 inches (5 cm) deep on the inside. The wall thickness is roughly 1/4 inch. These dimensions slightly exceed the natural nest diameter to give the birds room to add their own mud lining, which is part of the bond-building process.
Step-by-step construction and installation
- Prepare the mold. Lightly coat the inside of the plastic bowl with cooking spray or petroleum jelly so the cured cup releases cleanly.
- Mix the peat and cement. Combine 1 cup of broken-up peat with 1/3 cup of Portland cement in your mixing container. Stir dry, then add water a tablespoon at a time, mixing thoroughly, until the mixture holds together like stiff cookie dough. It should not be runny.
- Pack the cup. Press the mixture firmly into the bowl mold, building up sides about 1/4 inch thick. Work from the bottom up, pressing firmly to eliminate air pockets. The inner surface of your finished cup will be defined by the bowl shape; the outer surface will be rough and irregular.
- Cure. Leave the mold in a cool, shaded spot for 48 to 72 hours. Do not force-dry in direct sun; slow curing produces a stronger cup. After the initial cure, pop the cup out of the mold and allow it to air-cure for another five to seven days before installation. Cement is caustic until fully cured; do not place near birds until curing is complete.
- Drill two small mounting holes. Using a 3/16-inch masonry bit, drill two holes through the base of the cured cup, roughly 1 inch apart, centered in the floor of the cup.
- Mount the cup. For direct eave or beam installation: hold the cup against the underside of the eave or beam, making sure overhead cover exists above the cup. Drive 1.5-inch exterior screws through the mounting holes up into the wood. Alternatively, use construction adhesive rated for masonry and wood; apply to the base of the cup, press firmly, and support with tape for 24 hours while the adhesive sets. For use inside a shelf box from Plan 1: apply construction adhesive to the cup base and press it onto the scored floor of the box, centered. Once set, the shelf box roof provides the necessary overhead cover.
- Check orientation. The open top of the cup must face upward and the cup must sit level. A tilted cup will cause the nest to fail.
- Add a mud source nearby. Same recommendation as Plan 1: a small shallow tray of moist clay-loam soil within 30 to 50 feet supports construction.
Where, how high, and which direction to mount your structure
Placement is at least as important as construction quality. Barn swallows in most North American populations typically nest 7 to 16 feet (roughly 2 to 5 meters) above ground or water. I recommend a minimum of 8 feet for structures on standard residential buildings, both to reduce access by terrestrial predators such as raccoons and domestic cats, and because swallows approach their nest at speed and prefer a clear flight path. Where possible, 10 to 12 feet is better.
Orientation matters for weather protection. Face the open front away from the prevailing wind and rain direction for your region. In most of the continental United States and Canada, that means facing east or south, but check your local prevailing weather. The structure should be under a real overhang: the soffit of your eaves, the underside of a deck, a barn rafter, or a bridge structure. An exposed ledge with no roof above it is rarely used.
Rural properties with open farmland, pastures, or ponds nearby are prime habitat because barn swallows forage over open ground and water where flying insects concentrate. Suburban yards can work if there is open lawn, a garden, or a nearby water feature. Avoid mounting structures in dense tree canopy; swallows need clear airspace to approach and depart. If you're in an urban area, a sheltered carport, covered parking structure, or the underside of a balcony can replicate the barn-eave environment.
Installing multiple units
If your barn wall or eave is long enough to host a small colony, space individual shelf boxes or cup inserts 6 to 10 feet (2 to 3 meters) apart. Research shows that birds settle more comfortably when they cannot make direct eye contact with the contents of a neighboring nest, so install a small vertical baffle board (a 4 x 4-inch piece of 3/4-inch plywood) between adjacent units. This simple addition can meaningfully increase the number of pairs that settle on a given wall.
Predator-proofing and competition management
Predation is one of the leading causes of nest failure for barn swallows. Terrestrial mammals (raccoons, domestic cats, foxes), snakes, corvids, and raptors all take eggs and nestlings. The good news is that height alone goes a long way: a nest at 10 to 12 feet on a smooth wall surface is genuinely difficult for a climbing mammal to reach. Add a cone-style stovepipe baffle to any freestanding pole mount, and keep the structure well away from overhanging rooflines, branches, or adjacent structures that give predators a jumping platform. Extension Gardener Handbook, NC State Extension (predator‑proofing recommendations) recommends mounting boxes on smooth metal poles with cone or stovepipe baffles and keeping boxes well away from jumpable structures or branches to deny mammals and snakes access Extension Gardener Handbook — NC State Extension (predator‑proofing recommendations).
- If mounting on a freestanding pole: use a smooth metal pole (1.5-inch galvanized pipe works well) and attach a 24-inch stovepipe or commercial cone baffle at least 4 feet above ground before installing the shelf. Grease the pole lightly with petroleum jelly once a season if cats or raccoons are active in your area.
- If mounting on a building wall: height is your main defense. A smooth painted or vinyl surface above 8 feet is very difficult for raccoons to climb, especially if there are no gutters, window ledges, or downpipes directly adjacent.
- House Sparrows and starlings: because your shelf box has no entry hole, starlings are unlikely to bother it. House Sparrows may attempt to build in an open shelf. If you see sparrow nest material (loose grass, feathers, and litter packed into the box), remove it promptly during the pre-season before swallows arrive. Once swallows are actively nesting, do not disturb the nest (see legal note below).
- Corvids (crows, jays): if corvids are a known problem at your site, partial side walls on the shelf box and ensuring the box is mounted flush under a deep overhang reduces their ability to reach in from above or the side.
The legal rules: what you can and cannot do
In the United States, barn swallows are protected under the Migratory Bird Treaty Act. See the Nuisance Swallows Fact Sheet, U.S. Fish & Wildlife Service (MBTA legal guidance) for details on MBTA prohibitions and permit exceptions Nuisance Swallows Fact Sheet — U.S. Fish & Wildlife Service (MBTA legal guidance). In Canada, they are protected federally and, in several provinces, at the provincial level as well (they are listed as Threatened under Canada's Species at Risk Act). This means that once a nest contains eggs or nestlings, it is illegal to disturb, move, or destroy it without a permit, regardless of where it is built. This applies even if the nest is on your own property and you find it inconvenient. The practical implication: if you want to control where swallows build on your property, install your artificial structures before the birds arrive in spring, and block (with bird netting or hardware cloth) any spots you specifically do not want them to use, before nesting begins. Once eggs are present, your options are legally constrained until the brood fledges and the nest is inactive. Removal of empty, inactive nests outside the breeding season is generally permitted, but check your local provincial or state regulations for any additional restrictions.
When to install and what to do before the birds arrive
Install your shelf box or cup insert before barn swallows return to your area in spring. In the southern United States, that means having everything in place by late February or early March. In the northern US and southern Canada, late March to mid-April is the target window. In northern Canada, aim for early to mid-May. Swallows scout nest sites shortly after arrival, so the earlier the structure is available, the better.
- Install and mount structures at least two to three weeks before your local swallow arrival date.
- Create or maintain a mud source: a shallow depression or tray filled with moist garden soil or clay-loam kept damp. Position it within 30 to 50 feet of the nest structure.
- Provide coarse grit or crushed eggshell nearby (on a flat board or shallow tray) as a calcium supplement for nesting females.
- Remove any old House Sparrow or starling nest material from the shelf box before the season begins.
- Do a quick structural check: tighten any loose screws, confirm drain holes are clear, and verify the roof overhang is intact.
Cleaning, sanitation, and end-of-season maintenance
Barn swallows return to and reuse their nests across broods and between years, so you have to think carefully about cleaning. Old mud-cup nests accumulate ectoparasites (mites, blowfly larvae) that can harm subsequent broods. The right approach is a targeted post-season clean rather than a full strip-out every year.
- Wait until the nest is definitively inactive: all chicks have fledged and adults have departed for the season (typically September through October in most of North America).
- Wearing disposable gloves and a dust mask, remove the old nest material (mud cup, feathers, and droppings). Place debris in a sealed bag for disposal.
- Scrub the shelf floor or cup insert with a stiff brush and a 10% bleach solution (1 part household bleach to 9 parts water). Rinse well and allow to dry completely in open air.
- Inspect the structure for cracks, loose screws, or rot. Replace any damaged boards. Re-score the floor surface if it has become smooth.
- Re-check baffle and mounting hardware. Tighten screws and replace any corroded hardware.
- Leave the cleaned, empty structure in place through the winter. Barn swallows return to the same sites and appear to recognize the general location and micro-features of previous nest spots.
Some conservation managers choose to leave one season's old mud-cup shell in place (removing only organic material from inside it) to give returning birds a head start on the second-year nest, since returning adults associate the cup shape with a successful previous site. This is a reasonable choice if the cup shows no signs of heavy parasite infestation. When in doubt, a full clean is the safer option.
Maintenance checklist at a glance
| Timing | Task |
|---|---|
| Late winter / early spring (pre-season) | Install or inspect structure; clear drain holes; remove sparrow nest material; prepare mud source |
| At swallow arrival | Confirm mud source is wet; check that structure has no obstructions to flight approach |
| During nesting (do not disturb active nests) | Observe from a distance; note nest progress; do not touch or disturb |
| After last brood fledges | Remove nest material; scrub with dilute bleach; rinse and dry |
| Autumn | Inspect for damage; tighten hardware; note any repairs needed before winter |
| Winter | Leave structure in place; complete any structural repairs; source replacement materials if needed |
Troubleshooting: why swallows might not use your structure
Even a well-built, correctly sited shelf box sometimes goes unused in its first season. Here are the most common reasons and what to try.
- No nearby mud: this is the single most overlooked factor. If the birds cannot find wet mud within a reasonable foraging distance, they will not start a nest. Keep a mud source moist throughout the nesting season.
- Too much foot traffic or noise close to the structure: barn swallows tolerate human presence better than most songbirds, but a structure mounted directly above a high-traffic door or loud machinery may be avoided in the first year. Give them one season to habituate.
- No existing swallow population nearby: artificial structures attract swallows that are already in the area and looking for nest sites. If you are outside the species' usual range or in a heavily urbanized area with no swallows present, a shelf box alone will not create a population.
- Installed too late in the season: if the structure went up after swallows had already settled elsewhere, try again next year with an earlier install.
- Competitor occupation: check whether House Sparrows or other species have moved in and blocked access. Remove non-native competitor nests before the breeding season.
- Inadequate overhead cover: a shelf box mounted on a wall with no true overhang above it, just open sky, is unlikely to be used. Provide genuine roof coverage.
- Structure is too accessible to predators: if cats, raccoons, or corvids are frequently active near the mounting site, add a baffle and consider relocating to a higher or more isolated position.
A note on monitoring and contributing to citizen science
If you install a nest structure and barn swallows begin using it, consider enrolling in Cornell Lab's NestWatch program. Recording clutch size, hatch dates, and fledgling counts takes about five minutes per check and contributes directly to population monitoring for a species that has declined significantly across parts of its North American range. Because barn swallow nests are open and visible, monitoring is straightforward compared to cavity-nesting species. Keep your observation sessions brief, stay at least 10 feet away during active checks, and never visit more often than every three to four days during incubation.
FAQ
What is the best overall nest design for barn swallows?
Barn swallows need an open horizontal ledge or shallow mud-cup platform rather than an enclosed hole box. The best designs mimic natural nest sites: a sheltered horizontal shelf (3–8 cm deep) with a shallow cup or removable mud-cup insert and a small backstop/partial side walls to give protection and visual privacy. These designs are consistently recommended by monitoring and recovery programs because swallows are open‑cup, mud‑nesting birds and rarely use traditional cavity boxes.
Why don’t standard hole-style birdhouses work for barn swallows?
Barn swallows build open mud cups attached to horizontal surfaces (eaves, beams), not cavity nests. Hole boxes restrict the open approach and internal visibility and do not provide the shallow, mud-plastered cup or exposed flight access swallows require, so occupancy is very unlikely.
What evidence supports using ledges, shelf boxes or mud-cup inserts?
Peer-reviewed studies and conservation reports show artificial ledges and mud-cup supports can be used by swallows when natural sites are limited. Case studies (e.g., Fort Rodd Hill) and experimental work report moderate to high occupancy when shelves or cups are properly sited, sheltered, and installed before the breeding season.
What is one clear DIY plan (materials, tools, dimensions) I can build?
DIY Barn Swallow Shelf Box (single nest): Materials: 1 exterior-grade cedar or plywood panel 18×12 in (45×30 cm), 1 board 12×4 in (30×10 cm) for front lip, 1 small backboard 6×12 in (15×30 cm), 2 side pieces 4×6 in (10×15 cm), stainless screws, exterior wood glue, 1 removable shallow mud-cup mold (plastic condiment cup ~7.5 cm/3 in rim and 2.5 cm/1 in depth) or form. Tools: circular saw or jigsaw, drill, screwdriver, sandpaper, measuring tape, level. Dimensions & construction: cut a flat shelf 12×6 in (30×15 cm) forming the main platform. Attach a front lip 12×1.5 in (30×4 cm) vertically to create a rim. Attach backboard 12×6 in (30×15 cm) set upright at the rear to provide shelter; side panels (4×6 in) form small partial side walls leaving the front open. Mount the removable shallow cup on the shelf near the backboard center; cup rim ~7.5 cm diameter and ~2–3 cm deep to guide mud building. Finish: round edges, leave interior surfaces rough for nest adhesion, do not paint inside. Mounting height and orientation below.
What are exact mounting height, orientation and siting rules?
Height: 2–5 m (7–16 ft) above ground or water is typical—higher reduces mammal access. Orientation: face the shelf toward open flying space (avoid facing directly into prevailing heavy rain/wind); some southern exposure in cool climates helps but avoid midday sun in hot regions. Siting: place under an overhang, eave, bridge, or porch soffit to shelter nests; keep shelves at least 2–3 m away from jumpable structures (railings, low roofs, branches). Provide nearby mud and foraging habitat (open water, grassy fields) within a few hundred meters.
How do I predator-proof and reduce competition?
Predator-proofing: mount on smooth metal pole or on building with no climbable route; add a metal cone or stovepipe baffle around pole and keep the shelf at least 2–3 m from edges that allow climbing. Remove nearby ledges or blocking perches that allow cats, raccoons or snakes access. Competition: house sparrows and starlings may harass swallows; use shallow open shelves (not deep cavities), site multiple ledges with partial visual screens between cups to mimic natural spacing (2–4 m desirable between nests; visual obstructions can allow closer spacing), and avoid attracting sparrows with feeders or nest materials nearby.
Next Article
Do Sparrows Like Bird Houses? How to Encourage or Deter Them
Find out if sparrows use bird houses and how to adjust hole size, placement, and sanitation to attract or deter them.