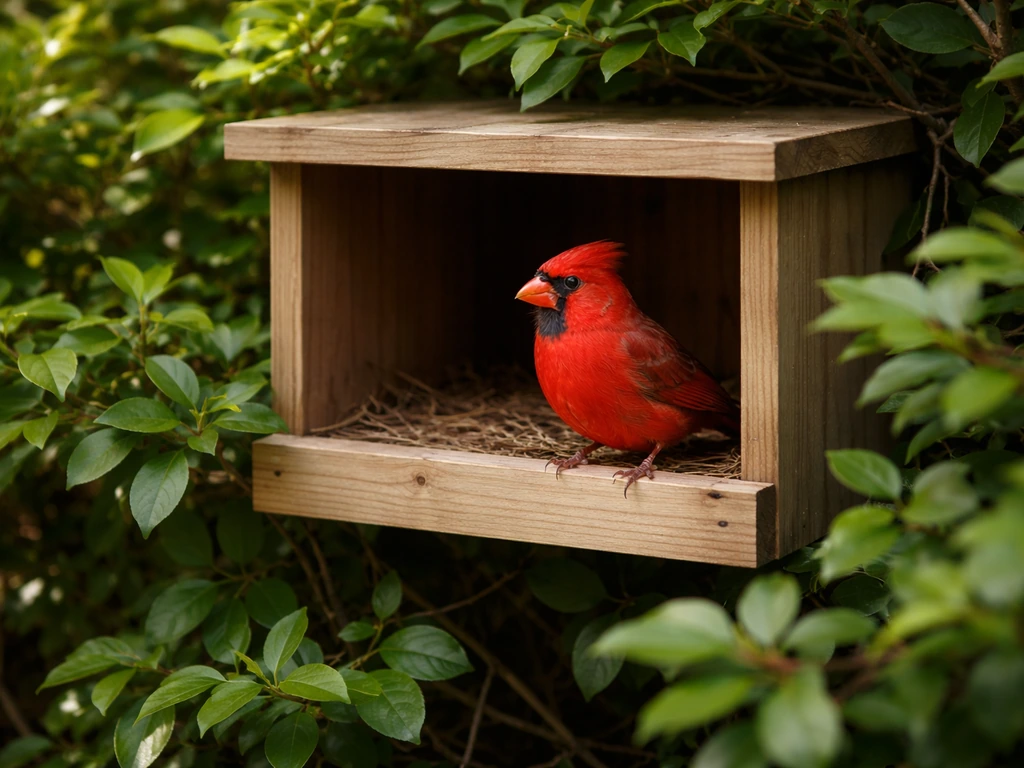
Hummingbirds do not nest in traditional bird houses. They are not cavity nesters, so the small enclosed wooden boxes sold as 'hummingbird houses' are almost certainly going to sit empty. What hummingbirds actually do is build tiny open cup nests attached to slender branches or horizontal supports, and you can encourage that behavior in your yard with the right habitat, a couple of simple DIY structures, and a few smart placement choices.
Do Hummingbirds Nest in Bird Houses? Safe DIY Nesting Options

Maya Thompson
21 Jul 2026
How hummingbirds actually build their nests
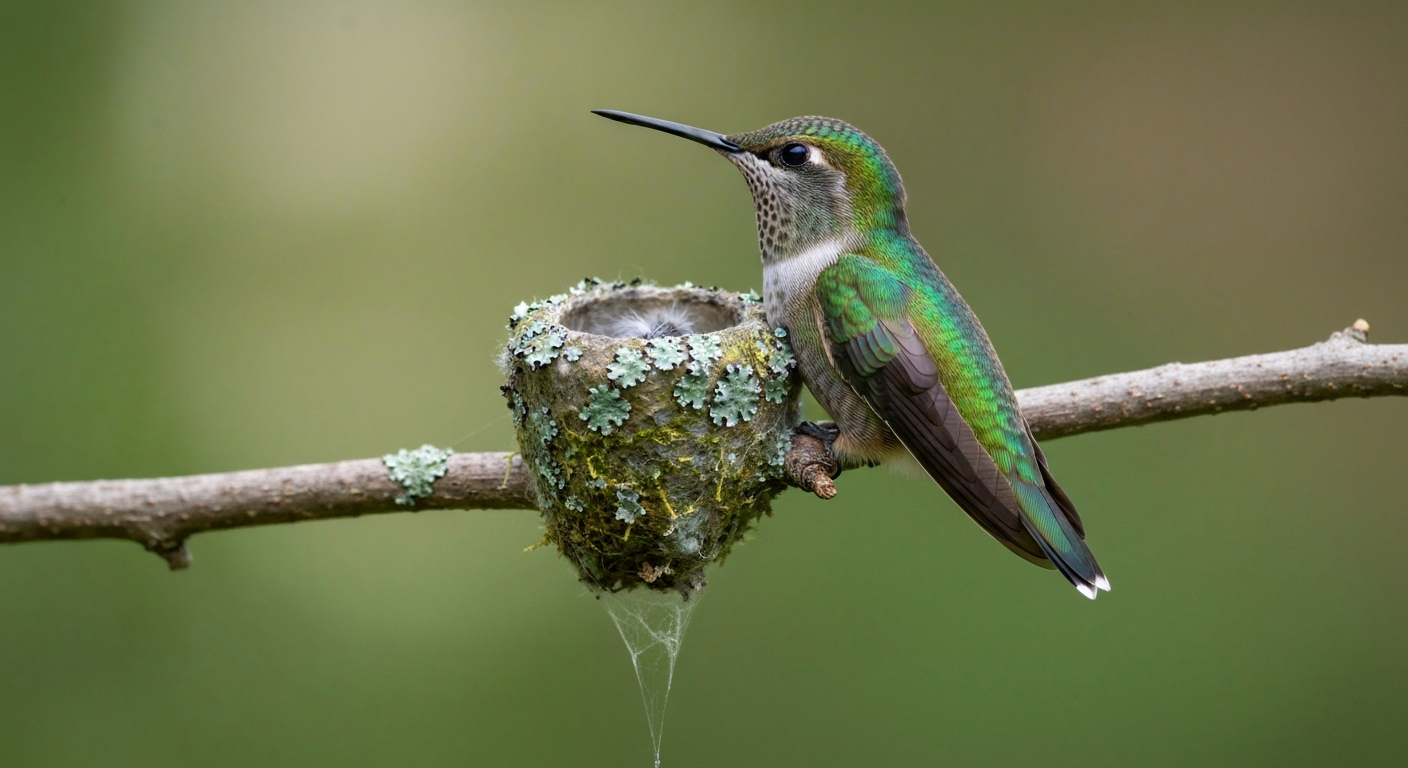
Hummingbird nests are engineering marvels on a tiny scale. A female Ruby-throated Hummingbird spends 6 to 10 days weaving plant down and spider silk into a compact cup, then camouflages the outside with lichen or moss so the finished nest looks like a small knot on a branch. The outer diameter is only about 2 inches, and the inner cup is roughly the size of a large thimble. Anna's Hummingbirds on the West Coast build slightly smaller nests, roughly 1.5 inches across and 1 inch tall. Rufous Hummingbirds produce nests about 2 inches in outside diameter with an inner cup around 1 inch wide.
The preferred attachment site is a small, slender, descending or horizontal branch, often in a shrub, vine, or small tree. Ruby-throated Hummingbirds typically nest 10 to 40 feet above the ground. Anna's nests usually sit 6 to 20 feet up. Rufous females often go higher, sometimes up to 30 feet, and frequently choose conifers in the Pacific Northwest. The spider silk is the key ingredient: it binds everything together and, crucially, allows the nest to expand as the nestlings grow.
One thing I find fascinating is how readily hummingbirds accept human structures when they mimic a slender branch. Documented nest sites include wind chimes, string lights, loops of extension cord, wire, porch eave straps, and outdoor faucets. Cornell Lab's NestWatch documents examples of hummingbird nests on wind chimes, string lights, faucets, porch eaves, and loops of chain or wire (see Will Hummingbirds Use Birdhouses?, NestWatch (Cornell Lab)) Will Hummingbirds Use Birdhouses? — NestWatch (Cornell Lab). The common thread is a horizontal or slightly downward-angled surface that is narrow enough to grip and stable enough to support the nest cup. That insight is exactly what drives the DIY alternatives described below.
Why a traditional enclosed bird house won't work
A standard bird house is an enclosed box with an entrance hole sized for a specific cavity-nesting species. Chickadees, wrens, bluebirds, and many woodpeckers evolved to seek out hollow trees or old woodpecker cavities and will readily move into a well-built nest box. Hummingbirds did not evolve that way. They build an exposed cup nest in open air, and a dark enclosed box offers nothing they need or want. Cornell Lab's NestWatch program is direct on this point: commercially sold 'hummingbird houses' are decorative items and are unlikely to be used for nesting.
This is worth keeping in mind if you are shopping for a gift or browsing online. The cutesy miniature houses with tiny round holes are charming, but they are not functional nesting structures for hummingbirds. Your money and effort are better spent on native plantings, a good feeder, a water mister, and one of the simple DIY supports described in this article. If you are also curious about species that do use enclosed boxes, cardinals and doves are a separate story: neither is a true cavity nester either, though their shelter preferences differ in important ways. For more on dove preferences for nest boxes and bird houses, see do doves like bird houses.
Species differences, timing, and regional habits
The three most commonly encountered backyard hummingbirds in North America each have somewhat different nesting windows and habitat preferences, and knowing those details helps you time your preparations correctly.
| Species | Primary Range | Nesting Season | Typical Nest Height | Broods/Season | Incubation Period |
|---|---|---|---|---|---|
| Ruby-throated Hummingbird | Eastern North America | Late April to early August | 10–40 ft | 1–2 | 12–14 days |
| Anna's Hummingbird | Pacific Coast, Southwest | December to June (year-round in some areas) | 6–20 ft | 2–3 | ~16 days |
| Rufous Hummingbird | Pacific Northwest, Rockies | May to July | Up to 30 ft | 1–2 | 15–17 days |
Anna's Hummingbirds are the standout here: they are largely resident on the West Coast and can start nesting as early as December in California, which means your habitat improvements need to be in place well before spring. Ruby-throated birds arrive in the eastern U.S. as early as late March in the South and push north through April and May, so late winter is the right time to get your yard ready in the East. Rufous birds are migrants with a compressed nesting window in the Pacific Northwest, usually May through July. eBird abundance maps are the most reliable tool for checking exact arrival dates in your county.
Clutch sizes are small across the board, usually 2 eggs, and incubation is entirely the female's job. Nestling periods run 15 to 22 days depending on species, after which juveniles become independent quickly. A successful female Anna's may raise 2 to 3 broods in a single season, which means a well-set-up yard can support repeated nesting activity across several months.
What actually supports hummingbird nesting
The most effective thing you can do is grow the plants that provide both food and nesting materials. Native tubular flowers like trumpet honeysuckle, cardinal flower, bee balm, and salvia supply nectar. Willows, native ornamental grasses, and thistles contribute plant down for nest construction. Spiders and their webs are essential nest ingredients, so resist the urge to clear every web from your porch or garden shed. A yard with active spiders is a yard with nesting-material supply.
- Plant native tubular flowers and shrubs that supply nectar and attract spiders
- Allow plant down sources: willows, thistles, native grasses, cottonwood
- Maintain at least one hummingbird feeder with a 4: 1 water-to-sugar ratio, cleaned every 2 to 3 days (more often above 80°F)
- Install a water mister or dripper: hummingbirds bathe frequently, especially during nesting
- Tolerate spiderwebs on eaves, fences, and garden structures — they are a critical nest-building resource
- Leave a few slender horizontal dead stubs and low-hanging branches in place rather than pruning everything back
On the structural side, you have two practical DIY options: a hanging-cup support that mimics a loop or stub of branch, and a small shelf or ledge platform mounted under an eave or in a shrub. Neither will guarantee a nest, but both provide exactly the kind of horizontal anchor point that hummingbirds have been documented using on human structures. The two plans below give you specific dimensions, materials, and steps.
DIY plan 1: hanging-cup nesting support
This design mimics a forked or looped branch stub. A short horizontal dowel or twig fork is suspended from a sturdy hook, giving the hummingbird a narrow, stable perch on which it can anchor the spider-silk base of its nest cup. It is the simplest build in this article and requires almost no tools.
Materials and dimensions
- 1 natural hardwood or cedar dowel, 3/8-inch diameter, cut to 6 inches long (or a real forked twig of similar diameter)
- 18 to 24 inches of 20-gauge galvanized wire (available at hardware stores)
- 1 small galvanized screw hook, rated for outdoor use
- Optional: a second shorter 3-inch dowel piece to create a Y-fork shape
- No finishes, paints, or stains — leave wood bare or use a fully cured, low-VOC exterior finish if you must treat it
Step-by-step build
- Cut your 3/8-inch dowel to 6 inches. If you want a Y-fork, cut a second piece to 3 inches and bevel one end at about 45 degrees so it fits against the main dowel at an angle.
- If making the Y-fork: hold the short piece against the main dowel about 1 inch from one end, and lash the joint tightly with 4 to 6 inches of galvanized wire, twisting the ends together on the underside. The fork angle should be 30 to 45 degrees.
- At the center of the main 6-inch dowel, wrap 3 loops of wire tightly and twist the free ends into a hanging loop about 2 inches tall. This is your suspension point.
- Thread the remaining wire through the suspension loop and form a hanging line 12 to 18 inches long, finishing with a small closed hook or loop at the top.
- Screw the galvanized hook into the underside of an eave, a tree limb, or a pergola beam at your chosen height. Hang the support from this hook.
- Tug the assembly firmly to confirm it holds at least 1 pound of static load without swinging excessively. A slight natural sway is fine; excessive spinning is not.
- Leave the wood bare. Do not add anything to attract the hummingbird. Place it and leave it alone.
Mounting notes
Hang the support so the dowel sits at 8 to 15 feet above the ground for Ruby-throated and Anna's birds, or up to 20 feet for Rufous. The dowel should be roughly horizontal or angled slightly downward at one end, which is the natural orientation hummingbirds prefer. Position it within 10 to 30 feet of dense shrub cover but with a clear approach path from at least two directions. Avoid placing it directly above a high-traffic walkway or play area.
DIY plan 2: small shelf or ledge nesting platform
This is a flat wooden platform with a shallow raised lip, sized to fit under an eave or inside a dense shrub. A hummingbird will not nest in an enclosed box, but a small open shelf placed in the right spot can work like the broad, flat branch forks that hummingbirds sometimes choose in nature. Keep the platform as open and minimalist as possible.
Materials and dimensions
- 1 piece of untreated cedar, pine, or cypress board: 4 inches wide by 5 inches long by 3/4 inch thick
- Cedar or pine strip for the front lip: 3/4 inch tall by 4 inches wide by 3/8 inch thick
- 2 galvanized wood screws, 1-1/4 inch, for attaching the lip
- 2 galvanized screws, 1-5/8 inch, for mounting to a backing board or beam
- Optional backing board: 4 inches wide by 6 inches long, same thickness, for eave-mount applications
- No paint or stain on contact surfaces; leave bare or apply one coat of fully cured, water-based exterior finish to the underside and mounting face only
Step-by-step build
- Cut your cedar board to 4 inches by 5 inches. Sand the top surface lightly with 120-grit sandpaper so it is smooth but not slick.
- Cut the front lip strip to 4 inches long and 3/4 inch tall. This lip keeps the nest material from sliding off the front but is low enough that it does not obstruct or enclose the nest.
- Pre-drill two pilot holes through the lip strip to avoid splitting. Attach the lip flush with the front edge of the platform using two 1-1/4 inch galvanized screws driven from underneath, or from the front face. The platform surface should be flat and level, with the lip protruding 3/4 inch above it.
- If mounting under an eave: attach the optional backing board to the rear edge of the platform at a 90-degree angle using two 1-5/8 inch galvanized screws to form an L-shape. This backing board screws flat against the eave face.
- If mounting in a shrub or on a tree: drill two through-holes in the rear of the platform and use galvanized wire to lash it to a sturdy horizontal branch, keeping the platform surface level.
- Confirm there are no protruding screw tips, loose pieces of adhesive, or rough splinters on the top surface. Run your hand across the platform; it should be smooth.
- Mount at your target height and position. Do not add nesting material, twigs, or decoys. The female will build from scratch.
Mounting notes
The ideal height for this shelf is 8 to 20 feet off the ground, installed on the underside of an eave, a pergola beam, or the inside face of a dense shrub where there is some natural overhead cover. Orient the shelf so it faces away from prevailing afternoon sun in your region. In hot climates, a north or east-facing position reduces heat stress on eggs and nestlings. In cool Pacific Northwest gardens, a more sheltered south-facing spot is fine.
Placement guidelines by region and season
Where you place your support structures matters nearly as much as how you build them. Hummingbirds are attracted to sites with dense nearby cover for escape, good sightlines for the sitting female, and proximity to reliable food. Here are the practical rules for each major region.
| Region | Primary Species | Best Install Date | Preferred Height | Vegetation Near Structure | Feeder/Water Distance |
|---|---|---|---|---|---|
| Eastern U.S. | Ruby-throated | Late February to early April | 10–30 ft | Deciduous trees, shrubs, native vines | 15–40 ft from feeder; mister within 20 ft |
| Pacific Coast / California | Anna's (year-round) | November to January | 8–20 ft | Native oaks, ornamental shrubs, eucalyptus | 10–30 ft from feeder; mister within 20 ft |
| Pacific Northwest | Rufous, Anna's | Late March to April | 10–25 ft | Conifers, native deciduous shrubs | 15–30 ft from feeder; mister within 25 ft |
| Southwest / Mountain West | Broad-tailed, Black-chinned, Rufous | March to May | 8–20 ft | Desert willows, agaves, native flowering shrubs | 15–30 ft from feeder; mister within 20 ft |
A few rules apply everywhere. Place supports within a dense planting but keep the approach path open: the female needs to fly in on at least two sides without ducking through a tangle. Avoid placing supports directly above or within 5 feet of a busy bird feeder, which draws traffic, noise, and potential nest disturbance. A distance of 15 to 40 feet from your nectar feeder is the sweet spot. Misters and drippers can be closer since bathing birds are calm and quiet. Keep structures away from low shrub layers (under 4 feet) where cats can wait in ambush, and away from fences or tree trunks that give squirrels and raccoons easy climbing routes. Dealing with Predators, NestWatch (Cornell Lab) recommends keeping pet cats indoors and away from nesting areas, siting nests and supports away from low shrub layers and easy climbing routes, and maintaining dense overhead and nearby escape cover to reduce predator ambushes Dealing with Predators — NestWatch (Cornell Lab).
Predator-proofing, sanitation, and monitoring
Hummingbird nests are vulnerable to the same predators that raid other backyard nests: cats, corvids, snakes, and raccoons. Research on nest boxes from NestWatch data found that predator guards improved nesting success by about 6.7 percent on average, and using multiple guards produced even better results. You cannot clamp a stovepipe baffle onto a hummingbird's branch, but you can apply the same principle through thoughtful placement and habitat management.
- Keep cats indoors, especially during the breeding season from April through August
- Avoid mounting supports on thin tree trunks that squirrels and raccoons climb easily; attach to beams or eaves where access from above is blocked
- Maintain dense shrub cover within 10 feet for escape perches, but avoid low ground-level cover directly beneath the nest site
- Do not install reflective tape, predator decoys, or wind spinners near the nest support; these disturb nesting birds as much as they deter predators
- Clean your hummingbird feeders every 2 to 3 days, and daily in temperatures above 80°F, to prevent mold and fermentation that can sicken foraging adults
- Change mister or dripper water daily
If you find an active hummingbird nest, the best thing you can do is leave it alone. Under the Migratory Bird Treaty Act, active nests with eggs or young are federally protected, and disturbing them without authorization is illegal. Keep any monitoring to brief, infrequent visual checks from a distance of at least 6 to 10 feet. If you want to contribute your observations to science, register the nest with Cornell Lab's NestWatch program, which provides a standardized data sheet and a code of conduct that keeps your monitoring visits safe for the birds. Approach no more than once every 3 to 4 days, keep visits under 2 minutes, and withdraw if the female flushes from the nest.
After the nest is vacated and all young have fledged, you can remove any artificial support for cleaning, but leave natural branch nests in place. Hummingbirds sometimes return to reuse the same site in subsequent seasons, and the structure presents no hazard once empty.
How hummingbird nesting compares to cardinals and doves
Readers often ask about hummingbirds alongside cardinals and doves, since all three are common backyard visitors. The short answer is that none of these three species is a true cavity nester in the strict sense, which means enclosed nest boxes are not the right solution for any of them, though the reasons differ. Hummingbirds build a suspended cup nest and need an exposed horizontal support. Cardinals and doves build open cup or platform nests in shrubs and low trees and are most likely to use a dense planting or a natural ledge rather than any manufactured structure. If you are curious about what does and does not attract cardinals and doves to purpose-built structures, those are worth exploring as separate topics alongside this one. For details on what bird houses do cardinals like, see our separate guide on attracting cardinals and doves to purpose-built structures. For recommendations on attracting and sheltering cardinals, see our guide to the best cardinal bird house. Do cardinals use bird houses? See our separate guide on cardinals and bird houses for what attracts them and when purpose-built structures may or may not help.
The bigger takeaway is that matching your yard setup to actual nesting biology, rather than buying a product labeled for a particular species, is almost always the more effective and humane approach. For hummingbirds that means open supports, native plants, spider-friendly landscaping, clean feeders, and a little patience.
Quick pre-season checklist
- Check your region's expected hummingbird arrival date using eBird abundance maps and plan to have all structures installed 2 to 4 weeks before first arrival
- Confirm hanging-cup or shelf supports are mounted at the correct height and orientation for your target species
- Verify no loose wire ends, splinters, or soft plastics are present on any artificial support
- Set up and clean your nectar feeder: 4 parts water to 1 part plain white sugar, no red dye
- Install or activate a water mister or dripper
- Identify and protect spider web areas near the nest support site
- Brief all household members: no touching or approaching close to any active nest
- If monitoring, register your site with NestWatch before the first nest check
FAQ
Do hummingbirds nest in traditional enclosed bird houses (small “hummingbird houses” sold in stores)?
No. Authoritative sources (Cornell Lab/NestWatch, Audubon) report that hummingbirds are not cavity nesters and rarely, if ever, use enclosed nest boxes. Small decorative “hummingbird houses” are unlikely to be used; hummingbirds build tiny open cup nests on exposed horizontal branches or similar surfaces.
If they don’t use boxes, where do hummingbirds typically build nests?
Hummingbirds build a tiny open cup nest attached to a small horizontal branch, twig, vine, or human-made horizontal support (wind chimes, string lights, faucet, loop of chain). Nests are made from plant down and spider silk, camouflaged with lichen or moss, and usually sit on a slender surface rather than inside a cavity.
What are typical nest dimensions, clutch size and timing I should expect?
Finished nests: outer diameter ≈1–2 in, inner cup ≈0.5–1.0 in, depth ≈1 in. Clutch size usually 1–3 eggs (most species 2). Build time ≈6–10 days; incubation ≈12–17 days (species-dependent); nestling period ≈15–22 days. Regional species (Ruby‑throated, Anna’s, Rufous) vary slightly in timing and height of placement.
What evidence‑based alternatives support hummingbird nesting in backyards?
Provide species‑appropriate habitat and artificial supports that mimic a small horizontal branch: (1) plant native tubular flowers, shrubs and small trees for natural nest sites; (2) tolerate spider webs and plant down; (3) offer water (misters/drippers) and perches; (4) provide sturdy short horizontal stubs, narrow shelves, or hanging cup supports where hummingbirds can build on top—not enclosed boxes. Keep feeders clean and landscape to reduce predator access.
Can you give simple DIY support designs (materials and measurements) that mimic a branch for nest building?
Yes. Two reliable, species‑appropriate options: 1) Horizontal stub/ledge: material—untreated cedar/pine or weather‑cured hardwood; dimensions—platform length 3–4 in, depth 3/4–1 in (thin to mimic a twig), thickness 1/2–3/4 in; attach to a slender branch or small post so it projects horizontally and flexes minimally. 2) Hanging cup support: material—untreated wood disk or composite ~1.5–2 in diameter, 1/2–3/4 in thick; drill a shallow central depression 1/2–3/4 in wide × 1/4–1/2 in deep to give initial cup support; suspend with thin galvanized wire or nylon cord so it hangs level. Use non‑toxic, fully cured finishes if needed; avoid pressure‑treated wood, plastics that off‑gas, or loose fibers that can entangle chicks.
How should I mount and place these DIY supports (height, orientation, surrounding vegetation)?
Placement checklist: - Height: typically 6–30 ft depending on species and yard—Ruby‑throated often 10–40 ft; Anna’s commonly 6–20 ft; Rufous up to ~30 ft. If unsure, aim 6–15 ft in suburban yards. - Orientation: horizontal, level, and exposed on top with some overhead cover nearby (continuous canopy or shrub layer) so the nest is sheltered from rain and predators. - Distance from feeders: place supports 10–30 ft from feeders to reduce disturbance; hummingbirds forage widely. - Vegetation: near small branches or shrubs that offer escape cover and perching sites. - Avoid: isolated low perches without cover (predator risk) and sites that allow easy predator access from a single tree trunk or fence post.
Next Article
What Bird Houses Do Cardinals Like? Size, Setup, Placement
Cardinals prefer box-style nesting houses with the right entrance size, depth, cover, and predator-safe placement.