Mount a bird house on a metal pole, add a stovepipe baffle beneath it, face the entrance hole away from prevailing wind, and set the box at 4 to 6 feet off the ground for most cavity-nesting species. That combination gives you a stable, predator-resistant setup that is also easy to monitor and clean without a ladder. Everything else, including exact height, spacing, and hole size, depends on which bird you are trying to attract, and this guide will walk you through each decision in order. This guide is part of our step-by-step advice on how to hang bird house setups for different species.
How to Mount a Bird House on a Pole Step by Step
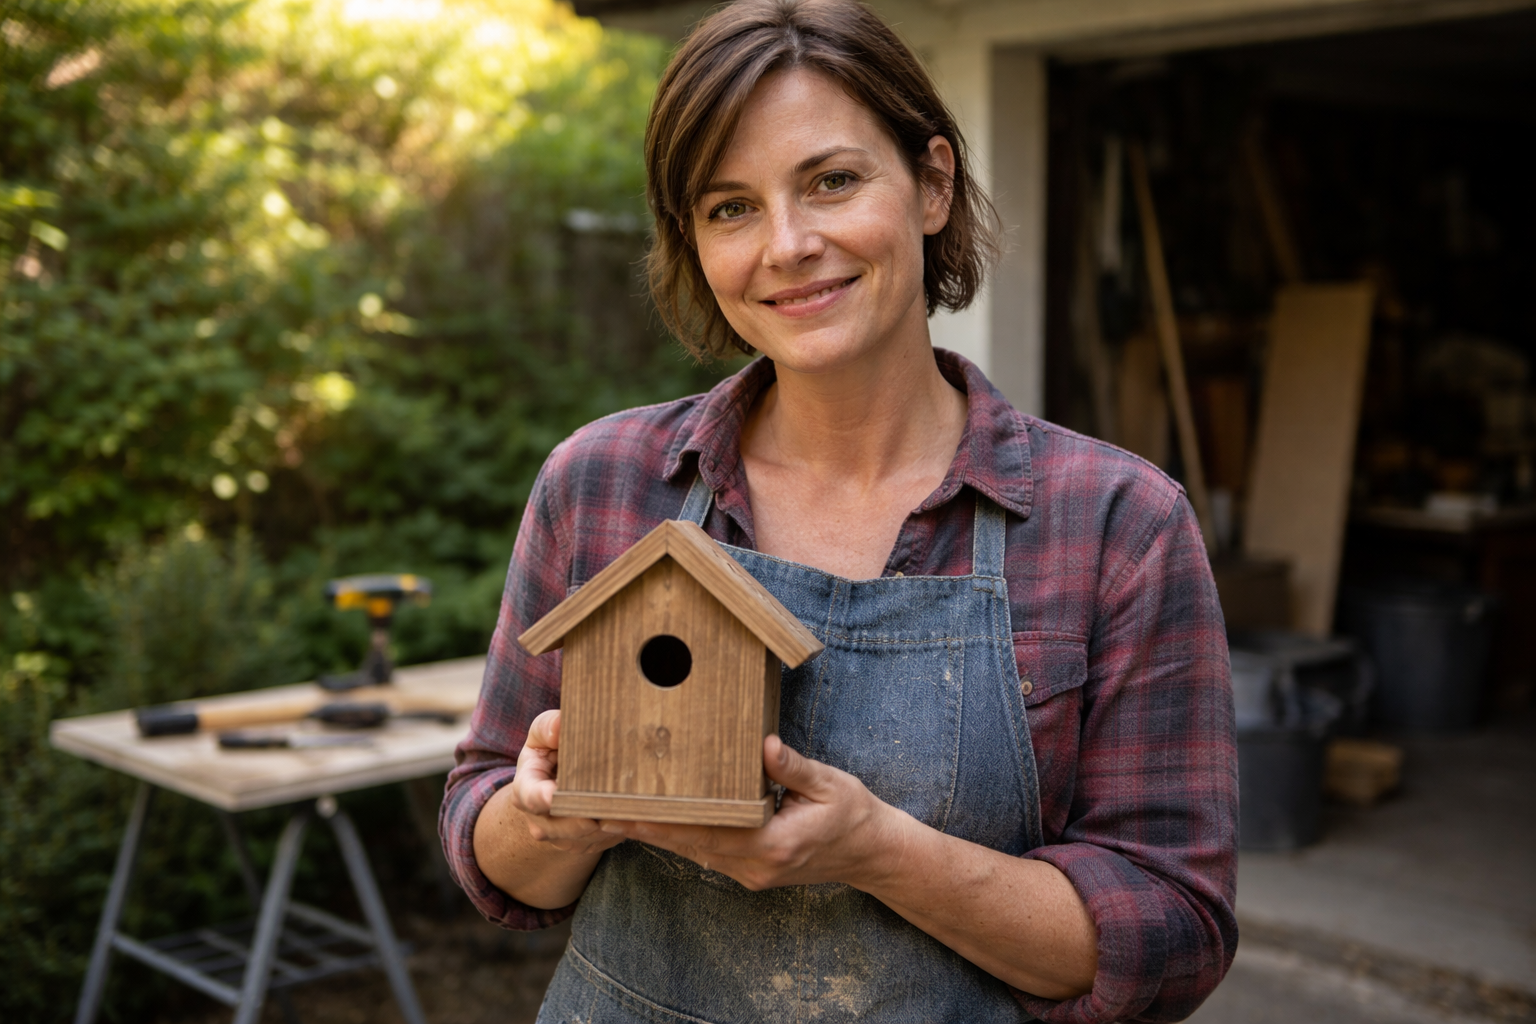
Maya Thompson
3 Jun 2026
Choose the right mounting setup for your bird house
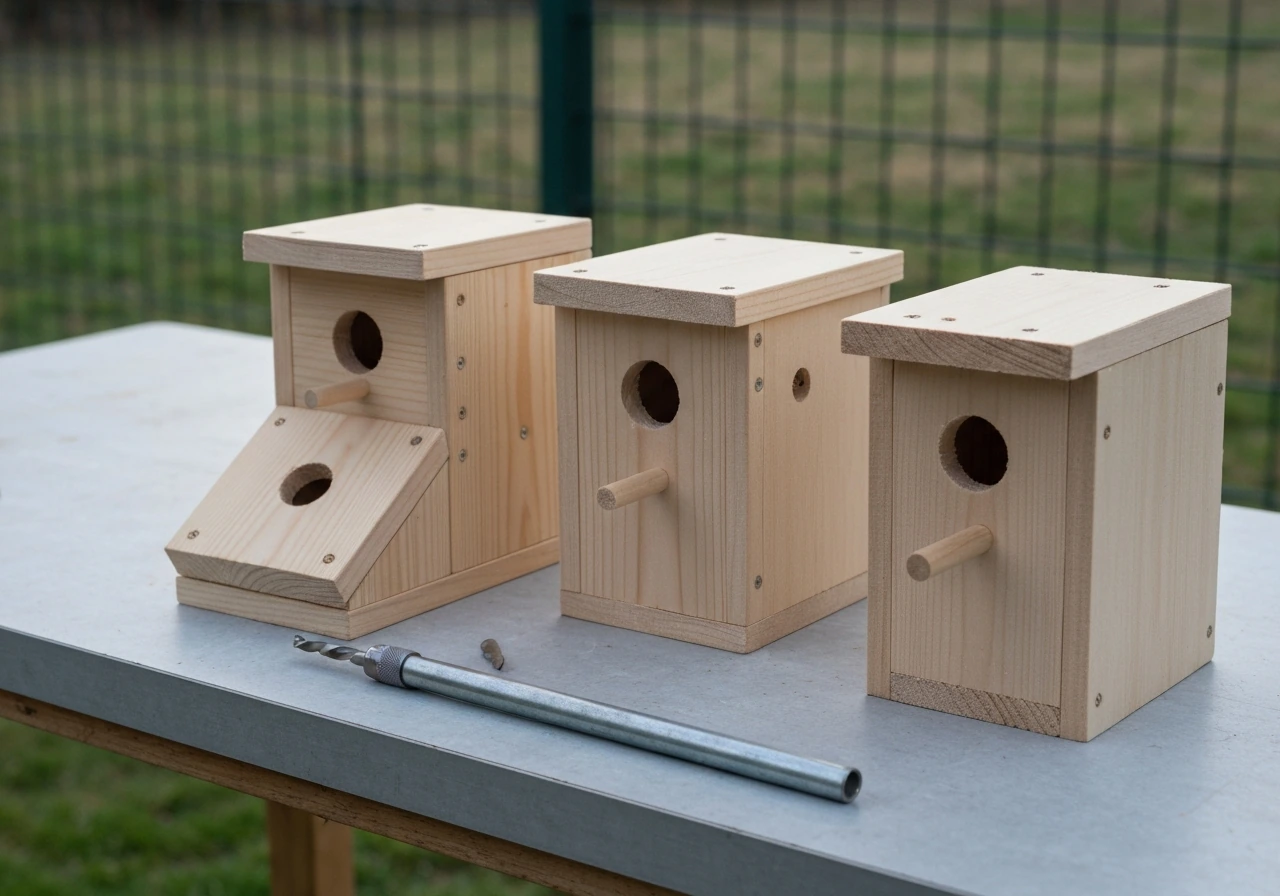
Before you drive a single stake into the ground, match the house design to the species you want. Interior dimensions, entrance-hole diameter, and drainage all need to be correct before mounting, because the mount locks in the orientation and height.
The TREE SWALLOW NEST BOX INSTRUCTIONS PDF from Meadowlands Conservation Trust and NJSEA also specifies drainage-hole and entrance-hole build elements, so preserving the design orientation during mounting keeps drainage and the entrance configuration effective Drainage all need to be correct before mounting, because the mount locks in the orientation and height. .
A bluebird box, for example, should have a floor around 4 by 4 inches (up to 5 by 5 inches), an entrance hole exactly 1. 5 inches in diameter, and at least four drainage holes of 3/8 to 1/2 inch in the floor corners. Ventilation gaps of about 1/2 inch near the roof and a roof overhang of at least 3 inches round out the design.
If your box does not already have these features, fix them now rather than after the house is up.
Pole mounting is the best general approach for almost every cavity-nesting species. NestWatch specifically recommends it over tree or fence mounts because a freestanding pole is the easiest surface on which to add an effective predator guard. A smooth metal pipe, typically electrical conduit (EMT) in the 1/2 to 3/4 inch size range, is the go-to choice: it is inexpensive, widely available, resists rot, and accepts standard conduit clamps and U-bolts. If you are building a bluebird trail with multiple boxes, a consistent pole system also simplifies monitoring because every box is at the same height and uses the same hardware.
Before you buy anything, decide whether you want a permanent ground-driven pole or a portable stake system. Ground-driven is more stable and better for long-term trails. A portable setup (a spike-style anchor you can pull out) works well if you rent, if your soil is rocky, or if you want to move the box between seasons. Either way, the pole needs to be tall enough to get the box at the right height after accounting for ground depth: if you drive 18 inches into the ground and want the box floor at 5 feet, you need at least a 7-foot pole.
Mounting methods on a pole
There are three reliable ways to attach a bird house to a pole: U-bolt/conduit clamp hardware, a mounting board with screws, and a bracket arm. Each has its place, and the choice usually comes down to your pole diameter and whether you want the box to be removable for cleaning.
U-bolt and conduit clamp method
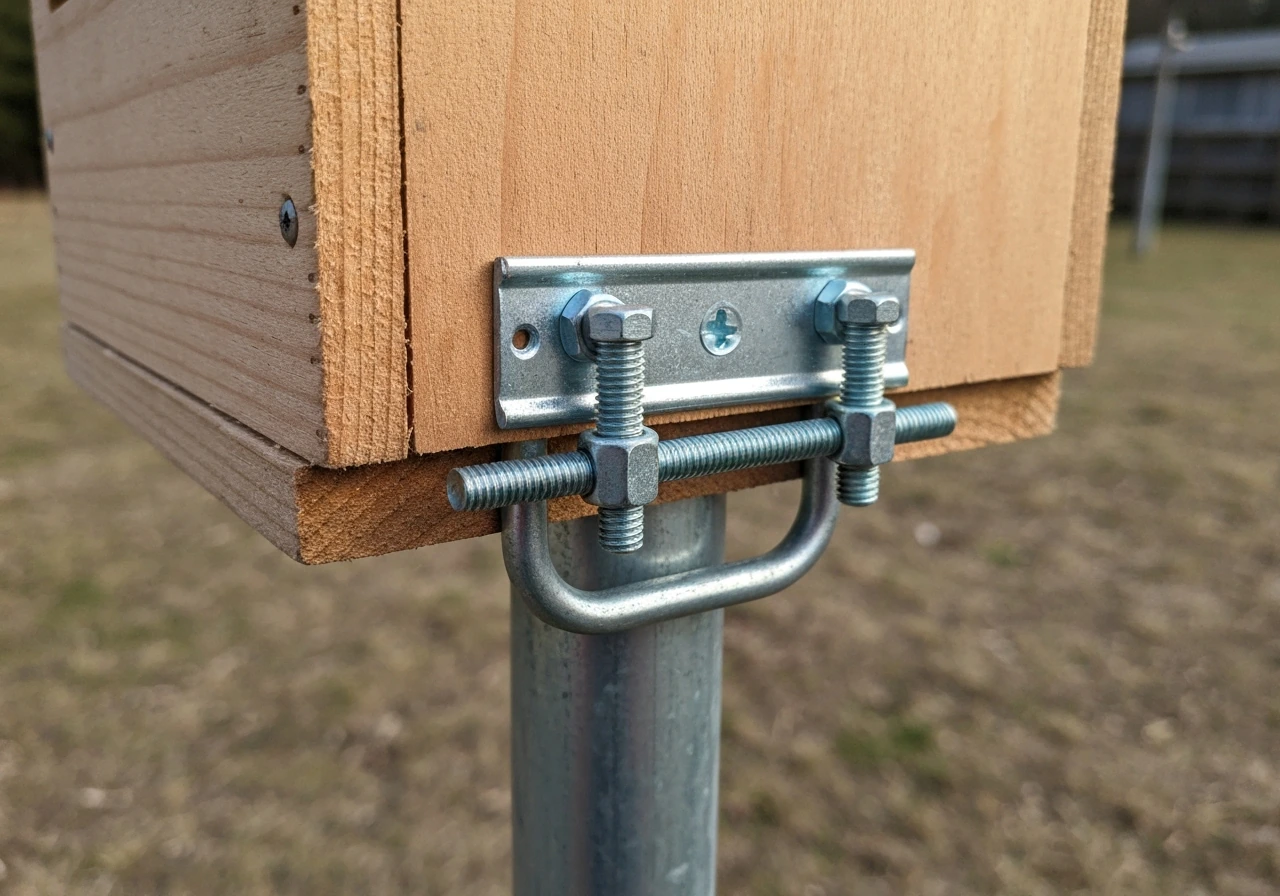
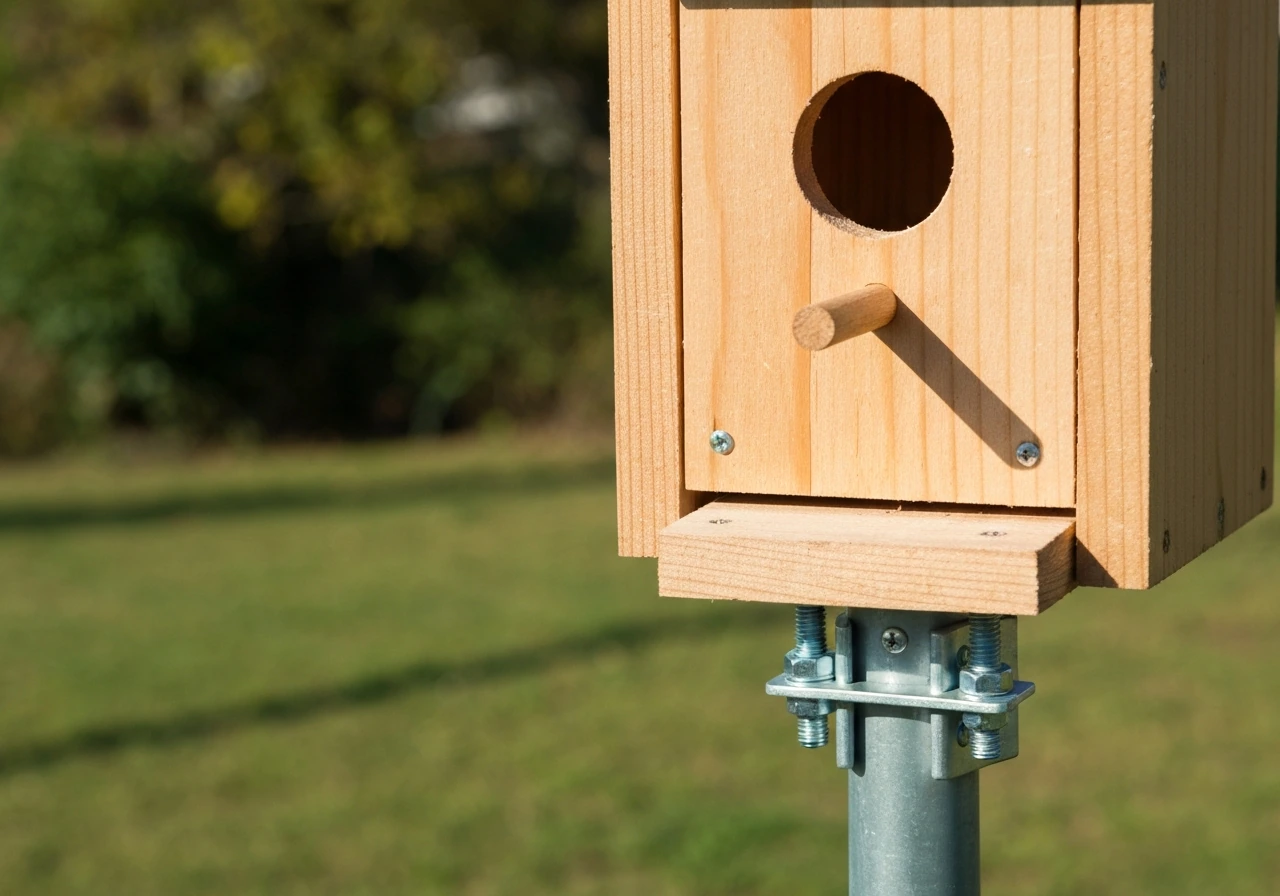
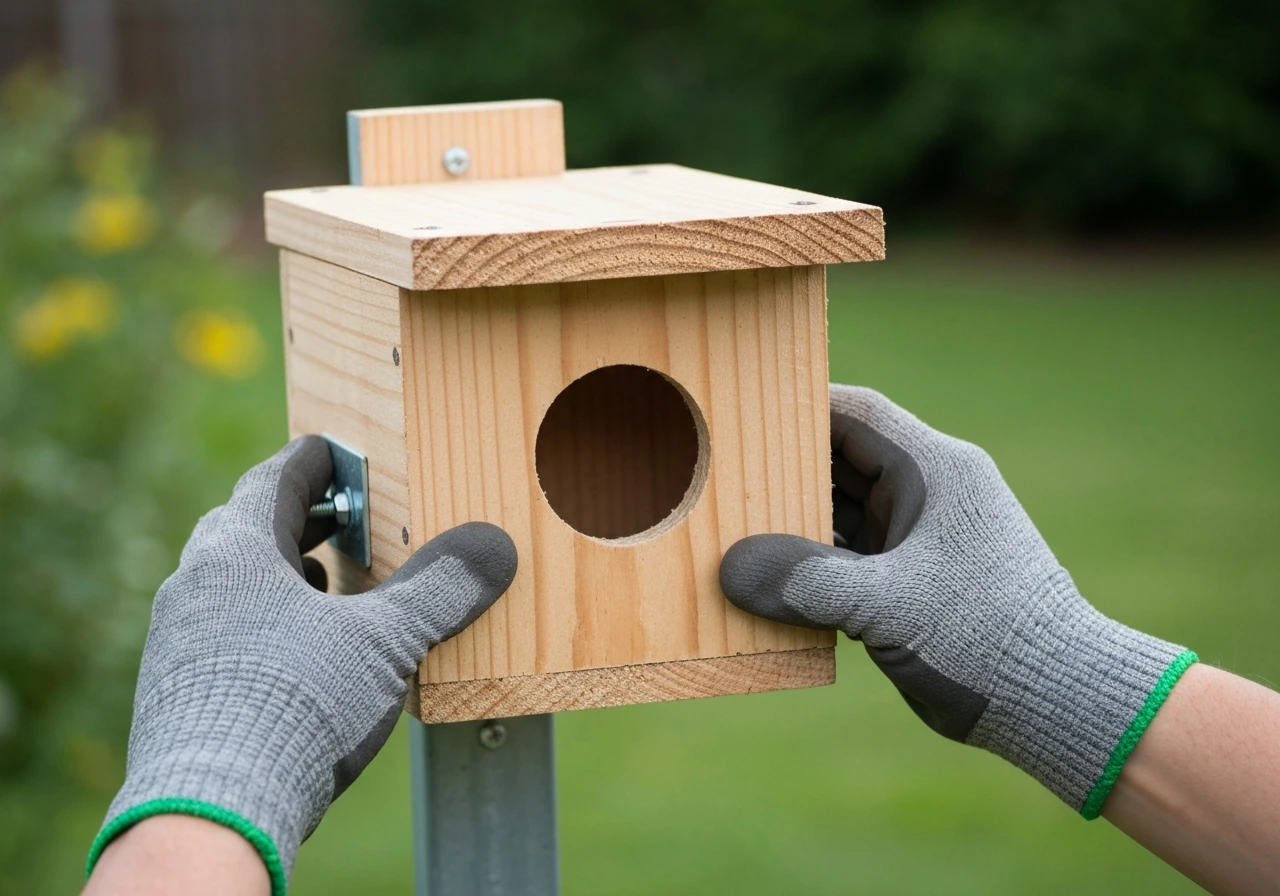
This is the most secure and most commonly used approach for a bluebird-style box on a metal conduit pole. You attach a U-bolt or conduit clamp to the back of the nest box, then slide it over or bolt it to the pole. The California Bluebird Recovery Program specifically notes the importance of sizing your clamp or U-bolt to match your pipe diameter, so measure your conduit before ordering hardware. For a 3/4-inch EMT pipe, a matching conduit clamp with a flat mounting plate works cleanly. Tighten the hardware so the box does not wobble, but do not over-torque to the point of cracking the back panel.
Mounting board with screws
If your box has a flat back panel, you can screw it directly to a wooden or composite mounting board, then clamp or bolt that board to the pole. This spreads the load across the full back of the house rather than concentrating stress at two clamp points. It also makes it easier to swap boxes on the same pole if you want to test different designs. Use exterior-grade screws (stainless or coated) to avoid rust streaking and corrosion over time.
Bracket arm method
A short bracket arm welded or bolted to the top of the pole lets the box hang or sit offset from the pole itself. This is useful when you want the entrance hole to clear the pole silhouette, or when you are using a heavier decorative house that needs a platform rather than a back-mount. If you are hanging a bird house on a tree instead of a pole, see the steps for how to hang a bird house on a tree to choose the right attachment and placement. The tradeoff is that a bracket arm creates a small lever effect in wind, so the bracket connection to the pole needs to be especially secure, ideally with two bolts rather than one.
Preventing wobble and keeping the entrance clear
Wobble is the enemy of nesting success. A swaying box stresses incubating birds and can cause eggs to cool or chicks to be jostled. After attaching the box, grip the house firmly and try to twist and rock it. There should be no movement. If you feel any, add a second clamp point or tighten existing hardware. Also stand back and look at the entrance hole: it should be completely unobstructed by the pole, a bracket edge, or nearby vegetation. The entry needs a clear flight path of at least a few feet in front of it.
Positioning height, direction, and spacing for birds
Height, facing direction, and distance from other boxes all affect whether birds accept a house. Get these right and you will see occupancy much faster.
How high to mount
For bluebirds and most other open-country cavity nesters, 4 to 6 feet above the ground is the practical sweet spot. The USDA Forest Service recommends about 5 feet for bluebirds, and MU Extension agrees that this height is convenient for monitoring.
It puts the box at eye level, so you can open it quickly to check nests without a step stool, and it still keeps the entrance well above ground-based predator reach, especially once you add a baffle (more on that below). Some species prefer higher mounts: purple martin houses go up at 10 to 15 feet, and wood duck boxes are typically placed 4 to 6 feet over water or 10 to 20 feet on a tree.
Know your target species before you commit to a pole length.
Which direction should the entrance face
Face the entrance hole away from prevailing wind, which in most of North America means avoiding west and north-facing orientations. NestWatch recommends that black-capped chickadees have their entrance facing away from prevailing wind, and that general principle applies broadly. East or southeast is a common good choice: it gets morning sun (which helps warm the box early in the day and encourages birds to start foraging) while shielding the interior from afternoon heat and driving rain. If your site has a clear wind pattern, let that override compass direction. A mounting system with a rotatable clamp gives you fine-tuning flexibility even after the pole is set.
Spacing between boxes
Bluebirds are territorial, so boxes placed too close together will be contested or ignored. The USDA Forest Service suggests 100 to 150 yards between boxes on a bluebird trail, and Bluebirds Across Nebraska recommends at least 300-foot intervals, or roughly 100 yards. A common practical compromise when you want to accommodate both bluebirds and tree swallows is paired boxes: place two boxes 5 to 25 feet apart to allow the two species to coexist, then space the next pair 100 yards or more away. Chickadees in woodland settings can be even more spread out, with NestWatch citing 650-foot spacing as appropriate for some woodlot setups.
| Species | Recommended height | Entrance hole diameter | Box spacing |
|---|---|---|---|
| Eastern bluebird | 4 to 6 feet | 1.5 inches | 100 to 150 yards |
| Tree swallow | 4 to 6 feet | 1.5 inches | Paired boxes, then 100 yards |
| Carolina chickadee | 4 to 8 feet | 1.125 inches | ~650 feet (woodland) |
| Wood duck | 4 to 6 ft over water / 10 to 20 ft on tree | 4 by 3 inch oval | ~600 feet or more |
| Purple martin | 10 to 15 feet | 2.125 inches (starling-resistant oval) | Colony spacing varies |
Predator-proofing and safety checks for mounted houses
A pole-mounted box without a predator guard is still vulnerable. Raccoons, snakes, squirrels, and cats can all climb a bare metal or wooden pole. The good news is that a pole setup makes it straightforward to add the most effective guard types, which is a key reason NestWatch recommends pole mounting over trees or fences in the first place.
The stovepipe baffle: your best tool
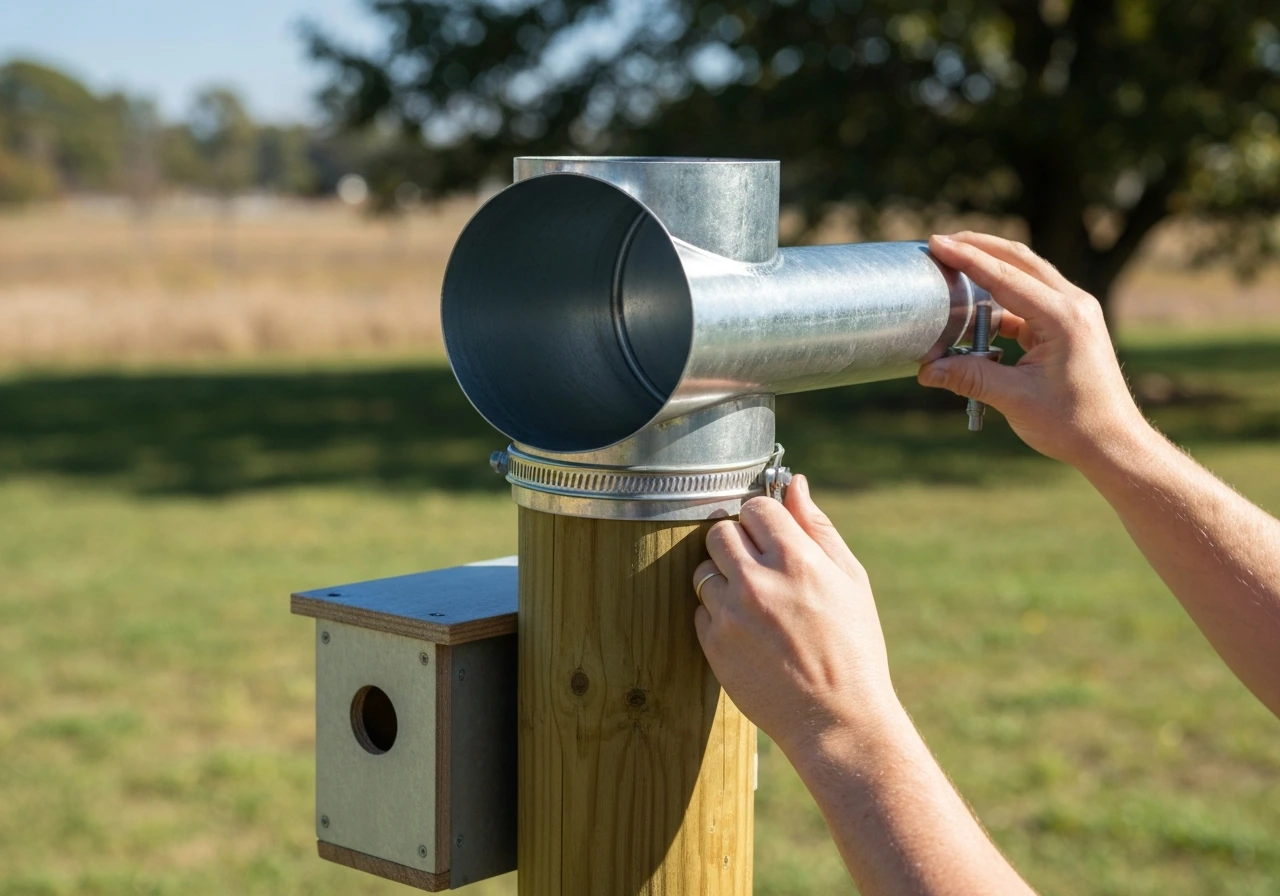
Michigan Bluebirds calls the cylindrical metal stovepipe baffle the easiest and most effective predator guard for a pole-mounted box. A stovepipe baffle is a section of metal pipe or flashing, typically 8 inches in diameter and 24 inches long, with a capped top, that slides over your pole and hangs below the nest box. The smooth metal surface prevents raccoons from gripping the pole above the baffle, and the overhang at the top stops snakes from simply reaching past it. The Virginia Bluebird Society recommends using both a snake baffle and a raccoon guard together for the fullest protection.
Installation order matters here. The Tennessee Wildlife guidance is explicit: install the baffle hardware on the pole before you attach the nest box. Bolt hanger-iron strips or hose clamps to the pole at the intended baffle resting height, then slip the baffle over the pole so it rests on those brackets. After that, mount the nest box above. If you try to retrofit a baffle after the box is already up, you either have to remove the box or work around it, which is awkward and risks disturbing active nests.
Drainage, ventilation, and safe access checks
Once the box is mounted, do a quick functional check before declaring it ready. Open the box and look straight down: you should see at least four drainage holes in the floor corners, each 3/8 to 1/2 inch in diameter. Tilt the box slightly and confirm water drains out rather than pooling. Check that ventilation gaps near the roof are open and unblocked by the mounting hardware.
Finally, open and close the access panel (usually the side or front) while the box is on the pole. If it is stiff, jams against the pole, or requires two hands to open, address that now. During nesting season you may need to open it quickly and one-handed to check on eggs or chicks.
Avoiding other hazards
- Keep the pole at least 6 to 8 feet away from any fence, tree branch, or structure that a predator could use to bypass the baffle by jumping laterally rather than climbing the pole.
- Avoid placing boxes near heavy bird-feeder traffic. Concentrated feeder activity draws house sparrows aggressively, and house sparrows will kill native cavity-nesting birds inside the box.
- Check that the entrance hole is not obstructed by the pole hardware, a nearby branch, or a bracket edge. Birds need a clear, unobstructed flight path into and out of the hole.
- Inspect the pole itself for sharp edges or burrs (common on cut conduit) that could injure a bird's feet or your hands during monitoring.
Installation steps and common mistakes to avoid
Here is the full installation sequence in order. Next, review the installation steps and avoid common mistakes so your bird house is mounted correctly the first time. Following this order prevents the most common mistakes, especially the frustrating one of having to disassemble everything because you forgot the baffle.
- Verify your nest box is ready: correct floor size, hole diameter, drainage holes, and ventilation gaps. Fix any issues before going outside.
- Choose your pole location: open area with clear sight lines, 4 to 6 feet target box height, at least 6 to 8 feet from any fence, tree, or structure a predator could jump from.
- Drive or set the pole: for metal conduit, drive 18 inches into the ground using a driving cap to protect the threads, or use a spike-base anchor. Check with a level that the pole is plumb (straight vertical). A leaning pole puts torque stress on every clamp and causes the box to face the wrong direction.
- Install baffle hardware first: bolt hanger-iron strips or hose clamps to the pole at the height where the baffle will rest, typically 18 to 24 inches below where the box bottom will sit.
- Slide the stovepipe baffle over the pole from the top and rest it on the brackets. The baffle should hang freely and wobble slightly, which actually makes it harder for predators to navigate.
- Attach the nest box: use your U-bolt, conduit clamp, or mounting board to fix the box to the pole above the baffle. Tighten hardware firmly. Check for wobble by gripping and rocking the box.
- Set the entrance direction: rotate the box so the hole faces away from prevailing wind (usually east or southeast). Tighten the final clamp position.
- Do the functional check: confirm drainage holes are clear, ventilation is open, the access panel opens easily, and the entrance is unobstructed.
- Record the location: note the GPS coordinates or a simple sketch of the spot. This matters when you start monitoring and especially when you register nest attempts.
Mistakes that cost you occupancy
- Installing too late: putting the box up in May when birds are already nesting means you miss the season entirely in many regions.
- Skipping the baffle: a box without a predator guard is essentially a baited trap for native birds. Predators learn pole locations quickly.
- Leaning pole: even a few degrees of lean causes the entry hole to angle downward, funneling rain inside and making the house unattractive.
- Wrong hole size: a 1.75-inch hole on a bluebird box lets European starlings in; a 1.5-inch hole keeps them out. Do not guess.
- Placing near a feeder: aggressive house sparrows will take over and can be lethal to other species inside the box.
- Not testing the access panel: discovering a stuck side door while a nest is active means disturbing the birds more than necessary to open it.
Seasonal timing, monitoring, and maintenance after mounting
When to install
Install boxes well before the breeding season begins so birds have time to find and investigate them. For bluebirds in most of the eastern US, the peak nesting window runs from roughly early April through mid-May, with USFS data showing a peak clutch period around April 6 to May 14. That means late February or early March is the target install date for most of the South and Midwest. In colder northern regions, late March is still reasonable.
Kentucky extension guidance notes that bluebirds begin using nest sites in mid-April, so having boxes up by early April at the latest is critical in that region. NestWatch puts it simply: install boxes before breeding begins. If you are reading this and it is already late spring, install anyway. Many species raise two or three broods per season, and a box up in June can still be occupied for a second or third clutch.
How to monitor without causing harm
Tennessee Wildlife is direct about this: do not put up a nest box if you are not willing to monitor it at least once or twice during the nesting season. If you are unsure about the timing and process, review how to put up bird houses before placing your box so you can plan to monitor it at least once or twice during the nesting season. Unmonitored boxes become house sparrow breeding stations or trap sites for other predators.
Monitoring is simple: open the box, look in, close it gently, and walk away. Do this once a week during active nesting. NestWatch recommends logging each new clutch as a separate nest attempt in their free tracking system, which gives you useful data over multiple seasons and helps you see whether your placement is working. First-year non-use is normal, even with perfect design and placement, so do not move the box after just one empty season.
Cleaning: when and how
Clean out the box as soon as a brood fledges, not at the end of the entire season. NestWatch and Sialis.
org both emphasize this: removing the old nest material immediately allows the pair to start a second clutch faster, since bluebirds often raise two or three broods in a season and prefer a clean box for each one. Scoop out the old nest, scrape any debris from the walls and floor, and check that drainage and ventilation holes are still clear.
Do not use soap or chemical cleaners inside the box: a dry scrape and a quick rinse with plain water is enough. At the end of the season (typically after the last brood fledges in late summer), do a full cleaning and leave the box open or remove it briefly to let it dry completely before the following spring.
If you approach an occupied box and hear chicks inside, leave it alone. Wait until you see the fledglings exit on their own, then give the box a day or two before cleaning to make sure no late stragglers remain. If a box has an abandoned or failed nest, clean it out promptly to give the pair a chance to re-nest. Annual sanitation prevents parasite buildup, reduces blowfly larvae, and extends the life of the box itself by keeping moisture from accumulating in decomposing nest material.
Annual hardware inspection
Once a year, before the breeding season begins, pull on the box to check that all clamps and bolts are still tight. Metal conduit can shift slightly over winter freeze-thaw cycles, which loosens hardware. Re-tighten anything that has worked loose, check the pole for rust or corrosion at the ground line (the most common failure point), and confirm the baffle is still resting correctly on its brackets. A five-minute check each February keeps the whole system solid for another year.
FAQ
How do I confirm my bird house entrance hole will be correct after it is mounted on the pole?
Most species fail to use a box if the opening is wrong or the placement blocks airflow. Measure the entrance hole diameter and the exact distance from the hole to the interior floor, then verify there is at least a few feet of clear space in front of the entrance (no pole, baffle, or overhanging branch blocking the approach path).
What should I do if I forgot the predator baffle and the bird house is already mounted?
If the box is already on the pole, you can sometimes install a baffle by removing the box only if access allows the baffle to slide down onto the pole above the nest area. If the box cannot be lifted off quickly without disturbing nesting activity, do not attempt it. Wait until the box is empty, then install the baffle hardware before remounting.
How far from trees, shrubs, or fences should the pole be so birds can actually use the box?
Even with the right height, a pole placed too close to shrubs or fence lines can reduce occupancy by narrowing the birds’ flight path. Keep the entrance unobstructed and avoid placing the pole where predators can hide and ambush at the same height as the entrance.
Why does my mounted bird house wobble even after tightening the hardware?
Clamp-on mounts can loosen if the pole surface is dirty or the hardware size does not match the conduit diameter. Clean the pole where the clamp will sit, use the correct clamp/U-bolt size for your pipe, and after tightening, re-check for wobble by twisting firmly at the front and back of the box.
Which pole-mount attachment method makes it easiest to remove the box for cleaning?
When you want removability for cleaning, use a mounting board or bracket that lets you detach the box without taking the entire pole down. If you choose a U-bolt or conduit clamp, consider using a second person to support the box while removing it, and avoid loosening hardware while birds are nesting or if eggs or chicks are present.
How can I mount the box so I can monitor it frequently without disturbing nests?
If you can open the access panel only by pushing against the pole or reaching awkwardly, you may end up skipping checks during nesting season. Reposition the box orientation (and, if needed, swap to a side access design) so you can open and close it gently one-handed while standing safely at the base of the pole.
What is the most common long-term problem with pole-mounted bird houses, and how do I prevent it?
For ground-driven poles, the failure point is usually at the ground line due to moisture and freeze-thaw movement. Make sure the pole is firmly set, check for rust or corrosion at the buried portion during your yearly pre-season inspection, and re-tighten mounts if the pole shifted.
Can I change the direction the entrance faces after the pole is already installed?
Yes, if you rotate after placement. Use a rotatable clamp when possible so you can fine-tune the entrance facing for sun and wind once the pole is set, and then lock it down firmly. Avoid frequent adjustments during nesting, because disturbance can cause abandonment.
What should I check if the box has drainage holes but the floor still seems to stay wet?
If drainage holes are present but water still pools, the box may be slightly tilted the wrong way or drainage paths may be blocked by sawdust or old nesting material. Clean out debris, confirm the floor corners drain freely, and check that ventilation gaps are not compressed by the mounting hardware.
My birds ignored the box the first season. Should I move it right away?
If a species does not use the box the first year, do not assume the mount is wrong. Keep the setup stable for at least one nesting attempt, because many cavity nesters explore and may only begin using a box in the following season. Only make major changes (height, predator guard, clearance) after confirming the box is correct for the target species.