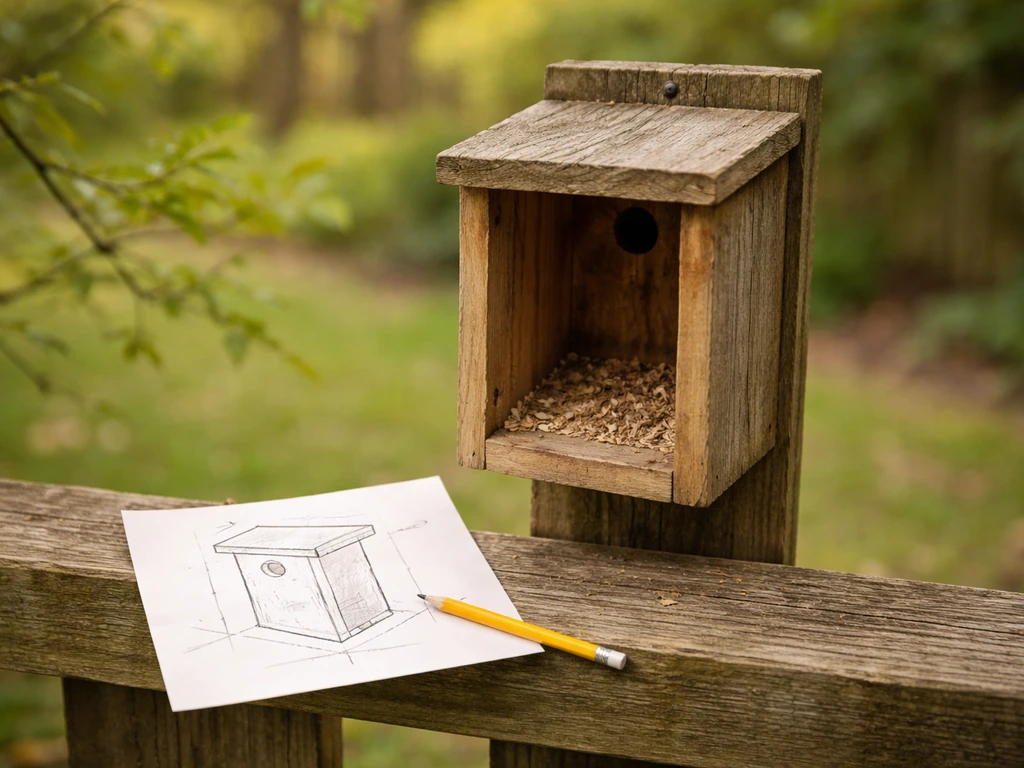
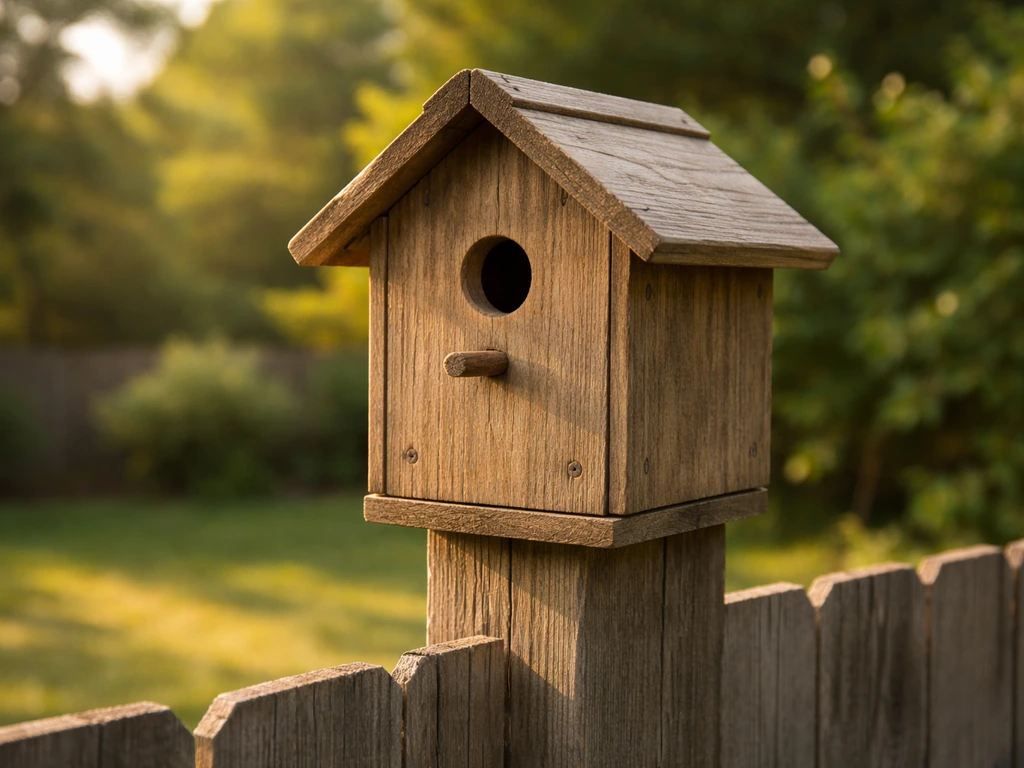
You can build a safe, functional bird house in an afternoon with a few boards, basic screws, and a drill. If you're curious what do blue jay bird houses look like, compare your build choices to the appearance and size details for the intended species in the steps below. The real trick is not the woodworking, it's making sure the box matches the bird you want to attract before you cut a single piece. Get the entrance hole diameter and interior floor size right for your target species, use untreated wood, add ventilation and drainage, skip the perch, and mount it on a pole with a predator baffle. That's genuinely all there is to it. Everything below walks you through each step in order. If you want to adapt these steps for a decorative wine cork bird house, focus on creating safe ventilation, drainage, and a secure mounting so the tiny structure stays stable wine cork bird house instructions.
Simple Bird House Instructions: Beginner Build Guide


Start with the bird, not the box
The most common beginner mistake is building a box and then hoping birds show up. A better approach takes about two minutes of planning: figure out which cavity-nesting species live or nest in your area, then build to their specs. A box sized for a bluebird won't work well for a chickadee, and a wren-sized entrance hole will keep bluebirds out entirely. That's not a problem, it's actually useful, because you can target exactly who you want.
The most beginner-friendly species to build for are the ones with well-documented nest box programs: Eastern bluebirds, tree swallows, black-capped chickadees, Carolina wrens, and house wrens. These birds are widespread, actively use nest boxes, and have clearly published specifications you can follow without guesswork. If you're in the western US, mountain bluebirds and western bluebirds are equally straightforward targets, though their hole sizes differ slightly from Eastern bluebirds.
For most readers, a basic Eastern bluebird-style box is the safest starting point. It's the most-studied nest box in North America, has detailed plans from multiple conservation organizations, and the same basic box design, with a slightly smaller entrance hole, also works for tree swallows. If wrens are your target, the box gets smaller and the entrance hole shrinks. Choose your bird first, then move to the dimensions section below.
Dimensions and entrance hole sizes by species
These numbers are not suggestions, they're functional requirements. An entrance hole that's too large invites nest predators and competing species like European starlings. One that's too small prevents your target bird from entering at all. Interior floor area affects how many chicks can develop safely. Get these right and you're most of the way to a successful box.
| Species | Entrance Hole Diameter | Floor Area | Cavity Depth | Mount Height |
|---|---|---|---|---|
| Eastern Bluebird | 1 3/8 in | 5 x 5 in | ~6 in | 4–6 ft |
| Western Bluebird | 1 1/2 in | 5 x 5 in | ~6 in | 4–6 ft |
| Mountain Bluebird | 1 9/16 in | 5 x 5 in | ~6–8 in | 4–6 ft |
| Tree Swallow | 1 3/8 in | 5 x 5 in | ~6 in | 4–6 ft |
| Black-capped Chickadee | 1 1/8 in | 4 x 4 in | ~8 in | 4–8 ft |
| Carolina Wren / Bewick's Wren | 1 1/2 in | 4 x 4 in | ~6 in | 4–6 ft |
| House Wren | 1 1/8 in | 4 x 4 in | ~6 in | 4–8 ft |
A word on tolerances: aim for within 1/16 inch of the listed hole diameter. Slightly small is better than slightly large, you can always enlarge a hole, but you can't shrink it. Use a hole saw or spade bit and test the diameter with a simple circle gauge before mounting. For the bluebird-style box, the North American Bluebird Society lists acceptable floor sizes ranging from 4x4 to 5x5 up to 5.5x5.5 inches depending on the specific design, so there is some flexibility in floor area. Cavity depth matters most for chickadees, which prefer a deeper box that mimics a natural tree cavity.
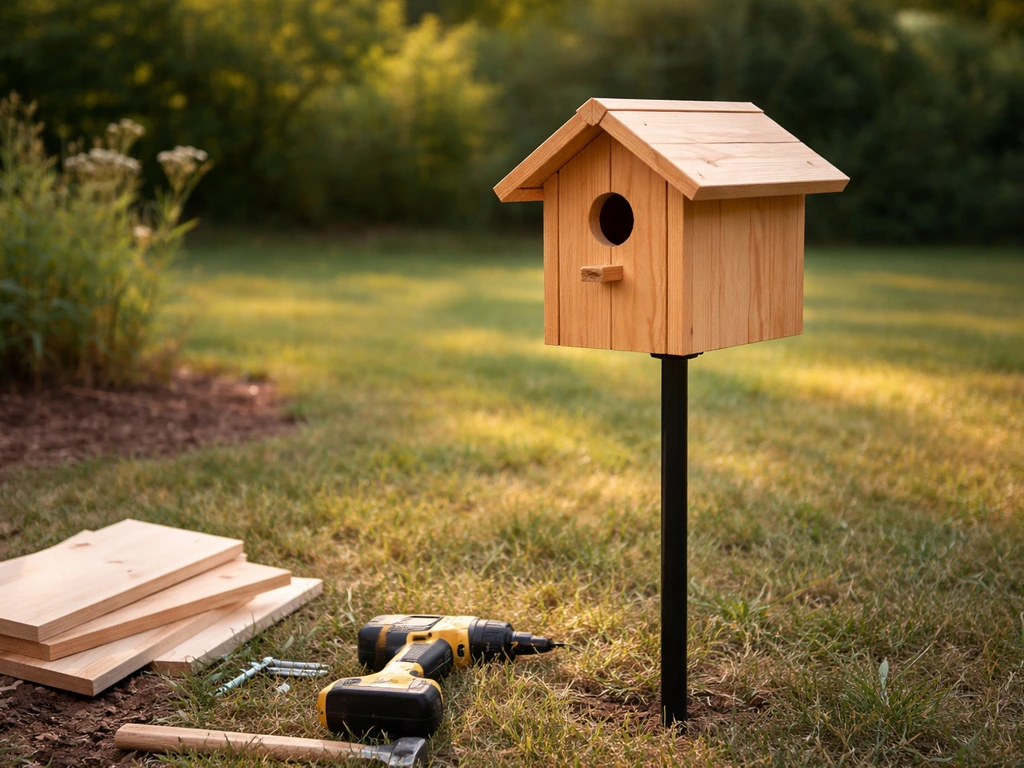
Materials and tools, what you actually need
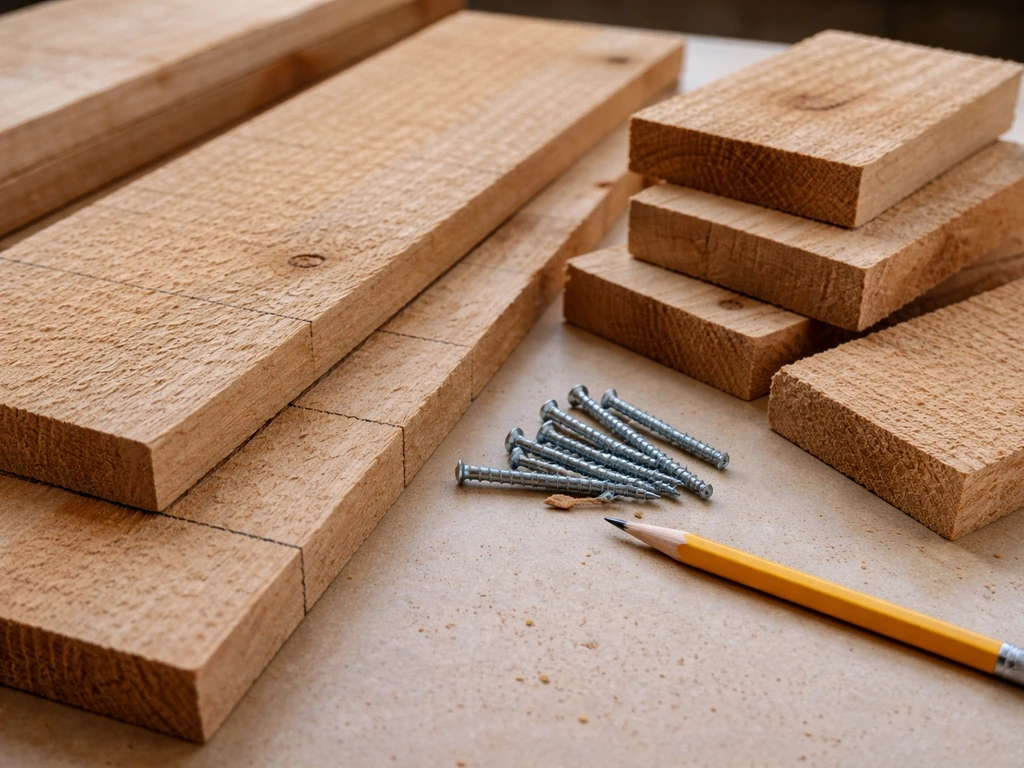
For a beginner, the material choice is simple: use 3/4-inch rough-cut cedar. It's naturally rot-resistant, doesn't need any finish, and the rough surface gives nestlings something to grip when they're climbing toward the entrance. Cypress is equally good. If neither is available locally, untreated pine works fine, it just won't last as many seasons without some maintenance. The critical rule from NestWatch and every major conservation organization is the same: never use pressure-treated lumber. It contains pesticide and fungicide residues that are harmful inside a nest box.
Materials list for one bluebird-style box
- One 6-foot length of 1x6 rough cedar or cypress (actual width ~5.5 in) — covers front, back, two sides, and roof
- One 6-inch square piece of the same board for the floor
- 1 5/8-inch exterior screws (about 20) — screws hold better than nails and let you disassemble for cleaning
- One hinge or pivot screw for the cleanout door (side or front panel)
- Optional: one small hook-and-eye latch to keep the cleanout door closed
Tools list
- Circular saw or hand saw for straight cuts
- Drill with bits: 1/4-inch bit for ventilation and drainage holes, plus a hole saw or spade bit in the correct diameter for your entrance hole
- Tape measure and pencil
- Sandpaper (80 grit) — only for smoothing the entrance hole edges on the outside
- Carpenter's square for checking right angles before assembly
- Safety glasses and hearing protection
You don't need a workbench. A pair of sawhorses or even a stable outdoor table works fine. If you don't own a hole saw, a 1 3/8-inch spade bit costs under five dollars at any hardware store. Don't sand or smooth the interior walls, that rough texture is intentional so nestlings can grip the wood.
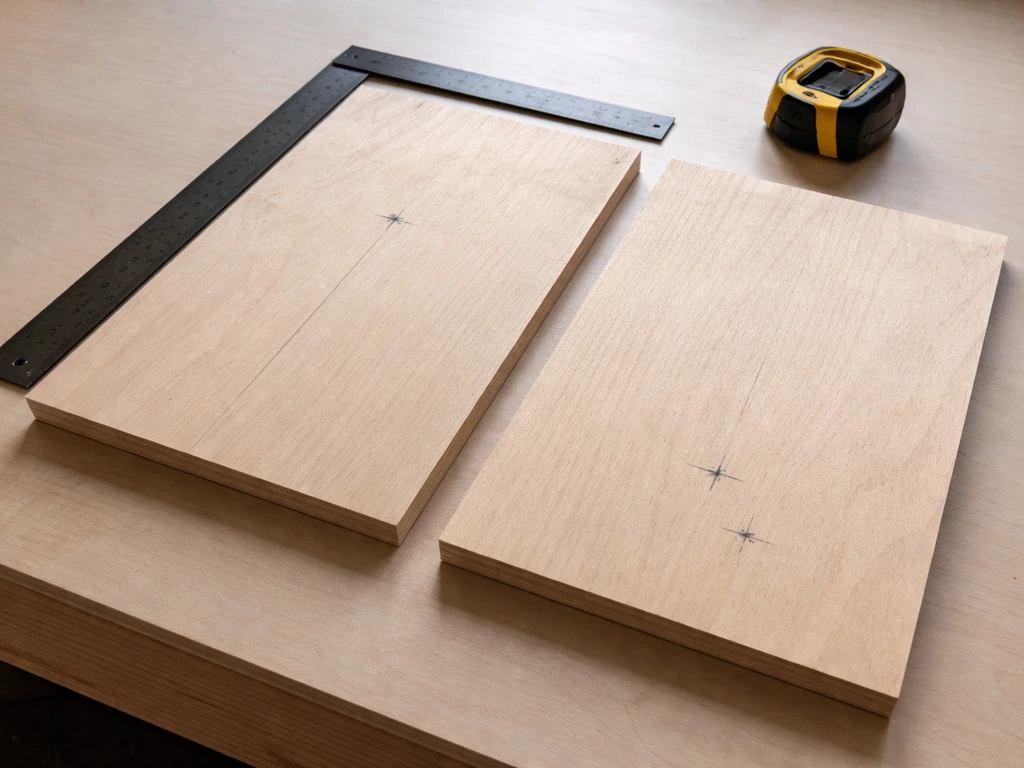
Step-by-step build instructions
This cut list and assembly sequence is written for a standard Eastern bluebird box. Adjust the floor size, hole diameter, and cavity depth using the table above if you're building for a different species. If you're comparing species-specific dimensions to the overall build flow, bird house instructions will help you map each cut and step to your target cavity nester.
Cut list
| Part | Dimensions (L x W) | Notes |
|---|---|---|
| Front panel | 9 in x 5.5 in | Drill entrance hole centered, 2 in from top edge |
| Back panel | 14 in x 5.5 in | Extra length allows for mounting to pole or post |
| Two side panels | 9 in x 5.5 in, angled top cut | Cut top edge at slight angle (5–10 degrees) so roof sheds water |
| Roof | 7 in x 7 in | Wider than box sides to create overhang on all sides |
| Floor | 5.5 in x 5.5 in | Cut or drill corners for drainage (see below) |
Assembly steps
- Cut all pieces according to the cut list. Use your carpenter's square to verify right angles on the side panels before cutting the angled top edge.
- Drill the entrance hole in the front panel. Center it left-to-right, placing the bottom of the hole about 6 inches from the floor (for a 6-inch cavity depth). Smooth only the outside rim of the hole with 80-grit sandpaper to remove splinters — leave the inside rough.
- Prepare the floor for drainage. Either cut small triangles ('dog-ears') off each corner using a saw, or drill two to four 1/4-inch holes near the corners. Both methods let water escape if it gets in.
- Attach the two side panels to the back panel with screws, keeping everything flush at the bottom. Pre-drill screw holes to prevent splitting the cedar.
- Attach the floor inside the box, recessed about 1/4 inch from the bottom edges of the sides. This protects the floor end grain from rain splash.
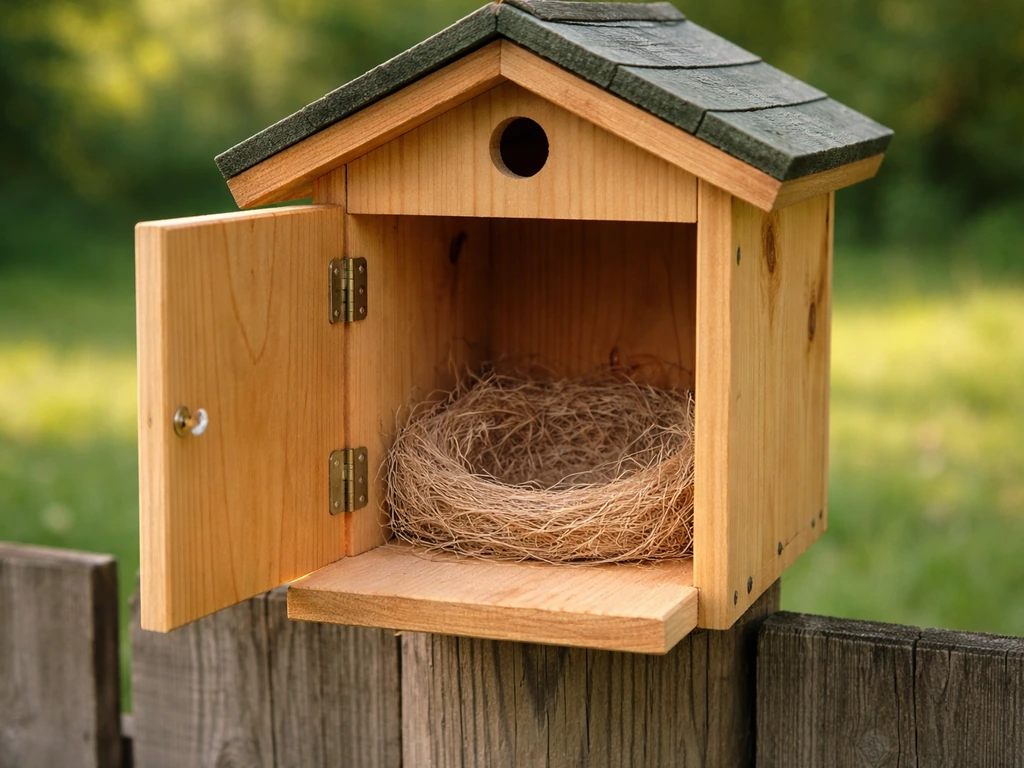
- Attach the front panel. If you want a cleanout door, attach the front panel using just one or two screws near the top so it pivots open at the bottom, and add a hook-and-eye latch at the bottom to keep it shut. Alternatively, attach one side panel with a single pivot screw at top and bottom so the whole side swings open.
- Drill ventilation holes before attaching the roof. Place two to four 1/4-inch holes on each side panel just below where the roof will sit — this gives cross-ventilation near the peak without letting rain in.
- Attach the roof with screws, making sure it overhangs the front by at least 2 inches and the sides by 1 inch. A 5-inch overhang over the entrance is ideal for reducing predator reach. Do not caulk the roof joints — you want some air movement.
- Do a final check: shake the box gently and confirm all joints are tight, the cleanout door opens and closes smoothly, and there are no interior nails or screw tips poking through.
Ventilation, drainage, and safe interior design
These three things are what separate a functional bird house from a decorative one. A box that traps heat can kill nestlings on a hot day. A box with no drainage turns into a wet nest after rain. And a box with a perch below the entrance hole actually invites predators to stand there and reach inside.
Ventilation: the 1/4-inch holes you drilled just under the roofline on both side panels create cross-ventilation. This is important because even mild afternoon sun can push interior temperatures dangerously high. Some builders add two additional vent holes on the upper front panel below the roofline. In early spring when nights are still cold, you can temporarily cover the vent holes with small pieces of tape, remove them once consistent warm weather arrives.
Drainage: the corner cut-outs or floor holes let any rain that enters the box drain immediately. Keep the floor recessed slightly from the box bottom so it isn't sitting in pooled water. If you notice water accumulating in a box during the season, check that the drainage holes haven't been plugged by nesting material and clear them out.
Interior safety: never paint the interior of a nest box. Avoid any finish, stain, or wood preservative inside the cavity. On the exterior, you can apply a light coat of exterior latex paint in a neutral color (tan, gray, light green) on the outside surfaces only if you're using pine and want better weather protection. Never paint the interior or the entrance hole rim. Skip the perch entirely, cavity nesters don't need it, and it gives house sparrows and predators a foothold.
Where and how to mount your bird house
Placement matters as much as the box dimensions. A perfectly built bluebird box placed in the wrong spot will sit empty for years. If you want, you can follow those guidelines for good directions and mounting so your bird house sits in the right place good directions bird house. A few simple guidelines make the difference.
Height and orientation
For bluebirds and tree swallows, mount boxes 4 to 6 feet off the ground, this is low enough to monitor easily and high enough to discourage casual predator access. Chickadees and wrens accept a wider range, from 4 to 8 feet. Face the entrance hole toward the east or northeast whenever possible. This gives the box morning sun to warm it up, avoids the harsh heat of western afternoon sun, and reduces exposure to prevailing cold winds in most of North America. If east-facing isn't possible due to your yard layout, north-facing is the next best option for hot climates; south-facing works better in cold northern regions.
Placement by habitat type
- Open lawn or meadow edge: ideal for bluebirds and tree swallows. Place the box in the open, 50–100 yards from a woodland edge if possible. Avoid areas directly beneath dense tree cover.
- Yard edges near shrubs and brush: good for Carolina and house wrens, which prefer broken, brushy habitat near low cover. Mount on a post or fence post 4–6 feet up.
- Near water (pond, stream edge): excellent for tree swallows, which forage over water. Keep the box within view of the water but not directly overhanging it.
- Suburban backyards with mixed plantings: chickadees and wrens do well here. Place the box away from high-traffic areas and at least 100 feet from active feeders to reduce traffic conflicts around the nest.
If you're putting up multiple boxes, space them at least 100 yards apart for bluebirds (they are territorial and will not share territory with their own species). Tree swallows and bluebirds can tolerate being paired closer together, about 5–10 feet apart, because they don't compete directly with each other. This pairing trick is widely used on bluebird trails.
Mounting hardware
A smooth metal conduit pipe (1/2-inch EMT conduit is inexpensive and widely available) is the best mounting solution for beginners. Drive it into the ground until it's stable, slip the box over the top or attach it with a conduit clamp, and you're done. Conduit is harder for snakes and raccoons to climb than wood posts, especially when combined with a baffle (see below). Avoid attaching boxes directly to trees or fence posts if you can, if you must, use those locations as secondary options and accept that predator-proofing will require extra effort.
Predator protection and a cleaning schedule you'll actually follow
Predator-proofing basics
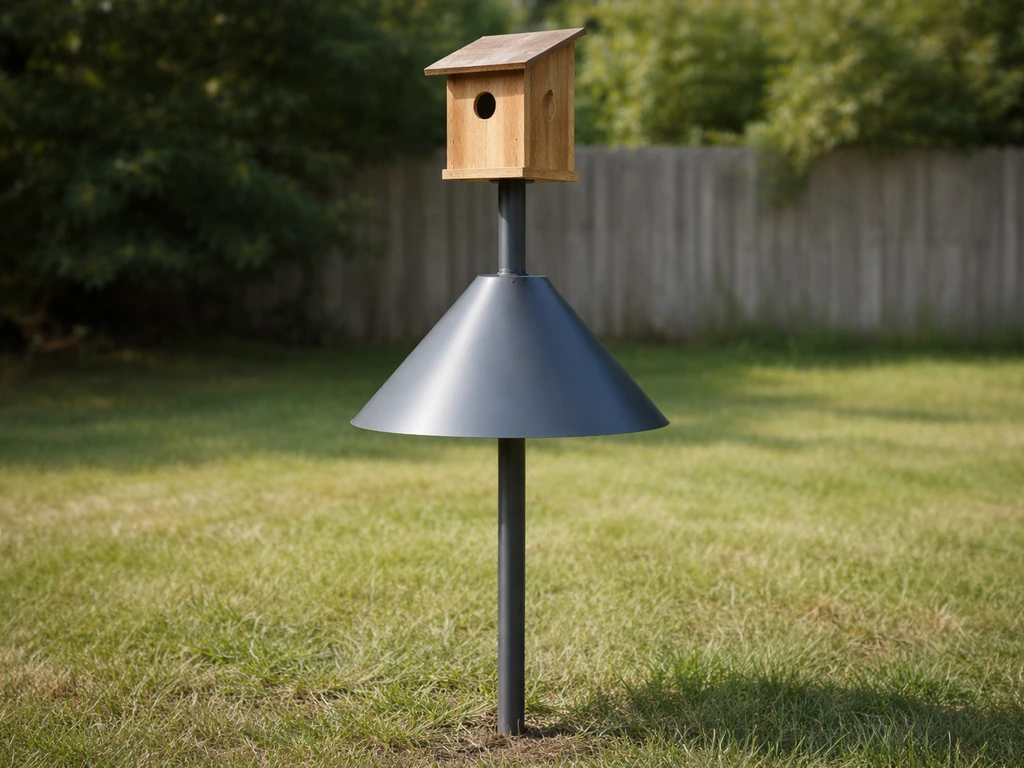
The single most effective thing you can do is install a stovepipe or cone baffle on the mounting pole, positioned about 4 feet off the ground. A stovepipe baffle, a 24-inch section of smooth 8-inch diameter metal pipe centered on the pole, prevents raccoons, cats, and snakes from climbing up to the box. No baffle means you're hoping predators won't find it. They almost always will.
The extended roof overhang you built into the box also helps. A 5-inch overhang over the front makes it significantly harder for a raccoon to reach down into the entrance hole from above. Some builders add an entrance hole extender, a short wooden tunnel (about 1.5 inches deep) added to the front panel around the entrance, which makes the reach-in angle even worse for predators.
- Install a smooth metal baffle on the mounting pole — this is non-negotiable if you have raccoons, cats, or black rat snakes in your area
- Never mount a box on a tree or wooden fence post without accepting that predator-proofing will be much harder
- Don't place boxes near low-hanging branches or fences that give predators a jumping-off point within reach of the box
- The entrance hole itself is your last line of defense — keep it exactly the right size and don't add a perch
- Avoid placing boxes near active bird feeders, which attract house sparrows and can create nest competition
Cleaning schedule and how to do it safely
Clean out nest boxes between September and February, after nesting is definitively finished and before the next season begins. This is the window recommended by most bluebird monitoring programs. If your local birds have multiple broods in one season (bluebirds often have two or three), you can do a mid-season clean-out between broods, wait until fledglings have left and the box has been vacant for a few days. It's both safe and beneficial to remove old nests so birds start fresh.
- Open the cleanout door and remove all old nesting material. Drop it into a trash bag immediately.
- If the box contained a mouse nest (identifiable by shredded material and droppings), wear a dust mask and disposable gloves. Mouse nests in enclosed spaces carry a small but real hantavirus risk — don't blow or brush them dry. Dampen the material first before removing it.
- Scrub the interior with a stiff brush. No soap needed for a routine clean.
- For disinfecting (recommended at least once a year or after any sick/dead bird incident), spray the interior with a 10% bleach solution (1 part bleach to 9 parts water) or a diluted white vinegar solution, let it sit for a few minutes, then rinse with water and let the box dry completely in the sun before closing it.
- Check all hardware — make sure screws are tight, the cleanout door latches securely, and the entrance hole hasn't been enlarged by woodpeckers. Repair any cracks that might let water in.
- Reinstall or leave the box in place for the next season. Most cavity nesters begin scouting for nest sites in late winter to early spring.
If you do nothing else all year, clean out the box at the end of nesting season. That one task removes parasites, old nest debris, and anything that might deter birds from using the box next spring. It takes ten minutes and makes a real difference.
Your do-this-next checklist
Here's the full sequence compressed into a checklist you can run through before, during, and after your build.
- Identify your target species (bluebird, chickadee, wren, or tree swallow) based on what lives or nests in your region
- Look up the correct entrance hole diameter and floor size for that species using the table above
- Buy 3/4-inch rough-cut cedar or cypress — no pressure-treated lumber, no plywood with formaldehyde glue if possible
- Cut all pieces to your cut list before drilling anything
- Drill the entrance hole to the exact diameter for your species, smoothing only the outside rim
- Cut or drill floor drainage before assembly
- Drill side-panel ventilation holes just below the roofline on both sides
- Assemble with exterior screws, not nails — include a cleanout mechanism (pivot front or side panel)
- Attach the roof with at least a 2-inch front overhang; aim for 5 inches over the entrance
- Skip the perch and skip any interior finish or paint
- Mount on smooth metal conduit at the correct height for your target species
- Install a stovepipe or cone baffle on the pole, about 4 feet off the ground
- Orient the entrance hole east or northeast, away from prevailing weather
- Clean and inspect the box every fall between September and February, and disinfect with diluted bleach or vinegar solution at least once a year
Once you've built one box and watched it get used, the next one gets faster and more intuitive. Many of the same core design principles apply whether you're building for bluebirds, building a smaller wren box, or scaling up to accommodate larger cavity nesters. The species-first approach is what ties it all together, get that right and the rest of the build is just carpentry.
FAQ
How do I choose the right hole size if I am not sure which species will actually move in?
Pick based on the species you want most, then treat the plan as a filter, not a guess. If you target a bird with a specific entrance diameter, nearby birds that do not fit the hole cannot use it, so you will not get an accidental mix. If you truly are unsure, start with an Eastern bluebird style box, because the design parameters are known to work for a limited set of cavity nesters while still excluding larger competitors.
What is the safest way to test the entrance hole diameter before assembly?
Cut a test scrap of the same board thickness, drill the entrance hole in the scrap, and then measure the opening with a simple method like a circle gauge or by checking the hole against a marked template. Err slightly small within the tolerance, because you can enlarge later with the correct bit, but you cannot safely reduce an over-size hole without replacing the front panel.
Can I add a predator guard after the box is already installed?
Yes, but prioritize doing it without disturbing the nesting cavity. In the off-season, add or replace a pole baffle and confirm it is positioned high enough to block climbing and centered on the mounting pole. If you need to change anything during nesting season, do it when the box is vacant (after fledglings leave) to avoid stressing adults and chicks.
Do I need insulation or extra walls to keep the box warm in winter and cool in summer?
No, the core design is usually enough if you get ventilation and drainage right. Extra insulation or interior wall treatments can trap heat or add moisture retention. Instead, rely on cross-vent holes under the roofline, an appropriate entrance orientation, and a tight exterior only paint approach (only on the outside surfaces when using pine).
Is it okay to smooth the inside walls so chicks are safer?
Do not smooth or sand the interior. The rough surface is intentional so nestlings can grip and move toward the entrance as they fledge. If you want to reduce splinters, focus on cleaning up only sharp edges on the exterior and entrance rim, while keeping the cavity walls rough.
What should I do if water keeps collecting even though I built drainage holes?
Check two common failure points: drainage holes getting clogged (often by nesting material) and the floor being tilted upward, which prevents water from exiting. Also verify that the entrance and roof overhang are giving adequate shelter from direct rain. During the season, wait until the box is inactive, then clear plugged drainage holes and correct any floor alignment issues.
How can I tell if my box placement is too exposed or too sheltered?
If the box interior overheats or birds avoid using it, consider sun and wind exposure. For hot climates, east or northeast is usually best, and north-facing can work better than south. If you are seeing persistent nest failure or predation attempts, the mounting location and predator access routes matter as much as height, so confirm the baffle is present and the area does not allow easy reach.
Should I install more than one entrance hole or a larger entrance to help ventilation?
Avoid multiple entrance holes or enlarging the opening for ventilation. More openings can increase predator access and can also invite competing species. Ventilation should come from the side vent holes under the roofline and, if needed, optional additional upper front vents as described in the build plan.
Can I paint the interior if I am using untreated cedar for better hygiene?
Do not paint or seal the interior of the cavity. Finishes can off-gas or create residue that nestlings contact. Keep the interior bare, untreated, and rough, and if you are using pine externally, limit paint to the outside only (including not painting the entrance rim).
How often should I clean between broods, and what if I do not know when fledglings have left?
If your target species can raise multiple broods, wait until you can confirm fledglings have left and the box has been vacant for a few days before doing a mid-season clean-out. If you cannot confirm, it is safer to wait rather than open the box repeatedly. In general, the reliable full-season cleaning window is between September and February.
What is the best mounting option if I have no clear place for a pole?
If you cannot use a pole, choose a secondary mounting spot like a stable fence post or nearby structure only if you can still achieve predator-proofing. Pole baffles work best with smooth metal conduit, so if you must mount elsewhere, plan for additional effort to keep predators from climbing and reaching the entrance from above or around the sides.
Will birds still use a box if the overhang is shorter than intended?
A shorter overhang can reduce protection from reach-in predators, especially from above. The overhang is part of how the design prevents raccoons and other animals from getting their paws to the entrance. If you have to adjust, keep the overhang as close as possible to the specified size and do not skip the baffle.
Learn best bird house directions for entrance placement by sun, wind, shelter, height, and cleaning access for key speci
Beginner bird house instructions: choose design, cut and assemble, add entrance/vent/drain, install safely, maintain and
What to put in a bird house: safe nest liner and floor setup, do and don’t lists, cleaning tips, maintenance for nesting