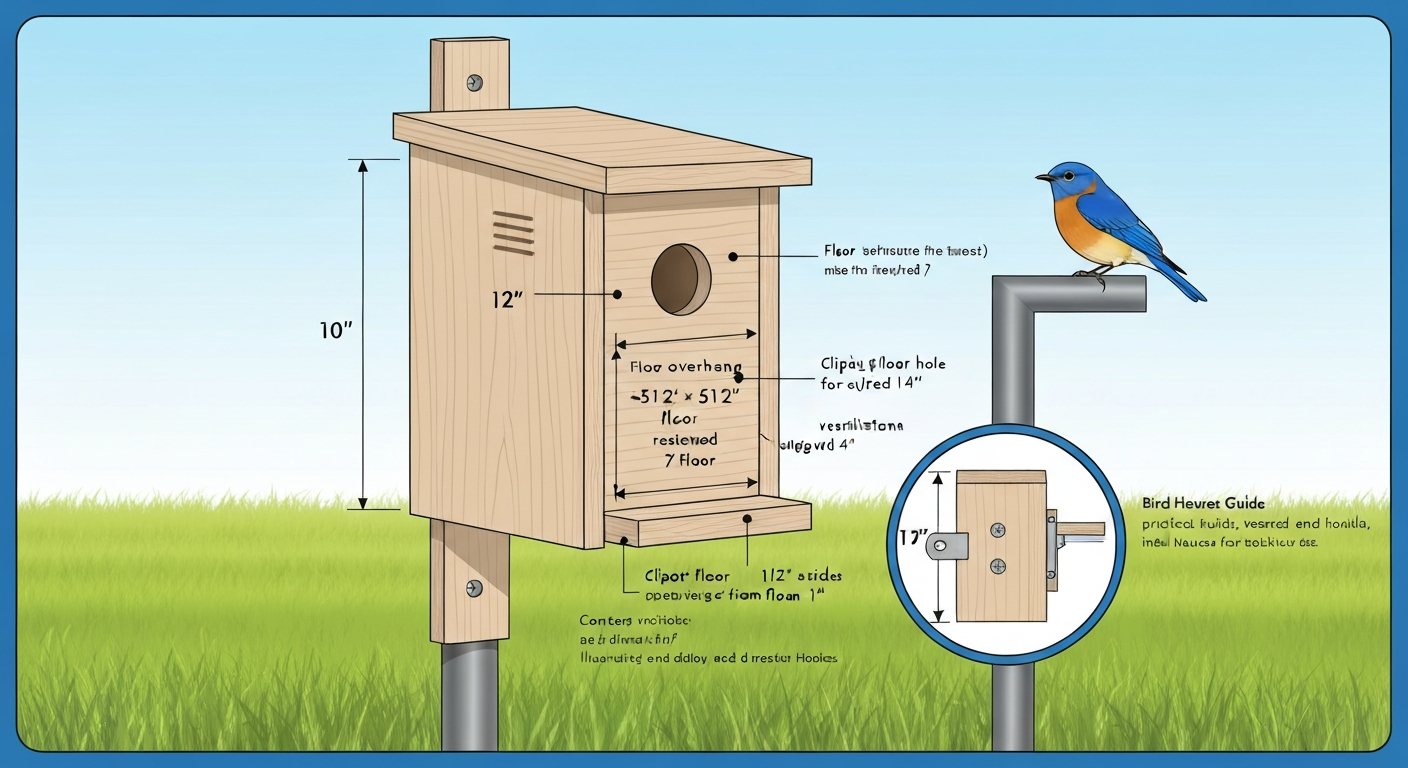
To build a bluebird house that birds will actually use, cut a 5½" × 5½" floor, 10" tall front and 12" tall back from ¾" cedar or redwood, drill a 1½" entrance hole centered 7" from the floor, add ventilation slots near the roof, recess the floor ¼" and clip its corners for drainage, and mount the finished box on a smooth metal pole 4–6 feet high in open habitat at least 100 yards from your next box. That basic plan, based on the North American Bluebird Society (NABS) construction specifications, works for Eastern Bluebirds across most of the country and adapts easily for Western and Mountain Bluebirds with a slightly larger hole and floor. See the guide titled "good directions bird house" for a step-by-step companion with additional photos and mounting tips.
Blue Bird House Instructions: DIY Plans, Sizes & Mounting

Why build a bluebird house at all
All three North American bluebird species (Eastern, Western, and Mountain) are secondary cavity nesters. They cannot excavate their own holes, so they depend on old woodpecker cavities, natural rot pockets, and, increasingly, nest boxes to raise young. Habitat loss and competition from introduced House Sparrows and European Starlings have pushed all three species hard since the mid-20th century. Well-designed, well-maintained nest boxes along bluebird trails have contributed meaningfully to population recoveries, and your backyard box can be part of that.
A good bluebird box is not simply a small wooden box with a hole in it. The design details matter. Ventilation holes near the roofline keep interior temperatures from spiking on hot days. Drainage holes or clipped floor corners prevent water from pooling and soaking a nest. An overhanging roof and a recessed floor give nestlings a dry interior during rain. A side or front panel that swings open lets you check progress, remove old nests, and clean between broods without destroying the box. And the right entrance hole size is the single most important detail: too large, and starlings move in; too small, and bluebirds can't enter.
Materials, tools, and cut list
Lumber and hardware
NABS recommends solid wood ¾–1" thick. Western red cedar and redwood are the top choices because they are naturally rot-resistant and dimensionally stable. Untreated pine works but tends to warp faster. Do not use pressure-treated lumber (chemical preservatives can harm nestlings), metal (overheats too quickly), or sealed/painted interiors. Exterior-grade plywood at ¾" thickness is an acceptable substitute if solid stock is unavailable.
- One 1×6 cedar or redwood board, 6 feet long (actual width: 5½") — for front, back, sides, and floor
- One 1×10 cedar or redwood board, 14 inches long (actual width: 9¼") — for roof
- Galvanized or exterior-grade deck screws: 1⅝" for most joints, 2" for the back-to-side connections
- One duplex nail or single exterior screw for the pivot/catch on the opening panel
- Exterior latex paint (light color) for painted surfaces — exterior faces only, never the interior
Exact cut list
| Part | Dimensions (L × W) | Qty | Notes |
|---|---|---|---|
| Front | 10" × 5½" | 1 | Drill entrance hole centered, 7" up from bottom |
| Back | 12" × 5½" | 1 | Extends 2"+ below floor for mounting bracket |
| Floor | 5½" × 5½" | 1 | Recess ¼" up from bottom of sides; clip corners ¼" |
| Side (left) | 10" tall, 5½" wide | 1 | Top cut at angle to match roof pitch |
| Side (right) | 10" tall, 5½" wide | 1 | One side pivots as access panel |
| Roof | 12" × 9¼" (or 10") | 1 | Overhang ~6" over front, ~2" each side |
These dimensions reflect the NABS 2020 Eastern/Western Bluebird nestbox plan. The floor measurement of 5½" × 5½" gives an interior floor area of about 30 square inches, which is adequate for all three bluebird species and particularly important for Western and Mountain Bluebirds that raise larger clutches.
Tools
- Circular saw or handsaw for straight cuts
- Drill/driver with 3/16" and 1/8" pilot-hole bits, plus a 1½" spade or Forstner bit for the entrance hole
- Tape measure and pencil
- Clamps (2 are enough)
- Safety glasses and hearing protection
Exact measurements and entrance-hole sizes
The entrance hole is the most critical single measurement. For Eastern Bluebirds, a 1½" round hole is the standard. NABS also approves a 1⅜" × 2¼" vertical oval slot or a 1⅛" horizontal slot as alternatives that further restrict House Sparrow access. For Western and Mountain Bluebirds, or wherever ranges overlap, use a 1⅝" (1 9/16") round hole. Drill the hole centered horizontally on the front panel, 7" measured from the inside floor surface to the bottom of the hole. That gives nestlings enough room to grow without climbing out prematurely. The hole should be drilled cleanly with a Forstner or spade bit and left rough on the inside (rough wood helps fledglings grip when leaving).
Ventilation: drill three ½" holes in each side panel, angled upward at a slight angle, positioned about ½" below the roof line. This upward angle prevents rain from entering. In very cold northern climates, you can reduce this to two holes per side, but do not eliminate ventilation entirely. Drainage: instead of drilling floor holes (which can collect debris), simply clip each corner of the floor panel at a 45-degree angle, removing about ¼" per corner. This keeps the floor structurally solid while letting water escape.
Species specifications at a glance
| Species | Floor Size | Interior Height | Entrance Hole | Hole Height from Floor | Mounting Height | Preferred Habitat |
|---|---|---|---|---|---|---|
| Eastern Bluebird | 5½" × 5½" | 10" | 1½" round (or 1⅝" where ranges overlap) | 7" | 4–6 ft (1.2–1.8 m) | Open fields, meadows, woodland edges, golf courses |
| Western Bluebird | 5½" × 5½" | 10" | 1⅝" (1 9/16") round | 7" | 5–10 ft (1.5–3 m) | Open pine/oak woodlands, orchards, forest edges |
| Mountain Bluebird | 5½" × 5½" | 10–12" | 1⅝" (1 9/16") round | 7–8" | 5–10 ft (1.5–3 m) | High-elevation meadows, sagebrush flats, open rangeland |
Note that Mountain Bluebirds nest at elevation in open terrain, so their boxes often benefit from a slightly taller interior (up to 12") and a slightly higher entrance-hole measurement. All three species will use the standard NABS box without modification in most situations.
Step-by-step build instructions
Work on a flat surface and pre-drill all pilot holes before driving screws. Pilot holes prevent the cedar from splitting and add years to the box's life. Use a 3/16" bit for screws entering edge grain and a 1/8" bit for face-grain connections.
- Cut all pieces to the dimensions in the cut list above. Label each piece with a pencil so you don't confuse front and back.
- Drill the entrance hole in the front panel. Mark the center: 2¾" from each side edge (center of a 5½" board), 7" up from the bottom. Use a Forstner or spade bit at slow drill speed for a clean cut. The interior face can stay slightly rough to help nestlings grip.
- Drill ventilation holes in both side panels. Mark three evenly spaced ½" holes along the top edge of each side, about ½" below where the roof will sit. Angle your drill slightly upward (about 10–15 degrees) so rain cannot run in.
- Clip the floor corners. Use a handsaw or jigsaw to cut a small 45-degree notch at each corner of the floor panel, removing about ¼". This is your drainage system.
- Assemble the box floor and sides first. Stand both side panels vertically and position the floor between them, recessed ¼" above the bottom edge. This recess means the floor doesn't catch rain running down the sides. Drive 1⅝" screws through the side panels into the floor edges (two screws per side). Pre-drill first.
- Attach the back panel. Stand the side-floor assembly upright and position the back panel so it extends 2" or more below the floor (for your mounting bracket). Drive screws through the back into the side panel edges, two per side.
- Attach the front panel. One side panel should swing open as your access door. Attach the front to the non-moving side only, using two screws top and bottom. The front panel is now fixed to the back via the stationary side.
- Set up the pivoting side panel (access door). Position the remaining side panel in place. Drive a single screw through the top of this panel into the front or back to act as a pivot point. At the bottom, use a duplex nail or a single screw left slightly loose to act as a catch. You should be able to swing this panel open by removing or rotating the catch.
- Attach the roof. Position the roof so it overhangs roughly 6" over the front and about 2" on each side. Drive two screws down through the roof into the top of each side panel and into the top of the back panel. Do not nail or screw through the front — this leaves the roof slightly flexible and easy to replace.
- Paint or finish exterior surfaces only. Apply one or two coats of exterior latex in a light color (tan, gray, or white) to the outside of the roof, back, and sides. Do not paint the interior, the entrance hole area, or the floor. Let the box dry fully before mounting.
A simpler beginner plan
If the full NABS plan feels like too much for a first build, try this stripped-down version. For step-by-step simple bird house instructions, see the beginner guide. It uses only a single 1×6 board (6 feet long) and requires just a handsaw, a drill, and a screwdriver. Skip the roof angle cut entirely: just attach a flat roof board with a generous overhang. Use the same floor size (5½" × 5½") and the same entrance hole (1½" for Eastern Bluebirds). The result is a plain, boxy design that performs just as well for the birds as the more refined version. The only real compromise is that a flat roof collects a bit more debris and may require more frequent checks. This kind of simplified approach is covered in greater detail in general bird house instructions guides if you want additional plan options.
- Materials: one 1×6 cedar board at 6 feet, a handful of 1⅝" deck screws, one 2" screw for the pivot
- Cuts: two 10" side pieces, one 10" front, one 12" back, one 5½" floor square, one 9" roof rectangle (all from the same board)
- Tools: handsaw or circular saw, drill with 1½" spade bit and 3/16" pilot bit
- Assembly: follow steps 2 through 8 above, then attach the flat roof board flush or with a small overhang
Mounting and placement
Best mounting options
A smooth metal pole (½" electrical conduit or EMT conduit works well) is the preferred mounting option. Raccoons and snakes struggle to climb smooth metal, especially when combined with a baffle. Do not mount bluebird boxes directly on tree trunks: trees give predators multiple approaches and climbing footholds that are almost impossible to block. Fence posts are a workable second choice in open areas where fence lines run through appropriate habitat, but add a baffle to the post whenever possible.
Fasten the box's extended back panel to the pole using two galvanized pipe clamps or a simple wooden arm bracket with lag bolts. The box should be level or tilted very slightly forward (front lower than back by about 5 degrees) to shed rain away from the entrance.
Placement: distance, spacing, and orientation
Bluebirds are territorial about nesting sites. NABS and Cornell Lab both emphasize that boxes for the same species should be at least 100 yards (about 91 meters, roughly the length of a football field) apart to avoid territorial conflicts. If you want to increase density, use paired boxes: two boxes placed 10–20 feet apart, then a 100-yard gap to the next pair. This strategy sometimes allows two species (e.g., a bluebird pair and a Tree Swallow pair) to coexist as neighbors.
Face the entrance away from prevailing afternoon sun and winds, ideally east or southeast. This is especially important in hot climates where west-facing boxes can overheat in afternoon sun. Place boxes in open habitat: open lawns, meadows, fields, golf courses, and pastures are ideal. Bluebirds need clear sightlines to the ground to hunt insects, so avoid placing boxes in dense shrubs or under heavy tree canopy. A perch within 50–100 feet (a fence wire, shrub top, or even a nearby post) helps, but keep it well away from the box itself so it does not serve as a launching pad for predators.
Regional placement notes
- Southeast and Gulf Coast: face boxes east; afternoon heat is the main enemy; ensure ventilation is not blocked
- Midwest and Great Plains: Eastern and Mountain Bluebird ranges overlap in some areas; use the 1⅝" hole to serve both
- Mountain West (Rockies, Sierra Nevada): Mountain and Western Bluebird habitat; place boxes in open, high-elevation meadows and sagebrush flats; 5–10 ft mounting height is appropriate
- Pacific Northwest: Western Bluebirds in open oak woodlands and forest edges; face boxes away from heavy prevailing rain (often southeast)
- Northeast: Eastern Bluebirds arrive earlier in spring than in the Midwest; boxes can go up in late February in mid-Atlantic states
Regional and seasonal timing
Getting your box up early matters. Bluebirds begin scouting nest sites weeks before they actually lay eggs, and pairs that cannot find a cavity in time will move on. A good rule of thumb is to have boxes in place by the date you typically see your first bluebirds of spring: late February to early March in the South and mid-Atlantic, mid-March in the Midwest, and April in the northern Plains and Mountain West.
| Region | Put Box Up By | First Eggs Expected | Last Brood Fledges | Clean and Prep for Winter |
|---|---|---|---|---|
| Southeast / Gulf Coast | Mid-February | Late February–March | August | September–October |
| Mid-Atlantic / Carolinas | Late February | Mid-March | Late August | October |
| Midwest / Great Plains | Mid-March | Early April | August | September–October |
| Mountain West / Rockies | Early April | Late April–May | Late July–August | September |
| Pacific Northwest | Late February–March | March–April | July–August | September |
You do not need to take boxes down for winter in most regions. Bluebirds and other cavity-roosting species sometimes use boxes for overnight shelter during cold months. However, clean out old nest material at the end of each breeding season before fall to prevent parasite carryover. In areas with heavy ice or snow loading (northern Rockies, northern Minnesota), a mid-fall inspection to check mounting hardware is worth doing.
Predator-proofing your bluebird box
Research from the Cornell Lab's NestWatch program, analyzing over 24,000 nest records, confirmed that boxes with predator guards had measurably higher nest survival rates for Eastern Bluebirds. This is not just a precaution: it is one of the highest-return actions you can take for a nest box.
Baffles and pole guards
A cone or stovepipe baffle mounted on the pole below the box is the most effective deterrent against raccoons, cats, squirrels, and most snakes. The baffle should be positioned at least 4 feet off the ground and should extend at least 6–8 inches outward from the pole. A stovepipe baffle (a length of 8" diameter metal duct pipe) works especially well because snakes and raccoons cannot get purchase on the smooth, wide cylinder. Position it so its top edge is at least 18–24 inches below the box itself.
Entrance hole extenders
A wooden or metal entrance-hole extender (a short block, usually ¾"–1" thick, with the correct hole size drilled through it, screwed flush over the entrance hole) extends the tunnel depth to about 1½". This makes it significantly harder for a raccoon to reach inside and hook nestlings. It also reinforces the hole edge against enlargement by woodpeckers.
Clearance and perch removal
- Keep the box at least 10 feet from any tree branch, shrub top, or fence corner that could serve as a jumping-off point for a raccoon
- Do not add an external perch peg below the entrance hole: bluebirds do not need it and House Sparrows use it as a convenience
- If snakes are a known problem in your area, a smooth galvanized conduit pole combined with a stovepipe baffle is the most effective combination
- Check that vegetation has not grown up to touch the pole during the season: trim grass and weeds away from the pole base
Cleaning, sanitation, and monitoring
How often to check
The NestWatch Code of Conduct recommends visiting active nest boxes every 3–7 days during the nesting cycle. Keep visits brief (under 1 minute at the box), avoid early morning when adults are most alert and disturbed, and stop checking once eggs have hatched and nestlings are 12 or more days old to avoid triggering premature fledging. Never open a box in heavy rain or extreme cold. If you plan to monitor systematically, completing NestWatch's free online certification before your first season is worth the time.
Cleaning protocols
After each brood fledges, open the box and remove all old nest material. Bluebird nests are typically compact grass-and-pine-needle cups, sometimes lined with feathers. Wear latex gloves: nest material can carry ectoparasites including Protocalliphora blowfly larvae and mites. Multiple studies have documented infestation rates of 20–90% in bluebird nests depending on region and season, and heavy blowfly burdens measurably reduce nestling health. Long‑term variation in environmental conditions influences host–parasite fitness (PubMed) documents regional and seasonal variability in Protocalliphora prevalence consistent with reported 20–90% infestation rates. Getting rid of old material breaks the parasite cycle and encourages bluebirds to build a fresh, cleaner nest for the next brood.
- Open the access panel and remove all nest material into a sealed plastic bag
- Check the interior walls and floor for mites (look for small moving specks, especially in crevices)
- If parasites are visible, wipe the interior with a dry cloth or a cloth dampened with a very dilute bleach solution (1 part bleach, 9 parts water)
- Let the box air dry completely in the sun for at least an hour before closing it up
- Close the panel and reset the catch so it is secure against predators
Important legal note: under the Migratory Bird Treaty Act, it is illegal to destroy or remove an active bluebird nest (one with eggs or live nestlings) without a federal permit. Only remove nests after confirmed fledging or after a documented complete nesting failure. Inactive nests (no eggs, no nestlings, abandoned with no adult activity for at least 2 weeks) may be removed without a permit.
Maintenance schedule and common repairs
| Task | When | What to Check/Do |
|---|---|---|
| Pre-season inspection | 4–6 weeks before expected first arrival | Check mounting hardware, tighten screws, clear any wasp nests from interior, confirm baffle is secure |
| Between-brood cleaning | Within a few days of fledging | Remove old nest, inspect for parasites, clean if needed, dry fully |
| Mid-season hardware check | Midsummer | Re-tighten pivot screw and catch, check that roof screws are snug |
| End-of-season cleaning | September–October (after last brood) | Full clean-out, check floor and ventilation holes for debris, inspect wood for cracking |
| Annual structural check | Late winter (before mounting season) | Check floor panel for soft spots or rot, re-caulk any gaps in roof joint, repaint exterior if faded or peeling |
The floor panel takes the most abuse because it holds nest moisture. If it shows soft spots or surface rot, unscrew it and replace it with a fresh-cut piece of ¾" cedar. The pivot screw on the access door is the other high-wear point: if it wobbles, replace it with a slightly larger diameter screw and pre-drill a fresh pilot hole. Ventilation holes occasionally get plugged with mud or spider webs: clear them with a thin wire or drill bit during your pre-season inspection.
Troubleshooting when things go wrong
No bluebirds taking the box
Wait at least one full season before giving up. Boxes in excellent habitat sometimes sit empty their first year. Check that the habitat is right (open ground, no dense canopy overhead), that the entrance hole is the correct size, and that you have not placed the box too close to shrubs or buildings. Bluebirds are cautious; a box that looks too exposed or too hidden often gets passed by. If you are in appropriate range and habitat but still have no takers after a full season, try moving the box 50–100 feet in a different direction.
House Sparrows or European Starlings moving in
House Sparrows are the most serious competitive threat. They are not protected under the MBTA and their nests may be legally removed (check local regulations). Starlings cannot enter a properly sized hole (1½" blocks them entirely), so correct hole size is your first defense. For House Sparrows, consider switching to a 1⅛" horizontal slot entrance, which is difficult for sparrows to use but passable for bluebirds. Persistent sparrow pressure in suburban and agricultural areas may require repeated nest removal and active management.
Nesting failures and parasites
If a nest is abandoned mid-incubation or nestlings die before fledging with no obvious external cause, heavy blowfly infestation is a common culprit. Remove the failed nest, inspect for larvae (white maggots in the nest cup floor), clean the box thoroughly, and allow a fresh nest to be built. If failures repeat in the same box year after year, consider replacing the floor panel and repainting the interior with a water-based sealant (interior-only, fully cured before the season) to reduce parasite harboring.
Raccoon and snake predation
Signs of raccoon predation include a destroyed or enlarged entrance hole, missing eggs or nestlings with no other obvious cause, and claw marks on the wood above the entrance. Add or upgrade your stovepipe baffle immediately. Signs of snake predation are more subtle: eggs or nestlings simply vanish with no external damage. A smooth metal pole with a stovepipe baffle is the most reliable snake deterrent, since most snakes (including rat snakes, the most common culprit in bluebird boxes) cannot climb smooth-walled metal pipe.
Craft alternative: wine-cork decorative bluebird houses
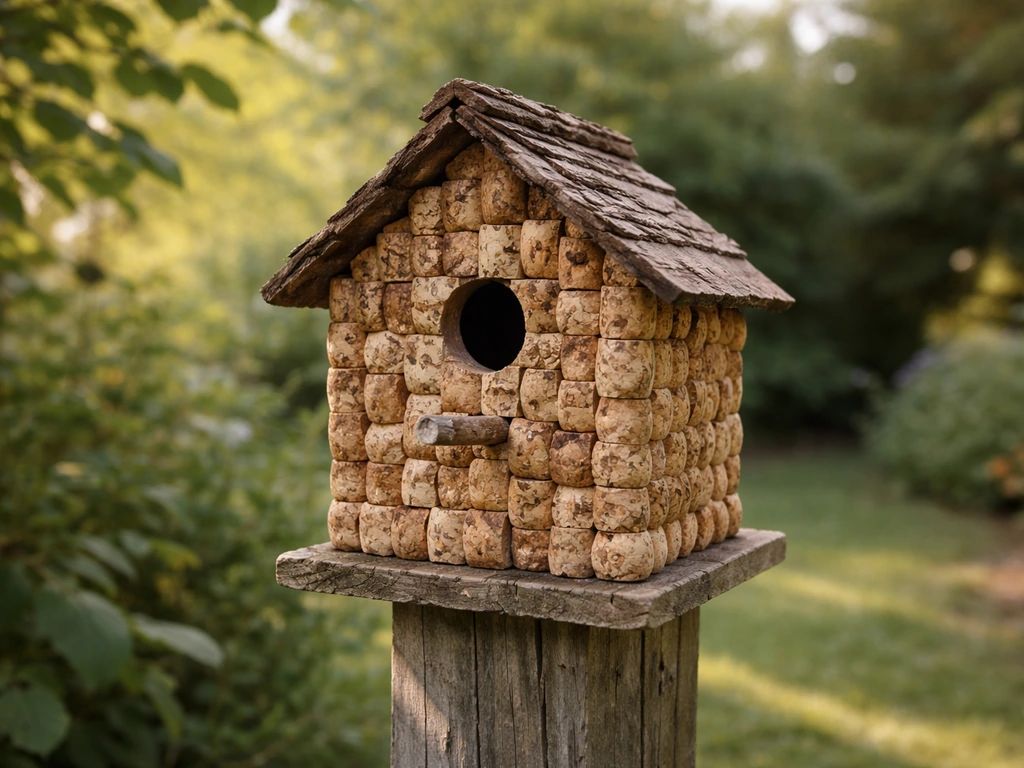
Wine-cork bluebird houses have become popular as craft projects and gifts, and they can be a fun way to introduce kids to the bluebird concept. The basic craft version involves gluing natural wine corks in a mosaic pattern over the exterior of a small wooden house form, sometimes painting details to mimic a bluebird's coloring. If you enjoy craft projects like this, detailed wine cork bird house instructions are available as a separate guide.
A critical caution: decorative cork-covered houses sold as gifts or made as crafts are almost never dimensionally appropriate for real bluebirds. The entrance holes are typically too small, too large, or wrongly placed; the interiors are too small; and the ventilation and drainage are usually absent. These boxes are fine as decorations, but please do not mount them outdoors and expect bluebirds to use them. A poorly designed box that attracts birds but then leads to nesting failures, overheating, or predation is worse than no box at all. If you want birds, build the functional box above. If you want a craft project, build the cork version for display.
Bluebird vs blue jay: very different nesting needs
This is a surprisingly common point of confusion, so it is worth addressing directly. Blue jays and bluebirds share a color name, but they are completely different birds with completely different nesting habits. Bluebirds (family Turdidae) are cavity nesters that use enclosed boxes with small entrance holes. Blue jays (family Corvidae) are open-cup nesters: they build stick-and-grass nests in the forks of trees and shrubs, and they will never voluntarily nest in an enclosed box. If someone is asking what do blue jay bird houses look like, the honest answer is that blue jays do not use traditional enclosed nest boxes at all. A nest platform (open shelf) in a dense shrub or conifer is about the closest a box-style structure gets to supporting blue jays. Designing or buying a "blue jay house" modeled on a bluebird box is a wasted effort. Keep the designs separate and species-appropriate.
Quick answers to common questions
Can I use pine instead of cedar? Yes, untreated pine works and is cheaper, but it weathers faster and may need painting sooner. Expect a cedar box to last 10–15 years; a pine box may need replacement or significant repair in 5–8 years.
Does the entrance hole have to be perfectly round? Not perfectly, but close. A slight oval is acceptable. What matters most is that the widest dimension doesn't exceed 1⅝" (which lets starlings in) and doesn't fall below 1½" (which blocks bluebirds). Drill slowly with a sharp bit and you'll get a clean, accurate hole.
Can I mount two bluebird boxes on the same pole? It is not recommended. Two bluebird pairs will compete at the same pole, often resulting in neither pair nesting successfully. Place boxes at least 100 yards apart on separate poles.
How often do I need to clean the box? At minimum, once per season after the last brood fledges. If you are monitoring actively and bluebirds are raising multiple broods (which they commonly do, 2–3 per season in favorable conditions), clean between each brood. This significantly reduces parasite carryover.
Is a simple beginner box just as good as the full NABS plan? For the birds, yes. Bluebirds care about hole size, floor dimensions, ventilation, and drainage, not aesthetics. A well-built simple box with correct dimensions and a functioning access door is as good as an elaborate one. If you are new to woodworking, start with the simplified plan described above, nail the dimensions, and get it mounted in the right habitat. That is what matters most.
Can a decorative craft box also work as a functional nest box? Only if it meets all the dimensional requirements (correct hole size, floor area, ventilation, drainage, and access for cleaning). Most decorative boxes do not meet these standards. If you want to find the best blue bird house for actual use, prioritize function over appearance: the right dimensions, correct wood thickness, and a working access panel are the three things that matter most.
FAQ
What entrance-hole size and floor dimensions should I use for Eastern, Western, and Mountain Bluebirds?
Use a 1 9/16" (≈1.5625") round entrance hole as the standard for all three species; where ranges overlap this size works best. Floor area: Eastern Bluebirds do well with ~16–25 in² (for example 4"×4" to 5"×5"); Western and Mountain Bluebirds should have at least ~5"×5" (NABS uses 5½"×5½"). Depth (interior height) of about 10–12" is appropriate. These dimensions match North American Bluebird Society (NABS) recommendations and regional extension guidance.
What exact cut list and lumber thickness should a beginner use for a simple, single-box plan?
A straightforward plan uses one 1×6 board (actual ≈¾"×5½") plus one 1×10 for a roof or two 1×6s depending on roof style. Typical cut list (single box): front 5½"×10" (with entrance centered 6–7" above floor), back 5½"×12" (taller to form a sloped roof), two sides 5½"×5½", floor 5½"×5½", roof ~12"×10" (or one 1×10 cut to length). Use ¾" exterior-grade cedar, redwood, or exterior plywood; pre-drill pilot holes and use galvanized/exterior screws. Do not use pressure-treated lumber for interior surfaces.
How many ventilation and drainage holes, and what size, should I add?
Drill three ½" ventilation holes under the roofline on each side or two on each side (½" diameter), slightly angled upward if possible to aid airflow while reducing rain ingress. For drainage, drill four ¼" holes in the floor or recess the floor ¾" and cut small corner notches to allow water to run out. In very cold climates reduce ventilation slightly to retain warmth.
What are evidence-based features of the “best” bluebird house design?
Key features are: species-appropriate entrance diameter and interior volume; good ventilation (½" holes near roofline); drainage (¼" floor holes or corner notches); predator resistance (no perches, tight seams, predator-guard compatible); easy human access for cleaning (side/roof/front panel that opens securely); unpainted interior and breathable solid-wood construction; light-colored exterior paint is acceptable on outside faces only. These elements reduce overheating, moisture, parasites, and predation risk when combined with proper placement and maintenance.
Where and how high should I mount bluebird boxes for each species and region?
General guidance: Eastern Bluebirds: 4–6 ft (1.2–1.8 m) high, in open yards, fields, or fence lines with nearby perches. Western and Mountain Bluebirds: often 5–10+ ft (1.5–3+ m), especially in ranch or open-country sites; Mountain Bluebirds sometimes mounted in pairs 10–20 ft apart within a pair and ~100 yd between pairs where recommended. Face the entrance east or east‑southeast (away from prevailing hot afternoon sun and prevailing winds). Use a smooth metal pole (electrical conduit) or treated post; avoid mounting directly on tree trunks when predators are a concern.
What predator‑proofing measures work best?
Use a smooth metal pole (1/2" conduit or galvanized pipe) with a baffle: stovepipe or cone baffles are highly effective for raccoons, cats, and snakes. Fit an entrance-hole guard or extender to prevent enlargement by woodpeckers/squirrels. Keep boxes at least 20–30 ft from dense cover (brush, dense hedges) to reduce predator ambush opportunities, but allow a perch within sight for bluebirds. Empirical NestWatch data show boxes with predator guards have higher nest survival rates.
Wine Cork Bird House Instructions: DIY Steps and Bird-Safe Specs
Step-by-step wine cork mini birdhouse build with bird-safe dimensions, safe materials, mounting, cleaning, and weatherpr