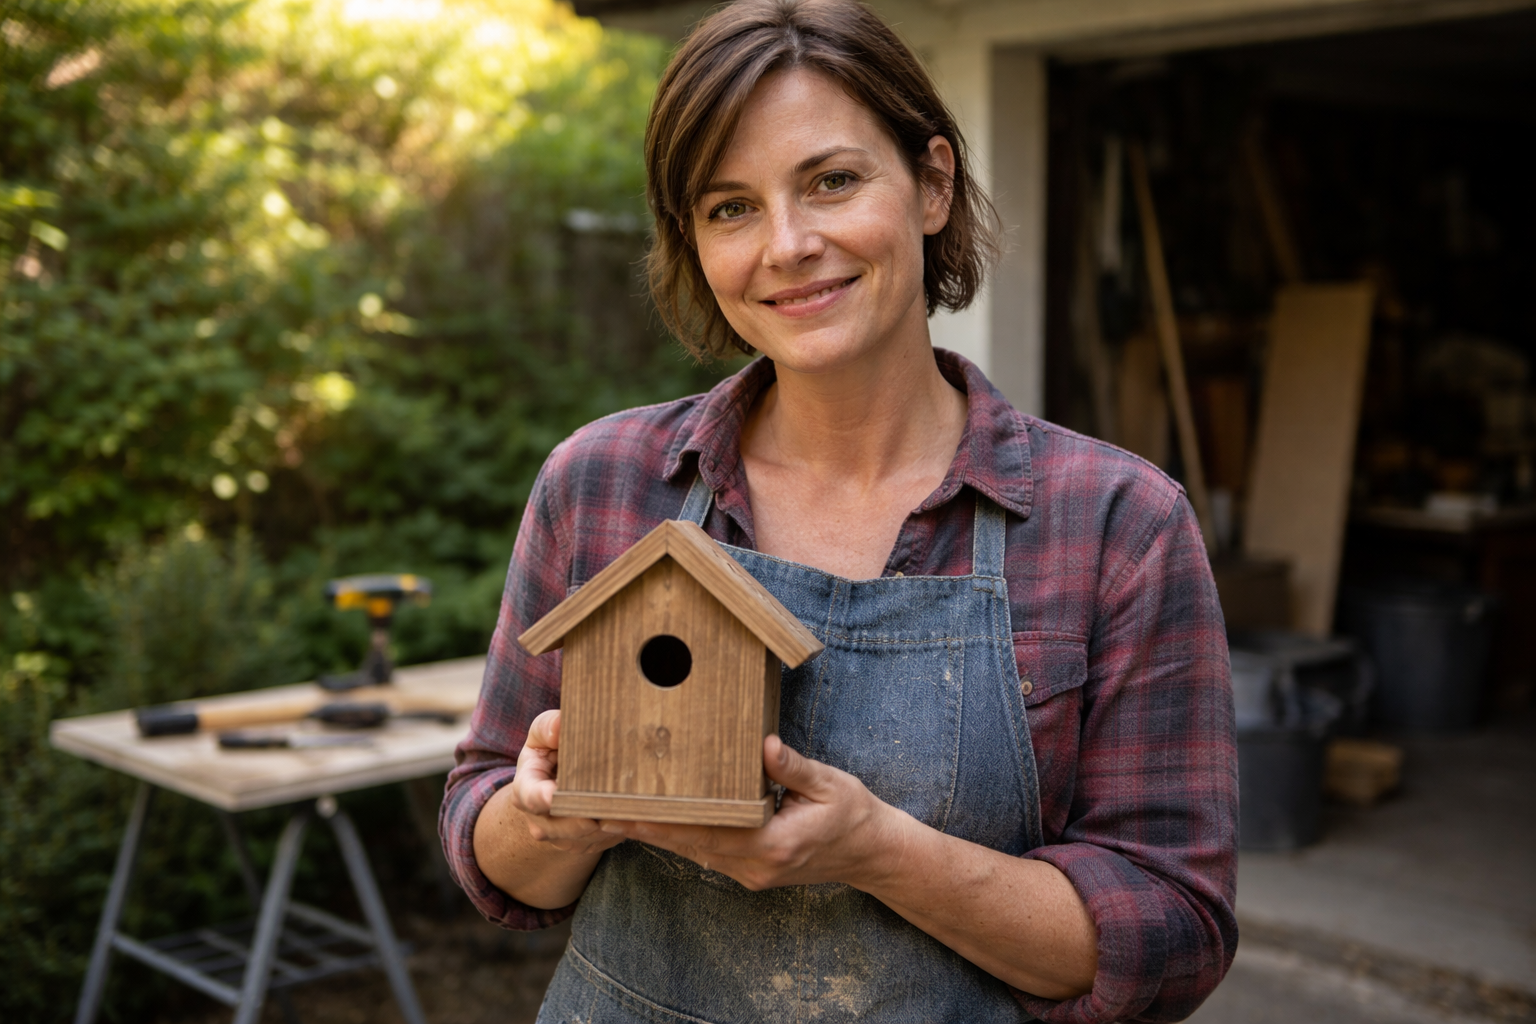
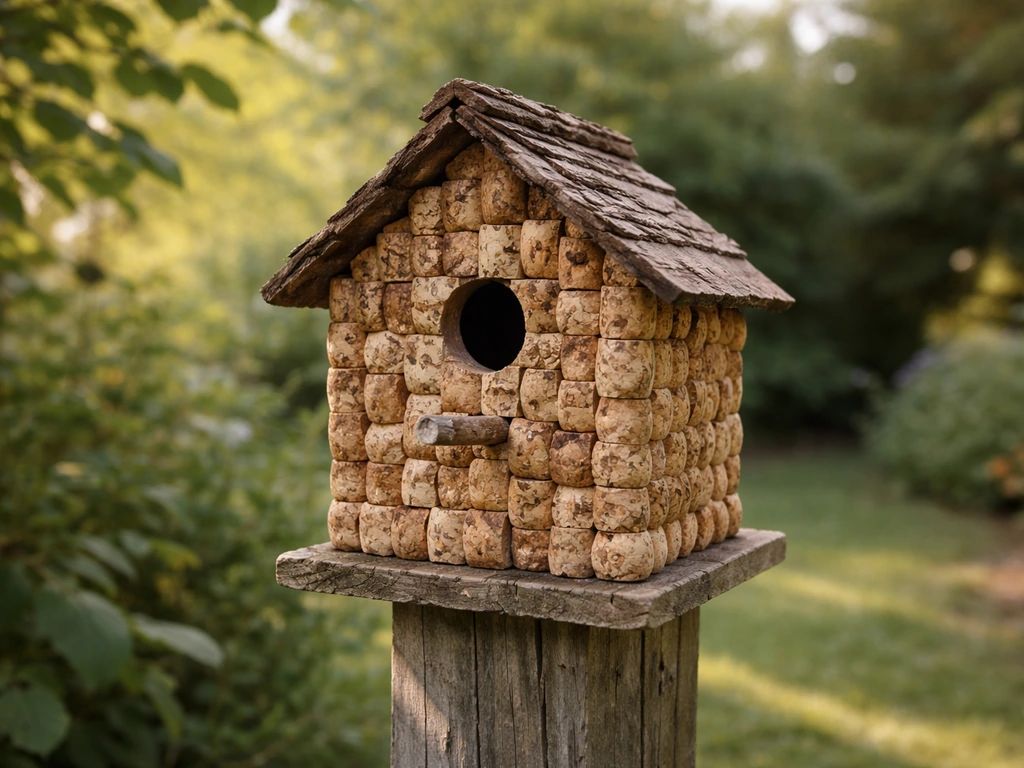
You can build a functional wine-cork bird house, but it works best as a tiny nest shelter sized for house wrens or chickadees, not a full-size box for bluebirds or larger birds. The corks become the outer wall material, glued onto a small wooden frame, while the internal cavity, entry hole, drainage, and ventilation follow standard bird-safe specs. Use only natural, uncoated corks, a safe adhesive like Titebond III or non-toxic PVA glue, and untreated wood for the frame. Nail or screw a clean-out panel on one side, drill a 1 1/8-inch entry hole, add four drainage holes in the floor, and you have a shelter that real birds will actually use.
Wine Cork Bird House Instructions: DIY Steps and Bird-Safe Specs
Maya Thompson
2 Jun 2026
When a wine-cork bird house makes sense (or not)
Wine corks are small, roughly 1. 75 inches in diameter and 1. 5 to 2 inches long. That means the structure you can build with them is compact.
A cork-clad box with an interior floor of about 4x4 inches is the practical ceiling for this approach, and that floor size is exactly right for house wrens and black-capped chickadees. It is not right for eastern bluebirds, which need a 5x5 floor and a 1. 5-inch entry hole. If your goal is to attract bluebirds, build or buy a proper wooden box instead.
If you are aiming for bluebirds, you will want bluebird box instructions instead of scaling up this cork-clad design. Blue jay bird houses typically have larger entrances and more roomy interiors than the smaller cork boxes described here, so the overall shape and size will look different larger bluebird box.
House wrens and chickadees are the sweet spot for this project. Both are cavity nesters, both readily accept man-made boxes, and both thrive in backyard settings with shrubs, small trees, or a fence line nearby. If you live in an area with Carolina wrens or Bewick's wrens, the same dimensions apply. If you are building the cork house purely as a decoration and do not care about occupancy, the functional rules still matter: a non-functional "decorative" box can trap birds that explore it and then cannot escape, so always build to spec even if aesthetics are the main goal.
Materials and tools: what's safe and what to avoid
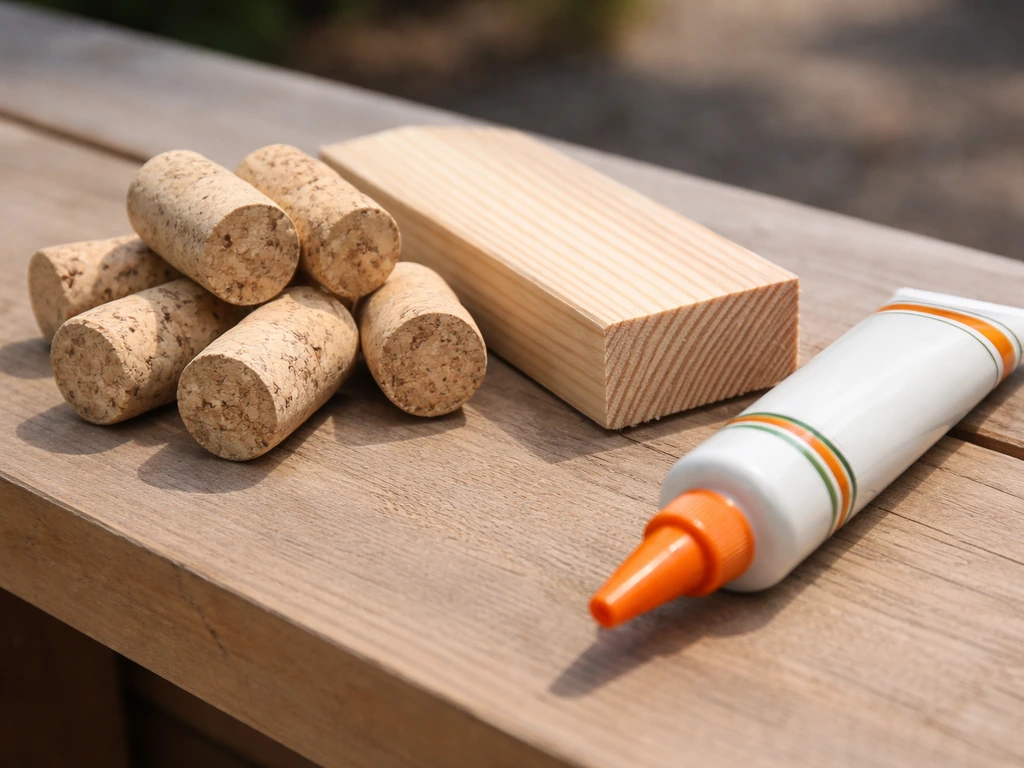
Safe cork types
Natural wine corks are ideal. They are harvested from cork oak bark, are non-toxic when unfinished, and provide decent insulation. Synthetic corks (the plastic or foam ones often found in cheaper wines) are not suitable: they do not absorb moisture the same way, they can off-gas, and they do not hold adhesive as reliably. Avoid any corks with heavy dye staining, wax coatings, or metallic foil residue. A quick wipe with a damp cloth and a day of air-drying before you start is all the prep they need.
Frame wood

Use untreated, natural wood for the inner frame. Cedar is the gold standard for outdoor bird houses because it resists rot without chemical treatment. Pine works fine and is cheaper. Never use pressure-treated lumber, plywood with exterior glue (which contains formaldehyde), or any painted or stained wood on the interior surfaces. The interior walls should stay bare and slightly rough so nestlings can grip them when it is time to fledge.
Adhesives and finishes
Titebond III waterproof wood glue is the best choice for attaching corks to the frame and for any wood joints. It is water-resistant, non-toxic once cured, and flexible enough to handle temperature swings. Plain PVA (white or yellow wood glue) works indoors but is not waterproof, so only use it for interior reinforcement if you are adding an external waterproof layer.
Hot glue is acceptable for holding corks in place while the structural adhesive cures, but do not rely on it as your primary bond. Avoid construction adhesives with strong solvents (Liquid Nails, most silicones), super glue in large quantities, or any exterior paint or sealant on interior surfaces.
If you want to apply a finish to the exterior wood frame pieces that the corks do not cover, use raw linseed oil or a water-based exterior sealant, and keep it off the inside of the box.
Tools list
- Drill with a 1 1/8-inch spade or Forstner bit (for the entry hole)
- 3/8-inch drill bit (for drainage and ventilation holes)
- Hand saw or miter saw (to cut the frame pieces)
- Sandpaper, 80-grit (to rough up interior wall below the entry hole)
- Clamps or painter's tape (to hold corks while glue cures)
- Tape measure and pencil
- Screwdriver and 1 1/4-inch exterior screws (for the clean-out panel and mounting)
- Hot glue gun (optional, for tacking corks in place)
- Safety glasses and dust mask for drilling
Step-by-step: building the wine-cork bird house
This plan builds a small box with a 4x4-inch interior floor, roughly 8 inches of interior height, and a removable front panel for cleaning. The corks clad the exterior on four sides. Finished exterior dimensions will be roughly 6 to 7 inches square, depending on how many cork layers you add. If you want even simpler bird house instructions, use the same dimensions approach, then follow the entry-hole, drainage, and ventilation steps Finished exterior dimensions.
- Cut your frame pieces from 3/4-inch cedar or pine: two side panels at 4 inches wide x 10 inches tall, one back panel at 5.5 inches wide x 12 inches tall (the extra height gives you a mounting flange at the top and bottom), one floor piece at 4x4 inches, one roof piece at 6 inches wide x 7 inches deep (the overhang sheds rain), and one front panel at 4 inches wide x 10 inches tall. The front panel becomes your clean-out door.
- On the floor piece, drill four drainage holes using the 3/8-inch bit, one near each corner, about half an inch in from the edges. These let water escape so the nest stays dry.
- On the two side panels, drill two ventilation holes near the top of each panel using the 3/8-inch bit. Position them about 1 inch down from the top edge. Ventilation prevents heat buildup, which can kill nestlings on hot days.
- Assemble the back panel, two sides, and floor using Titebond III and exterior screws. The floor sits inside the side panels, not under them, so rainwater cannot wick up into the wood joint. Let the glue cure for at least an hour before moving on.
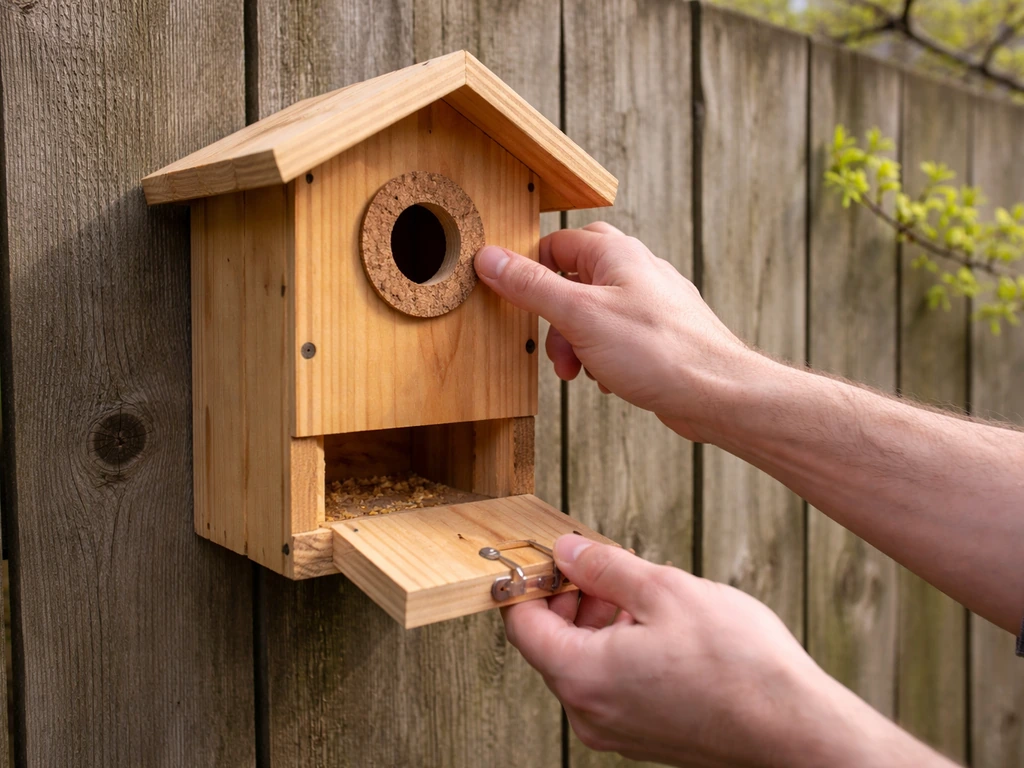
- On the front panel, mark your entry hole center at 6 inches above the floor (measuring from the bottom edge of the front panel). Drill the entry hole with the 1 1/8-inch Forstner bit. Do not add a perch below the hole: perches help predators, not birds.
- Rough up the interior wall of the front panel below the entry hole with 80-grit sandpaper. This gives nestlings something to grip when they are ready to leave.
- Attach the front panel with two exterior screws at the bottom only, driven through the side panels into the edges of the front panel. This lets the front swing open for cleaning. Add a single brass hook-and-eye latch at the top to keep it closed during the nesting season.
- Attach the roof piece with screws and glue. Angle it slightly forward (a 5-degree tilt is enough) so rain runs off the front rather than dripping into the entry hole.
- Now apply the corks. Working one face at a time, lay out your corks in a tight pattern on the exterior. Apply Titebond III to the flat end of each cork, press it firmly against the wood, and tack it with a dab of hot glue while the wood glue sets. Fill each face completely. Alternate cork orientations (some horizontal, some vertical) for visual interest and a tighter fit. Allow 24 hours of full cure time before hanging.
- Once cured, do a final check: shake the box gently to confirm no corks are loose, confirm the floor drainage holes are clear, and confirm the front panel opens and closes cleanly.
Entry hole, ventilation, drainage, and sanitation details

The entry hole is the single most important dimension in any bird house. For house wrens and black-capped chickadees, 1 1/8 inches is the standard. Birdfy’s hole-size chart by species lists chickadee entrance holes as 1 1/8 inches and House Wren holes as 1 inch, with interchangeable entrance panels as a way to tune the hole size [For house wrens and black-capped chickadees, 1 1/8 inches is the standard. ](https://www.
birdfy. com/blogs/blogs/birdhouse-hole-size-chart-by-species). Some sources list house wren at exactly 1 inch, which is workable, but 1 1/8 inches is more forgiving and still excludes larger, competing species. A Forstner bit cuts a cleaner hole than a spade bit, which matters because rough edges on the hole can deter birds or injure them.
If your bit leaves a rough rim, sand it smooth from the outside. The hole center should sit 6 to 8 inches above the floor, which gives nestlings enough drop space below them and keeps the nest material away from the opening.
Ventilation is handled by the four 3/8-inch holes drilled near the tops of the side panels. That is enough air movement to prevent the box from becoming an oven on a 90-degree summer afternoon. Do not seal these holes in winter: many cavity nesters will roost in boxes year-round, and they regulate their own temperature just fine.
The four floor drainage holes (also 3/8 inch) are non-negotiable. Rain blows in, dew condenses, and nestlings produce liquid waste. Without drainage, the nest becomes a soggy, bacteria-laden mat that kills young birds. NestWatch recommends at least four drainage holes, and that is exactly what this plan includes. NestWatch recommends at least four drainage holes (3/8″ to 1/2″ diameter) on the floor for a good birdhouse design.
For sanitation between broods (wrens and chickadees can raise two broods per season), open the clean-out front panel after the first brood fledges, remove all old nesting material completely, and wipe the interior with a stiff brush. You can use a 10 percent bleach solution (1 part bleach to 9 parts water) to scrub the interior, then rinse with plain water and let it dry completely in the sun for a full day before closing it back up. Never clean the box while a brood is still inside.
Where and when to hang it
Height and orientation
Mount the cork house at 6 to 10 feet off the ground for house wrens, and 6 to 15 feet for chickadees. Both species accept a wide range, so 7 to 8 feet is a practical middle ground that is also easy for you to monitor and clean. Face the entry hole between north and east. This keeps the morning sun warming the box gently while avoiding the brutal afternoon heat from a south- or west-facing hole. In hotter climates (USDA zones 8 and above), north-facing is actually the better choice to keep interior temperatures from spiking.
Habitat and placement
House wrens want to be near shrubby edges: a garden border, a hedgerow, or the edge of a wooded area works well. Do not place the box in the middle of an open lawn. Chickadees prefer placement near deciduous trees, particularly oaks, maples, or birches where they forage. A spot with partial shade for at least part of the day is better than full sun. Keep the box away from bird feeders by at least 10 feet: feeder activity can stress nesting birds and attract house sparrows, which are aggressive competitors.
When to put it up
Put the box up by late February or early March if you are in the northern United States or Canada. House wrens arrive on their breeding grounds from late April through May, but chickadees start scouting nest sites earlier. Getting the box up at least four to six weeks before breeding season gives birds time to find and accept it. If you miss the spring window, put it up anyway: late-arriving wrens or a second-brood pair may still use it, and it will be established for next spring.
Predator-proofing and safety checks
Cats and raccoons are the biggest threats to nest boxes at accessible heights. The best deterrent for a box mounted on a post is a smooth metal baffle installed 18 inches below the box on the post. For a box hung from a wire or tree branch, a cone-shaped baffle above the mounting point works.
If you are attaching the cork house to a fence or wall (a common choice for its decorative appeal), understand that cats can easily reach a wall-mounted box. In that case, mount it higher, at least 8 feet, and add a metal plate around the entry hole to prevent a cat's paw from reaching inside. A 1/16-inch thick steel or aluminum plate with the entry hole drilled through it protects the cork surround from chewing and scratching.
Squirrels are less of a threat at the 1 1/8-inch hole size because it is too small for them to enter. However, they will chew the opening wider if given the chance. The metal entry-hole plate solves this problem completely. It also protects the cork material itself from being pulled off, which a curious squirrel or woodpecker would otherwise do.
Weatherproofing the cork house means making sure the roof overhang extends at least 2 inches past the front panel, the roof is tilted forward, and there are no gaps between the cork layer and the wood frame where water can seep in and pool. Check all the cork joints after the first heavy rain. Any cork that has lifted or loosened needs to be re-glued immediately before moisture works its way into the frame. Corks that stay wet for extended periods can harbor mold, which is harmful to both birds and the structure.
Do a quick safety check every two weeks during the nesting season. Look for: loose corks, a roof that has shifted, the front panel latch working correctly, and any signs of wasp or insect nest buildup inside (wasps often start building in early spring before birds claim the box). Knock out any insect nests before a bird moves in.
Maintenance, cleaning, and knowing when birds are happy
Seasonal maintenance schedule
| Time of year | What to do |
|---|---|
| Late February to early March | Install or re-hang the box. Check that all corks are secure, the entry hole plate is in place, and the clean-out latch works. |
| During active nesting (April to July) | Observe from a distance only. Do not open the box while eggs or chicks are present. Check that the baffle and mounting hardware are still secure. |
| After first brood fledges (typically June) | Open the clean-out panel, remove all old nesting material, scrub with dilute bleach solution, rinse and dry fully before closing. |
| After second brood fledges (typically late July to August) | Repeat the full cleaning. Inspect corks and roof for weather damage. |
| October to November | Do a thorough inspection and re-glue any loose corks. Leave the box up: wrens and chickadees use boxes as winter roost sites. |
| January to February | Final pre-season check before breeding scouts arrive. Clear any debris that has blown in through the entry hole. |
What good occupancy looks like
A wren claiming a box will often stuff it with small sticks first, sometimes filling it almost completely, before the female builds a proper nest cup inside. This stick-filling behavior is normal and signals success. Chickadees bring moss, plant fibers, and animal hair. If you peek inside (before eggs appear) and see a neat cup of soft material, the box is being used as intended. A box that sits completely empty through May and June might need to be relocated: try moving it closer to shrubby cover, lowering it by a foot or two, or checking that nothing is blocking the entry hole from the outside.
Signs of moisture problems inside the box include a dark, stained floor, soft or spongy wood, or a musty smell when you open the panel. If you see any of these, check your drainage holes are not clogged with debris, re-examine the roof overhang, and make sure no corks on the top layer are directing water inward rather than away. A properly built box with good drainage should stay dry inside even after heavy rain.
Troubleshooting if there's no interest
- Relocate the box: move it at least 10 feet in any direction, ideally closer to shrubby or wooded cover.
- Check the entry hole: make sure it is exactly 1 1/8 inches and that the interior below the hole is rough enough for birds to grip.
- Remove any perch you may have added: perches are predator aids, not bird aids.
- Check for competing nest sites: if a neighbor has an identical box within 30 feet, wrens will often ignore the second one.
- Be patient: first-year boxes are often explored and passed over before being claimed. Many boxes are not used until their second season.
If you enjoy building small-scale bird houses and want to graduate to species-specific plans for slightly larger birds like eastern bluebirds, the same core principles apply but with adjusted dimensions. For bird house instructions by species, use the right entry hole and floor dimensions so the housing fits the bird you want to attract species-specific plans.
The entry hole, floor size, and mounting height all shift meaningfully by species, so always start with a species-specific dimensions chart before cutting wood. The cork cladding technique in this guide can scale up, but at a certain point a full-size bluebird box needs structural wood, not decorative cork, to stay weatherproof through multiple seasons. If you are specifically aiming for bluebirds, use a properly sized bluebird box so they can nest successfully best blue bird house. To find the best blue bird house for your yard, match the box size and entry-hole dimensions to bluebird needs.
FAQ
Can I use corks that are stained, waxed, or from cheaper wine blends for the outside cladding?
It is better to avoid heavily stained corks and any corks with wax, metallic foil residue, or heavy dye. These materials can transfer gunk to birds or interfere with how well the cork bonds. If you must salvage corks, test first by wiping and checking whether residue rubs off onto a white cloth, and skip anything that leaves a noticeable film.
Do I need to coat the cork or seal it to make it more weatherproof?
No. The cork should stay uncoated. Sealing the cork can trap moisture and reduce how the cork layer handles humidity. Instead, keep water management on the wood side, use a forward-tilted roof with an overhang, and confirm there are no gaps where rain could pool behind the cork.
How far above the entry hole should the interior floor be, and can I “offset” the height when building?
The hole height relative to the floor matters because wrens and chickadees need a safe drop space for nestlings and a nest material that will sit away from the opening. Keep the hole center about 6 to 8 inches above the floor as specified, instead of adjusting it to make the build easier. If you change the floor size, revisit the entry-hole position too.
Is hot glue acceptable as the main adhesive for attaching cork to the frame?
Hot glue can temporarily hold cork while other glue cures, but it should not be the primary structural bond. Primary attachment should be done with a wood glue such as Titebond III or non-toxic PVA, so the cork does not loosen during freeze-thaw cycles or after repeated wetting.
What happens if I accidentally drill the entry hole a little larger or smaller than 1 1/8 inches?
If it is significantly larger, you increase the risk of larger, competing birds using the box and potentially displacing the target species. If it is significantly smaller, wrens and chickadees may still use it, but acceptance drops because the entry feels restrictive. Aim for the correct bit size and smooth any rough rim so the opening is clean and comfortable.
Can I add a perch in front of the entry hole to help birds land?
Do not add a perch for this style of small, targeted cavity house. Perches can make it easier for predators and aggressive competitors to access the opening and can also change how birds approach the hole. If you want a functional design, rely on the correct height, orientation, and placement instead.
How do I handle cleaning if a bird is actively nesting but I need to remove pests?
Do not remove nesting material or open the box while eggs or nestlings are present. If you find an early insect nest forming inside before birds move in, remove it. During an active brood, address issues only by minimizing disturbance, wait until the brood fledges, then do the full clean-out and optional interior scrub.
What if the box is sitting empty through late spring?
Empty status can mean timing or placement issues. Try relocating the box closer to shrubby cover, lower it by about a foot or two, and double-check that nothing blocks the entry from outside (twigs, vines, or nearby obstruction). Also confirm the hole is not oriented into harsh afternoon heat in your climate.
Are drainage holes really necessary if the roof overhang is doing its job?
Yes, drainage holes are still necessary. Even with good sheltering, dew and rain blown around the structure can reach the interior, and nestlings produce liquid waste. If drainage holes clog or are too few, the floor can stay damp and increase mold and bacterial risk.
How can I tell whether the cork cladding is keeping the box too cold or too hot?
Look for signs after a run of weather. If you see consistently wet or musty conditions, the issue is usually water entry or clogged drainage, not temperature alone. For overheating, ensure the entry faces north or east, confirm ventilation holes are unobstructed, and verify the roof overhang is providing real shade over the front panel.
Can I hang or mount the cork bird house using rope or a loose bracket system?
Avoid any mounting that allows the box to swing, twist, or shift. Movement can loosen cork joints over time and makes cleaning harder. Use a stable post bracket or securely attach to a fence or wall, then re-check mounting points after the first heavy rain and during routine season checks.
Is it safe to add a small bird-safe camera hole to monitor activity?
Be cautious. Any added hole or hardware can interfere with ventilation, drainage, or structural integrity, and it can introduce sharp edges. If you want monitoring, use non-invasive observation from outside, or add inspection access only via the existing clean-out panel after nesting ends.