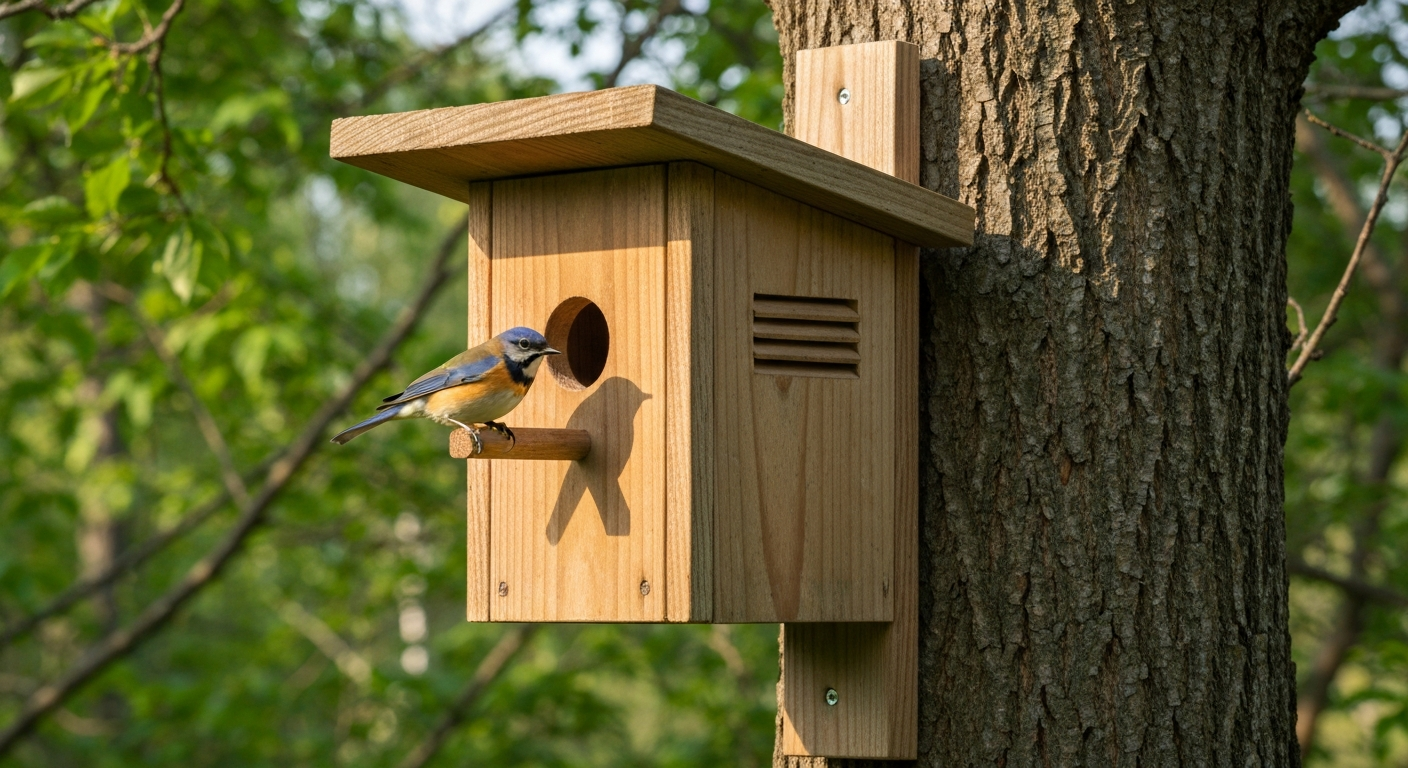
Yes, you can build or buy a bird house you can see into, and when done thoughtfully it is safe for the birds. The three practical options are open-front boxes (no entrance hole, fully exposed interior), transparent-panel boxes (one clear acrylic or polycarbonate side), and removable-window boxes (a hinged or sliding panel you open briefly for checks). Each design works well for certain species and fails badly for others, so matching the box style to the right bird is the single most important decision you will make.
Bird Houses You Can See Into: DIY Plans, Safety & Species

Maya Thompson
6 Aug 2026
Who this guide is for
This guide is written for backyard birders and DIYers who want to watch nesting activity up close without harming the birds doing the nesting. Whether you are building your first box from scratch, retrofitting an existing one with a clear panel, or deciding whether a nest camera makes more sense than a physical window, this article walks you through every decision point: design tradeoffs, species suitability, entrance-hole dimensions, thermal management, predator-proofing, and the legal and ethical rules that apply the moment a bird lays an egg.
What 'sight-friendly' nest boxes actually mean
A sight-friendly nest box is any enclosed or semi-enclosed nesting structure that allows a human observer to see the interior without fully dismantling the box. The term covers a spectrum of designs ranging from completely open fronts to tiny observation windows. A few key terms are worth pinning down before we go further.
- Open-front box: a nest box with no entrance hole at all, or with the entire front panel removed. The cavity is accessible and visible from any angle. Common for robins, phoebes, and barn swallows.
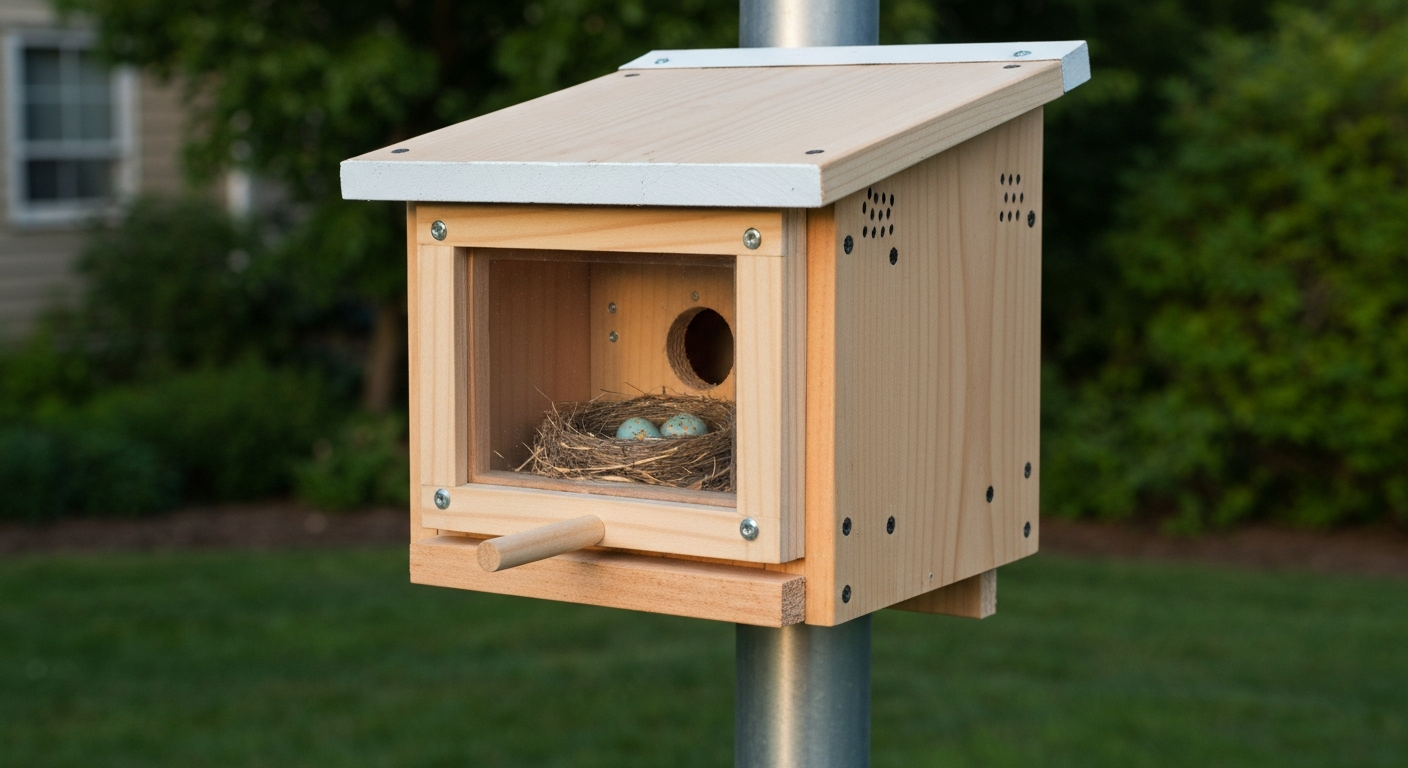
- Transparent-panel box: a standard enclosed box where one wall (usually the back or side) is replaced with clear acrylic or polycarbonate. The entrance hole remains intact, giving cavity-nesting species the enclosed feel they need while letting you see inside.
- Removable-window box: a standard box with a hinged or sliding opaque panel that you can open briefly for inspections, then close again. This is the most versatile design for monitoring without permanent glazing.
- Nest-box camera: a small IR camera mounted inside or outside the box, feeding live or recorded footage to a monitor or phone. Technically not a 'see-into' box in the physical sense, but it achieves the same goal with less thermal risk.
- Entrance-hole extender: a short tunnel added to the front of the entrance hole to increase the distance between a predator's arm and the nest. Not an observation feature, but often added alongside clear panels as a safety measure.
The main observation-friendly designs at a glance
Most commercially available 'educational' or 'observation' nest boxes use a transparent back panel, usually acrylic, mounted inside a recessed groove so it can slide out for cleaning. DIY versions often go a step further, adding a flip-up roof or hinged side panel. Open-front shelves are the oldest design and require no special materials, just a three-sided box with a partial or absent front. Camera-equipped boxes sit at the other end of the spectrum: the box itself looks entirely normal to the bird, and all the observation happens remotely. Each approach has a real place in a thoughtful backyard setup, and none of them is automatically safer or better than the others.
Design comparison: open-front vs. transparent-panel vs. removable-window
| Design | Best for | Main advantages | Main drawbacks | Typical species |
|---|---|---|---|---|
| Open-front shelf | Semi-open nesters on sheltered walls, porches, or under eaves | Dead simple to build; no special materials; good airflow; easy to clean | Offers zero predator protection from the front; not suitable for cavity nesters; vulnerable to weather if not placed under cover | American Robin, Eastern Phoebe, Barn Swallow, Mourning Dove |
| Transparent-panel box | Educational setups, school projects, patient observers who want passive viewing | Continuous observation without opening the box; no repeated disturbance; good for photography | Clear panels can overheat the interior in sun; acrylic scratches and fogs; birds may be stressed by visible human movement; needs shading or north-facing orientation | Tree Swallow, Bluebird (with care), Chickadee (with care) |
| Removable-window / hinged-panel box | Active monitoring, banding projects, nest-check schedules; best general-purpose choice | Observation on demand without full exposure; panel stays closed most of the time; works with standard hole-front designs; easy to combine with predator guards | Repeated opening can disturb adults at sensitive stages; panel must seal tightly when closed to prevent drafts and predator access | Most cavity nesters: Bluebird, Tree Swallow, Chickadee, Titmouse, Wren, Nuthatch |
| Camera-equipped box | Long-term monitoring, research, minimal-disturbance observation of sensitive species | No physical intrusion after initial setup; IR captures night activity; can cover multiple boxes with one monitor; 2009 meta-analysis suggests cameras may slightly reduce predation on average | Cameras near nests can attract predators in some habitats (corvids attracted to camera structures in one 2025 study); battery/card changes require visits; indicator lights must be disabled; upfront cost | Any species that accepts the standard box design |
My general recommendation: start with a removable-window box. It gives you observation on demand, it works for nearly every cavity-nesting species, and it does not introduce the thermal risk of a permanent clear panel. If you want truly hands-off viewing, pair that box with a small IR nest camera installed before the season starts, following Cornell NestWatch's guidance to run cables in conduit, disable indicator lights, and avoid visits after eggs are laid.
Species that suit visible nest boxes (and species that do not)
Not every backyard species will tolerate being watched, and not every design fits every bird's biology. Open-front shelves work only for semi-open nesters, which are a small group. Transparent-panel boxes are tricky because many cavity nesters (House Wrens and Chickadees especially) are quick to abandon a box if they sense disturbance. Bluebirds are notably tolerant of brief human presence near the box, which is why they are the most-monitored nest-box species in North America and the foundation of the NestWatch program. Tree Swallows are similarly tolerant. Titmice and nuthatches are more cautious and do better with removable-panel or camera setups rather than permanent glazing.
Raptors, including American Kestrels, are a special case. Kestrels accept nest boxes readily, but a 2022 Scientific Reports study on Bonelli's Eagle showed that inappropriate camera use (frequent visits, installation during sensitive breeding periods, repeated adjustments) reduced reproductive success in a threatened raptor. The principle transfers: for any raptor or sensitive species, cameras installed before the breeding season and left undisturbed are far safer than any design requiring physical access once eggs are present. U.S. Fish and Wildlife Service guidance on bald eagle nest cameras specifically recommends installation outside the breeding season and no maintenance on active nests.
The Migratory Bird Treaty Act (MBTA) protects the active nests and eggs of almost all native migratory birds in the United States. See Regulations Governing Take of Migratory Birds – Federal Register / USFWS (2021 rulemaking and guidance) for the MBTA's protections and guidance on activities affecting active nests. Removing, disturbing, or possessing an active nest or its contents without federal authorization is illegal, full stop. A removable-window check that causes nest abandonment is not just ecologically harmful, it may be a legal problem. Keep visits to the NestWatch-recommended maximum of every 3 to 4 days, lasting no more than 1 to 2 minutes each.
Species suitability at a glance
| Species | Open-front shelf | Transparent panel | Removable window | Camera |
|---|---|---|---|---|
| Eastern Bluebird | No | With shading; north-facing only | Yes, well-tolerated | Yes |
| Tree Swallow | No | With shading | Yes, well-tolerated | Yes |
| Black-capped / Carolina Chickadee | No | Not recommended (abandonment risk) | Use with care; limit checks | Yes |
| Tufted Titmouse | No | Not recommended | Use with care | Yes |
| White-breasted Nuthatch | No | Not recommended | Use with care | Yes |
| House Wren / Carolina Wren | No | Not recommended (easily disturbed) | Minimal checks only | Yes |
| American Kestrel | No | No | Minimal checks only | Yes, install pre-season |
| American Robin | Yes | N/A | N/A | External camera only |
| Eastern Phoebe | Yes | N/A | N/A | External camera only |
| House Sparrow / European Starling | Caution (invasive) | Caution | Caution | Monitoring useful for management |
Entrance-hole sizes for common nest-box species
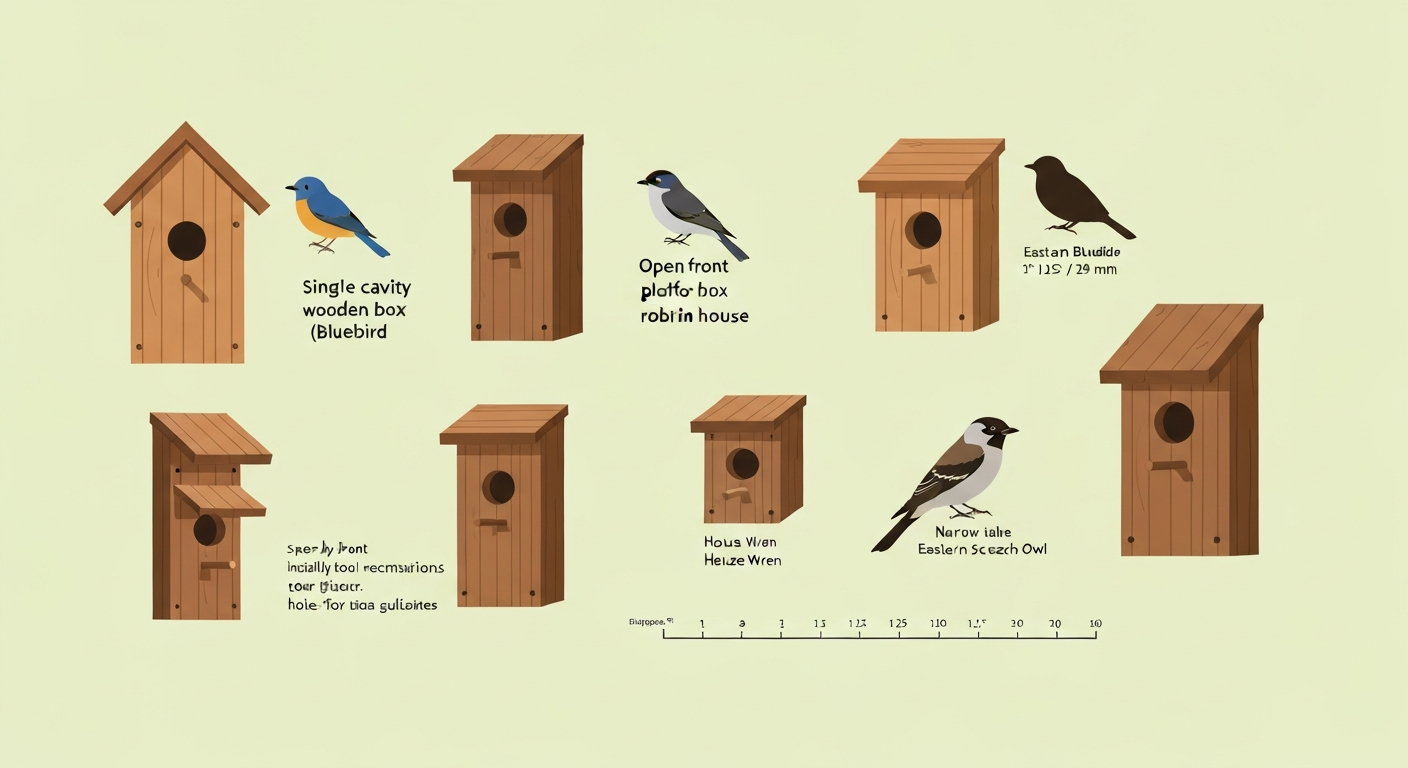
Entrance-hole diameter is the single measurement that most determines which species uses a box and which predators can reach inside. These figures come from Cornell Lab's Right Bird, Right House plans and NestWatch species pages. NestWatch / Right Bird, Right House – Cornell Lab of Ornithology provides species-specific nest-box construction plans and placement recommendations (entrance-hole sizes, internal floor area, cavity depth, mounting height and orientation). Drill holes to within 1/16 inch (1.5 mm) of the target diameter. A hole even slightly too large lets in House Sparrows or European Starlings, which can destroy eggs and kill nestlings of native species. Use a sharp spade or Forstner bit, not a hole saw, for clean edges.
| Species | Entrance hole diameter | Interior floor (inches) | Cavity depth (floor to hole) | Mounting height (feet) | Notes |
|---|---|---|---|---|---|
| Eastern Bluebird | 1.5 in (38 mm) | 5 × 5 | 6–10 in | 4–6 | Slot entrance (1.75 × 2.25 in) also accepted |
| Tree Swallow | 1.5 in (38 mm) | 5 × 5 | 6–8 in | 5–10 | Needs open habitat near water |
| Violet-green Swallow | 1.5 in (38 mm) | 5 × 5 | 6–8 in | 5–15 | Western North America |
| Black-capped Chickadee | 1.125 in (29 mm) | 4 × 4 | 8–10 in | 4–15 | Fill with wood shavings; they excavate |
| Carolina Chickadee | 1.125 in (29 mm) | 4 × 4 | 8–10 in | 4–15 | Same as Black-capped |
| Tufted Titmouse | 1.25 in (32 mm) | 4 × 4 | 8–10 in | 5–15 | Wooded yards preferred |
| White-breasted Nuthatch | 1.25–1.375 in (32–35 mm) | 4 × 4 | 8–10 in | 5–20 | Dense forest or wooded edge |
| House Wren | 1.0–1.125 in (25–29 mm) | 4 × 4 | 6–8 in | 5–10 | Smaller hole excludes House Sparrows |
| Carolina Wren | 1.5 in (38 mm) | 4 × 4 | 6–8 in | 5–10 | Prefers dense shrubs |
| American Kestrel | 3.0 in (76 mm) | 9 × 9 | 12–15 in | 10–30 | Open grassland or farmland; needs perch |
| Northern Flicker | 2.5 in (64 mm) | 7 × 7 | 16–18 in | 6–20 | Fill with wood chips |
| Downy Woodpecker | 1.25 in (32 mm) | 4 × 4 | 8–10 in | 5–20 | Fill with wood chips |
| House Sparrow (invasive) | 1.75 in (44 mm) | — | — | — | Monitor and manage if present |
| European Starling (invasive) | 2.0 in (51 mm) | — | — | — | Exclude by keeping holes at or below 1.5 in |
Building a see-into box: materials, tools, and step-by-step construction
Materials and tools
| Item | Specification | Substitution / notes |
|---|---|---|
| Lumber (front, back, sides, floor) | 3/4 in (19 mm) untreated cedar or pine | Douglas fir works; avoid pressure-treated, painted, or composite wood inside the cavity |
| Clear observation panel | 1/4 in (6 mm) acrylic or polycarbonate sheet | Polycarbonate is less brittle and handles temperature swings better than acrylic; cut to fit the back panel opening |
| Panel retaining strips | 1/4 in × 1/2 in wood strips | Create a groove so the panel slides out for cleaning; glue and brad-nail in place |
| Exterior screws | 1.5 in (38 mm) galvanized or stainless deck screws | Avoid smooth-shank nails; screws allow disassembly for cleaning |
| Ventilation mesh or drill holes | Four 1/4 in (6 mm) holes near top sides | Keep mesh out of the interior to prevent entanglement |
| Drainage holes | Four 1/4 in (6 mm) holes in floor corners | Bevel or recess floor 1/4 in above bottom edge as alternative |
| Exterior paint or wood preservative | Light-colored latex exterior paint for roof and outer walls only | No paint on interior surfaces; paint in fall and allow full off-gassing before spring |
| Forstner or spade bit | Matching target species entrance-hole diameter | Forstner gives cleanest cut; avoid hole saws which can split thin stock |
| Entrance-hole extender (optional) | 1.5 in deep hardwood block drilled to matching hole diameter | Adds predator resistance; glue and screw to front panel |
| Predator guard (baffle) | Stovepipe or cone baffle for mounting pole | NestWatch data shows predator guards improve nest success by ~6.7% |
| Sandpaper | 80-grit for rough cuts, 120-grit for interior | Rough up the inside front panel below the entrance hole so nestlings can grip it |
| Safety gear | Safety glasses, hearing protection for drilling | Mandatory when using power tools |
Step-by-step build: removable-window observation box for Eastern Bluebird
This plan produces a 5 × 5 inch interior floor box with a 1.5 inch entrance hole and a sliding polycarbonate back panel sized for an Eastern Bluebird or Tree Swallow. The overall exterior dimensions are roughly 6.5 inches wide × 7 inches deep × 14 inches tall (including the sloped roof overhang). The observation panel occupies the full back wall minus the retaining grooves, giving you a clear view of the entire nest cup.
- Cut your lumber. From a 1 × 8 cedar board (actual 3/4 in × 7.25 in), cut: front panel 14 in long; two side panels each 12 in long (cut top of each at a 10-degree angle for roof slope); floor panel 5 × 5 in with four 1/4 in drainage holes at corners; roof panel 8 × 8 in with a 1-inch overhang on all sides. The back panel is replaced by the observation frame (see step 3).
- Drill the entrance hole in the front panel, centered 2 inches from the top edge. Use a 1.5 in Forstner bit. Score a rough patch 4 inches tall below the inside of the entrance hole with 80-grit sandpaper so nestlings can climb out.
- Build the observation frame for the back. Rip four strips of 3/4 × 1/2 in cedar. Glue and nail two strips vertically to the inside left and right edges of what will be the back opening. These form grooves. Then add two horizontal strips at top and bottom, leaving a 1/4 in deep slot all around. The polycarbonate panel (cut to 5 × 11 in) slides into these grooves from the top and can be removed without tools for cleaning.
- Drill ventilation holes: four 1/4 in holes near the top of each side panel, positioned just below where the roof will sit. This keeps hot air from building up at the nest level.
- Assemble the box. Attach the side panels to the front panel using 1.5 in screws through the front into the side edges. Drop in the floor panel, recessing it 1/4 in above the bottom edge of the sides; screw through the sides into the floor edges. Slide the clear panel into the back grooves. Attach the roof with two screws through the top into the sides; do not glue the roof so it can hinge open for annual cleaning.
- Add a mounting cleat on the back frame: a 1 × 2 in strip of cedar, 6 in long, screwed horizontally across the back observation frame at mid-height. This gives you a solid point to screw the box to a mounting pole or post.
- Install an entrance-hole extender if predators are a concern in your yard. Glue and screw a 1.5 in-thick hardwood block (drilled through at 1.5 in) flush to the outside of the front panel over the entrance hole. This doubles the tunnel depth a predator must reach through.
- Paint only the exterior roof and outer walls with a light-colored latex paint. Leave all interior surfaces and the polycarbonate panel unpainted. If painting in spring, allow at least two weeks of ventilation before mounting.
- Mount the box on a smooth metal pole at 4 to 6 feet height, in the open, facing north or northeast to avoid afternoon sun hitting the clear back panel. Attach a stovepipe or cone baffle below the box on the pole.
Diagram suggestion: a labeled exploded-view drawing showing the five main pieces (front with hole, two sides with ventilation holes, floor with drainage holes, sloped roof) plus the sliding polycarbonate back panel in its groove strips, with arrows indicating assembly direction. Label the entrance-hole extender as an optional add-on piece at the front.
Solving the heat problem with clear panels
Transparent panels are the biggest thermal risk in any see-into design. Research comparing nest boxes to natural tree cavities has found that boxes can run up to 8 degrees Celsius hotter than hollows on summer days, and clear glazing facing south or west makes this much worse. A 2021 study on Collared Flycatchers found that even a 2 to 3 degree Celsius rise in nest temperature changed incubation behavior and reduced offspring fitness. That is a meaningful effect from a modest temperature increase.
The fixes are straightforward. Face the clear panel away from direct afternoon sun, which means mounting the box so the observation side faces north or northeast. Shade the box with a roof overhang of at least 2 to 3 inches. A 2017 study confirmed that painting the exterior of a box with a light-colored or reflective surface significantly reduces peak interior temperatures, and a 2018 insulation study found that adding a thin reflective foil layer inside the roof reduced temperature extremes by nearly 6 degrees Celsius in hot conditions. If your yard gets intense summer heat, add that foil layer under the roof board before assembly. Keep the ventilation holes open and unobstructed. Polycarbonate is preferable to acrylic for the clear panel because it handles thermal expansion and contraction better and is less likely to crack over repeated seasons.
Predator-proofing a see-into box
Any design with an observation panel or open front is worth nothing if a raccoon, snake, or cat empties the nest before the eggs hatch. The NestWatch citizen-science dataset from over 24,000 nest records (Bailey and Bonter, 2017) found that boxes with predator guards had about 6.7 percent higher nest success overall, with stovepipe baffles, cone baffles, and entrance-hole extenders among the most effective. For open-front shelves, placement under a deep eave or on a smooth metal wall bracket is your main protection because a baffle on the structure itself is harder to install. For pole-mounted boxes, a 24-inch stovepipe baffle around the pole is the single best investment you can make, regardless of the observation design you choose.
- Mount on a smooth metal pole, not a tree, fence post, or wooden stake that a climbing predator can grip.
- Install a stovepipe or cone baffle at least 4 feet off the ground, below the box, on the same pole.
- Add an entrance-hole extender (a 1.5 in deep block drilled to the correct diameter) to the front of any enclosed box. This prevents a raccoon from reaching in and sweeping the nest.
- Never mount a box on or near a branch, wire, or structure that gives a squirrel or cat a jumping-off point within 8 to 10 feet horizontally.
- For open-front shelves under eaves, check that there are no vertical surfaces a snake can climb within 4 feet of the shelf location.
- If adding a nest camera, run cables in rigid conduit flush to the pole. Loose cables give predators a grip and a reason to investigate.
When to use observation windows, removable panels, or cameras: a decision framework
The right choice depends on your species, site, and how much observation you actually need. Run through this checklist before committing to a design.
Choose an open-front shelf if:
- Your target species is a robin, phoebe, or barn swallow (semi-open nester, not a cavity nester).
- The mounting location is under a sheltered eave, porch roof, or barn overhang that provides rain and sun protection.
- You are comfortable with no predator barrier on the front face of the nest.
Choose a transparent-panel box if:
- Your primary goal is passive, non-intrusive observation (classroom project, photography setup, or a box you want to watch through a window from indoors).
- You can orient the clear panel to face north or northeast, keeping it in shade during the hottest part of the day.
- You are prepared to add a roof overhang, reflective foil under the roof, and adequate ventilation holes to manage heat.
- Your target species is a Tree Swallow or Bluebird (more tolerant) rather than a Wren or Chickadee (easily disturbed).
- You will not be moving, opening, or disturbing the box after eggs are laid.
Choose a removable-panel or hinged-window box if:
- You want to actively monitor nesting progress (egg counts, hatch dates, banding) on a schedule.
- You are participating in a citizen-science program such as NestWatch and need periodic interior checks.
- Your site or species has thermal risk that makes permanent glazing unwise.
- You want one design that works across multiple species and multiple years.
Choose a camera (inside or outside the box) if:
- Your target species is sensitive to physical disturbance (kestrels, nuthatches, shy cavity nesters) or is legally protected in ways that restrict access.
- You want observation without any repeated physical visits once the season starts.
- You are monitoring multiple boxes and cannot check each one frequently.
- You can install the camera before the breeding season and leave it in place undisturbed, following NestWatch camera guidance: disable indicator lights, run cables in conduit, use IR for night viewing, and choose a camera that does not require frequent battery or card changes.
- You are in a habitat where corvids or other intelligent predators are common, in which case position the camera housing close to and flush with the box to minimize novel structure attractiveness (a 2025 Journal of Wildlife Management study found camera structures attracted ravens to nests in some Arctic habitats).
Risk-benefit summary
| Scenario | Recommended design | Key risk to manage |
|---|---|---|
| Bluebird trail in open meadow, sunny site, active monitoring | Removable side panel + stovepipe baffle | Heat; predators; keep checks to 3–4 day intervals |
| Tree Swallow box near pond, shaded north-facing wall | Transparent back panel | Verify shade in afternoon; check ventilation |
| Chickadee or Titmouse in wooded yard | Removable panel or camera; no permanent glazing | Abandonment if disturbed; use camera after installation |
| Kestrel box on barn or post, open farmland | Camera installed pre-season | Legal/ethical disturbance; install before March in most of North America |
| Robin shelf under porch eave | Open-front shelf | Predator access from front; site under deep eave |
| Classroom observation box, indoor placement | Transparent panel, north-facing, well-ventilated | Overheating; use polycarbonate, add foil under roof |
| Any species in high corvid/predator area | Camera flush-mounted, cables in conduit | Camera structure attracting predators; minimize profile |
Mounting, placement, and timing
Cavity nesters scout for boxes well before they begin nesting, so get boxes up by late February in the southern U.S. and by late March in northern states and Canada. For open-front shelves, robins and phoebes begin scouting in March across most of North America. Camera installation should happen during fall or early winter, before any scouting begins, so the structure is familiar and weather-worn by the time birds arrive.
For cavity nesters, face the entrance hole away from prevailing winds and afternoon sun, which typically means east or northeast. Keep boxes at least 100 yards apart for Bluebirds (they defend territory around the nest box), but Tree Swallows can be paired as close as 5 to 15 feet if you want to observe two boxes from the same vantage point. Kestrel boxes do best on poles or barn walls 10 to 30 feet high in open farmland with nearby perch sites.
Once eggs appear, follow NestWatch's Nest Monitoring Code of Conduct: check no more than every 3 to 4 days, spend less than 1 to 2 minutes at the box per visit, and never check during incubation in rain or extreme heat. If you are using a transparent-panel or removable-window design, this discipline is not optional. It is the difference between successful nesting and abandonment.
Sanitation and annual maintenance
Clean every box after each nesting attempt is fully complete (all young have fledged and the adults have stopped returning). Remove the old nest material completely, scrub the interior with a stiff brush and a dilute solution of 10 percent bleach in water, rinse well, and allow the box to dry fully before reinstalling. This removes mites, blowfly larvae, and bacteria that can harm a subsequent nest. For transparent-panel boxes, remove the polycarbonate panel, clean both sides, and check the grooves for debris that could prevent the panel from seating properly. In late fall, do a structural check: tighten screws, reseal any gaps with exterior caulk, and confirm the roof is weathertight. If you painted the exterior, touch up any bare wood. Store camera units indoors if temperatures drop below the manufacturer's operating range.
Legal and ethical rules you need to know
In the United States, active nests and eggs of native migratory birds are protected under the Migratory Bird Treaty Act. You cannot legally remove, move, or possess an active nest or its eggs without federal authorization, even if the nest is in a box you built and own. This means that if a bird begins nesting in your observation box and you decide you want to relocate the box or remove the nest for any reason, you must wait until nesting is fully complete and the nest is inactive. The same law applies to cameras: installing a camera at an active eagle nest, for example, requires permits or may not be permitted at all, per USFWS guidance. For common backyard species like bluebirds and chickadees, the practical implication is simpler: observe and document, but do not intervene. If you are uncertain about a specific species or situation, contact your local USFWS field office or state wildlife agency.
Troubleshooting common problems
| Problem | Likely cause | Fix |
|---|---|---|
| Box is used but eggs or nestlings disappear | Predator access; snake, raccoon, or cat | Add stovepipe baffle on pole; add entrance-hole extender; relocate away from climbing surfaces |
| Birds investigate but do not nest | Wrong hole size; box too close to another; location too exposed | Check hole diameter against species table; move boxes 100+ yards apart for bluebirds; add nearby perch if missing |
| Clear panel fogs or crazes after one season | UV degradation of acrylic; thermal stress | Switch to polycarbonate; use UV-stabilized grade |
| Interior of box overheats on sunny days | Clear panel or dark exterior facing afternoon sun | Reorient box to north/northeast; paint roof white; add reflective foil under roof board; add ventilation holes |
| Adults stop visiting after a panel check | Disturbance during sensitive stage (incubation or early nestling) | Wait 3–4 days minimum between checks; limit time at box to under 2 minutes; avoid checks in hot weather |
| House Sparrows take over the box | Entrance hole too large; box in wrong habitat | Reduce hole to 1.125 in for chickadees or 1.5 in for bluebirds; relocate away from buildings; monitor and manage |
| Camera indicator light disturbs birds or attracts predators | LED status light on camera unit | Cover or tape over indicator light; use a camera model with disableable lights; switch to IR-only unit |
Further reading and related projects
If you want to explore other creative nest-box builds, there are related guides on this site worth checking out. Builders interested in unconventional materials will find the article on bird houses made out of license plates useful for understanding which non-standard materials hold up outdoors and which create thermal or toxicity problems. If you are new to the topic and want to be sure about the terminology, the bird house definition article lays out the difference between a nest box, a roosting box, and a decorative house in practical terms. And if you want to understand what nest boxes are technically called in different contexts, the bird house is called guide covers the naming conventions used in wildlife management, ornithology, and casual backyard birding. For a completely different application of the same basic woodworking skills, the bird house Minecraft tutorial shows how the standard box dimensions translate into a block-based build, which can be a surprisingly useful teaching tool for younger backyard birders.
FAQ
What is the recommended search-friendly title and a concise meta description for an article about bird houses you can see into?
Title: 'Bird Houses You Can See Into: Safe, DIY Observation Boxes, Cameras & Open-Front Options' Meta description (≤160 chars): 'How to build, install and ethically use observation nest boxes, transparent panels and camera setups to watch nesting birds safely.'
What types of 'see-into' nest boxes are covered and how do they differ?
Main types: open-front boxes (partial removal of a front panel or large entrance), transparent-panel/clear-window boxes (acrylic or polycarbonate viewing panels sealed into a wall), removable-window designs (snap-in/out panels or hinged inspection panels), and camera-equipped boxes (internal micro-cameras or external trail cams). Differences: open-fronts maximize visibility but change concealment and microclimate; transparent panels preserve a cavity while providing a view but require predator-proofing and thermal/ventilation mitigation; removable windows let you inspect only when safe; cameras allow remote viewing without opening the box but require careful installation to avoid disturbance or predator attraction.
When is it appropriate to use observation windows or cameras versus leaving a box fully opaque?
Use windows/cameras when: target species tolerate human presence or cavity visibility (many tits, chickadees, nuthatches, some swallows); you can install before breeding and avoid repeated disturbance; you can implement predator-proofing, ventilation and shading. Leave boxes opaque when: species are highly sensitive (most raptors, some owls, threatened species), permits prohibit disturbance, or you cannot guarantee minimal-maintenance cameras or secure, discreet installation. Follow species-specific guidance and local regulations—when in doubt, prefer remote cameras installed off-season or opaque boxes.
Which species are suitable for see-into boxes and which should be avoided?
Generally suitable: small to medium cavity-nesters tolerant of suburban/park environments—Blue Tit/Chickadee/Great Tit, Tree Swallow, House Wren (with caution), Nuthatch, some small woodpeckers (depending on design). Proceed cautiously or avoid for: raptors (eagles, hawks, owls), rare or legally protected species without permits, species known to desert nests when disturbed. Consult local species pages (Cornell NestWatch, BTO) for entrance sizes, box dimensions and legal protections before building.
What are standard dimensions, hole sizes and cavity depths for common species?
Examples (general guidelines; adjust to local species pages): Blue Tit/Chickadee: floor ≈12x12 cm, depth 15–20 cm, entrance 25 mm. Great Tit: floor ≈12x12 cm, depth 20–25 cm, entrance 28 mm. Tree Swallow: floor ≈12x12 cm, depth 15–20 cm, entrance 38–45 mm. House Wren: floor ≈12x12 cm, depth 15–20 cm, entrance 25–32 mm. Nuthatch: floor ≈12x12 cm, depth 20–25 cm, entrance 32 mm. Always confirm on regional resources (Cornell, BTO) and adapt for local subspecies.
What materials and tools are needed for building a transparent-panel or removable-window nest box?
Materials: untreated exterior-grade lumber (15–20 mm / ~3/4"), 3–4 mm exterior-grade acrylic or polycarbonate panel (not glass), marine-grade silicone sealant, stainless-steel screws, exterior wood glue, predator guard (metal plate or baffle), weatherproof hinge or snap fasteners for removable panels, UV-stable paint (exterior only) or stain, ventilation mesh (stainless), drainage plug or drill bits. Tools: circular saw or handsaw, jigsaw or coping saw (for entrance and panel cutouts), drill and bits, countersink, screwdriver, clamps, tape measure, square, sanding block, caulking gun, safety gear (eye/ear protection). Include a materials/tools table in the article for easy shopping.