
A bird house is most commonly called a nest box, and that is the term used by ornithologists, conservation organizations like the Cornell Lab of Ornithology and the RSPB, and most serious backyard birders. You will also hear it called a birdhouse, bird box, nesting box, or nest shelter depending on where you live and who you ask. All of these names describe the same basic thing: an artificial cavity provided so that hole-nesting birds have a safe place to raise their young. For a concise bird house definition, see the bird house definition page.
Bird House Is Called: Names, DIY Plans, Sizes & Safety Guide

Maya Thompson
24 Jul 2026
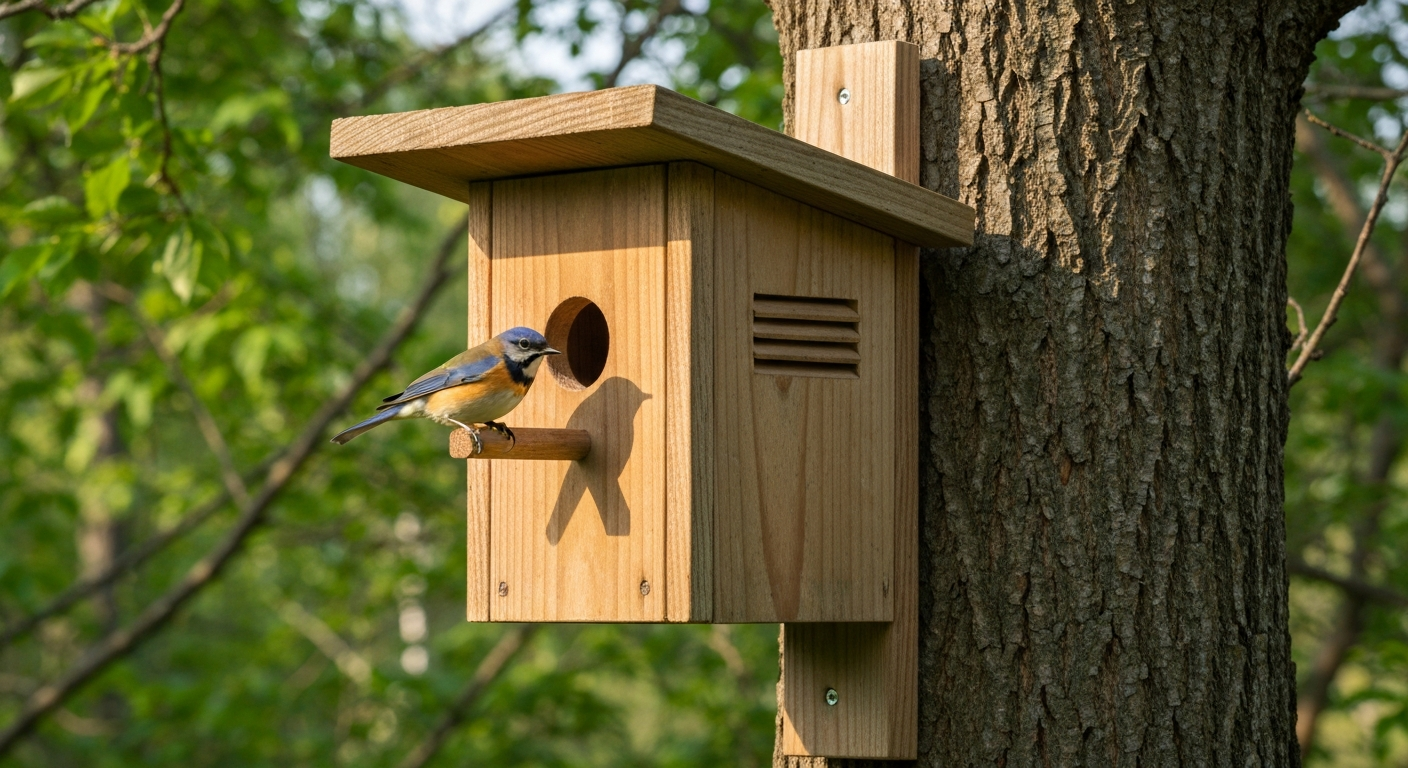
Every name a bird house goes by
The terminology around these structures is looser than most beginners expect, and knowing the variants helps when you are searching for building plans, buying hardware, or reading conservation research. Here are all the names you are likely to encounter.
- Birdhouse or bird house: the most common everyday term in North America, used interchangeably by retailers, gardeners, and casual hobbyists. Merriam-Webster lists birdhouse as a synonym for nest box.
- Nest box: the preferred scientific and conservation term used by Cornell Lab's NestWatch program and most academic literature. It emphasizes function over decoration.
- Bird box: the standard British term, used routinely by the RSPB in all its public guidance and garden signage. Cambridge and Oxford dictionaries list it as a direct synonym for nest box.
- Nesting box: a natural variation of nest box, used widely in extension-service literature, garden centres, and DIY guides.
- Nest shelter: an older or more formal variant, occasionally used in wildlife management documents.
- Martin box or martin house: a multi-chamber structure built specifically for Purple Martins, often a large white apartment-style unit.
- Owl box: a larger, deeper nest box sized and positioned for owls such as Barn Owls, Eastern Screech-Owls, or Barred Owls.
- Kestrel box: a medium-sized nest box designed specifically for American Kestrels, typically mounted on poles or fence posts at field edges.
- Roost box: a box designed primarily for overnight shelter or winter roosting rather than nesting; entrance holes are often placed near the bottom so warm air is trapped inside.
- Observation house or view box: a nest box with a clear or openable side panel so the interior can be watched or photographed.
In everyday conversation, birdhouse, bird box, and nest box are fully interchangeable. The distinction only matters when you are looking at specialty designs: a roost box is not ideal for nesting, and a martin house is not going to attract bluebirds. Keep that functional difference in mind as you decide what to build.
UK vs. US terms and how to spot each type at a glance
American English leans toward birdhouse and nest box; British English almost exclusively uses bird box or nest box. If you are following a UK-based plan from the RSPB, the build specifications and dimensions will be calibrated for European species like Blue Tits or Great Tits, which need different hole diameters and box depths than North American species. A 28 mm entrance hole is standard for Blue Tits; a 38 mm (1.5 inch) hole suits Eastern Bluebirds. Do not mix up the plans, or you will end up with a box that either lets in competitors or excludes the bird you want.
| Term | Primary region | Most common context | Quick visual ID |
|---|---|---|---|
| Birdhouse | North America | Retail, casual use, decorative items | Any size; often painted or decorative |
| Nest box | North America / global conservation | Scientific, DIY plans, NestWatch | Plain wood, functional shape, cleanout door |
| Bird box | UK / Australia | RSPB guidance, garden centres | Small, plain, often cedar or FSC timber |
| Nesting box | UK / North America | Extension service, garden writing | Identical to nest box in practice |
| Martin house | North America | Purple Martin programs | White, multi-unit, tall pole, large |
| Owl box | North America / UK | Barn Owl or Screech-Owl programs | Deep, large floor, low entrance hole |
| Roost box | North America / UK | Winter shelter | Entrance near bottom, roosting perches inside |
| Observation house | North America | Education, monitoring | Clear or hinged side panel |
The main types of bird houses explained
Not every nest box looks like the classic pitched-roof wooden box you picture in a backyard. Here is a practical rundown of the categories you will encounter when planning your project.
Standard nest boxes
The workhorse of backyard birding. A four-sided wooden box with a sloped roof, single circular entrance hole, ventilation slots near the top, drainage holes in the floor, and a hinged or removable panel for cleaning. Sized and drilled to suit one target species. This is what most DIY plans describe and what this article focuses on building.
Open or platform nest structures
American Robins, Barn Swallows, and Eastern Phoebes do not use enclosed boxes. They prefer a small open-fronted shelf or platform mounted on a building or fence. These are simple to build: a flat base with a roof overhang and partial back and side walls, no entrance hole required.
Natural gourds and gourd-shaped houses
Purple Martins were nesting in hollowed-out gourds hung by Indigenous peoples long before Europeans arrived in North America. Dried and drilled bottle gourds are still considered among the best martin housing available because their round shape limits starling entry, their natural material regulates temperature well, and they can be lowered on a system for easy monitoring. Plastic 'super gourds' replicate the shape with added durability and UV resistance.
Multi-chamber and condo boxes
Purple Martins are colonial nesters and require multi-compartment housing. The classic aluminum or wood T-14 style martin house has 12 to 28 compartments arranged around a central pole. The Purple Martin Conservation Association recommends compartments of at least 6 by 6 inches, preferably 7 by 12 inches, painted white to reflect heat, on poles 12 to 18 feet high. The Purple Martin Conservation Association, Housing (standards & management) recommends white-painted gourds or multi-compartment houses with compartments at least 6×6 inches (7×12 inches preferred), mounted on poles 12–18 ft high with predator baffles and regular active management to exclude House Sparrows and Starlings Purple Martin Conservation Association — Housing (standards & management).
Observation or clear-sided houses
These have a transparent or removable side panel so you can watch nesting activity or install a camera. Useful for education, but they carry real risks covered separately below.
Specialty boxes
Owl boxes are deep (Barn Owls need a floor of roughly 10 by 18 inches and an interior depth of around 16 inches), with the entrance hole positioned high so owlets cannot fall out prematurely. Kestrel boxes resemble bluebird boxes but wider (about 8 by 8 inch floor) with a 3-inch entrance hole. Roost boxes have the entrance near the bottom and multiple interior horizontal perches so heat rising from roosting birds stays trapped inside.
Quick identification guide for each type
| Type | One-sentence ID rule |
|---|---|
| Standard nest box | Four wood walls, sloped roof, single round hole, cleanout panel on one side. |
| Open platform shelf | Three or fewer walls, open front, flat or shallow-pitched roof, no hole. |
| Natural gourd | Round or pear-shaped dried gourd with a drilled entrance hole and drainage scratch in the base. |
| Multi-chamber martin house | White, apartment-style structure with many same-sized openings on multiple sides, mounted on a tall pole. |
| Observation house | Standard box shape but one wall is clear acrylic or has a hinged wood flap exposing the interior. |
| Owl box | Large, deep wooden box with a wide entrance hole near the top, often mounted high on a tree or barn wall. |
| Kestrel box | Medium wooden box, roughly cube-shaped, with a 3-inch round hole, typically on a fence post or pole in open farmland. |
| Roost box | Box with entrance hole near the bottom edge and rows of thin internal perches; used in winter months. |
Observation and clear-sided houses: when they work and when they do not
The idea of watching eggs hatch through a clear panel is genuinely appealing, especially for kids. But there are two real risks you need to weigh before building one. See bird houses you can see into for a focused discussion of observation-box designs and safety guidelines. First, any transparent or thin-walled material allows sunlight to enter the box and can create a greenhouse effect, raising internal temperatures to lethal levels for eggs and nestlings. Cornell NestWatch explicitly cautions against transparent walls for this reason, and the Purple Martin Conservation Association echoes the warning for plastic and metal boxes. Second, even a hinged opaque panel that you open frequently can cause adult birds to abandon the nest, especially during the laying and early incubation stages.
If you want to observe nesting birds responsibly, a better approach is a small, properly housed nest camera. A camera with a low-lux lens can be mounted inside before the season starts and wired or transmitted to a monitor indoors. This eliminates both the light-transmission problem and the disturbance from opening the box. If you do use a hinged-panel observation box, face the opening away from direct sun, limit checks to no more than once every three to four days, keep each visit under 60 seconds, and stop opening it entirely once eggs are present. The NestWatch Code of Conduct provides clear ethical guidelines for this kind of monitoring.
Best materials, tools, and safe recycled choices
Wood: the reliable choice
For a long-lasting, thermally stable nest box, stick with untreated solid wood or exterior-grade plywood at least three-quarters of an inch thick. Cedar, cypress, and redwood are naturally rot-resistant and need no treatment. White pine and Douglas fir are fine if protected with a water-based exterior stain or linseed oil on the outside only. The thickness matters for insulation: thin walls heat up and cool down fast, which stresses developing embryos and chicks.
- Cedar: top pick for most North American builders; naturally rot-resistant, stable, and easy to work with hand tools.
- Cypress: excellent durability in wet climates, widely available in the southeastern US.
- Redwood: comparable to cedar; more expensive but very stable.
- Exterior-grade plywood (at least 3/4 inch): practical for larger boxes like martin houses or owl boxes; use a water-based exterior finish on outside surfaces only.
- White pine or Douglas fir: widely available and affordable; seal exterior surfaces with a non-toxic water-based stain or raw linseed oil.
What to avoid
Do not use pressure-treated lumber anywhere a bird or its eggs will contact the wood. Older CCA (chromated copper arsenate) treated wood contains arsenic; the US EPA and USFWS both caution against using it where chemical residues can contact animals. Even newer pressure-treatment chemistries are not proven safe for nest boxes. Avoid thin plastic, sheet metal, and materials with chemical coatings on interior surfaces. Never paint, varnish, or stain the inside of the box.
Recycled materials including license plates
Recycled materials can make charming and functional nest boxes if chosen carefully. Wooden pallet boards of the right thickness work well once you confirm they are untreated (look for the HT heat-treated stamp rather than MB or chemical stamps). License plates make excellent roof material for a wooden nest box: they are durable, shed water well, and add visual interest. The key caution is that license plates are metal and conduct heat, so they should only be used as the roof surface over a solid wood base, never as the walls. Make sure no sharp cut edges are exposed where a bird could be injured. The decorative appeal of license-plate builds is real, but the functional box underneath should still be made of 3/4-inch wood.
Tools you need
- Tape measure and pencil for marking cuts
- Saw (hand saw, circular saw, or jigsaw)
- Drill with a 3/8-inch bit for pilot holes and screws, plus a spade bit or hole saw in the target entrance-hole size
- Sandpaper (80 grit to remove splinters inside the box)
- Exterior wood screws (1.5 to 2 inch, galvanized or stainless)
- Hammer and galvanized nails as a secondary option
- Clamps to hold pieces during assembly
- Speed square for checking right angles
- Safety glasses and dust mask when cutting
Design decisions, step by step
Entrance hole: size and shape
The entrance hole is the single most important dimension. Too large and you invite House Sparrows, European Starlings, or predators. Too small and your target species cannot enter. Round holes drilled with a spade bit or hole saw are standard. Some martin housing uses a crescent-shaped entrance (3 by 1-1/8 inches) which reduces starling entry significantly. Center the hole at least 5 to 6 inches above the floor to prevent nestlings from falling out prematurely.
Ventilation and drainage
Drill four 1/4-inch holes in the upper corners of the side walls, or leave a 1/4-inch gap between the roof and the top of the side walls, for ventilation. Drill four 1/4-inch drainage holes in the floor corners, or cut the corners of the floor at a 45-degree angle. These two features together prevent a moisture buildup that can kill nestlings and breed parasites.
Roof and cleanout access
The roof should overhang the front by at least 2 inches to keep rain off the entrance hole. A simple way to build in cleanout access is to hinge one side wall so it swings out, held closed by a screw or nail turned 90 degrees. Some builders hinge the roof instead. Either works as long as you can fully clear out old nest material each season.
Perches: skip them
Perches below the entrance hole are not needed by cavity-nesting birds and actively benefit House Sparrows, which use them as a staging platform. Leave them off.
Interior texture and insulation
Rough up the inside face of the front wall below the entrance hole with a saw kerf (several shallow horizontal cuts) or coarse sandpaper. This gives fledglings a grip when they climb toward the exit. The 3/4-inch wood walls provide adequate insulation in most climates. In very cold regions, a double-walled construction with a small air gap gives extra thermal buffering.
Choosing dimensions based on species and habitat
Every species has evolved to fit a specific cavity size. A box that is too spacious allows heat loss and gives predators room to reach in; one that is too cramped stresses the adults and may not accommodate the nest. The table below gives the specifications I use when building for the most common North American cavity nesters, drawn from Cornell NestWatch data. If you are building for a species not listed here, the NestWatch Right Bird, Right House tool is the most reliable reference.
| Species | Floor size (inches) | Interior depth (inches) | Entrance hole diameter (inches) | Hole height above floor (inches) | Mounting height (feet) | Habitat / placement |
|---|---|---|---|---|---|---|
| Eastern Bluebird | 4 x 4 to 5 x 5 | 8–12 | 1.5 (1 9/16 for Western) | 5–6 | 3–6 | Open field or lawn edge, on a pole with baffle |
| Tree Swallow | 5 x 5 | 8–10 | 1.5 | 5–6 | 4–8 | Near water or open field, pole-mounted |
| Black-capped Chickadee | 4 x 4 | 8–10 | 1.125 | 6–8 | 4–8 | Woodland edge, tree or post |
| Carolina Wren | 4 x 4 | 6–8 | 1.5 | 4–6 | 5–10 | Brush or shrubby habitat |
| House Wren | 4 x 4 | 6–8 | 1.0–1.25 | 4–6 | 4–8 | Garden edge, orchard |
| Downy Woodpecker | 4 x 4 | 10–12 | 1.25 | 6–8 | 5–15 | Open woodland, snag nearby |
| Wood Duck | 10 x 18 | 16–24 | 3 x 4 (oval) | — | 4–8 over water | Over or near water, tilted slightly forward |
| American Kestrel | 8 x 8 | 12–15 | 3.0 | 9–11 | 10–30 | Open farmland or field edge, pole or fence post |
| Purple Martin (per compartment) | 6 x 6 min, 7 x 12 preferred | 6 | 2.125 round or 3 x 1.125 crescent | 1–1.5 | 12–18 | Open area >40 ft from trees, colony housing on pole |
| Barn Owl | 10 x 18 | 16 | 6 (oval or round) | — | 12–18 | Barn interior or on tree in open farmland |
Beginner DIY plan: a basic all-purpose nest box
This single-board plan uses a standard 1x6 cedar board (which actually measures 3/4 inch by 5.5 inches) and produces a nest box suitable for bluebirds, tree swallows, or chickadees depending on the hole size you drill. You need one 6-foot board, a handful of screws, and about an hour.
Cut list from one 6-foot 1x6 cedar board
| Piece | Dimension (inches) | Notes |
|---|---|---|
| Front | 5.5 x 10 | Drill entrance hole 5.5 in from bottom edge |
| Back | 5.5 x 14 | Extra length for mounting; drill two screw holes top and bottom |
| Floor | 4 x 4 | Rip to 4 in width; cut corners at 45 degrees for drainage |
| Roof | 5.5 x 8 | Overhang at front; bevel top edge of side walls at ~15 degrees to match |
| Side (fixed) | 4 x 10.5 | Width 4 in after ripping |
| Side (hinged cleanout) | 4 x 10.5 | Same dimensions; attach with two screws acting as pivot pins |
Assembly sequence
- Rip the floor and both side pieces to 4 inches wide on a table saw or with a circular saw guided by a straightedge.
- Bevel the top edge of both side pieces at about 15 degrees so the roof sits flush.
- Drill the entrance hole in the front piece: 1.5 inches for bluebirds/swallows, 1.125 inches for chickadees. Center it horizontally, 5.5 inches up from the bottom edge.
- Roughen the inside of the front piece below the hole with four or five horizontal saw kerfs or coarse sandpaper.
- Attach the fixed side wall to the back piece with two 1.5-inch exterior screws, checking for square.
- Screw the floor to the bottom of the back-and-side assembly, leaving a 1/4-inch gap at the front for drainage.
- Attach the front piece, pre-drilling pilot holes to prevent splitting.
- Fit the hinged side: drive two screws through the top and bottom of this side piece into the front and back panels so they act as pivot pins. The panel should swing out when you loosen a small screw or turn a nail at the mid-point.
- Screw the roof on, ensuring at least 2 inches of overhang over the front.
- Drill four 1/4-inch ventilation holes in the upper corners of the side walls.
- Sand all exterior edges smooth; do not sand or finish the interior.
- Apply a coat of water-based exterior stain or raw linseed oil to exterior surfaces only. Allow to dry fully before mounting.
Alternative DIY projects: license plates and other recycled materials
License-plate birdhouses have real appeal: they are cheap, durable, and unique. The functional approach is to build a standard 3/4-inch wood box and use the license plate as the roof only, bending it over the peak and fastening it with small roofing screws. This keeps the thermal benefits of wood walls while using the plate for weather shedding where metal is actually fine. Avoid using license plates as walls. The metal conducts heat rapidly and the thin gauge provides essentially no insulation.
Other recycled wood sources, like pallet boards or salvaged fence boards, are perfectly fine if they are genuinely untreated. Check the pallet stamp: HT means heat-treated and is safe; MB means methyl bromide fumigated and should be avoided; any chemical marking is a disqualifier. Avoid wood with heavy paint layers, creosote, or an oily surface. When in doubt, use new cedar.
Decorative birdhouses sold at garden centres and craft fairs are often built for aesthetics first. Thin walls, non-functional or undersized holes, metal roofs over thin plywood, and interior varnish are all common problems. If you want to use a decorative house, check that the walls are at least 3/4 inch thick, the hole is the correct diameter, there is no interior finish, and there is a cleanout option. Many can be modified with a drill and a rasp.
Mounting and placement
Where you put the box matters as much as how you build it. A perfectly made bluebird box nailed to a tree in the shade of dense woods will never be used by bluebirds. Every species has a preferred habitat and a preferred mounting style. Here are the core rules.
- Pole-mount whenever possible: a smooth metal pole or PVC pipe is far easier to baffle against predators than a tree trunk.
- Face the entrance hole away from prevailing wind and afternoon sun. In most of North America, facing it between north and east gives the best results.
- For bluebirds and swallows, place the box in open areas with short grass or low vegetation within 100 feet of the box for foraging.
- Space multiple boxes of the same species at least 100 yards apart (bluebirds and swallows are territorial); place boxes for different species closer together if habitat supports it.
- Keep boxes for open-country species (bluebirds, kestrels) away from dense shrubs, brush piles, and bird feeders, which attract competitors and predators.
- Tilt the box very slightly forward (5 degrees) so rain does not blow in the entrance.
- For Wood Ducks, mount the box over water or within a few feet of the waterline and add a 3-inch layer of wood shavings inside; ducklings need a rough interior surface to climb out.
Predator-proofing your nest box
Cornell NestWatch data show that nest boxes with predator guards have measurably higher nesting success, roughly 6.7 percentage points higher on average. A few simple additions make a big difference.
Baffles
A cone baffle or stovepipe baffle mounted on the pole below the box is the single most effective predator deterrent. A stovepipe baffle is an 8-inch-diameter, 24-inch-long metal pipe section slipped over the pole so it wobbles when a raccoon or snake tries to climb past it. A cone baffle is a sheet-metal cone at least 24 inches in diameter, flared downward. Either stops most raccoons and rat snakes if the box is mounted on a pole at least 5 feet from any tree, fence, or structure a predator could jump from.
Entrance hole extenders and metal plates
A metal plate (aluminum or steel) drilled to the correct hole diameter and screwed over the wooden entrance hole prevents raccoons from enlarging the hole with their claws. A 1.5-inch metal plate on a bluebird box stops a raccoon that would otherwise gnaw the hole to 2 inches overnight. An entrance hole extender, a short wooden or metal tunnel glued or screwed around the hole, makes it harder for a raccoon to reach through and hook eggs or nestlings.
Other precautions
- Anti-climb collars made from smooth sheet metal around tree trunks help when tree-mounting is unavoidable.
- Keep grass and vegetation cut short within 10 feet of the pole base to reduce snake habitat.
- Remove nest boxes or seal entrance holes after the breeding season ends to prevent mice from building winter nests that attract snakes in spring.
- Do not apply grease or petroleum products to poles; these degrade and can contaminate birds' feathers.
Sanitation, monitoring, and seasonal timing
When to put boxes up and take them down
In most of the eastern United States, put boxes up by late February or early March before Eastern Bluebirds begin scouting. Tree Swallows arrive a few weeks later. In the northern states and Canada, mid-March is usually fine. Take down or seal boxes in October or November unless you are providing winter roost boxes. If you leave nest boxes up year-round, clean them in late autumn so they are ready for spring without harbouring parasites.
How to clean a nest box safely
Only clean a box when you are certain it is inactive. For active boxes, wait until after fledglings have left. Wear gloves and a dust mask when removing old nest material, as dried nests can harbor mites, fungi, and bacteria. Remove all old nesting material completely. Scrub the interior with a stiff brush and a solution of one part bleach to nine parts water. Rinse thoroughly, let the box dry fully in the open air, and replace it before the next potential nesting attempt. Do not leave damp wood sealed up.
Monitoring without causing harm
NestWatch recommends checking your nest box no more than once every three to four days, keeping each visit under 60 seconds. Check in the morning when adults are most likely away foraging. If an adult is inside, close the box quietly and return later. During the incubation period, minimize handling of eggs. Never remove an active nest, eggs, or dependent young from a nest box without a permit: in the United States this is prohibited under the Migratory Bird Treaty Act (16 U.S.C. §703), and equivalent protections apply under the UK's Wildlife and Countryside Act 1981 and Canada's Migratory Birds Convention Act.
Humane and conservation-minded guidance
Providing nest boxes is a genuinely positive conservation action for native cavity-nesting birds, whose populations have declined partly because of a loss of old-growth trees with natural cavities. But a badly managed box trail can do more harm than good if it primarily benefits invasive species.
European Starlings and House Sparrows are non-native birds in North America. They are not protected under the MBTA and aggressively outcompete native species for nest cavities. Both species will readily use nest boxes. The most effective strategy is correct hole sizing (a 1.5-inch hole excludes starlings entirely; a 1.125-inch hole excludes House Sparrows from chickadee boxes) combined with weekly monitoring during the breeding season and prompt removal of House Sparrow nests when they appear in boxes intended for native species. NestWatch provides detailed guidance on managing sparrow competition for bluebird trails specifically.
If you find a nest with injured or orphaned birds, do not attempt home care. Contact a licensed wildlife rehabilitator. If a nest has been disturbed and young birds are on the ground, you can place them back in the box; the parents will not reject them because of your scent. If a brood fails completely and you are certain the box is empty, you can remove the failed nest and clean the box. When in doubt, leave it alone and consult your regional bird society or extension service.
Troubleshooting common problems
| Problem | Likely cause | Quick fix |
|---|---|---|
| Box never occupied | Wrong habitat, wrong species, or wrong hole size | Confirm species present in your habitat; check NestWatch specs; try relocating box to more open area |
| Wasps or bees build in box | Box was available in early spring before birds arrived | Remove nest in winter; rub interior ceiling lightly with bar soap in early spring (bees dislike it) |
| Ants invade the nest | Box not isolated from vegetation | Apply a ring of Tanglefoot or similar sticky barrier to the pole below the baffle; keep grass cut |
| Blow flies or nest mites | Normal in many nests; heavy infestation stresses chicks | Clean between broods if the box is empty; replace nesting substrate with dry grass clippings if needed |
| Predator damage to entrance hole | Raccoon enlarging hole | Add a metal hole guard plate immediately; check baffle is positioned correctly |
| House Sparrows take over | Hole too large or box in wrong habitat | Reduce hole diameter; move box to more open area away from buildings; monitor weekly and remove HOSP nests |
| Water inside box | Inadequate roof overhang or drainage | Add a larger roof overhang; clear drainage holes; check box tilt |
| Adults abandon nest mid-incubation | Over-monitoring, predator disturbance, or weather event | Reduce check frequency; confirm baffle is working; wait a few days before concluding abandonment |
Minecraft and virtual building: real dimensions in blocks
Minecraft is a surprisingly useful tool for planning a nest box build before you cut any wood. One Minecraft block equals roughly one cubic foot in the game's standard scale, which means a basic bluebird box translates to about 1 block wide, 1 block deep, and 1 to 2 blocks tall in a simplified form. That is too small to be fully accurate, but you can use a 2:1 scale where each real-world inch equals half a Minecraft block to get more meaningful proportions.
For a basic bluebird box at 2:1 scale: a 4 x 4 inch floor becomes a 2 x 2 block base, a 10-inch interior depth becomes 5 blocks tall, and the 1.5-inch entrance hole becomes a single half-block opening at about 3 blocks up from the floor. The educational value here is real: students and beginners who build a nest box virtually first tend to make fewer assembly errors because they have visualized the sequence of pieces. A Minecraft nest box model also makes it easy to experiment with cleanout panel placement and roof pitch before committing to wood. For a step-by-step bird house Minecraft tutorial that walks through block-by-block construction and scale conversions, see the linked guide.
Shopping checklist and measurement templates
Print this section or save it to your phone before heading to the hardware store.
Materials
- 1x6 cedar, cypress, or redwood board (6 feet for one basic box, 12 feet for two)
- Exterior-grade wood screws: 1.5-inch (box 20) and 2-inch (box 10), galvanized or stainless
- Two small galvanized screws or nails to act as pivot pins for the cleanout panel
- Water-based exterior wood stain or raw linseed oil (small can)
- Sandpaper: one sheet 80-grit, one sheet 120-grit
- Optional: aluminum or steel entrance-hole guard plate in the correct diameter
- Optional: metal stovepipe or cone baffle for the mounting pole
Tools
- Tape measure
- Pencil and marking square
- Hand saw or circular saw
- Drill and bits: 3/8-inch general bit, spade bit or hole saw in the target entrance-hole diameter (common sizes: 1.0, 1.125, 1.25, 1.5, 2.125, 3.0 inch)
- Clamps (two is enough for a basic box)
- Safety glasses and dust mask
Key measurements to confirm before you cut
| Measurement | Target species example | Value to confirm |
|---|---|---|
| Entrance hole diameter | Eastern Bluebird | 1.5 inches (38 mm) |
| Entrance hole diameter | Chickadee | 1.125 inches (29 mm) |
| Entrance hole diameter | House Wren | 1.0–1.25 inches (25–32 mm) |
| Entrance hole diameter | American Kestrel | 3.0 inches (76 mm) |
| Floor size | Bluebird / swallow | 4 x 4 to 5 x 5 inches |
| Interior depth | Most small species | 8–10 inches |
| Hole height above floor | All enclosed boxes | 5–6 inches minimum |
| Roof overhang at front | All boxes | At least 2 inches |
| Wall thickness | All boxes | 3/4 inch minimum |
| Mounting height (bluebird) | Eastern Bluebird | 3–6 feet on a pole with baffle |
FAQ
What is a "bird house" called (all relevant name variants and regional terms)?
Common terms: birdhouse, bird house, bird box, nest box, nesting box, nest shelter. Regional notes: 'bird box' or 'nest box' is more common in the UK; 'birdhouse' or 'bird house' is common in North America. Organizations (Cornell, RSPB, NestWatch) use 'nest box' and 'bird box' interchangeably with 'birdhouse'.
What types of artificial bird housing are commonly built or sold?
Main types: 1) Standard nest box (opaque, single compartment) for cavity‑nesters. 2) Multi‑compartment/birdhouse (for species like Purple Martins). 3) Gourds or fabricated gourds (Purple Martins, Wrens depending on region). 4) Observation/clear‑sided boxes (clear front or sides for viewing). 5) Platform or open nests for species that use open platforms (less common). 6) Specialized boxes (owl boxes, kestrel boxes) sized and placed for larger raptors.
Are observation or clear‑sided bird houses recommended?
No, they are generally discouraged. Clear or thin walls alter thermal regulation (risk overheating), allow light that can stress nestlings, and provide less insulation and protection from predators. Use remote cameras placed outside the box with minimal disturbance instead, following ethical monitoring guidelines.
What materials are recommended — and which should be avoided?
Recommended: untreated, unpainted, unvarnished solid wood such as cedar, cypress, redwood, or exterior‑grade 3/4" plywood. Use stainless or galvanized hardware and exterior wood glue/fillers designed for outdoor use. Avoid: pressure‑treated wood (especially old CCA‑treated lumber), thin plastics, transparent materials, very thin metal, or containers that cause greenhouse heating. Recycled materials: can be used if opaque, non‑toxic, and provide proper insulation; avoid suspect or chemically treated scraps (e.g., old pressure‑treated boards, painted metals with unknown coatings).
What basic tools and supplies will I need for a DIY nest box project?
Basic tools: tape measure, square, pencil, saw (hand or circular), drill with spade/Forstner bits for entrance holes, screwdriver, hammer or nail gun, clamps. Supplies: recommended wood, exterior screws or galvanized nails, waterproof exterior glue, stainless/galvanized hinge or side‑open fastener for cleaning, predator‑proofing hardware (metal entrance plate), mounting pole hardware, exterior paint (only outside, light color), sandpaper, and weatherproof sealant applied only to exterior surfaces.
What are the step‑by‑step design choices builders should make?
1) Choose target species (right bird, right house). 2) Select species‑appropriate internal floor dimensions and entrance size/shape. 3) Use 3/4" thick wood or thicker for insulation. 4) Provide drainage holes and ventilation slots. 5) Create a clean‑open method (hinged side or roof). 6) Add predator‑proofing (metal plate around hole, overhang, baffles). 7) Choose mounting (pole, post, tree — avoid direct tree mounting for long term). 8) Finish exterior only with light‑colored, water‑resistant paint or stain; keep interior bare. 9) Install at recommended height & orientation for species. 10) Plan for seasonal cleaning and monitoring following legal/ethical guidance.
Next Articles
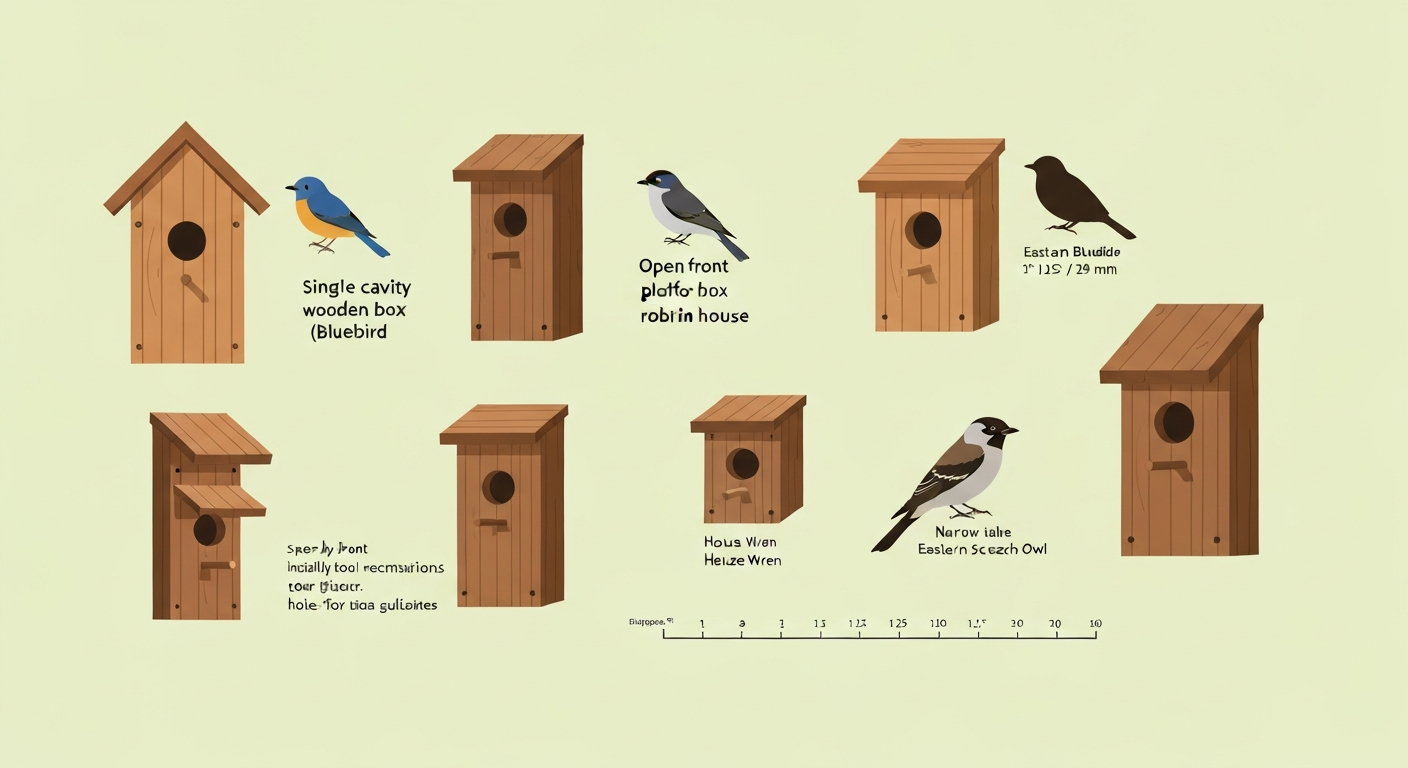
Bird House Definition: DIY Guide, Sizes, Placement & Care
Learn what a bird house is, how it differs from feeders, species‑specific dimensions, DIY plans, placement, and care.
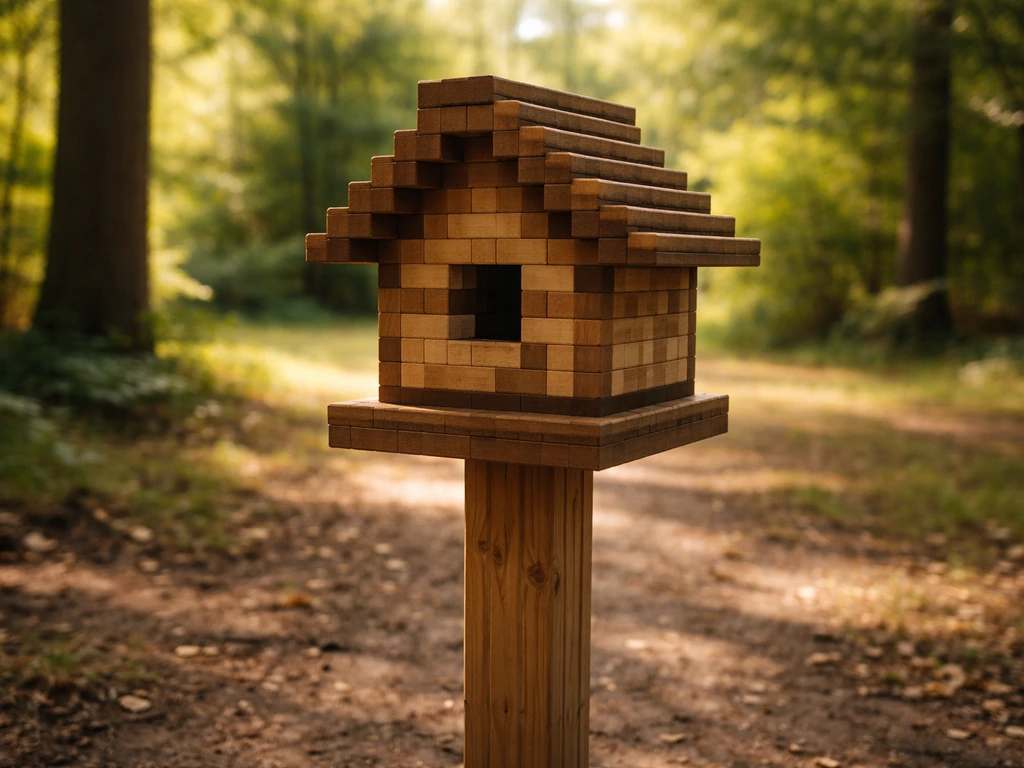
Bird House Minecraft Tutorial: Build, Place, and Finish
Step by step Minecraft bird house build: materials, safe placement, predator friendly design, roof and entrance sizing,
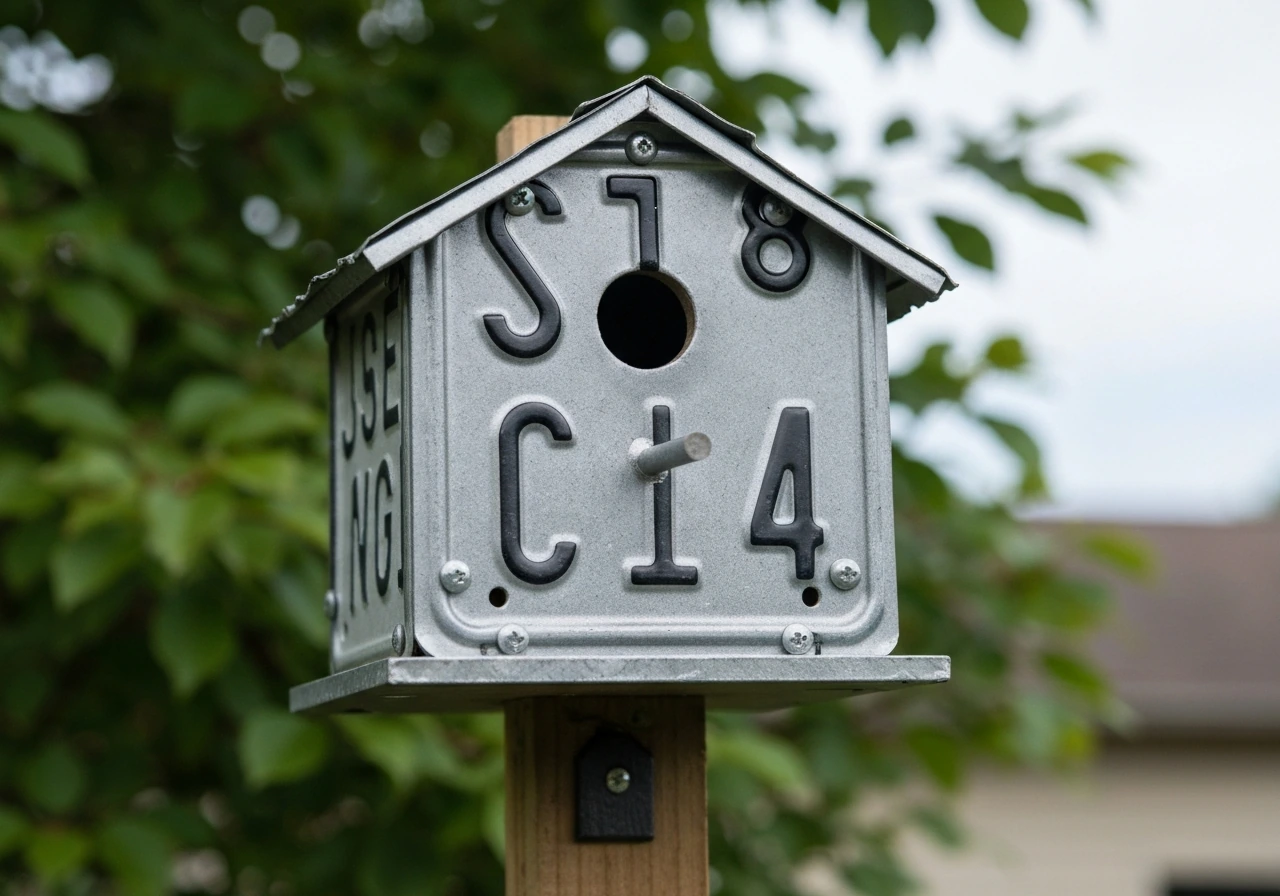
Bird Houses Made Out of License Plates: DIY Guide
Step-by-step DIY bird houses from license plates: safe prep, cutting, sealing, nesting design, mounting, and maintenance