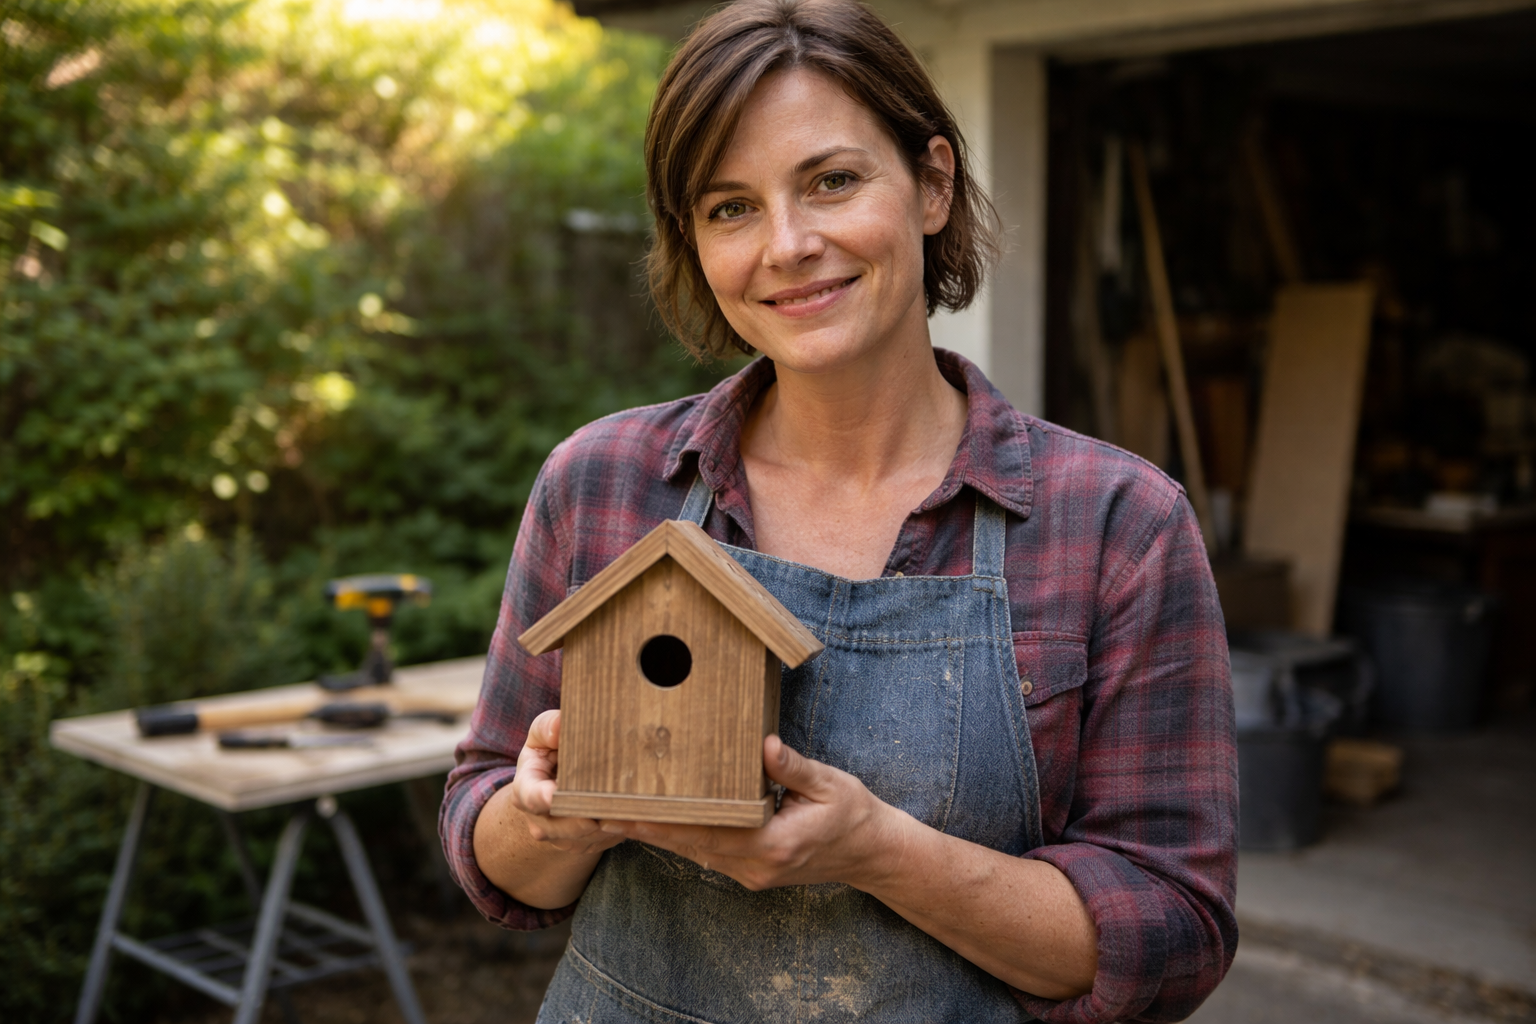
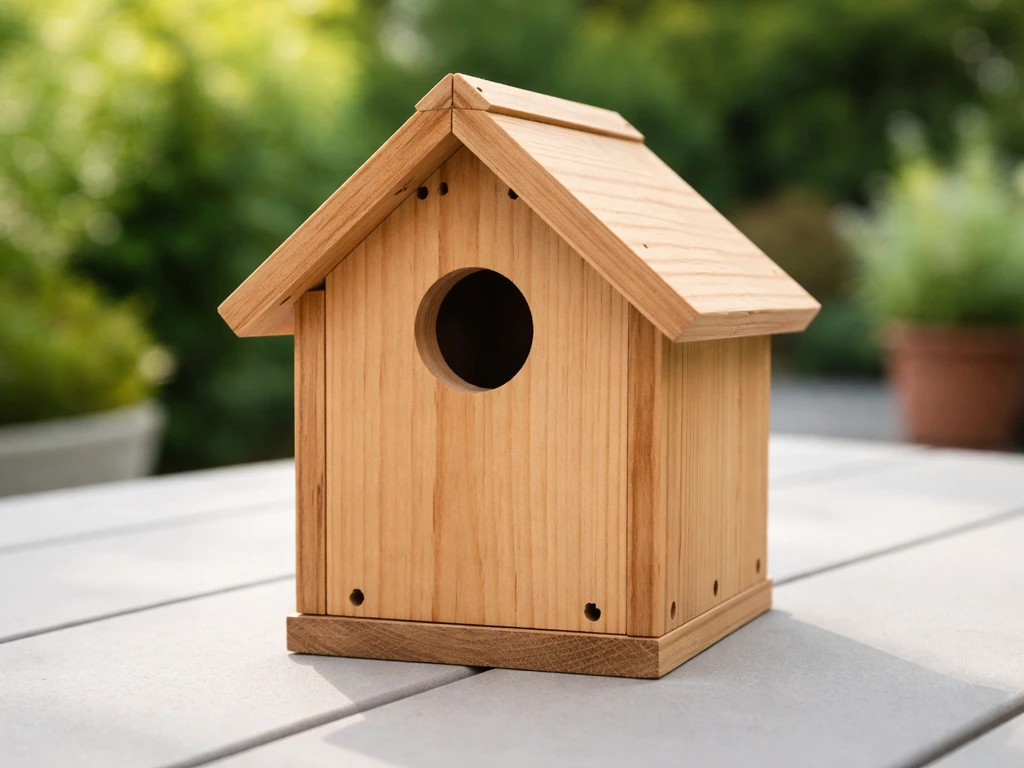
A high quality bird house is one that fits the target bird's exact specifications, keeps them safe from predators, stays dry and cool inside, and can be cleaned between seasons without destroying it. That means precise entrance hole diameters, correct interior dimensions, untreated wood, drainage holes in the floor, ventilation gaps near the roof, and a hinged or removable panel so you can actually get inside to scrub it out. Pretty paint and a decorative cupola don't make a house good. The specs do.
High Quality Bird Houses: How to Choose, Build, and Maintain
Maya Thompson
8 Jun 2026
What 'high quality' actually means for a bird house
Forget the ornamental stuff for a moment. A truly well-made bird house hits several non-negotiable benchmarks that have nothing to do with how it looks on the shelf. These are the things that determine whether a bird moves in and successfully raises young, or whether the box stays empty and becomes a trap.
- Correct entrance hole size for the target species (within 1/16 inch matters)
- Interior floor dimensions that match what the species needs for a nest cup
- Entrance hole positioned at the right height above the interior floor
- At least four drainage holes (3/8 to 1/2 inch diameter) in the floor so water doesn't pool
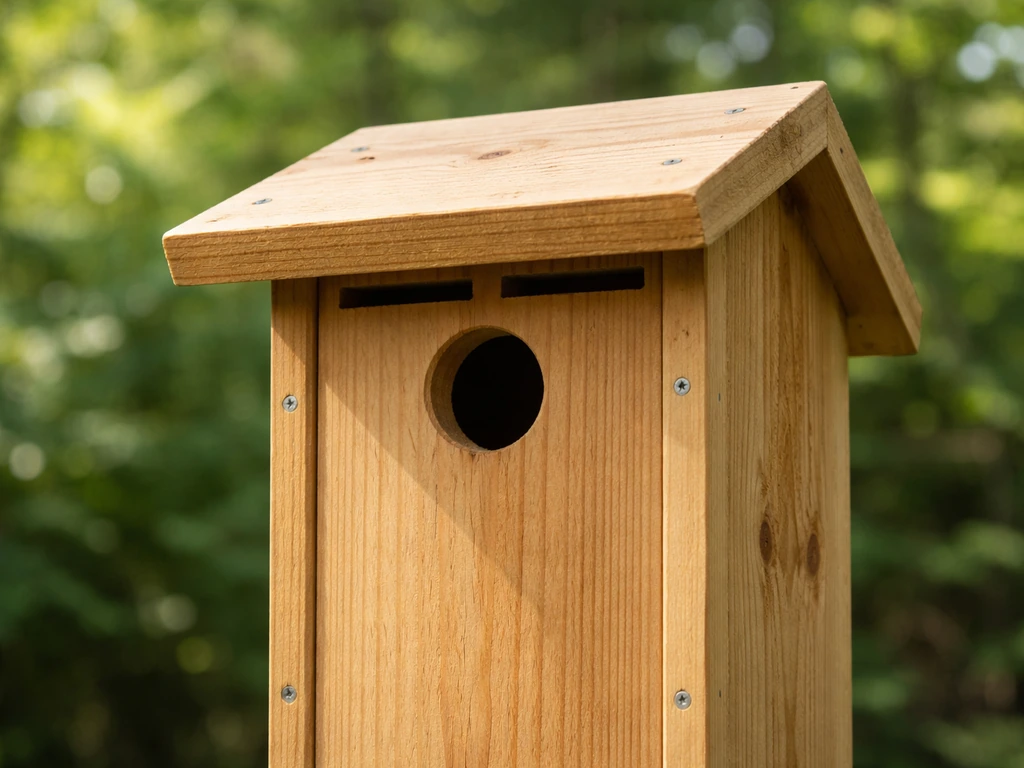
- Ventilation gaps or small holes near the top of the side walls to prevent overheating
- A sloped roof with a 1 to 2 inch overhang to shed rain away from the entrance
- Thick walls (at least 3/4 inch) for thermal insulation
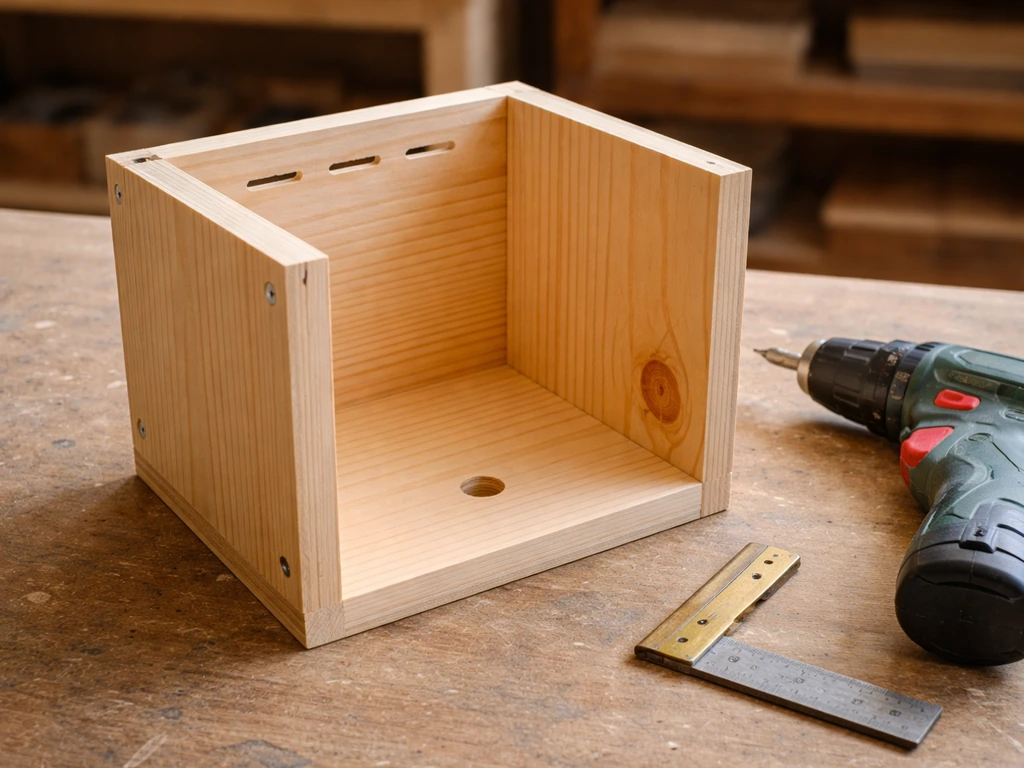
- One hinged or removable panel for monitoring and cleaning
- Rough or grooved interior wall below the entrance hole so fledglings can climb out
- No toxic materials, perches, or interior finish on the inside surfaces
A hinged side panel is not optional. NestWatch is emphatic on this point: a box you cannot open is a box you cannot clean, and a box you cannot clean will accumulate old nesting material, parasites, and bacteria that harm the next brood. If you're buying a kit or evaluating a pre-built house, open it up and look inside before you commit. If it doesn't open, pass on it.
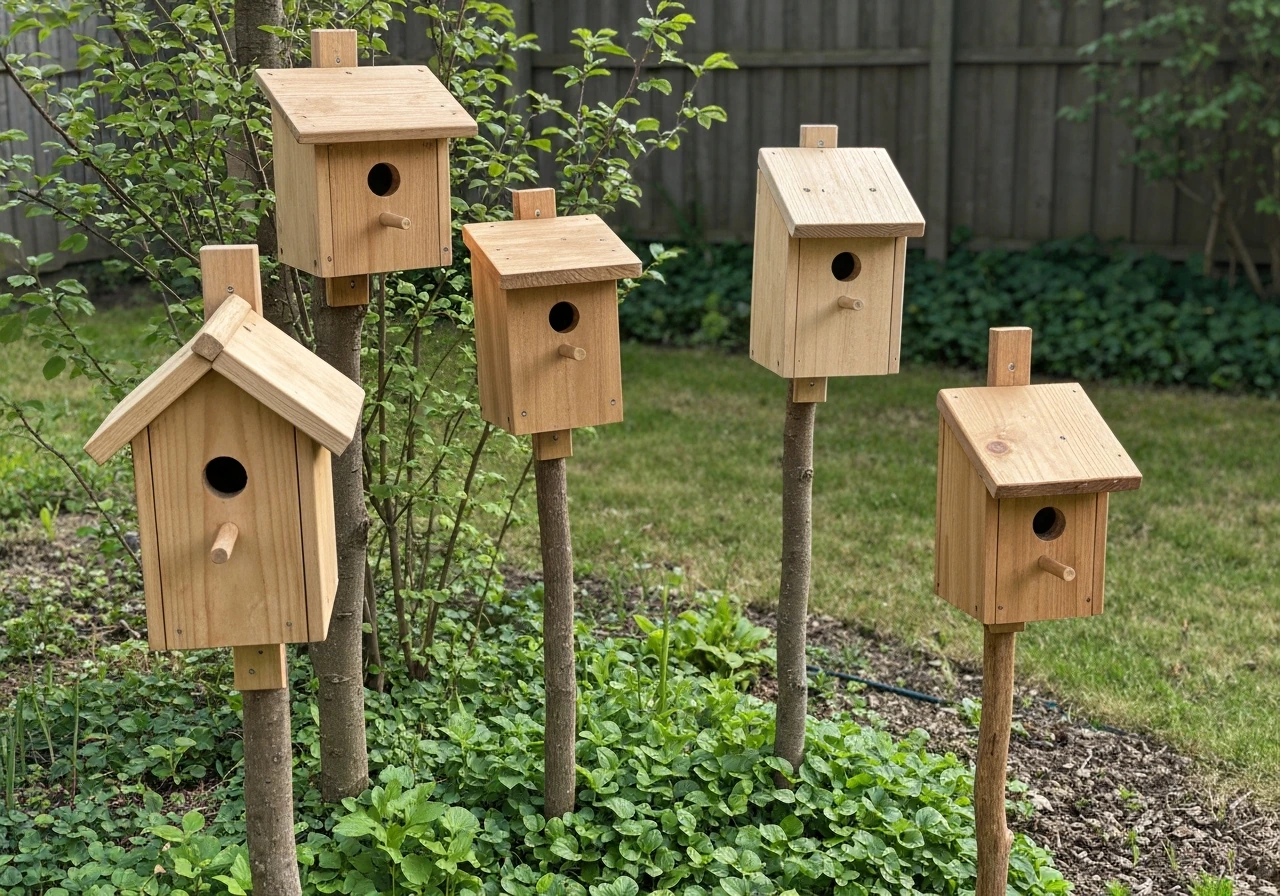
Choosing the right house for your target bird
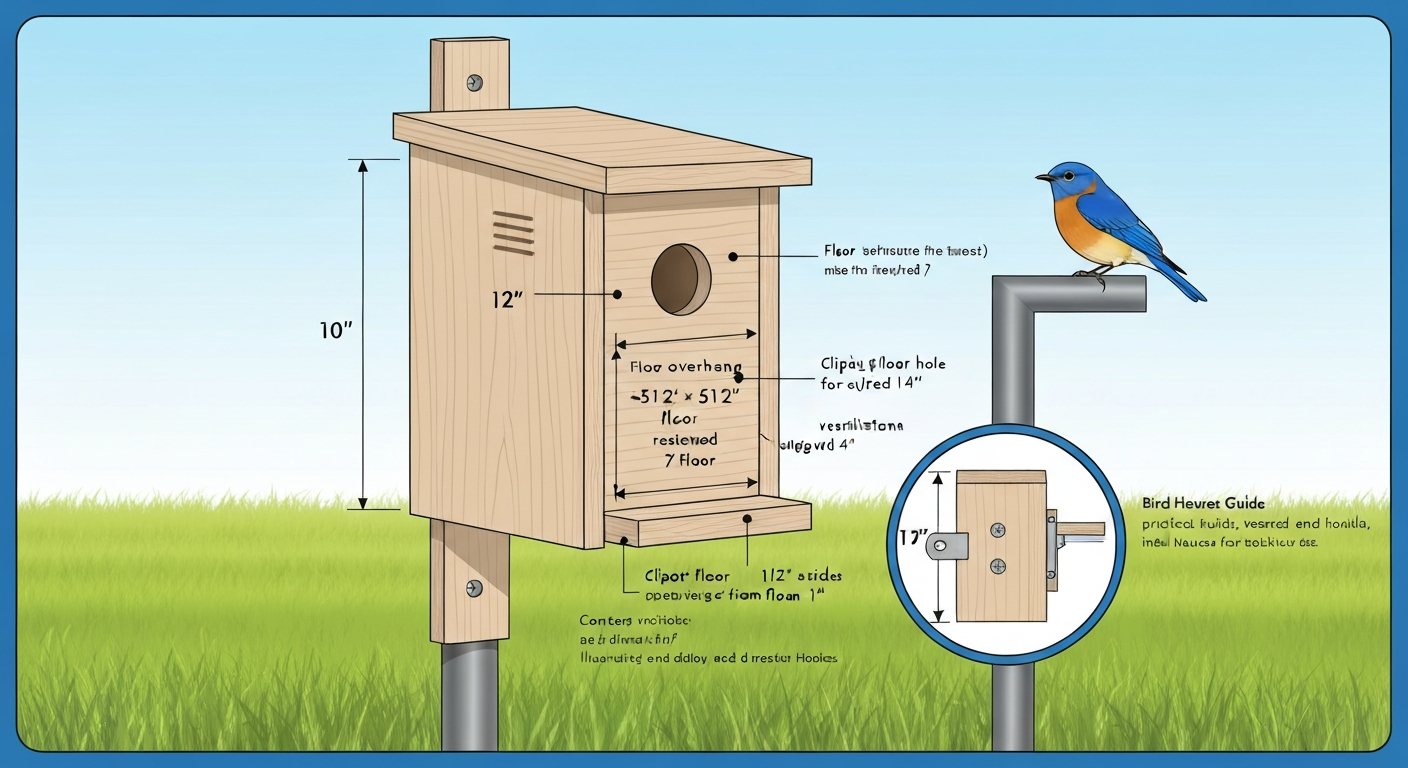
Different cavity-nesting birds have genuinely different needs. A house built for a Carolina Wren will not work for an Eastern Bluebird, and a house sized for a Wood Duck would be a disaster for either of them. Once you have the right dimensions for wrens, the best wren bird houses are the ones that also fit those maintenance, ventilation, and predator-protection basics. Get the dimensions right first, then worry about everything else. For example, the UNL Extension birdhouse dimensions list Eastern Bluebird entrance diameter as 1 1/2 inches, floor dimensions as 5×5, and height above ground as 4, 10 feet blank" rel="noopener noreferrer">Eastern Bluebird entrance diameter of 1 1/2 inches, floor dimensions of 5×5, and height above ground of 4–10 feet.
Species-specific dimensions at a glance

| Species | Entrance Hole Diameter | Floor Size | Entrance Height Above Floor | Mounting Height |
|---|---|---|---|---|
| Eastern Bluebird | 1 1/2 inches | 5 x 5 inches | 8 inches | 4 to 10 feet |
| Carolina/House Wren | 1 1/8 inches | 4 x 4 inches | 6 to 8 inches | 5 to 10 feet |
| Black-capped Chickadee | 1 1/8 inches | 4 x 4 inches | 6 to 8 inches | 4 to 15 feet |
| Tree Swallow | 1 1/2 inches | 5 x 5 inches | 6 inches | 4 to 15 feet |
| Downy Woodpecker | 1 1/4 inches | 4 x 4 inches | 9 to 12 inches | 5 to 15 feet |
| American Kestrel | 3 inches | 9 x 9 inches | 9 to 12 inches | 10 to 30 feet |
The Eastern Bluebird entrance hole is the most commonly misunderstood. USGS bluebird plans call for the hole to be as close as possible to 1 1/2 inches in diameter. That half-inch difference from a wren-sized hole is not casual: it lets bluebirds in while making it meaningfully harder for House Sparrows and European Starlings to take over the box. Starlings need at least 1 9/16 inches to enter comfortably, so holding the line at 1 1/2 inches is one of the easiest conservation wins you can build into a box.
Ventilation and interior geometry
The entrance height above the floor is just as important as the hole size. For bluebirds, that dimension should be 8 inches, meaning the floor-to-hole measurement inside the box needs to be 8 inches. This gives the nest cup enough depth that fledglings are protected and predators reaching in through the hole can't easily grab them. For wrens, 6 to 8 inches above the floor is the target range. Interior depth is one of the specs that cheap mass-produced houses most often get wrong, so always measure before you mount.
Best materials and construction details
Wood is the right material for bird houses, full stop. It breathes, insulates, and can be worked easily. The question is which wood and how it's finished.
Wood to use and wood to avoid
Cedar, redwood, and pine are the three most practical choices for backyard bird houses. Cedar and redwood are naturally rot-resistant and hold up for many seasons without any surface treatment. Pine is less durable but widely available, inexpensive, and perfectly acceptable if you apply an exterior-grade, water-based paint or stain to the outside. Whatever you choose, use boards that are at least 3/4 inch thick. Thinner stock warps, gaps open at seams, and provides poor thermal insulation.
Pressure-treated lumber is the big one to avoid. The EPA’s overview of wood preservative chemicals explains how these pesticide products are regulated and how they are used in pressure-treated wood, which provides the context for avoiding unnecessary chemical preservatives in wildlife nesting areas. USDA and NRCS guidance is explicit: do not use pressure-treated wood in wildlife nesting structures. Older formulations used chromated copper arsenate (CCA), which contains arsenic, and even newer treatments introduce chemicals you don't want in an enclosed space where birds are raising chicks. If you're repurposing old wood from a deck or fence, check what it was treated with before using it.
Finishes and weatherproofing
Paint the outside only. Light colors or natural earth tones work best because they reflect heat in summer. Dark finishes can push interior temperatures dangerously high on a sunny afternoon. Leave the interior walls completely unfinished, including the interior ceiling and floor. Birds don't need it, and some finishes off-gas or become slippery. If you want to add texture to the wall below the entrance hole so fledglings can climb out, score it with a chisel or drill shallow horizontal grooves.
For roof weatherproofing, a sloped roof with a 1 to 2 inch overhang on all sides is the simplest and most effective approach. You can add a thin strip of rubber weatherstripping or exterior caulk along the seam where the roof panel meets the side walls, but make sure any sealant is fully cured and non-toxic before birds move in. The overhang keeps rain from driving into the entrance and running down the front wall.
Drainage and ventilation as structural requirements
Drill at least four drainage holes in the floor, each 3/8 to 1/2 inch in diameter, positioned near the corners. This is the spec from NestWatch and it's practical: rain will get into almost any box eventually, and standing water kills eggs and chicks fast. For ventilation, leave a small gap between the top of the side walls and the roof, or drill two to four small holes (about 1/4 inch) near the top of each side wall just under the roofline. FWS guidance covers both of these details as non-optional features. A box without proper airflow can overheat to lethal temperatures on a warm day even in partial shade.
Placement and installation for real results
You can build a perfect box and put it in the wrong place and get nothing. Placement is where a lot of well-intentioned setups fail. The main variables are height, direction the entrance faces, habitat type, and distance from competing structures.
Height and orientation
For bluebirds, mount the box 4 to 10 feet off the ground on a freestanding metal pole, with the entrance hole facing east toward open habitat. NestWatch's Eastern Bluebird species page is specific on this: east-facing helps the birds warm up early in the morning and keeps the box cooler during the hottest part of the afternoon. For wrens and chickadees, a slightly higher mount of 5 to 10 feet on a tree or post works well. Tree swallows prefer open areas near water and tolerate a wide range of heights from 4 to 15 feet.
Habitat-specific tips
- Open fields and meadows: ideal for bluebirds and Tree Swallows; mount on isolated poles at least 100 yards from woods edges
- Woodland edges: good for chickadees, nuthatches, and wrens; mount on trees or posts near but not deep inside the tree line
- Backyards with mixed shrubs: suitable for wrens and chickadees; keep the entrance facing away from prevailing wind and main foot traffic
- Near water (ponds, streams): Tree Swallows actively favor these areas; bluebirds and swallows compete, so space boxes for competing species at least 100 yards apart
- Open farmland: excellent bluebird habitat; consider a bluebird trail of paired boxes spaced 100 to 150 yards apart along fence lines
Keep bird houses well away from feeders. Feeders attract traffic and noise that stress nesting birds and can draw predators. A minimum separation of 30 to 50 feet from any active feeder is a reasonable baseline. Also avoid placing boxes directly in full sun all day if your region has hot summers. A little afternoon shade goes a long way toward keeping interior temperatures safe.
Predator protection: the step most people skip
Installing a box without predator protection is like leaving your front door open at night. Raccoons, rat snakes, cats, and House Sparrows are the most common threats to cavity-nesting birds in North American backyards. Each one needs a different approach, and you need to address them before the birds move in, not after.
Baffles for climbing predators
If you're mounting on a metal pole, a stovepipe-style cylindrical metal baffle is the most effective climbing guard available. The Michigan Bluebird Society recommends this style specifically: a smooth metal cylinder about 8 inches in diameter and 24 inches long, mounted on the pole below the box, prevents raccoons and snakes from getting a grip. Mount it so the bottom of the baffle is at least 4 feet off the ground, since raccoons can reach higher than most people expect.
For boxes mounted on wooden posts or trees, add a cone-shaped metal baffle below the box. The Virginia Bluebird Society recommends both a snake baffle and a raccoon guard for boxes on public land, and that's a smart standard for any monitored box.
Entrance hole guards and spacing
A wooden or metal entrance hole guard (also called a portal guard or hole extender) adds 3/4 to 1 inch of depth to the entrance tunnel, making it much harder for a raccoon's paw to reach inside and grab eggs or chicks. These are inexpensive and easy to add to any existing box. For competing species like House Sparrows, the correct hole size is your first line of defense, but active monitoring is also required. Check your box every few days during nesting season. If you find a House Sparrow nest (a messy, loosely constructed nest of coarse grass with feathers, often with trash mixed in), remove it promptly.
Cats are a serious predator that many backyard birders underestimate. NestWatch notes that cats can jump to nest boxes and predators of this kind are one reason baffles matter even at seemingly safe heights. If outdoor cats are present in your area, mount boxes higher and always use a baffle. A box at 5 feet on an unguarded wooden post is extremely vulnerable to a determined cat.
Cleaning, maintenance, and keeping boxes healthy season to season
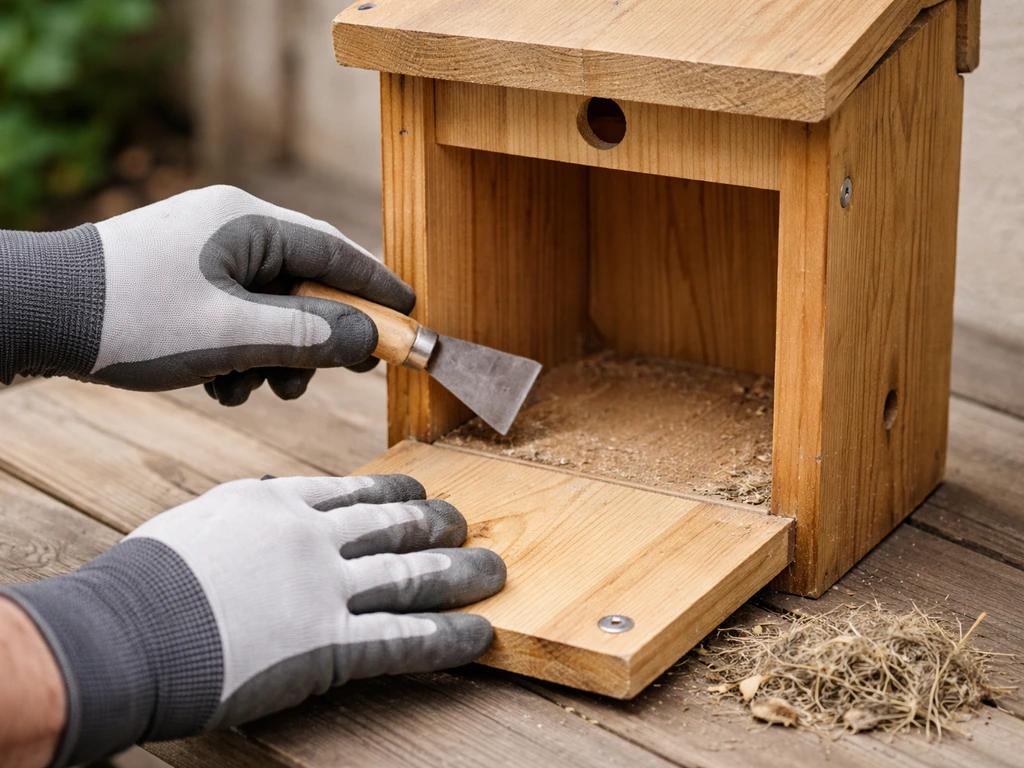
End-of-season cleaning is not optional. Old nesting material harbors blow fly larvae, mites, and bacteria that can kill the next brood before it even hatches. The good news is that cleaning a well-designed box takes about five minutes.
How to clean after each brood
- Wait until you're certain the brood has fledged and the adults have stopped returning to the box (usually 3 to 5 days after the last chick leaves)
- Open the hinged panel and remove all nesting material by hand or with a stiff brush; bag it and dispose of it away from the box area
- Scrub the interior walls, floor, and ceiling with a stiff brush and mild dish soap in warm water
- If there is significant fecal matter or parasites visible, rinse the interior with a solution of 1 part bleach to 9 or 10 parts water (both NestWatch and several Audubon chapters recommend this ratio)
- Let the box air dry completely with the panel open before closing it up; at least a few hours in open air is ideal
- Check for damage: loose screws, cracked walls, gaps at seams, and clogged drainage holes; fix anything that needs attention before the next season
Timing and seasonal rhythm
Clean the box after each completed brood if multiple broods use it in a season, and do a thorough clean again in fall after the last birds have fledged. Flathead Audubon Society recommends fall cleaning as the standard timing for most areas. In late winter (February to early March for most of the US), do a quick inspection to make sure the box is structurally sound and the drainage holes are clear before the first scouts arrive. You don't need to add nesting material: birds bring their own, and pre-added material can actually deter some species or harbor pests from the previous season.
Monitoring during the season
Active monitoring during nesting season makes a real difference in outcomes. Checking the box every 3 to 5 days lets you catch problems early: competing species taking over, parasites building up, or eggs that haven't hatched after the expected incubation period. Keep a simple log (date, contents, estimated stage) and you'll quickly develop a feel for what's normal in your yard. NestWatch has a free citizen science monitoring program if you want to contribute your data and get structured guidance in return.
Common mistakes when building or buying a bird house
Most of these mistakes are easy to fix once you know what to look for. The trouble is that decorative bird houses are sold everywhere with no indication of whether they meet any of these standards, and even well-meaning DIY builds fall into some of these traps. To help you choose the best bird houses UK buyers recommend, focus on construction that matches your target species and keeps the box easy to clean.
| Mistake | Why it matters | Quick fix |
|---|---|---|
| Wrong entrance hole size | Lets in competitors or excludes the target species entirely | Drill to exact spec; use a Forstner bit for clean holes |
| No drainage in the floor | Water pools and kills eggs or chicks | Drill four 3/8 to 1/2 inch holes near floor corners |
| No ventilation gaps | Box overheats in summer sun; can be lethal | Add 1/4 inch holes under roofline or leave a gap between roof and side walls |
| Box can't be opened | Can't clean between broods; parasites accumulate | Only buy or build boxes with a hinged or removable panel |
| Mounting too close to feeders | Traffic and noise stress nesting birds; attracts predators | Move the box at least 30 to 50 feet from any active feeder |
| No predator baffle | Raccoons, snakes, and cats raid the nest | Add a stovepipe or cone-style metal baffle below the box |
| Using pressure-treated wood | Toxic chemicals in an enclosed nesting space | Use untreated cedar, redwood, or pine only |
| Painting the interior | Some finishes off-gas; smooth surfaces trap fledglings | Leave all interior surfaces bare and unfinished |
| Adding a perch below the entrance | Gives predators and competitors a foothold | Remove any perch; birds don't need them and they create risk |
| Skipping the entrance height measurement | Wrong interior depth; fledglings exposed to predator reach-in | Measure floor-to-hole distance and match the spec for your species |
| Mounting on a wooden post without a baffle | Snakes and raccoons climb wood easily | Switch to a smooth metal pole with a cylindrical baffle, or add a cone baffle to the post |
Your next steps depending on where you're starting
If you're building from scratch, start by picking your target species and pulling up the dimension spec for that bird. The USGS, NestWatch, and TPWD all have free, species-specific plans online. Choose untreated cedar or pine, cut to spec, drill your entrance hole with a Forstner bit for a clean edge, add drainage and ventilation, and put in a hinged side panel. That's the whole framework.
If you're buying a pre-built house or a kit, open the panel, measure the entrance hole diameter and the floor-to-hole distance, check for drainage holes, and make sure the interior is unfinished. If you're looking for the easiest way to compare options, you can also review what buyers call the best selling bird houses before you choose your kit or pre-built model.
Using the best bird house kits can make those checks easier, but you still need to confirm the specs before you mount the box If you're buying a pre-built house or a kit, open the panel, measure the entrance hole diameter and the floor-to-hole distance, check for drainage holes, and make sure the interior is unfinished. . Those four checks will tell you whether the box is worth putting up.
If you want to make money from your bird houses, focus on how to sell bird houses by targeting the right buyers and presenting the specs clearly whether the box is worth putting up. If you want a shortcut, look at the best selling bird houses that match these same specs for entrance size, ventilation, and easy cleaning.
If you already have a house in your yard that hasn't attracted birds, check the hole size, baffle situation, and proximity to feeders first. Those three things account for the majority of empty boxes.
The difference between a decorative box and a high quality bird house is almost entirely in the construction details covered here. Get those right and the birds will find you. If you're also exploring other formats, there are well-designed options among hanging bird houses, wren-specific houses, and bird house kits, all of which follow the same core principles around hole size, drainage, and cleanability. The specs don't change just because the style does. If you're looking for a quick shortlist, checking the best bird houses UK options can help you narrow down the right size, materials, and access for cleaning.
FAQ
How can I tell if a bird house is the right size without trusting the label on the box or kit?
Measure the entrance hole diameter and the floor-to-hole distance inside the box yourself, then compare to the target species spec. Also check interior depth and that the side walls are thick enough (at least 3/4 inch) so the box is not dramatically oversized or under-insulated, even if the hole size looks correct.
Is it okay to stain or varnish the interior if I keep it natural-looking?
Avoid finishing the interior (walls, ceiling, floor). Even “natural” stains and varnishes can create slippery surfaces and may off-gas in an enclosed space during the nesting season. If you want durability, finish only the outside, leave the inside bare wood, and ensure any exterior sealant is fully cured.
Can I add extra drainage holes beyond four if my design seems like it would collect water?
Yes, but place them low and near corners where water is likely to pool, and keep them large enough (about 3/8 to 1/2 inch). Do not widen openings near the entrance tunnel or ventilation holes in a way that creates drafts or predator access, and always re-check that the floor still feels sturdy after drilling.
What should I do if my drainage holes get clogged with debris or nest material?
During nesting season, do only light inspections every 3 to 5 days, and do not aggressively scrape out nest interiors. After a brood completes, clean the box fully and clear the floor holes so water can escape. If the design lets twigs settle over the holes, consider adding a slightly sloped floor toward the drained areas when building the next box.
Do I really need a baffle if the box is high up?
Height helps, but it is not a substitute for predator control. Raccoons and snakes can climb farther than expected, and cats can jump higher than many people assume. Use a stovepipe-style cylindrical baffle on metal poles, or a cone-shaped guard on wood posts, and keep the guard’s bottom high enough (about 4 feet or more) to reduce reach.
Can birds use a box if I provide no landing perch or landing space?
Many cavity nesters will enter directly through the entrance without a perch, but if your design reduces access too much you may reduce use. Instead of adding a big external perch, focus on the entrance tunnel depth and guards, and ensure the entrance area is clear and dry, since mud and standing water discourage entry.
What’s the safest way to monitor a nest box without abandoning eggs or causing failures?
Open the hinged panel briefly, disturb as little as possible, and close it promptly. Avoid removing eggs unless a qualified guide or local wildlife authority directs it. Keep your visits to the every 3 to 5 day cadence during active nesting, and use a simple log to track stage so you can identify delays early.
How should I clean the box between seasons if I want to avoid spreading parasites?
Remove all old nesting material during fall cleaning or after the last brood, then scrub the interior and let it dry completely before re-mounting. Do not add new nesting material, since birds prefer to bring their own and pre-added material can carry pests. If you see heavy mite or fly activity, focus on thorough removal rather than only wiping.
What if I see House Sparrows or another competitor nesting in my box?
Remove the competitor nest promptly, because the species often occupies and rebuilds quickly. Then keep checking every few days during the nesting window so you can remove subsequent attempts. The best prevention remains correct entrance size and active monitoring, since a box can be “technically predator-safe” but still become a competitor takeover site.
Where should I place the box if I have both feeders and nesting birds nearby?
Place the box at least 30 to 50 feet from active feeders as a baseline, and avoid mounting directly in full sun all day in hot regions. If you cannot increase distance, prioritize shaded placement (morning sun with afternoon shade for many areas) and use predator guards so increased traffic does not bring extra risk close to the entrance.
Next Articles
Best Outdoor Bird Houses: Choose, Install, and Maintain
Choose, install, and maintain durable outdoor bird houses with species-safe sizes, placement, predator protection, and c
Blue Bird House Instructions: DIY Plans, Sizes & Mounting
DIY bluebird house: step-by-step build, exact cuts and hole sizes, mounting, predator guards, cleaning, and care.
Wine Cork Bird House Instructions: DIY Steps and Bird-Safe Specs
Step-by-step wine cork mini birdhouse build with bird-safe dimensions, safe materials, mounting, cleaning, and weatherpr