The best outdoor bird house for your backyard is the one sized correctly for the cavity-nesting species already living in your area, built from untreated wood, mounted on a pole with a predator baffle, and cleaned out between every brood. If you want the top results, start with a hanging design, since the right height and predator protection make even the best bird house more successful best hanging bird houses. Get those four things right and birds will use it. Get them wrong and you'll host starlings, squirrels, or an empty box.
Best Outdoor Bird Houses: Choose, Install, and Maintain
Maya Thompson
5 Jun 2026
How to choose the right bird house for your local birds
Start by figuring out which cavity nesters actually live near you before you buy or build anything. The most commonly housed species in North American backyards are Eastern Bluebirds, Black-capped or Carolina Chickadees, House Wrens, Bewick's Wrens, White-breasted Nuthatches, and Tree Swallows. For help choosing sizes and specs for each cavity-nesting type, see our guide to the best wren bird houses. Each one has a specific entrance hole size it prefers, and that hole size is your single most important design decision because it controls which bird gets in and which competitors (mainly European Starlings) get locked out.
A quick way to narrow your list: bluebirds need open meadows or farmland edges with low grass, chickadees and nuthatches prefer woodland edges and mature trees, wrens do well in brushy yards and dense shrub borders, and Tree Swallows want open areas near water. Walk your yard, look at the habitat, and match the box to what's already there. Putting a bluebird box in a dense, wooded suburban yard will likely result in a chickadee or wren moving in instead, which is still a win but worth knowing in advance.
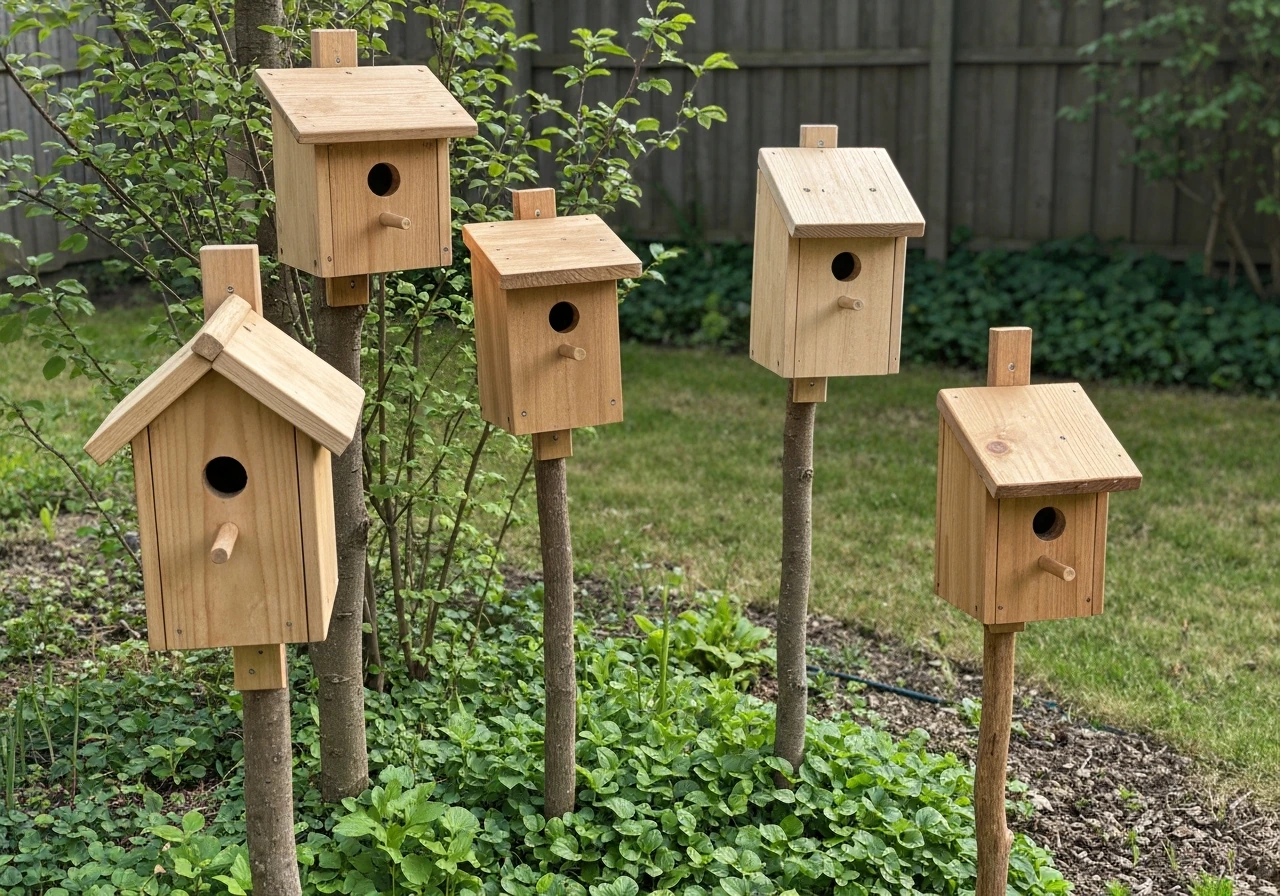
If you want to attract multiple species, build or place separate boxes designed for each one rather than buying a decorative multi-compartment house. The large multi-apartment styles are mainly attractive to House Sparrows and European Starlings, neither of which is a native species you want to encourage. Focused, single-cavity boxes designed to species specifications are what serious birders and conservation organizations consistently recommend.
Best materials and design features that last outdoors
Untreated, natural wood is the gold standard for outdoor bird houses. Choosing materials and dimensions that match the right species is what makes a high quality bird house. Cedar, pine, and cypress all weather well, hold screws reliably, and provide natural insulation without off-gassing chemicals that could harm eggs or chicks. Avoid pressure-treated lumber entirely; the preservatives are toxic in an enclosed, warm box. Plywood can work in a pinch but tends to delaminate over a few seasons outdoors, so solid boards are worth the small extra cost.
On the outside, you can apply a coat of exterior-grade latex paint in a light or neutral color to improve weather resistance and longevity. Light colors matter because dark finishes absorb heat and can raise the interior temperature to dangerous levels on sunny days. Never paint or stain the inside of the box or the entrance hole. The interior surface needs to stay rough and unpainted so chicks can grip it when climbing toward the opening, and paint fumes inside a sealed cavity are genuinely harmful to developing birds.
Beyond the material itself, look for these construction details in any box you build or buy:
- Roof overhang of at least 1 to 2 inches beyond the entrance hole to block rain and shade the opening
- Drainage holes or notched corners on the floor so water cannot pool inside
- Ventilation gaps or drilled holes near the top of the side walls (or small gaps between the roof and the top of the side panels) to release heat buildup
- A hinged or removable side or front panel that opens cleanly for monitoring and cleaning
- No perch below the entrance hole: perches help predators and competitors more than target species, which are strong enough to enter without one
- Smooth or lightly recessed exterior around the entrance so nothing gives a raccoon an easy grip
Avoid houses with entry holes through the roof, decorative ceramic or resin shells that retain heat, and any design where you cannot open the box for inspection. If you cannot clean it, it will eventually harm the birds using it.
Proper dimensions, entrance hole size, and ventilation for species fit
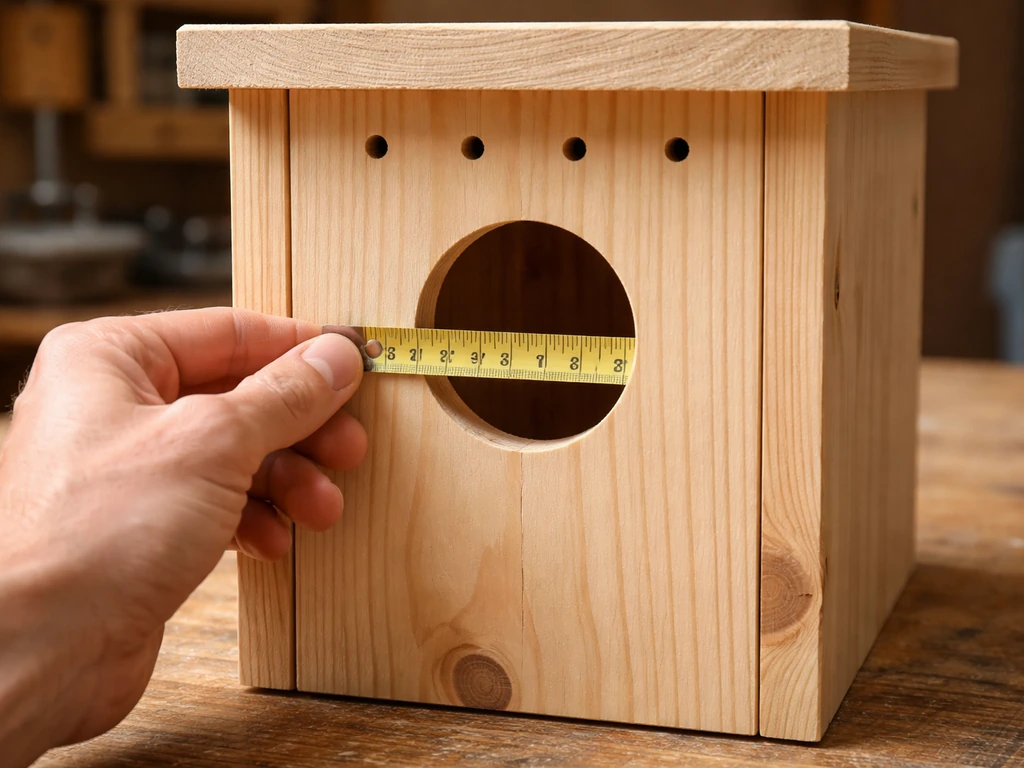
Entrance hole diameter is the most precise measurement in nest box building. A hole even a quarter inch too large can let in starlings or House Sparrows; a hole a quarter inch too small will be rejected by the intended species. The table below covers the most common backyard cavity nesters. Use a sharp drill bit and a hole saw or spade bit, then test with a physical gauge before mounting.
| Species | Floor Size (in) | Box Depth (in) | Entrance Hole Diameter (in) | Entrance Height Above Floor (in) | Mounting Height (ft) |
|---|---|---|---|---|---|
| Eastern Bluebird | 4 × 4 to 5 × 5 | 8–12 | 1½ | 6–10 | 4–6 |
| Black-capped Chickadee | 4 × 4 | 8–10 | 1⅛ | 7 | 4–8 |
| Carolina Chickadee | 4 × 4 | 6–8 | 1⅛ | 6–8 | 4–8 |
| House Wren | 4 × 4 | 6–8 | 1 to 1¼ | 4–6 | 4–10 |
| Bewick's Wren | 4 × 4 | 4–6 | 1¼ | 6–10 | 4–10 |
| White-breasted Nuthatch | 4 × 4 | 6–8 | 1¼ | 6–8 | 12–20 |
| Tree Swallow | 5 × 5 | 6–8 | 1½ | 6 | 4–8 |
The entrance height above the floor (the distance from the floor of the box to the bottom of the hole) matters because it forces the bird to reach down into the cavity for nesting material, which discourages predators from easily scooping out eggs or chicks with a paw. A range of 6 to 8 inches above the floor is a solid default for most species.
Starlings are blocked by any entrance hole smaller than 1½ inches. That means bluebird and Tree Swallow boxes sit right at the threshold, so accuracy matters. If you are in an area with heavy starling pressure, consider the NABS-recommended oval entrance (1⅜ × 2¼ inches) or a 1¼-inch slot for bluebirds, which starlings cannot navigate even though bluebirds can.
For ventilation, blank" rel="noopener noreferrer">drill two or three ¼-inch holes near the top of each side wall, or leave a small gap (roughly ¼ inch) between the roof panel and the tops of the side walls when you assemble the box. Either method allows hot air to escape on summer afternoons without creating a rain gap at the entrance. The roof overhang covers these vent openings from direct rain. On the floor, drill four ¼-inch drainage holes in the corners or cut the corners of the floor board at a slight angle. Both approaches prevent standing water after heavy rain.
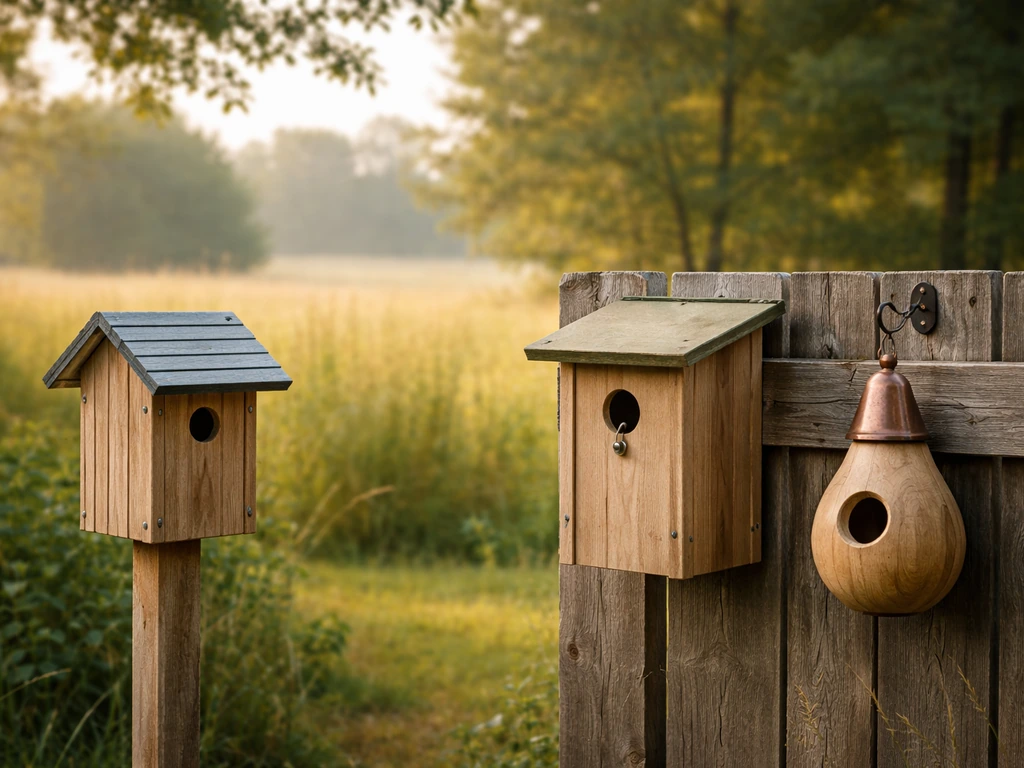
Placement rules: height, orientation, shade, wind, and habitat type
Where you mount the box is almost as important as how you build it. Most species have preferences, and ignoring them means an unused box or, worse, a species mismatch. Here are the core placement rules that apply across the board:
- Mount on a freestanding pole rather than a tree or fence post wherever possible. Trees give predators a natural climbing route and make baffle installation much harder.
- Face the entrance hole between north and east in most regions. This keeps the morning sun warming the box while avoiding harsh afternoon heat from the west and south.
- For bluebirds and Tree Swallows, aim for 4 to 6 feet above the ground in an open area with a clear flight path to the entrance.
- For nuthatches, mount 12 to 20 feet up near the edge of a mature woodland, since these birds search for cavities at canopy height.
- Space bluebird boxes at least 100 yards (about 300 feet) apart to reduce territorial fighting between pairs. If you want to attract both bluebirds and Tree Swallows, pair two boxes about 15 to 25 feet apart, which satisfies both species' spacing needs while preventing direct competition.
- Keep the box at least 50 feet from dense brush and bird feeders to reduce House Sparrow pressure on the entrance.
- Put the box up by late winter or very early spring (February to March in most of the US) so it is in place and weathered slightly before birds scout for nest sites. A brand-new shiny box sometimes gets ignored for the first season.
In hot climates like the Deep South or Southwest, orient the entrance toward the north or northeast and make sure the roof overhang provides meaningful shade. In cooler northern regions, a slight south-facing tilt can extend the usable nesting season by keeping the interior warmer in early spring. These are not rigid rules but practical adjustments based on local conditions.
Predator-proofing, safety, and humane considerations
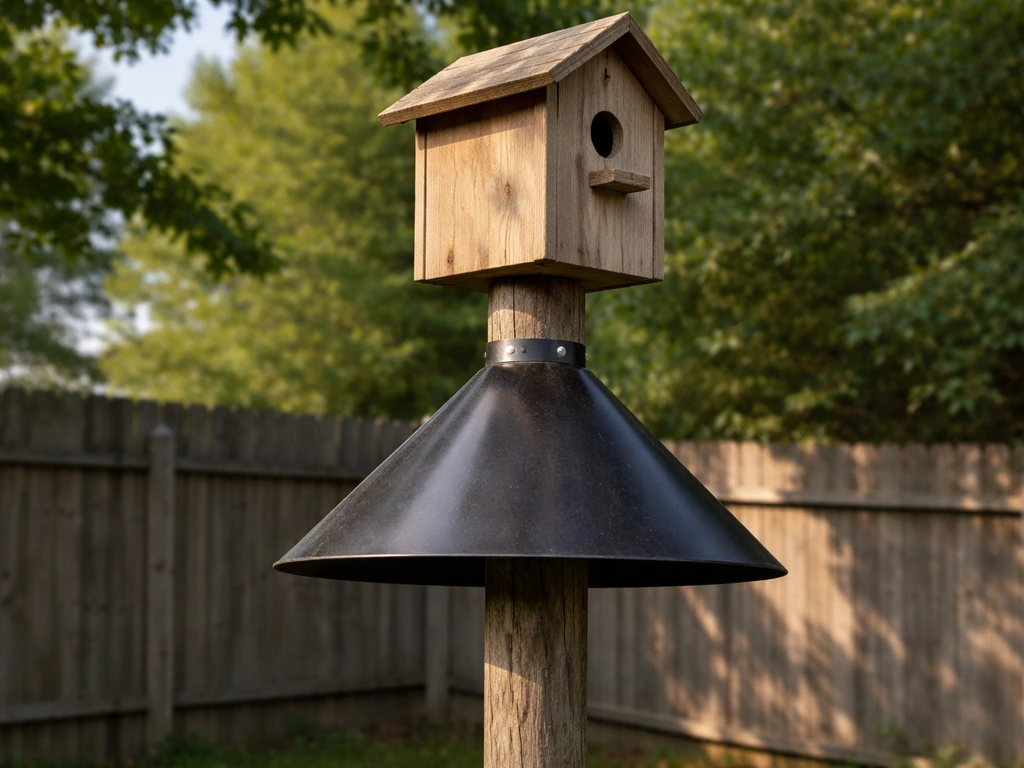
A well-placed box on a pole without a predator baffle is basically an unguarded meal delivery for raccoons, cats, and rat snakes. The predator guard is non-negotiable if you want actual nesting success rather than just occasional visits. The stovepipe baffle is the most effective and easiest type to build: it is a cylinder of aluminum flashing or sheet metal (roughly 8 inches in diameter and 18 inches long) mounted on the pole below the box. The smooth, rounded surface gives mammals nothing to grip, and the length prevents them from reaching over it. Cap the top of the cylinder with a metal disc so nothing can climb inside it.
If you must mount on a tree or wooden fence post (sometimes unavoidable in small yards), be aware that a baffle is much harder to attach effectively to a rough surface. A metal cone or wrap-around hardware cloth structure can help, but pole mounting is genuinely safer. Never put a box on a tree in snake country without acknowledging the risk; rat snakes are excellent climbers and even a pole-mounted box can be at risk if overhanging branches provide access.
A metal entrance hole guard (sometimes called a portal plate or hole protector) is a simple addition that prevents squirrels and woodpeckers from enlarging the entrance hole. These are small metal or hardwood rings that fit flush over the drilled opening and add virtually no cost to a DIY build. Use a piece of ¼-inch hardware cloth or aluminum sheet cut to size with the same-diameter hole drilled through it, then fasten it directly to the front panel.
A few more safety points worth building into your setup:
- Never mount a box where a cat can leap directly to the entrance from a nearby fence, wall, or branch. A clear open zone of at least 8 to 10 feet around the box is ideal.
- Avoid using staple guns or nails on the interior walls; sharp protrusions can injure chicks.
- Do not add a perch rod below the entrance. It benefits starlings and House Sparrows far more than bluebirds, wrens, or chickadees.
- If House Sparrows are persistent, consider a sparrow-resistant entrance design (like the NABS oval slot) rather than trapping, which requires knowing local regulations.
- Check that there are no ant trails leading up the pole. Ants can invade the box and kill chicks. A wrap of tanglefoot or a petroleum jelly ring low on the pole interrupts the trail without harming birds.
Installation, maintenance, and cleaning schedule
Installing the box correctly from the start saves a lot of remedial work later. Drive a smooth metal conduit pole (EMT conduit works well and is inexpensive) at least 18 to 24 inches into the ground for stability. Use a level to check vertical alignment before the pole is fully set. Attach the box with galvanized screws through a mounting board or a pre-drilled bracket, and make sure the box does not rock or tilt once in place. A wobbling box makes birds nervous and can dislodge eggs.
Once the box is up, monitor it regularly through the nesting season. A quick check every one to two weeks during breeding (roughly April through August for most species) lets you catch problems early: usurpation by unwanted species, nest damage, wasp nests building up inside, or signs of predator activity. Keep checks brief (under a minute), do them in the morning when adults are away foraging, and never open the box within two weeks of fledging to avoid causing premature fledging.
Cleaning is where most backyard birders fall short, but it is one of the highest-impact things you can do for nesting success. Once your boxes are producing healthy nesting activity, you can also turn that success into a plan for how to sell bird houses to other backyard birders. Old nest material harbors mites, blowfly larvae, and fungal spores that can harm the next brood. Here is the schedule to follow:
- Between broods (same season): Remove the old nest completely 7 to 10 days after fledglings leave the box. Many species will immediately begin a second nesting attempt, so a clean box encourages re-use.
- End-of-season deep clean: After the last brood of the year has fledged (usually September in most regions), remove all nesting material, scrub the interior with a stiff brush, and spray down with a 10% bleach solution or straight white vinegar. Let it air-dry completely before closing.
- Safe cleaning window: September through February is the low-risk period for more thorough cleaning, since most cavity nesters have completed their breeding cycles. Do not disturb occupied boxes during active nesting.
- Annual inspection: Before the new nesting season begins each February or March, check and tighten all screws, check the entrance hole for enlargement, inspect the roof seams for gaps, and re-check that the predator baffle is still firmly in place and undamaged.
When you clean, wear disposable gloves, remove the nest in a sealed bag, and wash your hands afterward. This is not overkill: old nests can carry histoplasma fungus and other pathogens. The birds themselves are not harmed by your scent inside the box, despite the old myth that human smell drives birds away.
If you get serious about monitoring multiple boxes, consider keeping a simple log: date checked, species, number of eggs or chicks, any issues noted. This takes about two minutes per box per visit and gives you genuinely useful data over several seasons. You will quickly learn which boxes produce two broods a year, which sites have predator pressure, and whether your hole sizes are attracting the right species or the wrong ones. That feedback loop is what turns a well-intentioned box into a reliably productive one.
For those interested in going further, building your own boxes rather than buying them gives you full control over materials, dimensions, and design features. Kits are a good middle ground if you want a hands-on project with pre-cut parts. And if you are birding from the UK, local species like Blue Tits and Great Tits have their own distinct hole-size requirements that differ from North American standards, so region-specific guidance matters there too. If you want the best bird houses UK has to offer, use these placement and sizing rules to match the cavity nesters in your area birding from the UK.
FAQ
How soon after installing a new outdoor bird house should I expect birds to move in?
In many backyards, you may see activity within a few weeks during the local nesting window, but some boxes sit empty for a full season if timing is off or the site is new. Keep the box up year-round, check it briefly every 1 to 2 weeks once nesting begins, and avoid moving it mid-season because birds often cue in to one location and can abandon attempts after disturbance.
Is it better to use a hinged roof or fully removable front for cleaning and inspections?
A hinged roof or a front panel that comes off cleanly is usually easier and safer for routine checks, especially when you do not want to completely disassemble the box. If you add a removable panel, make sure it closes firmly with minimal gaps and has no sharp edges, because loose panels can rattle and nestlings can injure themselves on rough hardware.
What should I do if the birds keep abandoning the box or the nest fails repeatedly?
First, verify species fit, especially entrance size accuracy and the entrance height off the floor, since small mismatches can lead to repeated rejection or usurpation. Then reassess placement, wind exposure, and predator access, and look for signs of wasps or ants. If you have done everything right and still see repeated failures, try moving the box a short distance (for example 20 to 50 feet) only between broods, not during active nesting.
Can I put bird houses closer than recommended to each other?
For most cavity nesters, spacing matters because territories overlap and competition increases. Instead of clustering multiple boxes of the same species near each other, space them far enough that entrances are not competing for the same microhabitat, and separate species boxes are more forgiving than repeating the same species pattern. When in doubt, start with fewer boxes in better habitat and add more later after you confirm which species actually use them.
Do I need to remove all nest material every time, or can I leave some of it?
Remove the old nest between every brood, but do not leave partial material that can harbor mites and disease. For safety, remove it as a whole and bag it immediately, then clean the box thoroughly before the next nesting attempt. Avoid scraping so aggressively that you damage the wood fibers, since rough interior texture is what helps nestlings climb toward the entrance.
What if the entrance is the right size but squirrels still get in or try to enlarge the hole?
A metal entrance hole protector (portal plate) is designed specifically for this problem, and it is most effective when it fits flush to the front panel with no gaps. Also confirm the entrance hole edges were drilled cleanly, if the edge is rough or chipped it gives squirrels extra purchase to chew. If you see repeated damage, increase predator control by tightening baffle effectiveness and reducing any nearby “climb paths” like low branches or fence rails.
How do I deal with heavy rain, wind-driven rain, or snow loading in my area?
Use a properly sized roof overhang and ensure the venting method does not create direct rain gaps at the entrance. For snow-prone areas, keep the entrance oriented as recommended and check that the roof extends far enough to prevent the opening from becoming partially blocked after storms. If puddling occurs despite drainage holes, look for blocked drainage corners (for example warped boards) and correct the floor slope or add additional drainage points.
Is painting the outside always safe, and what color choices help most?
Exterior-grade latex paint is generally fine if it is applied only to the outside surfaces and stays light or neutral to prevent heat buildup. Dark colors can raise internal temperatures, especially on sunny, sheltered walls. Also allow full curing time before birds start nesting, and avoid any coating that smells strongly or is applied to interior surfaces, including the entrance lip.
Can I use a decorative multi-compartment bird house if I only want native species?
If your goal is reliable nesting success for native cavity nesters, single-cavity boxes designed to precise entrance requirements are usually the safer choice. Multi-compartment designs often attract the species that are best at competing, and once those competitors establish, they can block access to the other compartments. If you already have a multi-compartment house, monitor closely early in the season and be prepared to remove or relocate it if non-target species repeatedly take over.
What should I do if I find wasps or other insects inside the box?
If you see active wasp nests or heavy insect buildup, remove the box from service and clean it thoroughly before allowing birds to use it again. Do not simply scrape or spray inside while birds might be present, since sprays can harm eggs or chicks. After cleaning, confirm ventilation and drainage are adequate, because poorly draining or overly humid conditions can make the box less suitable for nesting.
Next Article
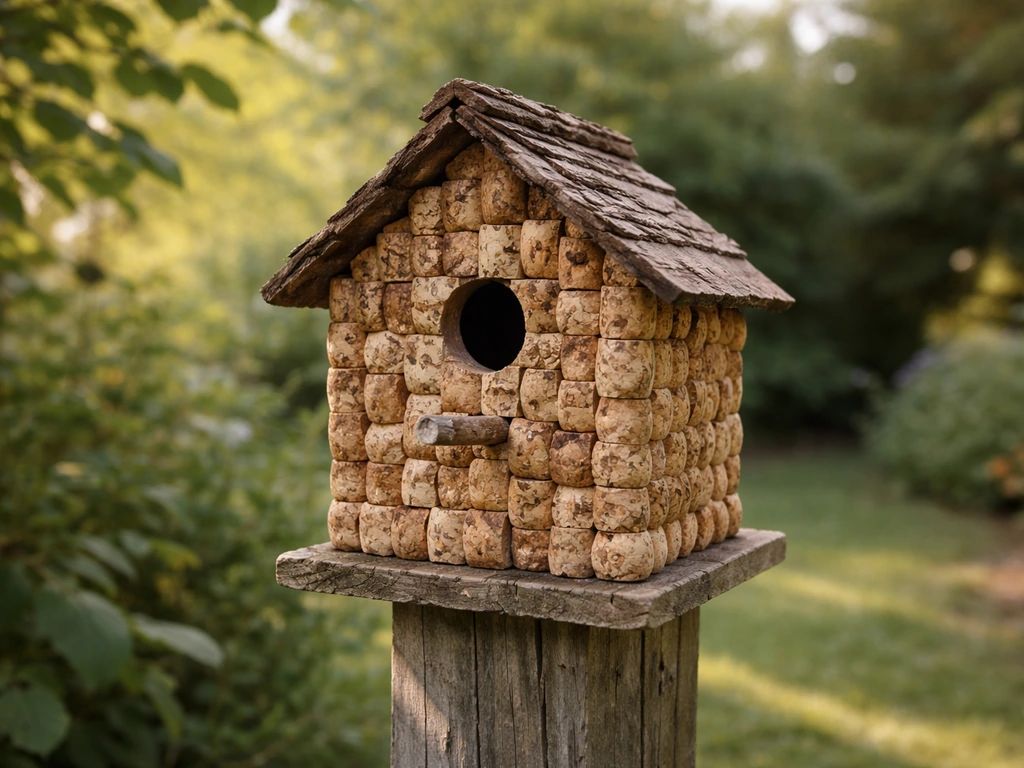
Wine Cork Bird House Instructions: DIY Steps and Bird-Safe Specs
Step-by-step wine cork mini birdhouse build with bird-safe dimensions, safe materials, mounting, cleaning, and weatherpr