Getting a bird to live in your birdhouse comes down to three things: building or buying a box that matches the species you want, putting it in exactly the right spot at the right time of year, and keeping predators out. If your box has sat empty, something about size, placement, or timing is probably off. This guide walks you through every variable, species by species, from entrance-hole diameter to baffle height, so you can fix the problem or get it right the first time. For step-by-step instructions on how to use a bird house, see our detailed guide.
How to Get a Bird to Live in Your Birdhouse: Practical Guide

Maya Thompson
22 Jul 2026
What to expect and picking a realistic target species
Not every bird nests in boxes. Robins, goldfinches, cardinals, and most songbirds build open-cup nests in shrubs or trees and will never enter a birdhouse no matter what you do. True cavity-nesting species, including bluebirds, chickadees, tree swallows, house wrens, nuthatches, kestrels, and wood ducks, actively seek enclosed cavities and will readily move into well-designed nest boxes. Your first job is to decide which species are actually present in your area, because a bluebird box in a dense suburban yard with no open lawn is unlikely to be used by bluebirds, while a chickadee or wren box in that same yard could be occupied within a season.
Start by spending ten minutes watching your yard and the surrounding habitat. If you see bluebirds hunting from fence posts over open grass, build for bluebirds. If you have mature trees and shrubby edges, chickadees, wrens, and nuthatches are better bets. Matching your box to what is already visiting dramatically shortens the waiting time. One box is a good start, but putting out two or three designed for different species gives you much better odds of occupancy in the first year.
Species-by-region guide: who goes where, and when
The species available to you depend heavily on where you live and what your yard looks like. The table below summarizes the most commonly box-using species in North America, their broad range, preferred habitat, and the window when they start scouting for nest sites. Having your box up and ready before that window opens is one of the most important things you can do.
| Species | Range (North America) | Preferred Habitat | Box-scouting Window | Notes |
|---|---|---|---|---|
| Eastern Bluebird | East of Rockies | Open fields, meadows, golf courses, rural roadsides | Late January to March | Needs open foraging area within 100 ft of box |
| Western Bluebird | Pacific Coast to Rockies | Open woodland edges, orchards, chaparral clearings | February to April | Similar specs to Eastern; slightly different timing |
| Mountain Bluebird | Rocky Mountains, Great Basin | Open mountain meadows, high-elevation grassland | March to April | Tolerates colder, higher sites |
| Tree Swallow | North America (migratory) | Open fields near water, wetland edges | April to May | Space pairs ~35 ft apart; highly tolerant of open sites |
| Black-capped Chickadee | Northern U.S., Canada | Deciduous/mixed woodland, wooded suburbs | March to April | Will add own nesting material; prefers wood chips inside |
| Carolina Chickadee | Southeastern U.S. | Woodland edges, suburban yards with mature trees | March to April | Slightly smaller than Black-capped; same box specs |
| House Wren | Most of U.S. and Canada | Shrubby edges, gardens, woodland borders | April to May | Aggressive defender; can evict other species |
| White-breasted Nuthatch | Most of U.S. and southern Canada | Mature deciduous and mixed forest | February to March | Early nesters; prefers boxes on large tree trunks |
| Brown-headed Nuthatch | Southeastern U.S. | Open pine forests, pine savannas | February to April | Pine-habitat specialist; rarely uses suburban yards |
| American Kestrel | Widespread across North America | Open farmland, grassland, roadsides | February to April | Needs clear flight approach; high pole or barn preferred |
| Wood Duck | Eastern U.S., Pacific Northwest | Forested wetlands, ponds, slow rivers | January to March | Place near water; add 4 in. wood shavings to floor |
In the UK, the primary box-using species are blue tits, great tits, coal tits, house sparrows, tree sparrows, starlings, nuthatches, tawny owls, barn owls, and stock doves. Blue and great tits start inspecting boxes in late February, so boxes should be up by mid-February at the latest. In Australia, rosellas, parrots, kookaburras, and several small hollow-dependent species will use nest boxes; timing and specifications vary considerably by state, and BirdLife Australia publishes regional technical sheets for those species.
Exact box specifications for each species
Entrance-hole diameter is the single most critical dimension. An opening that is too large lets in house sparrows, starlings, or larger predators. An opening that is too small simply blocks the target species from entering. The table below gives precise, research-backed specifications from NestWatch (Cornell Lab of Ornithology). These are the numbers to cut to; do not round up significantly on entrance holes.
| Species | Interior Floor | Interior Depth | Entrance Hole Diameter | Entrance Height Above Floor | Mount Height |
|---|---|---|---|---|---|
| Eastern Bluebird | 5" × 5" (12.7 × 12.7 cm) | 9" (23 cm) | 1.5" (38 mm) | 6–7" (15–18 cm) | 3–6 ft (0.9–1.8 m) on metal pole |
| Western/Mountain Bluebird | 5" × 5" (12.7 × 12.7 cm) | 9" (23 cm) | 1.5" (38 mm) W / 1.5" M | 6–7" (15–18 cm) | 3–6 ft (0.9–1.8 m) |
| Tree Swallow | 5.5" × 5.5" (14 × 14 cm) | 9" (23 cm) | 1 3/8" (35 mm) | 6" (15 cm) | 5–6 ft (1.5–1.8 m) on pole |
| Black-capped/Carolina Chickadee | 4" × 4" (10 × 10 cm) | 8–10" (20–25 cm) | 1.25" (32 mm) | 6" (15 cm) | 5–20 ft (1.5–6 m) |
| House Wren | 4" × 4" (10 × 10 cm) | 8" (20 cm) | 1.25" (32 mm) | 6" (15 cm) | ~5 ft (1.5 m) |
| White-breasted Nuthatch | 4" × 4" (10 × 10 cm) | 9–10" (23–25 cm) | 1.25–1.375" (32–35 mm) | 6–7" (15–18 cm) | 5–20 ft (1.5–6 m) |
| American Kestrel | 8" × 8" (20 × 20 cm) | 12–16" (30–40 cm) | 3" (75 mm) round or open-slot | 9–12" (23–30 cm) | 10–20 ft (3–6 m) |
| Wood Duck | 8" × 9.25" (20 × 23.5 cm) | 24" (61 cm) | 3" H × 4" W oval (7.5 × 10 cm) | 20" (51 cm) | 6–30 ft (1.8–9.1 m) near water |
A few interior features matter beyond raw dimensions. Chickadees prefer a small amount of wood chips (about 1 inch deep) inside the box when you first put it up, because they remove material rather than add it. Wood ducks need about 4 inches (10 cm) of wood shavings on the floor since they do not bring nesting material. Both wood ducks and tree swallows benefit from a roughened interior wall or a fledgling ladder (a strip of hardware cloth or scored wood) running from the floor up to the entrance hole, giving nestlings a grip when they are ready to leave. Never add an external perch; it gives predators and house sparrows a landing platform without helping the target species.
Materials, tools, and safety before you start
Best woods for nest boxes
Western red cedar is the gold standard: it is naturally rot-resistant, holds screws well, and weathers beautifully without any treatment. White cedar, bald cypress, and rough-sawn pine (at least 3/4-inch thick, preferably 1 inch for larger boxes) are all solid choices. For kestrel or wood duck boxes, 3/4-inch exterior-grade plywood (CDX or equivalent) is acceptable and keeps the weight manageable. Never use old pressure-treated lumber that was manufactured before 2004; the older formulation used chromated copper arsenate (CCA), and arsenic contact with eggs and nestlings is a serious hazard. Modern ACQ-treated lumber is technically safer but still not recommended for interior surfaces. Leave all interior wood unfinished and unpainted. Exterior surfaces can be painted a light neutral color (tan, gray, or barn red) or left natural to avoid heat build-up.
Hardware and fasteners
Use galvanized or stainless-steel screws throughout. Staples and nails rust quickly, loosen over time, and can become a hazard to nestlings. For the hinged clean-out panel, a single stainless or galvanized wood screw used as a pivot pin at the top and a hook-and-eye latch or a simple deck screw at the bottom works reliably. For mounting to a pole or post, use 1/4-inch galvanized lag screws or carriage bolts with lock washers. Avoid glue; it makes monitoring and repair impossible.
Beginner tool list
- Jigsaw or circular saw (a hand saw works fine for smaller boxes)
- Power drill with bits: 1/8" pilot-hole bit, 3/8" drainage-hole bit, 5/8" ventilation-hole bit, and a spade or hole-saw set in the entrance-hole sizes needed
- Tape measure and carpenter's pencil
- Square (combination square or speed square)
- Sandpaper (80-grit to chamfer cut edges; do not sand interior walls smooth)
- Safety glasses and hearing protection
- Clamps (two 6-inch bar clamps make assembly much easier solo)
- Screwdriver or bit driver for your drill
If you do not have a drill press, cutting a clean entrance hole is easiest with a sharp spade bit at slow speed, pressing firmly and keeping the drill perpendicular to the board. Practice on a scrap piece first. A forstner bit gives the cleanest edge if you have one. For entrance holes larger than 1.5 inches, a hole saw is faster and cleaner.
Step-by-step DIY build: a bluebird/chickadee starter box
This plan builds a versatile small-cavity box suitable for Eastern Bluebirds (with a 1.5-inch hole) or chickadees and wrens (swap to a 1.25-inch hole). It uses a standard 1x6 rough-cut cedar board (actual width 5.5 inches), which gives you approximately the right floor width with minimal ripping. The total lumber needed is one 6-foot length of 1x6 cedar.
Cut list
| Part | Dimensions (rough cedar 1×6) | Quantity | Notes |
|---|---|---|---|
| Front | 5.5" wide × 10" tall | 1 | Drill entrance hole centered 1.5" from top edge |
| Back | 5.5" wide × 14" tall | 1 | Extra length for mounting; drill two 5/16" mounting holes near top and bottom |
| Two sides | 5.5" wide × 10" tall with 1" slope cut on top edge | 2 | Slope runs front to back to shed roof water; drill two 5/8" vent holes near top |
| Floor | 4" × 5" (ripped to 4" width) | 1 | Drill four 3/8" drainage holes in corners; recess floor 1/4" above bottom edge |
| Roof | 7" wide × 8" deep | 1 | Wider board or glued-up panel; 2–4" overhang at front; 1" overhang on sides |
Assembly steps
- Cut all pieces to the dimensions above. Label each part with a pencil so you do not mix them up during assembly.
- Drill the entrance hole in the front panel first, before assembling. Mark the center 1.5 inches down from the top edge and use the appropriately sized spade or hole-saw bit. Drill from the outside face inward to avoid tearout on the face.
- Score or roughen the interior of the front panel below the entrance hole with a chisel or serrated saw cuts, creating horizontal grooves about 1/4 inch deep spaced roughly 1/2 inch apart. This gives fledglings grip to climb out.
- Drill four 3/8-inch drainage holes in the corners of the floor piece. These must be open, not just scored.
- Drill two 5/8-inch ventilation holes near the top of each side panel (about 1 inch below the roof line). This gives four vent holes total, promoting airflow without letting in rain.
- Attach the floor to the back panel first, setting the floor 1/4 inch above the bottom edge of the back panel so it is recessed slightly. Use two 1.5-inch galvanized screws per side. Pre-drill pilot holes to prevent splitting.
- Attach the two side panels to the back and floor using two screws per joint. Check that the sides are flush at the back edge and that the sloped tops angle down toward the front.
- Attach the front panel. For the hinged clean-out, drive one screw through each side panel into the top edge of the front panel, acting as pivot pins. Drive a removable deck screw through one side panel into the bottom edge of the front to act as a latch. This lets you swing the front panel open for monitoring and cleaning.
- Attach the roof with screws through the top into the side panels. Make sure the roof overhangs the front by 2 to 4 inches to shade the entrance hole and shed rain.
- Do not apply any finish to the interior. If you want to paint the exterior, use a light exterior-latex color and let it off-gas outdoors for a week before hanging.
Should you build or buy?
Building gives you control over dimensions and materials, costs roughly $5 to $15 in lumber per small box, and produces a box that is genuinely better than many cheap commercial options that use staples, glossy interior finishes, or incorrect hole sizes. Buying makes sense if you need a kestrel or wood duck box quickly, since those require larger lumber and more complex joinery. When buying, look for boxes that specify untreated wood, drainage holes, ventilation, and a clean-out panel. Avoid decorative boxes with external perches, painted interiors, or no access door.
| Factor | Build (DIY) | Buy (commercial) |
|---|---|---|
| Cost per box | $5–$15 (lumber only) | $15–$60+ depending on size/brand |
| Correct dimensions | You control this exactly | Varies widely; check specs before buying |
| Interior finish | Unfinished (correct) | Often painted or varnished (problematic) |
| Clean-out access | You build it in | Not always included on cheap models |
| Time investment | 1–3 hours per box | Zero build time |
| Satisfaction factor | High, especially for beginners | Lower, but functional if spec-correct |
Predator-proofing and mounting hardware
A 2017 analysis published in Wildlife Society Bulletin (Bailey and Bonter) examined a large NestWatch dataset and found that boxes fitted with predator guards had roughly 6.7% higher daily nest survival on average, and that combining multiple guard types produced even better results. This is not a small effect over a full breeding season. Predator-proofing is not optional if you care about the birds actually fledging successfully.
Guard types and specs
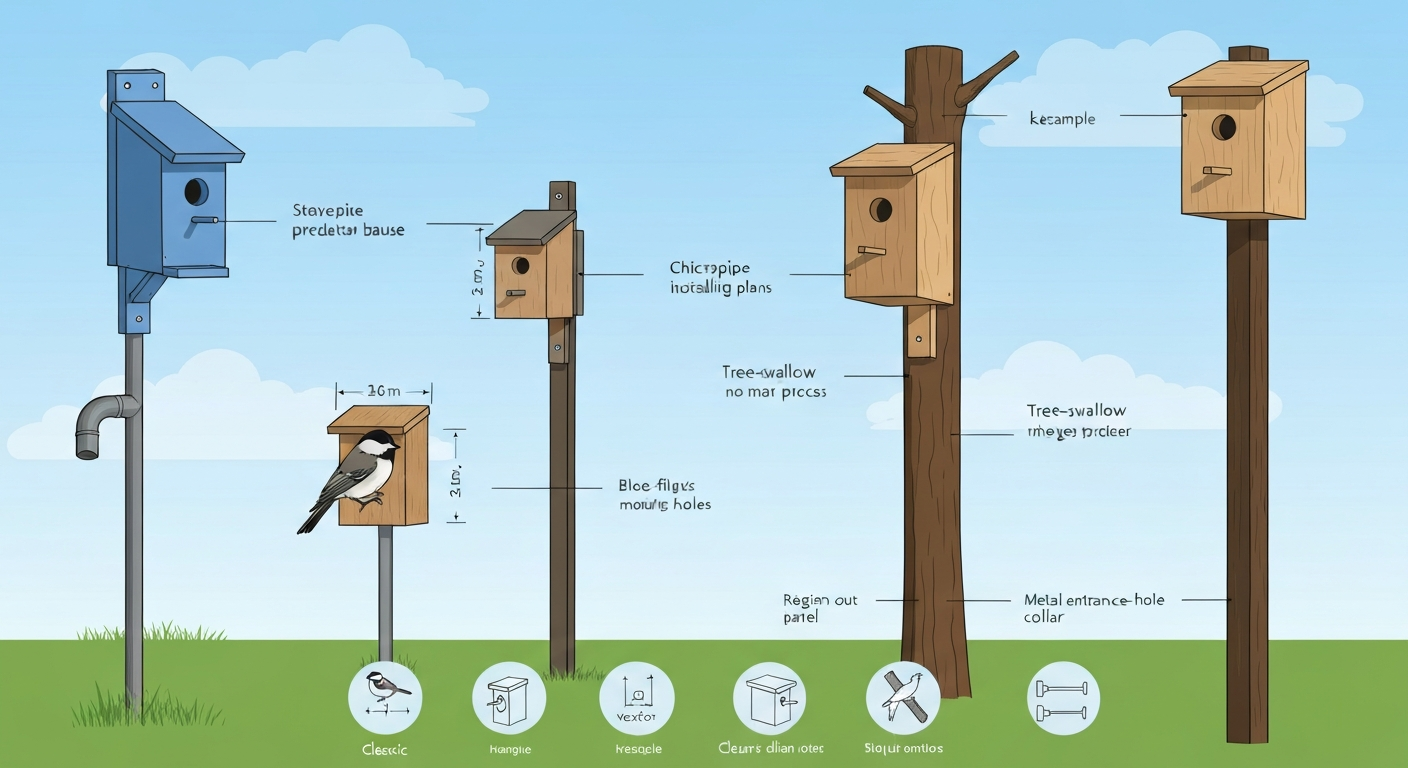
- Stovepipe baffle: a smooth metal cylinder 8 to 12 inches in diameter and 24 to 36 inches long, centered on the pole below the box. Raccoons and climbing snakes cannot grip the surface. Position the top of the baffle at least 4 to 5 feet above the ground so a jumping predator cannot clear it. This is the most effective single guard for ground-level predators.
- Cone baffle: a metal flared cone (18-inch diameter models are common) that wraps around the pole. Slightly less effective than the stovepipe for climbing mammals but easier to install. It works well as a secondary guard below a stovepipe.
- Metal entrance-hole plate (hole extender): a metal plate with the same hole diameter as your box, screwed over the entrance. It prevents squirrels from gnawing the hole wider and makes the tunnel deeper, which discourages raccoons from reaching in. Add one to every box as a matter of course.
- Hardware cloth cage: a 1/2-inch hardware cloth cylinder around the box protects against aerial predators (hawks, crows) and some climbing mammals. Used most often on duck boxes and kestrel boxes. Cut the cylinder large enough that birds can fly freely in and out.
- Wrap-around collar: for boxes mounted on wooden fence posts or trees where a stovepipe cannot be used, a smooth metal collar (sheet metal wrapped around the post) can help, though smooth metal poles are far more reliable.
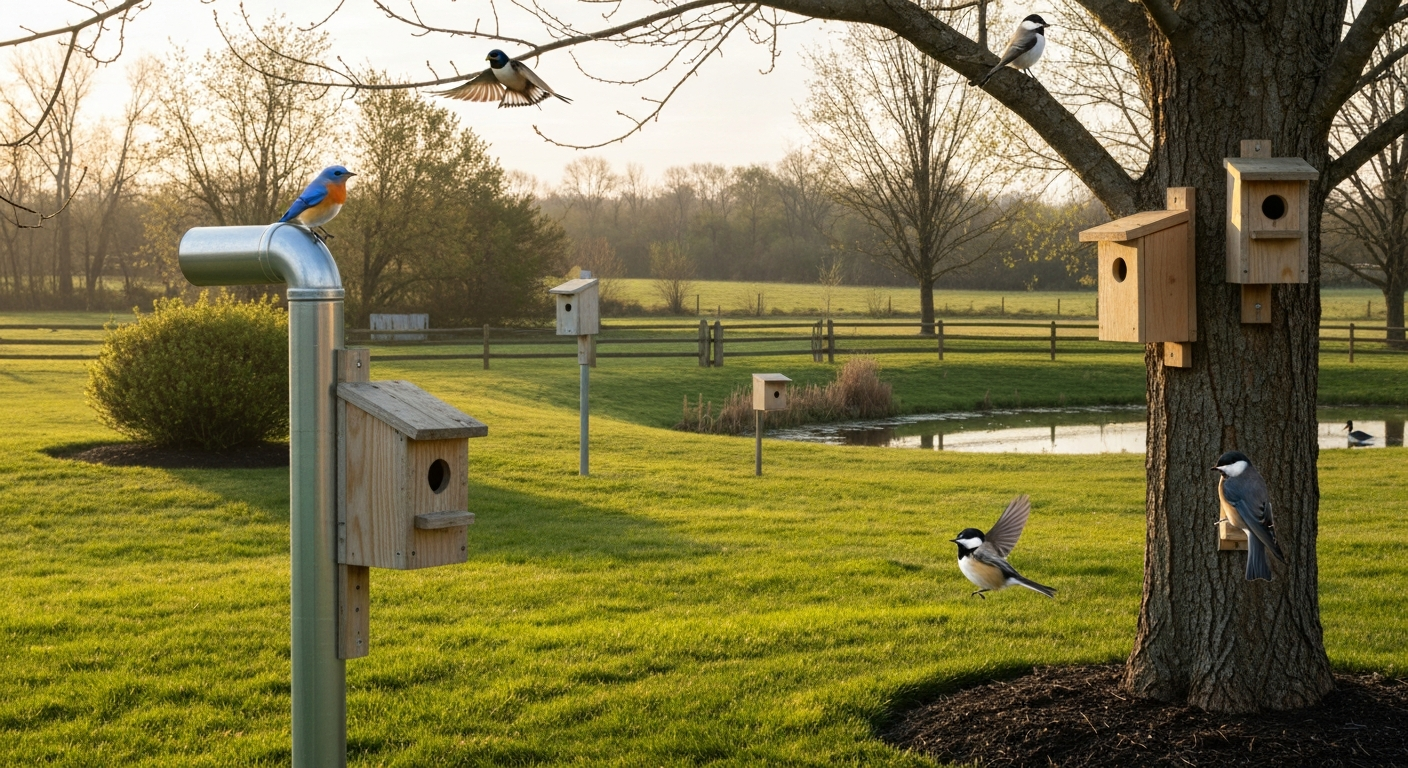
Mount your box on a smooth metal conduit pole (1/2-inch to 1-inch EMT conduit is inexpensive and widely available at hardware stores) rather than on a wooden post or tree whenever possible. A smooth galvanized metal pole combined with a stovepipe baffle is the most effective predator defense available to a backyard birdkeeper. Trees and wooden posts allow climbing predators to bypass any baffle, so use them only when a pole is genuinely impractical, such as with wood duck boxes over water.
Mounting options and placement height
How you mount the box affects both occupancy rates and long-term convenience. Here are the main options and when each makes sense.
Pole mount
For bluebirds, tree swallows, and wrens, a metal conduit pole driven 18 to 24 inches into the ground is the best option. Use a rebar driver or a fence-post driver to seat the conduit firmly, then attach the box using U-bolts or a purpose-made pole-mounting bracket with 1/4-inch galvanized hardware. The pole mount lets you position the box precisely in open habitat, move it if occupancy is poor, and install a baffle easily. Height for bluebirds: 3 to 6 feet. Tree swallows: 5 to 6 feet. Both measurements are from ground to the box floor.
Tree or wooden post mount
Chickadees, nuthatches, and woodpeckers often prefer boxes mounted on the trunks of mature trees, which more closely mimics natural cavity positions. Use lag screws (1/4-inch galvanized) directly into the tree, avoiding staples or wire that can girdle the bark over time. Mount chickadee and nuthatch boxes 5 to 15 feet high on the shaded north or east face of a trunk at the woodland edge. Accept that tree-mounted boxes are harder to protect from predators; a smooth metal collar around the trunk below the box helps but is not as effective as a pole-and-baffle system.
Wall and building mount
Kestrel boxes work well mounted high on barn walls, utility poles, or the sides of buildings (10 to 20 feet high), facing open farmland or grassland with an unobstructed flight approach. Use heavy lag screws into studs or blocking. Barn owl boxes can be mounted inside barn lofts or on the exterior under wide eaves.
Hanging mount
Hanging boxes from a branch or wire generally attract fewer cavity nesters and provide no protection from predators. Avoid hanging mounts for primary nest boxes; they are fine for decorative purposes but do not expect occupancy from serious cavity nesters.
Orientation and spacing
Face bluebird boxes east or toward the open foraging area. Facing east gives morning sun to warm the box on cool spring mornings without overheating it in afternoon sun. Tree swallow boxes can face south or east. Avoid south-facing boxes in hot climates; in the American Southwest or in full sun at low elevations, north or east-facing entrances help prevent overheating. Space bluebird and tree swallow boxes at least 100 feet apart for the same species, or pair a bluebird box with a tree swallow box about 15 to 25 feet apart (one of each species reduces territorial conflict). Tree swallow boxes intended for paired swallows can be spaced as close as 35 feet apart in that configuration. Wood duck boxes should be spaced at least 600 feet (183 meters) apart.
Placement by habitat and region
Open rural and farmland settings
This is ideal bluebird and kestrel territory. Place bluebird boxes along fence lines, at the edge of mowed areas with short grass (3 inches or less) for hunting, and within 100 feet of a perch (fence post, wire, or snag). Avoid boxes surrounded by dense tall grass or shrubs. Kestrel boxes should overlook open fields or roadsides with minimal tree cover blocking the approach.
Woodland edge and suburban settings
Chickadees, house wrens, and nuthatches thrive here. Place boxes at the edge of tree cover, not deep in the forest interior. A box on the edge of a wooded backyard facing a lawn or garden is a good position. Avoid placing wren boxes directly adjacent to bluebird boxes; wrens will investigate and sometimes remove eggs from any nearby cavity.
Wetland and water edges
Wood duck and hooded merganser boxes need to be near water but do not have to be over it. Mounting on a pole in shallow water (2 to 4 feet deep) with a stovepipe baffle is ideal, because water creates a natural barrier to mammalian predators. Alternatively, mount on a pole on the bank within 30 to 100 feet of the water's edge. Add the fledgling ladder and 4 inches of wood shavings to the floor every year before the scouting season starts in January.
Urban yards
Small urban yards are best suited to house wrens and chickadees. If you have a small patch of mature trees or dense shrubs, a wren box at 5 feet on a shepherd's hook with a baffle is a realistic goal. Bluebirds in urban settings require at least a quarter-acre of open lawn nearby; without that, they will not consistently use the box. Supplement any box setup with a shallow bird bath (no deeper than 2 inches, cleaned every two to three days) positioned nearby, since reliable fresh water increases the attractiveness of any nesting territory.
Regional timing: when to put your box up
The general rule is to have boxes up and ready at least two to four weeks before the species begins active nest-site scouting. Putting a box up in May after bluebirds have already selected a territory means you have probably missed that pair for the year. In the Southeast and lower Midwest (zones 7 to 8), bluebirds start inspecting boxes in January; in the northern states and Canada (zones 4 to 5), late February to mid-March is more typical. Tree swallows arrive from migration in April across most of their range. Chickadees begin scouting in late February to early March. In the UK, blue and great tits start looking in February; have boxes up by mid-February. In Australia, contact your state BirdLife chapter for regional timing, since breeding seasons vary considerably across latitude.
Attractants that actually help
Beyond the box itself, a few habitat additions meaningfully increase occupancy. For more practical tips on increasing occupancy, see our detailed guide on how to get a bird to use your birdhouse (34e81360-599a-4958-94e7-37822d7cc69d). For more detailed, step-by-step tips on how to attract birds to a birdhouse, see our full guide on how to attract birds to a birdhouse. Native plantings that produce berries (dogwood, elderberry, native hollies) attract bluebirds and give them a food source during cold snaps when insects disappear. A live mealworm feeder placed near a bluebird box during early spring, before insect emergence, can help a pair get established and builds familiarity with the site. Do not use dried mealworms as a substitute; live mealworms are far more attractive to bluebirds and are the only form that provides the hydration nestlings need. Offer mealworms in a smooth-sided dish (ceramic or stainless) that the birds can see into from a distance, positioned within 20 to 30 feet of the box.
Avoid placing nesting material (cotton fiber, pet hair, dryer lint) inside or near the box. Many of these materials tangle around nestlings' legs or hold moisture. Most cavity-nesting species either bring their own material or prefer to start with a clean, empty box. The exception is wood shavings for wood ducks and a thin layer of wood chips for chickadees, both of which are safe and actually used.
Monitoring, cleaning, and seasonal maintenance
Check your box every one to two weeks during the breeding season by opening the clean-out panel briefly and noting the nest stage (empty, eggs, nestlings). Keep visits to under 30 seconds and avoid touching eggs or very young nestlings. Monitoring is valuable because it lets you catch problems early: an abandoned nest may mean a predator visit, and a box full of chewed material with no eggs may indicate house sparrows rather than your target species.
After each brood fledges, remove the old nest entirely. Old nesting material harbors mites, blow fly larvae, and bacteria, and many species will not re-nest in a box with old material present. Scrape the interior clean, check the drainage holes for blockage, and leave the box open or remove the front panel for a few days to air out. Some species, particularly bluebirds in the South, may raise two or three broods per season, so prompt cleaning between broods increases total productivity significantly.
At the end of the season (late summer or early fall for most North American species), do a thorough clean and inspection. Check the box for cracks, rot, loose screws, or widened entrance holes. Replace the metal entrance plate if it has been gnawed. Tighten all mounting hardware. Decide whether to leave boxes up through winter (many species roost in them for warmth) or take them down briefly for deep cleaning and repairs. If you leave them up, check for wasp nests in early spring before bird scouting begins; remove them while wearing gloves.
Dealing with house sparrows and European starlings
House sparrows (Passer domesticus) and European starlings (Sturnus vulgaris) are non-native invasive species in North America and are not protected under the Migratory Bird Treaty Act. Both species aggressively occupy nest boxes intended for native cavity nesters and will kill bluebird, tree swallow, and chickadee adults and nestlings. Dealing with them is a conservation-minded responsibility, not cruelty.
The most effective physical measure against starlings is keeping entrance holes at or below 1.5 inches (38 mm) for small boxes; starlings cannot enter through a 1.5-inch hole. For boxes larger than this (kestrel, wood duck), monitor closely and remove any starling nesting material immediately before eggs are laid. House sparrows can enter through a 1.25-inch hole, so size alone is not enough. The most reliable control for house sparrows is the SREH (Slot Restrictor Entrance Hole), a vertical rectangular slot measuring 1 3/8 inches tall by 9/16 inch wide, which bluebirds can use but house sparrows cannot enter easily. Plans for the SREH are available through bluebird trail management groups and NestWatch.
Remove house sparrow nesting material repeatedly and promptly. Some trail managers use traps designed for house sparrows. Do not trap or disturb native species: if a chickadee, wren, titmouse, or nuthatch has laid eggs in the box, those eggs and the nest are protected under the MBTA in the United States, and you must leave them undisturbed until the clutch has either fledged or been abandoned for at least ten days. In the UK, all wild bird nests in use are protected under the Wildlife and Countryside Act 1981, with no exceptions for any species, so removal of an active nest is illegal regardless of which species built it. In New Zealand, active nests of native species are protected under the Wildlife Act 1953; contact the Department of Conservation before taking any action involving an active nest.
Troubleshooting: why your box is still empty
- Box went up too late: scout-watching for nest sites happens weeks before laying. Move the installation deadline to mid-winter for next year.
- Entrance hole is wrong: double-check against the species table above. Even 1/8-inch difference can matter.
- Box is in the wrong habitat: a bluebird box in a shaded yard with no open lawn will rarely attract bluebirds. Move the box to a better site or switch target species.
- No predator guard: birds that have lost a nest to a predator often abandon a site entirely. Add a stovepipe baffle before next season.
- Interior is too bright or light-colored: interior walls should be natural, unfinished wood. A glossy or white interior reads as 'open' and is unattractive to most cavity nesters.
- Too close to a feeder: active, high-traffic feeding stations create disturbance near nest boxes. Keep boxes at least 30 feet from busy feeders.
- House sparrows are monopolizing the box: try the SREH entrance modification, relocate the box away from buildings and urban areas, or switch to a species less vulnerable to sparrow competition.
- Box is in a high-traffic area: foot traffic, dogs, or frequent disturbance within 20 feet of the box will deter nesting. Relocate or reduce disturbance.
When to move, repair, or retire a box
Move a box at the end of the season (after all broods have fledged and ideally after you have confirmed the box is inactive) if occupancy has been consistently zero for two full seasons despite correct placement and species habitat. A box that has never been used in a well-managed location may simply be in a spot with too much predator pressure, too little food, or marginal habitat quality. Try a location 50 to 100 feet away before giving up. Repair a box immediately if the roof is leaking, the entrance hole has been chewed wider than spec, the floor drainage is blocked, or the mount is becoming unstable. Retire a box when the wood is so weathered or split that repair is not practical, typically after 8 to 12 years for pine, longer for cedar. Always clean before moving or storing any box, and never move an active nest with eggs or nestlings unless you have confirmed the relevant legal permissions in your jurisdiction.
FAQ
Which bird species are realistic targets for backyard nest boxes, and how do I choose by region and habitat?
Common realistic targets depend on habitat and region but include: Eastern/Western/Bluebirds (open lawns, fields), Tree Swallow (open areas near water), Chickadees and Nuthatches (woodland edges), House Wren (shrubby/edge habitat), Wood Duck (near water), and American Kestrel (open country/fields). Choose species by (1) nearby habitat (water, open lawn, woodland edge), (2) local records/atlas or birding groups, and (3) box type you can build. Aim at one or two target species per site; avoid placing small‑cavity boxes where raptors or ducks are the only likely users and vice versa. If uncertain, consult local birding groups, extension services, or regional nest‑box plans to match species to habitat and timing.
What are the precise box dimensions and entrance‑hole sizes for common target species?
Use species‑specific internal floor, height and entrance sizes: - Eastern Bluebird: floor ~5"×5" (12–13 cm), height ~9" (23 cm), entrance 1.5" (38 mm). - Tree Swallow: floor ~5½"×5½" (14×14 cm), depth ~9" (23 cm), entrance 1 3/8" (35 mm). - Chickadees (Black‑capped/Carolina): floor ~4"×4" (10×10 cm), depth 8–10" (20–25 cm), entrance 1.25" (32 mm). - House Wren: floor ~4"×4", height ~8", entrance 1.25" (32 mm). - Wood Duck: floor ~8"×9¼" (20×23.5 cm), depth ~24" (61 cm), oval entrance ~3"×4". - American Kestrel: floor ~8"×8" (20×20 cm), depth 12–16" (30–40 cm), entrance/slot per regional plan (~3" slot or open front). These follow NestWatch/extension specifications; use interior dimensions when cutting parts.
What materials, wall thickness, fasteners and interior features should I use for a durable, safe DIY box?
Use untreated, rot‑resistant wood (cedar, pine, or cypress). Wall thickness ~3/4" (18–20 mm) for insulation; larger raptor/duck boxes can use exterior‑grade plywood (CDX) but avoid old CCA‑treated lumber. Fasten with galvanized or stainless screws (no staples). Include at least four drainage holes (3/8"–1/2") in the floor, ventilation holes near the top (e.g., two ~5/8" per side or four total), roughen interior surfaces below the entrance, and a sloped roof with a 2–4" front overhang. No outside perches. Provide a hinged/side‑open or removable roof/panel for cleaning and monitoring.
What tools and a simple cut list/plan do I need for a beginner bluebird box (example step‑by‑step)?
Tools: tape measure, circular saw or handsaw, drill with bits (for entrance, ventilation, drainage), jigsaw (optional for rounded hole), screwdriver/driver, pencil, clamps, square, sandpaper. Cut list for a standard Eastern Bluebird box (interior): - Front: 9" tall × 6" wide (cut entrance 1.5" centered ~6–7" from floor) - Back: 12" tall × 6" wide (extends for mounting) - Sides (2): 9" tall × 5" deep (angled roof slope if desired) - Floor: 5" × 5" - Roof: 7" × 7" (overhang front) Construction steps: 1) Mark and cut pieces to size. 2) Drill entrance hole in front piece (1.5"). 3) Drill ventilation holes near top of sides/back and four drainage holes in floor. 4) Assemble sides to floor with screws, then attach front and back; use glue plus screws for strength. 5) Roughen interior under entrance and install hinged roof or side panel. 6) Sand edges, leave interior unpainted; optionally paint exterior with light, water‑based paint. 7) Mount using recommended hardware and predator guards. Follow species dimensions above for other species.
Where and how high should I mount boxes, orientation, spacing and habitat placement tips?
Mounting specs by species (general rules): - Bluebirds: metal pole 3–6 ft (0.9–1.8 m) above ground in open habitat, face east or open aspect. - Tree Swallows: pole 5–6 ft (1.5–1.8 m), face south or east, spacing ~35 ft (10–11 m). - Chickadees/Nuthatches: 5–20 ft (1.5–6 m) high in or near woodlands/edges, mount on tree trunk or post. - House Wrens: ~5 ft (1.5 m) high in shrub/edge habitat. - Wood Ducks: mount 6–30 ft (1.8–9.1 m) near water; include fledgling ladder. - Kestrels: 10–20 ft (3–6 m) on pole/building facing open approach. Orientation: face away from prevailing winds and hot afternoon sun (east/southeast typical). Spacing: follow species guidance—some territorial species need spacing (e.g., tree swallows ~35 ft, wood ducks ~600 ft). Use metal poles or straps; avoid mounting where cats can easily access. For poles, use smooth metal; for tree mounting use wide straps that allow tree growth and don't damage bark; avoid nails into live trees where possible.
What predator‑proofing hardware and placements are effective?
Use predator guards: stovepipe/torpedo baffles (metal/plastic cylinder) or cone baffles around poles, placed several feet below the box (typical baffle length 24–36"; diameter 8–12"). Install metal entrance plates or hole extenders to prevent squirrels from enlarging holes. For tree mounts, use raccoon/cat guards and put boxes on smooth metal poles if possible. NestWatch/extension studies show guards increase nest success; stacking multiple guard types (pole baffle plus hole plate) gives larger benefits. Ensure mount hardware leaves poles smooth so predators cannot climb; place baffle below the box at ~4–5 ft (1.2–1.5 m) above ground for small‑cavity boxes.
Next Article
How to Use a Bird House: Step-by-Step Guide for Beginners
How to use a bird house: step-by-step DIY, species-safe specs, placement, predator-proofing & maintenance