
If you have a bird hole in your siding, stop before you reach for the caulk gun. First, check whether that hole is still active. If an adult bird is carrying nesting material in or out, or if you can hear chicks inside, you are legally required in the U.S. (and most of Canada and the UK) to leave it alone until the young have fledged. Once the nest is inactive, the repair itself is straightforward: measure the hole, identify your siding material, and follow the matching patch method below. The whole job on a single wood-clapboard hole, start to finish, typically takes an afternoon.
fix bird holes in siding: DIY assessment repair & prevention

Maya Thompson
30 Jul 2026
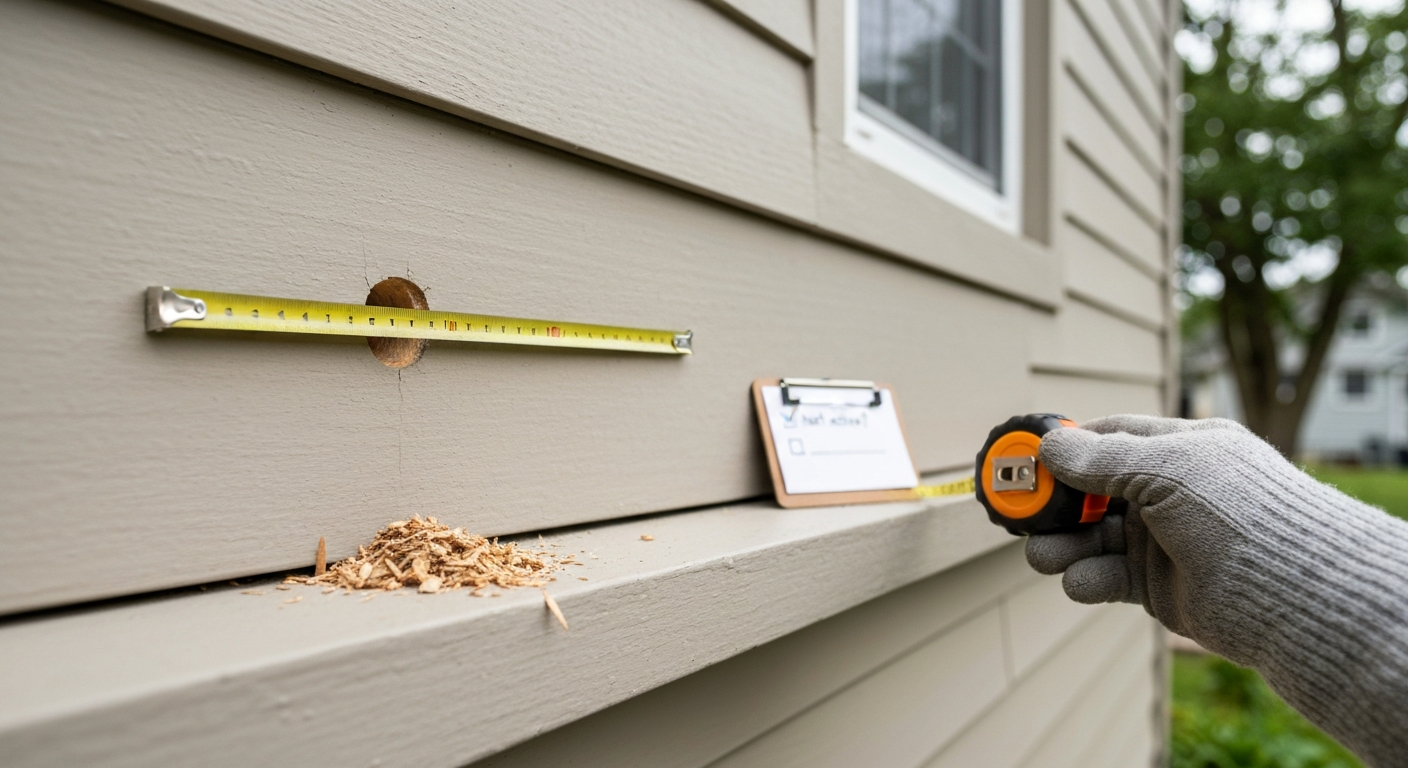
Quick damage assessment: who made that hole?
Before you repair anything, spend five minutes reading the evidence around the hole. The species that made it changes both the urgency of the fix and the legal picture. Here is what to look for.
| Clue | Woodpecker | House Sparrow / European Starling | Small cavity-nester (wren, chickadee) |
|---|---|---|---|
| Hole shape | Round to oblong, beveled lower rim, clean edges | Ragged or enlarged existing gap | Round, small, rarely self-excavated in siding |
| Hole diameter | 1–2 in (small spp.) up to 3–4 in (Pileated) | Varies, often an existing gap widened | Under 1.25 in |
| Debris below hole | Fresh wood chips piled on ground or ledge | Nesting material: grass, straw, feathers | Little or none |
| Sound clues | Repetitive daytime drumming or pecking | Chattering, nest-material carrying flights | Soft calls near entry |
| MBTA protection (U.S.) | Yes — protected | No (House Sparrow and Starling are non-native) | Yes — protected |
Measure the hole diameter with a tape measure. A round 1.5-inch hole with chips below almost certainly belongs to a Downy or Hairy Woodpecker. A roughly rectangular 3-by-4-inch excavation signals a Pileated. A hole stuffed with dry grass and straw with no chips underneath is a House Sparrow or European Starling. Knowing this matters because House Sparrows and European Starlings are not covered by the Migratory Bird Treaty Act in the United States, which means you have more flexibility to act immediately, subject to local rules. Native woodpeckers and songbirds are a different story.
Seasonal timing, nesting laws, and when to wait
This is the section most DIY guides skip, and it is the most important one on this site. Getting the timing wrong does not just disturb wildlife, it can put you on the wrong side of federal law.
U.S. legal baseline
The Migratory Bird Treaty Act (MBTA) prohibits taking, damaging, or destroying the active nest, eggs, or nestlings of any protected migratory bird species without a USFWS authorization. Sealing a hole with an active nest inside is destruction of that nest. For species exceptions and practical guidance on handling active nests (including House Sparrows and European Starlings), see Managing House Sparrows and European Starlings, NestWatch (Cornell Lab) Managing House Sparrows and European Starlings — NestWatch (Cornell Lab). USFWS regulatory authorizations (including the 'Birds in Buildings' provision at 50 CFR §21.14) allow narrow removals inside occupied structures, but exterior nests on siding are not automatically covered. If you are uncertain, call your regional USFWS migratory bird office before doing anything.
Canada and the UK
In Canada, the Migratory Birds Convention Act and the updated Migratory Birds Regulations (2022) similarly restrict removal or disturbance of active nests. Consult Environment and Climate Change Canada if a nest is present. In the UK, the Wildlife and Countryside Act 1981 protects all wild birds, their nests, and eggs while in use or being built. General licences from Natural England cover specific pest species in defined circumstances, but the default rule is: if a wild bird is using it, leave it.
Practical timing guide
Most small cavity-nesting songbirds in the U.S. and Canada breed roughly from March through August, though timing shifts by latitude. Many woodpeckers begin excavating nest cavities in late winter and through early summer. The safest general window for siding repairs and hole-sealing is September through February in most temperate North American locations. Check NestWatch (Cornell Lab) for regional timing data on your specific species before committing to a repair date. See Backyard Bird Nest and Egg ID / NestWatch timing guidance, Cornell Lab Academy for regional nesting-season timing and NestWatch data Backyard Bird Nest and Egg ID / NestWatch timing guidance — Cornell Lab Academy.
- Active nest present (adult entering/exiting, chicks audible, eggs visible): wait and monitor. Mark the date adult birds are last seen feeding young. Allow 2 weeks after fledging before repairs.
- Hole is empty and shows no fresh activity: safe to repair anytime outside breeding season, and potentially during breeding season if you are certain it is unoccupied.
- House Sparrow or European Starling nest (U.S.): not MBTA-protected federally, but confirm your state and local rules first. Remove nesting material and repair promptly to discourage re-nesting.
- Unsure of species or status: photograph the hole and activity pattern, then contact your regional wildlife agency.
Materials and tools checklist
I keep this kit in a single bucket so I am ready when the repair window opens. You probably already own most of it.
Tools
- Tape measure and pencil
- Utility knife with fresh blades
- Oscillating multi-tool or jigsaw (for wood and fiber-cement cuts)
- Circular saw (for full board replacement)
- Siding removal tool / zip tool (vinyl)
- Putty knife and 6-inch drywall knife
- Wire brush and stiff-bristle brush
- Drill and corrosion-resistant screws (stainless or hot-dipped galvanized)
- Caulk gun
- Safety glasses, work gloves, N95 dust mask (fiber-cement produces silica dust)
Materials
- Exterior-grade wood filler or two-part epoxy wood filler (e.g., Bondo Wood Filler or equivalent)
- Replacement siding board in matching profile (cedar, redwood, or species-matched for wood siding)
- Vinyl siding patch panel or patch kit in matching color and profile
- Fiber-cement compatible patching compound (manufacturer-specified for Hardie or equivalent)
- Portland cement-based mortar repair (color-matched for stucco or brick)
- Exterior-grade paintable caulk or polyurethane sealant
- Exterior primer (water-based, zero-VOC or low-VOC preferred)
- Exterior latex paint or stain to match existing siding (see finish guidance below)
- Corrosion-resistant nails or screws (stainless steel or hot-dipped galvanized)
Bird-safe wood and finishes: what to use on repaired siding near nest boxes
If you keep nest boxes near your home, the finishes you use on your siding repairs matter. Chemicals that leach or off-gas near a cavity-nesting bird's territory can pose real risks. Here is the short version of what the evidence supports. For guidance on whether you should paint nest boxes and which finishes are safest, see should bird houses be painted.
Wood choice for patch pieces
For any patch piece you are cutting from new lumber, use untreated cedar, redwood, or pine to match your existing siding. For more on selecting durable, bird-friendly lumber, including why cedar, redwood, and pine are top picks, see our guide to the best wood for bird houses. Pressure-treated wood is not appropriate for patch pieces that will sit directly against a bird house or nest box, and you should avoid it as a patch material on siding within a few feet of any active nest box. For guidance on whether can you use pressure-treated wood for bird houses and similar questions, consult resource 51f280d8-28c7-4baf-87fe-b499e1ca7d68. Modern pressure-treated lumber uses alkaline copper quaternary (ACQ) or copper azole preservatives, and while these are less acutely toxic than older CCA formulas, copper compounds can still be harmful to birds at close contact. For siding repairs well away from nest boxes, standard ACQ pressure-treated lumber is structurally acceptable but offers no advantage over untreated cedar or redwood, which weather well naturally.
Paints and stains for the repair
Once any repair patch is fully cured and primed, a quality exterior latex paint is a safe, durable finish. For guidance on finishes safe for nest boxes, see our guide to the best finish for bird houses. For guidance on selecting paint shades that attract or deter birds, see best color for bird house. Water-based latex paints cure quickly, have low VOC emissions once dry, and do not leach solvents into wood. Oil-based paints and solvent-heavy alkyds are not recommended near nest boxes because residual solvents can off-gas into adjacent cavities for weeks. If you are color-matching stained cedar siding, a water-based exterior deck stain or semitransparent siding stain is the right approach. For color matching, take a paint chip or photo to your paint counter and ask for a spectrophotometer match. For recommended products and application tips, see our guide to the best stain for bird houses.
Tung oil and penetrating finishes
Pure tung oil (100% Chinaeseoleum vernicifluum seed oil, no metallic driers or petroleum thinners added) is among the most bird-friendly penetrating wood finishes available. It cures by oxidative polymerization into the wood fiber rather than forming a surface film, and once fully cured, it is considered non-toxic. The key word is fully cured: wet or partially cured tung oil is not safe around birds. Allow at least 72 hours of ventilation and cure time before considering the repair area near an active nest box. Many products labeled 'tung oil finish' contain significant amounts of petroleum solvents or polyurethane and are not the same thing. Read the label.
Quick finish comparison
| Finish type | Bird-safe once cured? | Good for siding patch? | Notes |
|---|---|---|---|
| Exterior latex paint (water-based) | Yes | Best choice | Fast cure, low VOC, easy color matching |
| Water-based exterior stain | Yes | Good for stained wood siding | Allow 48 hr cure near nest boxes |
| Pure tung oil (no additives) | Yes, when fully cured | Good for raw wood patches | Allow 72+ hr cure; verify label says 100% tung oil |
| Oil-based alkyd paint | Caution | Acceptable on siding far from nests | Solvent off-gassing; avoid near active nest boxes |
| 'Tung oil finish' blends with solvents | Caution | Not recommended near nest boxes | Read ingredient label carefully |
| Pressure-treated wood as patch material | Avoid near nest boxes | Use only well away from nests | Copper preservatives; use untreated cedar instead |
Temporary patch vs. permanent repair: which to choose
Sometimes you need to stop water intrusion right now but cannot do a full repair yet, either because the nest is still active or because matching materials are on order. Temporary patches buy you time but are not a permanent solution.
| Option | Best use case | Lifespan | Limitations |
|---|---|---|---|
| Exterior paintable caulk bead | Hairline gaps, edges around a patch | 1–3 seasons if UV-stable | Does not span holes larger than ~0.5 in alone |
| Aluminum or galvanized metal flashing patch (taped) | Emergency water stop over hole up to 3 in | 1 season | Not invisible; birds may pull at edges |
| Vinyl siding patch tape | Holes under ~1 in in vinyl siding | 1 season | UV degradation; replace with panel repair |
| Spackling compound over small hole | Vinyl or painted wood, holes under 1 in | Months only | Not waterproof; for appearance only until proper repair |
| Two-part epoxy wood filler (permanent) | Wood siding holes up to about 2 in | Indefinite if primed/painted | This is a permanent repair, not just temporary |
My rule of thumb: if the hole is larger than about 1 inch in diameter, skip the temporary fix and do the permanent repair as soon as the nest is inactive. Water gets behind small temporary patches, and wood rot can develop in a single wet season. A properly executed epoxy or Dutchman patch, primed and painted, will outlast the original siding.
General repair workflow: the steps that apply to every siding type
Regardless of siding material, the sequence below applies to every hole repair. The material-specific steps in the sections that follow build on top of this workflow.
- Confirm the nest is inactive. Observe the hole for at least 15 minutes on two separate days. No adult entering or exiting, no chick sounds. If any doubt, wait.
- Remove any nesting material from inside the cavity using gloved hands and a trash bag. Dispose of it in a sealed bag, not your compost pile. Wash your hands thoroughly. Bird nest material can harbor mites, lice, and other parasites.
- Inspect the cavity interior. Use a flashlight to check for rot, soft wood, insect damage, or water staining around the hole. Probe soft spots with a screwdriver. Soft, punky wood must come out before you patch over it.
- Mark your cut lines at least 1 inch into sound material on all sides of the damage. This is critical: patching over soft or rotten wood will fail.
- Make clean cuts. Use the appropriate tool for the material (oscillating multi-tool for tight spots, jigsaw or circular saw for longer cuts in wood or fiber-cement).
- Treat any exposed bare wood with an exterior wood preservative or end-grain sealer before patching. This stops future rot at cut edges.
- Fit and fasten your patch using corrosion-resistant fasteners. No regular steel nails: they rust, stain the siding, and fail at the fastener head.
- Caulk all seams and edges with exterior-grade paintable caulk. Tool the bead smooth. Do not leave gaps, even small ones.
- Prime immediately. Unprimed wood or filler absorbs moisture and paint finishes fail faster. Use a quality exterior primer and allow it to dry fully per label.
- Apply finish coat(s) to match existing siding. Two thin coats beat one thick coat every time.
Repairing wood siding: step-by-step
Wood clapboard, shiplap, and board-and-batten are the most common siding types where woodpeckers cause significant holes. You have two main paths: an epoxy filler repair for holes up to about 2 inches, or a Dutchman patch for larger damage. For extensive rot or structural compromise, replace the full board.
Small holes (under 2 inches): two-part epoxy filler repair
- Wear safety glasses and gloves. Mix two-part exterior epoxy wood filler per manufacturer instructions on a disposable mixing surface. Work in temperatures above 50°F (10°C) for proper cure.
- Pack the mixed epoxy firmly into the cleaned, dry hole using a putty knife. Slightly overfill — epoxy shrinks minimally but you want material proud of the surface so you can sand it flush.
- Allow full cure per label (typically 30–60 minutes for handling, 24 hours before sanding).
- Sand flush with the siding surface using 80-grit sandpaper, then feather with 120-grit. The goal is no visible edge.
- Wipe clean, then apply exterior primer to the repair and a 2-inch feathered margin around it.
- Apply two coats of finish paint matched to the existing siding. See texture matching tips below.
Larger holes (over 2 inches): Dutchman patch repair
- Mark a clean rectangle around the damaged area with a pencil and speed square, extending at least 1 inch into sound wood on all sides.
- Set your circular saw blade depth to exactly the thickness of your siding board (typically 0.75 in for clapboard). Cut the two horizontal lines. Use an oscillating tool or chisel for the vertical end cuts to avoid overcutting into adjacent boards.
- Remove the damaged section. Inspect behind it for moisture barrier, sheathing damage, or rot. Repair any underlying damage before proceeding.
- Cut a replacement patch (the 'Dutchman') from matching siding stock to fit the opening precisely. If your siding is painted cedar, source a matching pre-primed cedar clapboard. The grain direction should match the original board.
- Test-fit the Dutchman. It should sit flush with no proud edges or gaps wider than 1/16 inch.
- Apply exterior polyurethane construction adhesive to the back face and fasten with corrosion-resistant nails or screws into the sheathing below. Drive fasteners at the same spacing as the original siding (typically every 16–24 inches into studs).
- Caulk all four seams with exterior paintable caulk. Tool flush. Allow to skin over (about 30 minutes for most latex caulks).
- Prime all bare wood including cut edges and the full patch face. Allow to dry fully.
- Apply two finish coats matched to existing siding.
Texture and color matching tips for wood siding
An invisible repair on aged painted wood is the hardest part of this job. The existing siding has years of UV weathering, dirt accumulation, and paint buildup that a fresh patch cannot instantly replicate. Here is how to get close. Clean the entire wall section with a soft brush and mild detergent, rinse, and allow to dry before painting. Take a paint chip (pry up a small flake from an inconspicuous spot) to a paint store and have it spectrophotometer-matched. If the siding has a brushed or rough-sawn texture, apply a light skim coat of exterior texture paint over the primed patch before the finish coat. Paint the entire board from end to end, not just the patch area: a spot-painted patch almost always shows as a sheen difference even when the color is exact.
Repairing vinyl siding: step-by-step
Vinyl siding does not rot, but bird holes in it are still a serious problem. Water gets behind the panel and can reach the sheathing, and the hole is an open invitation for repeat visits. Small holes under about 1 inch can be temporarily sealed with exterior spackling compound or a purpose-made vinyl patch kit, but for anything larger, replacing the damaged panel section is the right repair.
Holes under 1 inch: temporary vinyl patch
- Clean the area around the hole with a damp cloth and allow to dry completely.
- Apply exterior spackling or a color-matched vinyl patch compound with a putty knife, slightly overfilling the hole.
- Smooth flush and allow to cure per label.
- If the existing panel is painted, touch up with matching exterior latex paint. If the panel is unpainted colored vinyl, a color-matched vinyl touch-up paint is available at siding suppliers.
Holes over 1 inch: vinyl panel patch or full panel replacement
- Purchase a replacement vinyl panel in the matching profile and color from the original manufacturer if possible. Bring a piece of the removed panel to a siding supplier to match the profile (Dutch lap, beaded, D4, D5, etc.).
- Use a siding removal tool (zip tool) to unlock the butt seam of the damaged panel from the panel below it. Slide the tool along the bottom edge of the panel and pull down gently to release the locking channel.
- Remove the nails or screws holding the top nailing hem of the damaged panel using a pry bar and hammer. Work carefully to avoid cracking adjacent panels, especially in cold weather (vinyl becomes brittle below about 40°F / 4°C).
- Slide the damaged panel out. Inspect the moisture barrier and sheathing behind it. If you see water staining, soft sheathing, or mold, address it before installing the new panel.
- Cut the replacement panel to length with a fine-tooth saw or aviation snips. Score-and-snap also works cleanly.
- Slide the new panel into position from one end. Lock the bottom seam onto the top of the panel below it, then nail the top nailing hem. Do not nail tight: leave a 1/32-inch gap at each fastener to allow for thermal expansion. This is the most commonly skipped step, and it causes buckling.
- Re-lock the panel above using the zip tool to re-engage the locking channel.
- Run a thin bead of color-matched caulk at the cut ends of the patch if the panel does not span the full wall section.
Invisible-repair techniques for vinyl
Vinyl fades over time, and a new panel will be noticeably brighter than the surrounding siding. There is no perfect solution, but a few things help. Source the replacement panel from the original manufacturer using the profile code stamped on the back of the damaged panel. Ask the supplier if they have aged stock or a 'weathered' color variant. For a small patch within a panel, a vinyl color-matched touch-up paint brushed over the new section after installation can reduce the contrast noticeably. If the siding is more than ten years old, consider replacing the entire wall section rather than a single panel, as color variation between adjacent panels becomes very apparent.
Repairing fiber-cement, stucco, and brick/veneer siding
Fiber-cement (e.g., James Hardie)
Fiber-cement is hard and durable, so bird holes in it tend to be less common than in wood, but Pileated Woodpeckers are strong enough to get through it. Always wear an N95 respirator and safety glasses when cutting or sanding fiber-cement: it produces respirable silica dust. Manufacturer guidance from James Hardie favors replacing the full damaged board rather than patching small sections. For small punctures, use a compatible fiber-cement patching compound, prime with a manufacturer-approved primer, and finish with two coats of 100% acrylic exterior paint. Use corrosion-resistant (stainless or hot-dipped galvanized) fasteners only: standard steel fasteners corrode and stain fiber-cement permanently.
Stucco
Stucco repairs require matching the original system chemistry. Applying a Portland cement patch over an older lime-based stucco system is a common failure mode: the incompatible materials crack at the patch boundary. For small bird holes, remove all loose material back to sound substrate, clean the opening, dampen the edges to reduce suction, and build up in layers per ASTM C926: scratch coat, brown coat, finish coat. Match the finish coat texture by experimenting on a scrap board. Wet-dash, dry-dash, skip-trowel, and smooth finishes each require specific tools and technique to replicate. If your stucco is an EIFS (Exterior Insulation and Finish System) synthetic stucco, use only EIFS-compatible repair products from the original system manufacturer.
Brick and stone veneer
Birds rarely excavate into masonry directly, but House Sparrows and Starlings exploit existing mortar gaps or failed weep holes. For mortar joint repairs, remove deteriorated mortar to a depth of at least 3/4 inch using an oscillating tool or grinder. Blow out dust, dampen the joint, and pack new mortar in layers, finishing with a tooled profile matching the original joint. Match mortar color and compressive strength to the original: a hard Portland-only mortar on soft historic brick will cause the brick faces to spall. If a brick unit must be replaced, source a matching unit from a salvage yard and use mortar to match color and texture. This repair is worth getting right because a mismatched brick patch is permanent.
Stopping repeat damage: humane deterrents and better alternatives
Patching the hole without addressing why the bird targeted that spot means you will be doing this repair again next spring. Woodpeckers drum on resonant surfaces (hollow walls over an air gap are irresistible), forage for insects in deteriorating wood, or excavate nest cavities. Starlings and Sparrows return to successful nesting sites season after season. Here is what actually works.
For woodpeckers
- Hang visual deterrents at the repair site: reflective tape, mylar streamers, or a small mirror-surface object within 3 feet of the hole location. These work best when installed the moment repairs are complete and are refreshed every season.
- Apply a commercial bird repellent gel or spray (non-toxic, sticky-surface types) to the repaired area and surrounding siding. Reapply after rain.
- Check the wall cavity behind the repair for a resonance issue. A hollow wall that sounds like a drum when tapped is especially attractive. Adding insulation to the wall cavity reduces the resonance dramatically.
- Inspect the damaged area and adjacent siding for insect activity. Woodpeckers forage where insects are present. If you find carpenter ants, wood-boring beetle larvae, or termite activity, address the pest infestation: no deterrent outcompetes a food source.
- Install an appropriate nest box nearby as a competing cavity option. A properly sized woodpecker box with the right entrance diameter can redirect a nesting bird from your siding to a dedicated house. See our species-appropriate hole-size guidance for details.
For House Sparrows and European Starlings
- Seal all gaps and holes in siding, eaves, and vents promptly after nests become inactive. These species return to successful sites year after year.
- Install hardware cloth (1/4-inch galvanized mesh) over any vents or weep holes where birds have entered. Use a proper louvered vent cover with an internal mesh screen.
- If you manage nest boxes, monitor weekly during breeding season and remove House Sparrow and Starling nest material. For nest boxes intended for native species, consider a Sparrow Spooker or other proven in-box deterrent.
Sanitation, monitoring, and seasonal maintenance
After the repair, set a reminder to inspect the repaired area in October (end of breeding season in most U.S. locations) and again in March (before nesting season begins). Look for paint failure, caulk separation, new probe marks from woodpeckers, or gaps opening at seam edges. Early detection of paint film failure at the patch edges prevents the next water-intrusion cycle before it starts. Remove any bird droppings from the siding surface near the repair using a dilute bleach solution (1 part bleach to 9 parts water) and a stiff brush. Wear gloves and avoid breathing aerosols. Dried droppings can carry pathogens and should not be left to accumulate near living areas.
When to call a professional
Most single-hole repairs in wood or vinyl siding are solidly within the DIY range. Call a professional when:
- The damage covers more than 4 linear feet of siding or multiple boards, suggesting structural sheathing involvement.
- You find soft, punky wood or discolored sheathing behind the hole indicating active rot or moisture intrusion into the wall assembly.
- The siding is fiber-cement or stucco and you are not confident matching the original system — a bad stucco patch is worse than no patch.
- You suspect an active protected-species nest and want a permitted wildlife control operator to assess and handle removal legally.
- The wall contains lead paint (pre-1978 construction): sanding or cutting releases hazardous dust, and this work requires specific protocols and may require a licensed contractor under EPA RRP rules.
- You are in Canada or the UK and the nest status is unclear: a permitted wildlife control operator can conduct the assessment legally and document it.
FAQ
How do I quickly assess bird damage to siding and identify the likely species responsible?
Measure the hole diameter and note shape (round vs oblong/chewed), presence of fresh wood chips under the hole, nesting material protruding, droppings or seed husks, and observe behavior (daytime drumming/pecking or carrying nest material). Small circular holes ~1–2 in (2.5–5 cm) and fresh wood chips plus drumming suggest woodpeckers (Downy, Hairy, flickers, pileated). Gaping/chewed or irregular openings, nest material filling the cavity, and seed husks often point to house sparrows or starlings. Use these field clues (and local seasonal activity) to decide next steps — see Cornell Lab guidance for species cues (All About Birds) and extension diagnostics for woodpeckers.
What seasonal and legal timing rules should I follow before repairing holes?
Do not disturb or seal any active nest (adults carrying material, eggs visible, chicks heard/seen, or adults feeding young). In the U.S. and Canada most native migratory birds and their nests are protected (MBTA / Migratory Birds Convention Act) — removing or damaging active nests is unlawful without permits; house sparrows and starlings are federal exceptions in the U.S. but check local rules. Plan repairs for the off‑season after fledging (commonly after late summer) or contact your regional wildlife agency or a permitted operator if you suspect active nests. See USFWS Migratory Bird Permitting Handbook and NestWatch guidance for timing.
What tools and materials should a DIY homeowner gather before attempting repairs?
Materials/tools checklist: tape measure, pencil, camera/phone (document), ladder with helper, work gloves, safety glasses, dust mask, pry bar/crowbar, circular saw or multi‑tool (for wood/fiber‑cement replacement), oscillating tool, siding removal tool (vinyl), chisel and hammer, cold chisel/mortar rake (masonry), stucco trowel and hawk, exterior wood epoxy or two‑part filler, exterior polyurethane glue, stainless/galvanized or corrosion‑resistant fasteners, replacement siding panels/boards/brick or matching mortar/stucco patch, sandpaper, primer (exterior, stain‑blocking), exterior paint or bird‑safe finish (see next FAQ), exterior grade caulk/sealant (silicone or polyurethane), paintable elastomeric patch (vinyl temporary fixes), mortar mix and pointing tools (brick), fiber‑cement compatible patch compound, paint brushes/rollers, drop cloths, bleach or disinfectant for sanitation, and pest exclusion hardware (vent screens, metal flashing). Gather manufacturer‑recommended patch materials for fiber‑cement and consult local codes for masonry repair.
How do I decide between a temporary patch and a permanent repair?
Temporary patch: choose when you need to immediately exclude weather/critters but suspect nesting activity or plan a later full repair — use removable weather‑resistant seal (paintable elastomeric patch, temporary caulk, or foam backer with cover plate). Permanent repair: performed only when nests are inactive and after confirming no future immediate use — replace the damaged board/panel, install a Dutchman patch for wood, replace vinyl panel, replace fiber‑cement board or use manufacturer‑approved compound, repair brick/veneer mortar or replace brick, or perform ASTM‑compliant stucco patch. Permanent repairs require proper sealing, priming and finish to prevent rot and re‑use.
Step‑by‑step: how do I repair small to medium holes in wood clapboard or shiplap siding?
1) Confirm no active nest. 2) Document damage and measure. 3) Remove loose/rotten wood back to sound timber; clean debris. 4) For small gouges: apply two‑part exterior epoxy wood filler, shape after cure, sand, prime and paint. 5) For larger localized damage: cut a Dutchman patch — remove a clean rectangular/feathered area to receive replacement; fit a matching wood patch, glue with exterior polyurethane adhesive, fasten with corrosion‑resistant nails, fill seams with exterior caulk and epoxy fillers, sand, prime (stain‑blocking if needed) and paint to match. 6) For full board failure: remove and replace entire board, reinstall flashing/seals, prime and paint. 7) Seal bottom edge and caulk around overlaps to prevent moisture. (Follow contractor/This Old House Dutchman steps.)
Step‑by‑step: how do I repair holes in vinyl siding?
1) Ensure no active nest. 2) For very small holes (≤1 in): clean, use paintable exterior caulk or elastomeric patch as interim; note these are short‑term. 3) For larger or permanent repairs: remove the damaged panel with a siding removal tool, cut a replacement panel to size per manufacturer, snap and lock seams, reinstall clips/fasteners at recommended spacing, and blend color by replacing the full course if needed. 4) If matching color is impossible, paint the area with quality exterior vinyl‑safe paint after priming. 5) Seal gaps with appropriate exterior caulk and install metal vent covers/screens to prevent re‑use.
Next Articles
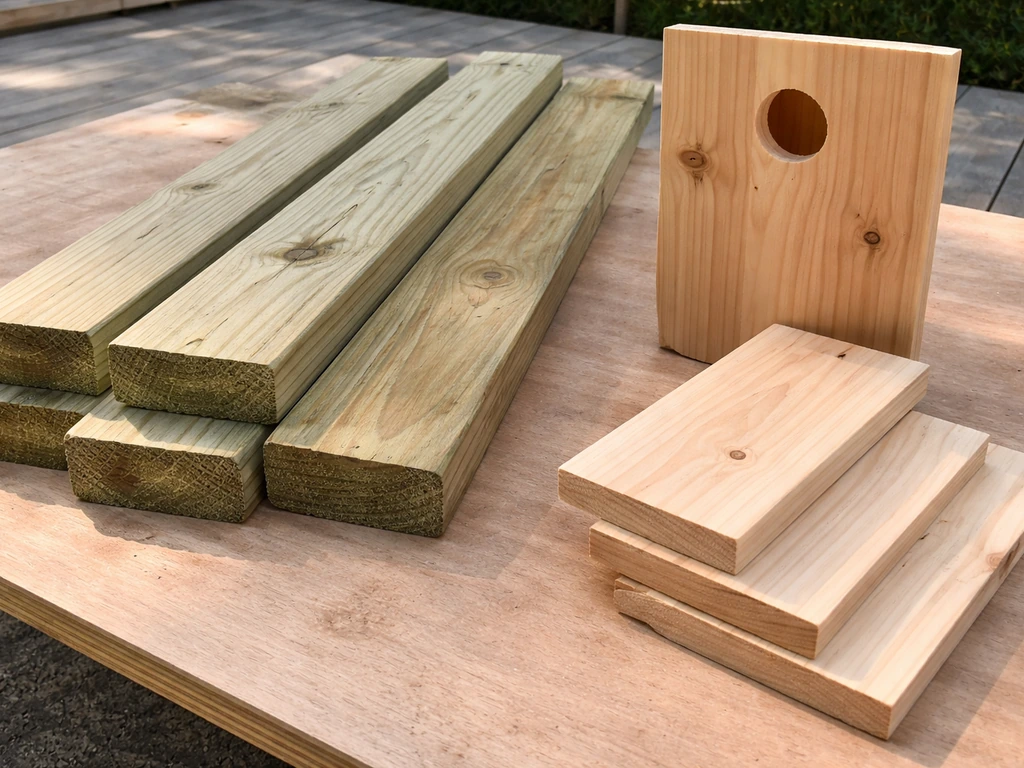
Can You Use Pressure-Treated Wood for Bird Houses?
Learn if pressure-treated wood is safe for bird houses, when to avoid it, and steps to seal, ventilate, and maintain.
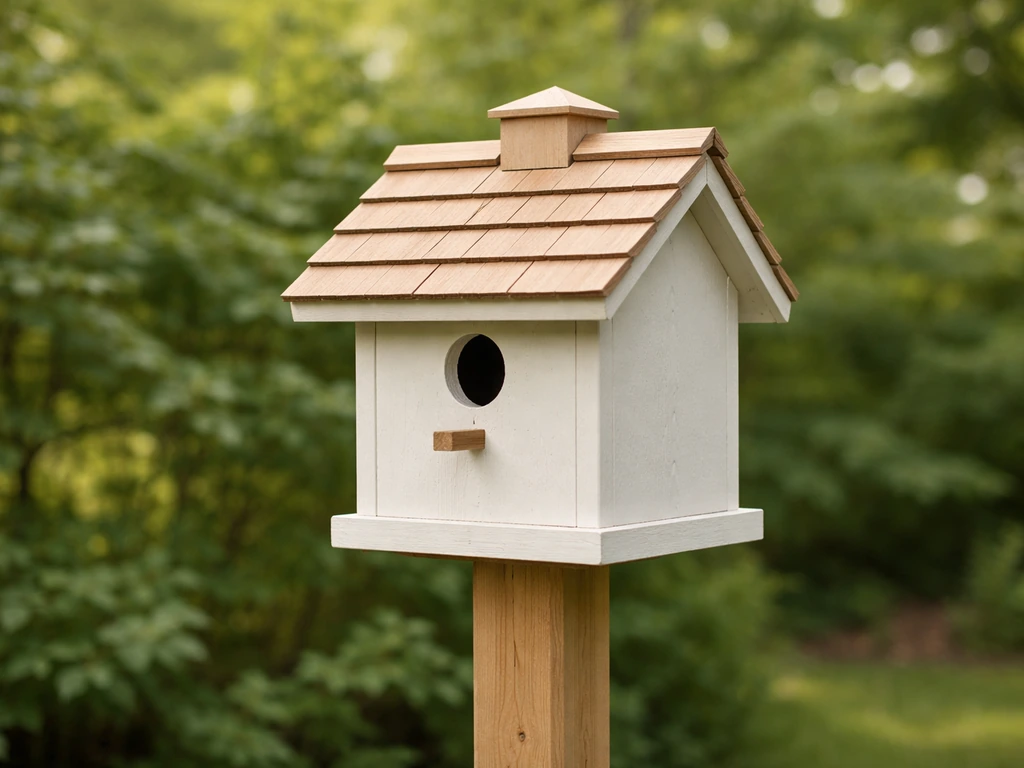
Best Color for Bird House: Attract Birds Safely
Choose the best bird house colors and learn safe paints, prep, curing times, and placement tips to attract backyard spec
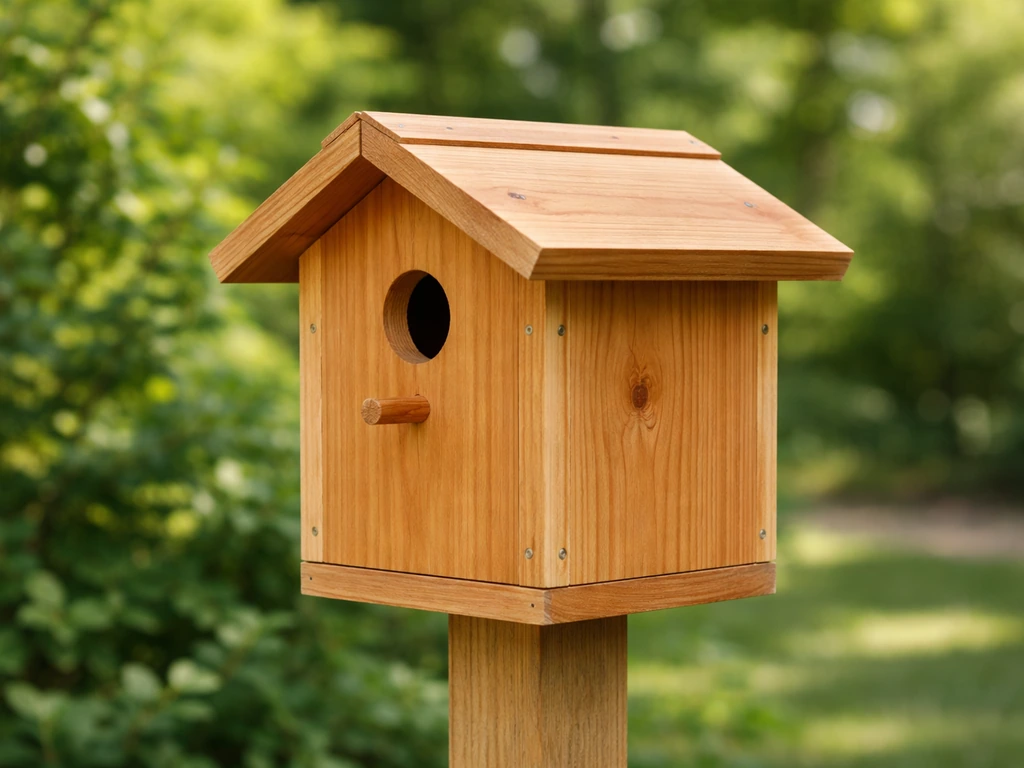
Best Wood for Bird Houses: Safe, Durable DIY Options
Choose safe, durable timber for bird houses, with wood to use, avoid, build tips, sealing steps, and maintenance care.