The best snake guard for your bird house depends on one thing above everything else: how your box is mounted. A pole-mounted bluebird box needs a different solution than a tree-hung chickadee box, and getting that match wrong means the guard either fails or accidentally blocks the birds you're trying to help. The short answer: a stovepipe or PVC pipe baffle on a smooth metal pole is the most reliably snake-proof setup you can build or buy today. Everything below will walk you through why snakes are such a persistent problem, how to size and install the right guard for your specific setup, and how to verify it's actually working.
Best Snake Guards for Bird Houses: Choose and Install

Maya Thompson
20 Apr 2026
Why snakes target bird houses in the first place
Cavity-nesting boxes are almost perfectly designed from a snake's perspective. The small entrance hole that keeps out larger predators like raccoons and crows does nothing to stop a rat snake, black snake, or corn snake. Those species are skilled climbers, slender enough to enter through a standard 1.5-inch bluebird hole, and highly motivated: a nest full of eggs or recently hatched chicks is a concentrated, easy meal. Snakes that specialize in egg predation don't need to ambush anything, they just need to find the box, reach it, and slip inside.
The predators you're most likely dealing with in the continental U.S. are rat snakes (Pantherophis species) in the East and Southeast, bull snakes and gopher snakes in the Midwest and West, and king snakes across a wide range. All of them climb poles, fence posts, and tree trunks with ease. They tend to be most active from late spring through early fall, which lines up almost exactly with peak nesting season for cavity nesters like bluebirds, tree swallows, and wrens. If you've noticed birds abandoning a box mid-season or found an empty nest with no obvious explanation, snake predation is one of the first things worth investigating. The topic of what else attracts unwanted visitors to your setup connects closely to how you mount and position your boxes. If you also wonder whether bird houses can bring in snakes, the guard design and mounting details matter just as much as the entrance hole size attract snakes. Once you’ve addressed the snake problem, also protect bird houses from other predators by choosing the right entrance size and mounting location. If you're also trying to figure out what bird houses attract which birds for your yard, use the same setup details like entrance size and placement as a starting point. Do bird houses attract snakes, too, because they bring in the wildlife that predators follow Attracting birds. Attracting birds to your bird house is largely about matching the species' needs for entrance size, location, and nesting conditions what else attracts unwanted visitors.
Sizing the protection: entrance holes, guard dimensions, and mounting height
Guard sizing is where most DIYers go wrong. Too small and the snake finds a gap. Too loosely fitted to the pole and it wobbles or can be bypassed. Here's what the numbers actually need to look like for common setups.
Pole diameter compatibility
Your guard's center hole must match your pole. A common standard: a 4-inch center hole fits a 3-inch post, a 5-inch center hole fits a 4-inch post, and a 6-inch center hole fits a 5-inch post. For thinner EMT conduit or rebar poles (the most common DIY choice), look for guards specifically rated for 3/4-inch to 1-inch pole diameter. If the center hole is too large, even by half an inch, a determined rat snake will find that gap. The fit should be snug enough that you can't easily rotate the guard by hand once it's clamped in place.
Guard length and placement height
For pipe-style and stovepipe baffles, aim for a guard that is at least 24 inches long. Shorter guards can sometimes be bypassed if a snake launches from nearby vegetation. Position the top of the guard about 2 inches below the bottom of the nest box. This placement closes the gap between the guard and the box floor so a snake can't get a purchase above the barrier. The box itself should be mounted so the bottom of the box sits at least 4 to 5 feet off the ground, which keeps the guard well above a snake's easy striking or lunging height from the ground.
Entrance hole extensions
Separately from the pole guard, consider a hole guard (sometimes called an entrance guard or predator block) mounted directly over the entry hole. These add a physical extension around the hole that sticks out roughly 1/2 inch to 3/4 inch from the face of the box, making it harder for a snake already on the box to reach its head inside. A common wood version uses a 5-inch by 5-inch block with a centered 3-inch diameter hole aligned with your box's entrance. These don't replace a pole guard, but they're a good secondary layer.
The main types of snake guards and when to use each
There are four practical guard styles worth knowing. Each solves a slightly different problem depending on your mounting situation.
| Guard Style | Best For | Key Advantage | Main Limitation |
|---|---|---|---|
| Stovepipe / pipe baffle | Smooth metal poles | Highly effective, snake can't grip or get above it | Must be slid onto pole before box is installed |
| Collar / circular sheet baffle | Wooden posts or larger square posts | Works on irregular cross-sections, adjustable fit | Seam gaps must be carefully overlapped and secured |
| PVC pipe wrapper | EMT conduit or smaller poles | Low cost, easy DIY, UV-resistant options available | Shorter sections may be less effective than stovepipe |
| Entrance hole guard / excluder block | Any mounting style, added to box face | Adds depth at entry hole, deters from the box face | Does not protect the pole climb path, secondary use only |
Stovepipe and pipe baffles
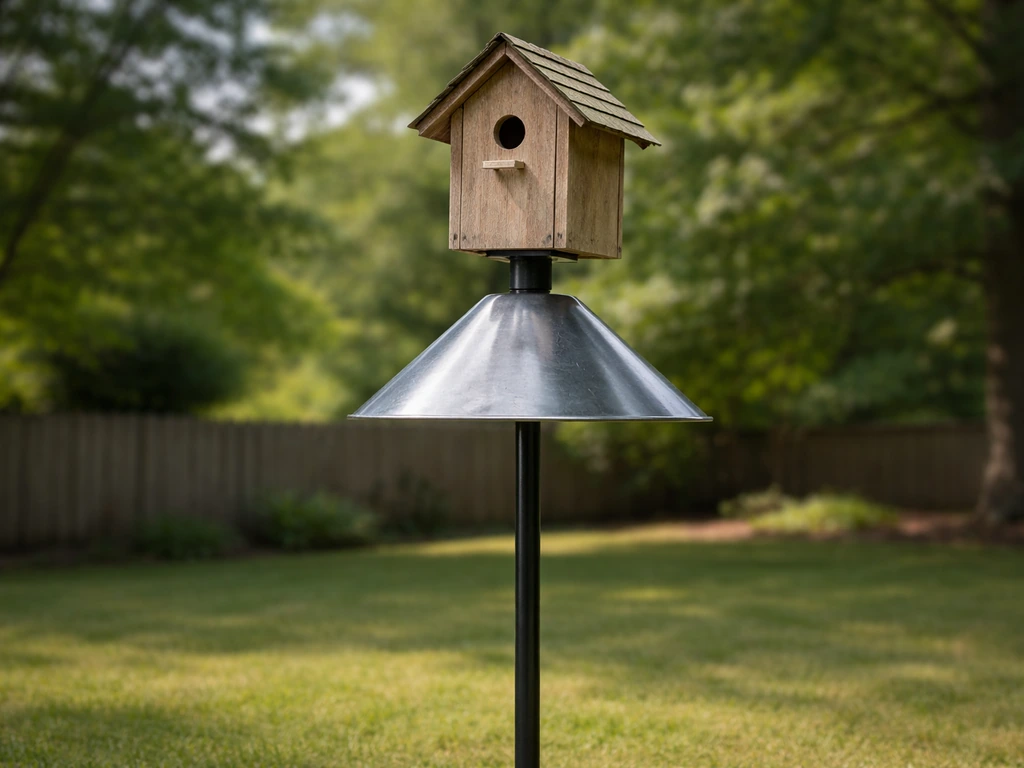
This is the gold standard for pole-mounted boxes and the style I'd recommend to almost anyone starting fresh. An 8- to 12-inch diameter HVAC metal stovepipe section (ideally as wide as the nest box itself) slid onto the mounting pole and positioned just below the box creates a smooth, ungrippable cylinder that a snake simply cannot navigate. The wider the diameter, the better: a snake at the bottom of an 8-inch pipe can't reach the inner wall to climb. Aluminum and galvanized steel versions hold up well outdoors. Galvanized stovepipe sections are inexpensive at most hardware stores and are widely used by bluebird trail monitors across the country.
Collar and circular sheet baffles
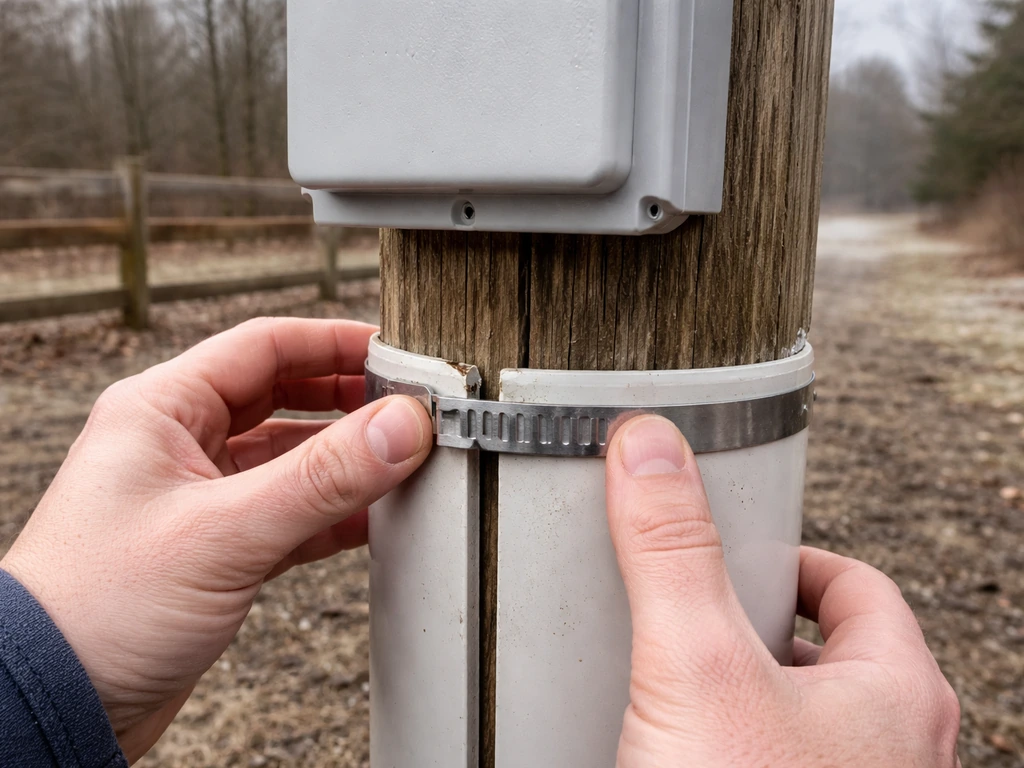
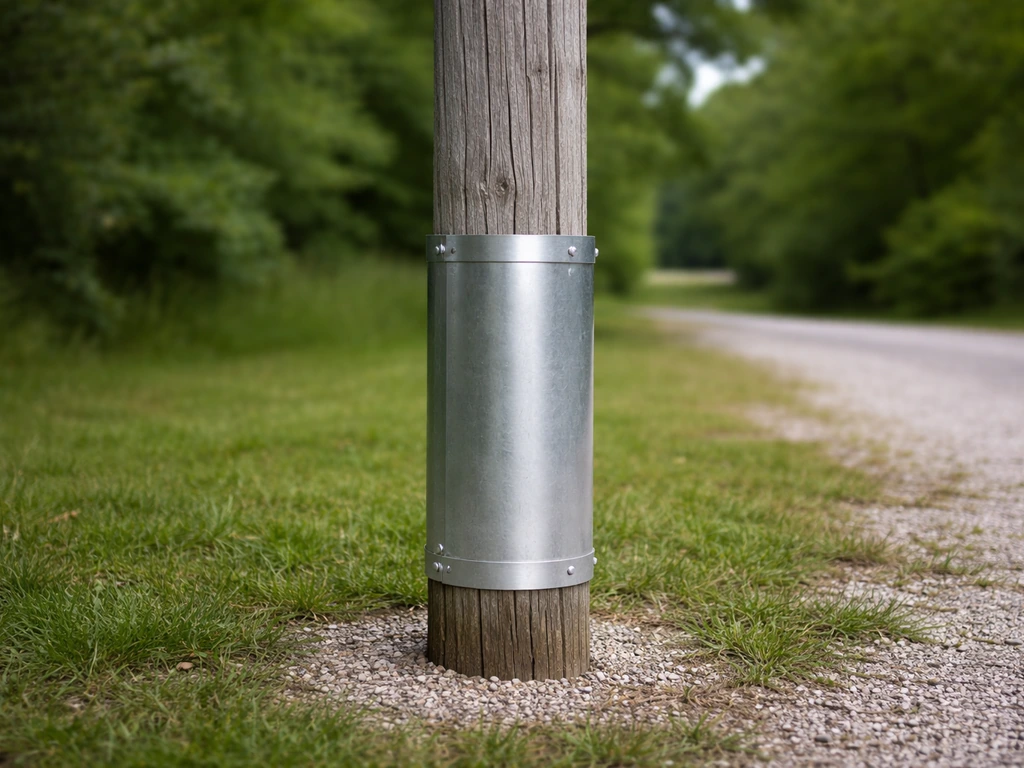
If your box is on a wooden fence post, a large-diameter wooden stake, or any post too wide for a standard pipe section to slide over, a circular sheet metal collar is the practical alternative. The design is essentially a flat disc or shallow cone that wraps around the post. One USDA NRCS design specifies cutting a 60-degree wedge out of a circular sheet, then overlapping the cut edges to fit snugly around the post. That overlap is critical: overlap the cut edges to the marked dotted line and secure them firmly. Any gap at the seam is an invitation. This style is also useful on tree-mounted boxes, though NestWatch rightly points out that tree mounts in general are harder to fully predator-proof because snakes have multiple approach routes through bark and nearby branches.
PVC pipe guards
A 2-foot section of 4-inch PVC pipe split lengthwise and clamped around your mounting pole works well as a budget-friendly pole guard. Oklahoma wildlife guidance recommends this approach specifically. PVC is smooth, UV-stable in most grades, and snakes get no traction on it. The downside is that split-pipe designs have a seam. That seam needs to be sealed or overlapped tightly, and the end caps or edges at top and bottom need to fit close to the pole. Use pipe clamps at top and bottom, not just at the center.
Entrance hole guards
These mount directly over the existing entry hole and are most useful as a secondary barrier on boxes that already have a pole guard. A wooden or metal block with a centered hole aligned to your box's entrance extends the tunnel depth slightly, which discourages a snake from probing inside even if it has somehow reached the box face. They're easy to retrofit onto an existing box with a couple of screws. On their own, without a pole guard, they are not adequate protection.
Materials and durability: what actually holds up outside
A snake guard lives outside year-round, baking in summer sun, sitting in ice in winter, and getting rained on constantly. Material choice matters more than most people realize.
- Galvanized steel stovepipe: excellent rust resistance, strong, smooth surface, widely available at hardware stores, typically the most cost-effective durable option
- Aluminum: lightweight, naturally rust-proof, holds up well to UV, slightly more expensive than galvanized steel but worth it in coastal or high-humidity climates
- Schedule 40 PVC (gray or white): UV-stabilized grades resist sun degradation for many years, smooth enough to prevent grip, easy to cut and seal, not chew-resistant but snakes don't chew
- Powder-coated or painted steel: durable if the coating stays intact, but chips expose the metal to rust, inspect annually
- Wood (cedar or pine): usable for entrance hole extensions where a small block attaches to the box face, not recommended for pole guards because it warps and provides texture snakes can grip
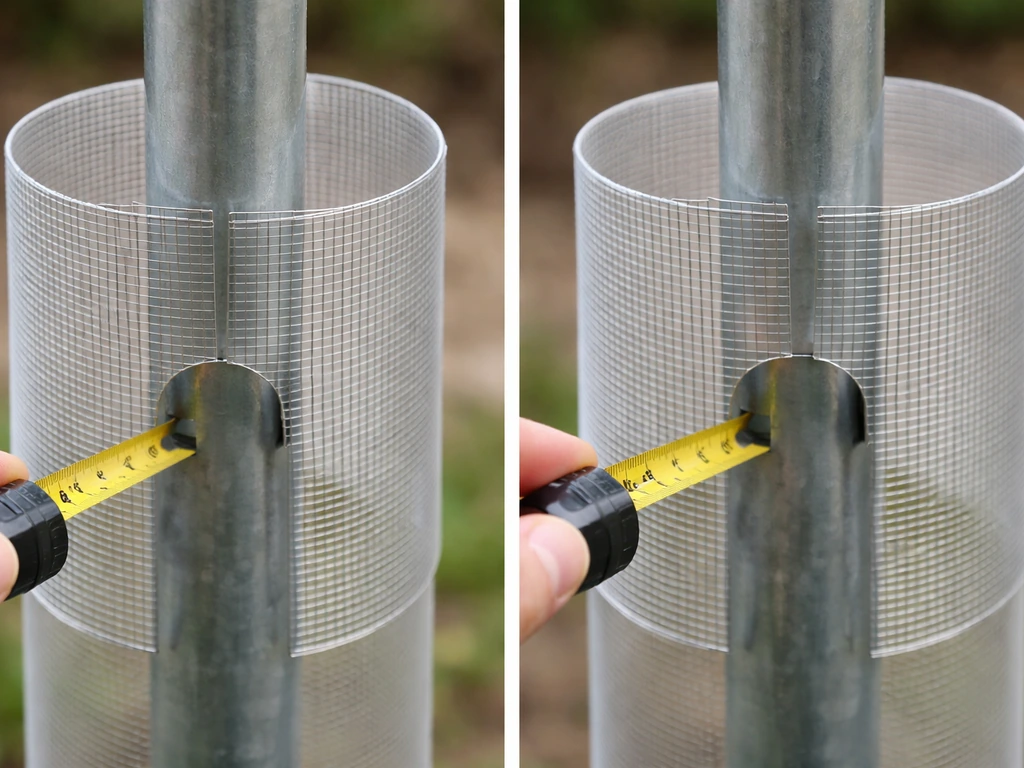
- Avoid: hardware cloth, chicken wire, or any mesh as a primary snake barrier because snakes can thread through gaps, and the texture gives them a climbing surface
For attachment hardware, use stainless steel or hot-dipped galvanized screws and bolts. Zinc-plated fasteners rust out within two or three seasons in most climates. A guard that holds perfectly in year one but falls loose in year two because a bolt rusted through is a common and easily preventable failure. If you're using pipe clamps, choose stainless steel worm-drive clamps over the standard zinc versions.
Installation steps that actually prevent entry
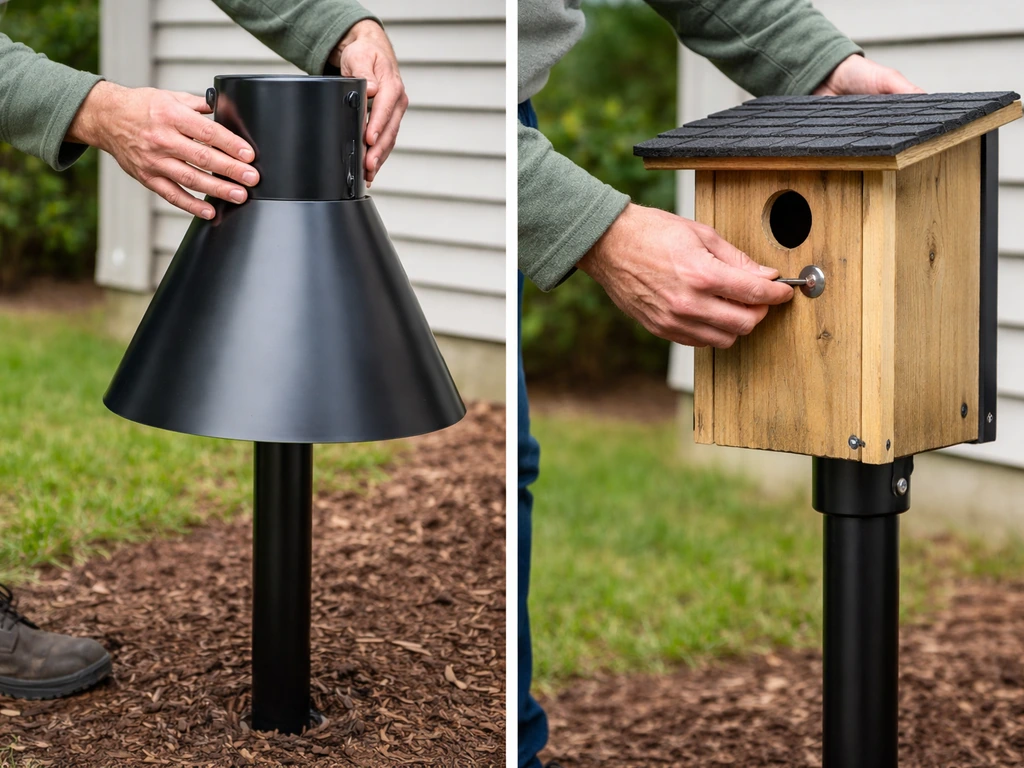
The single most important installation rule is one that trips up almost everyone building their first guarded setup: slide the baffle onto the pole before you attach the nest box. Sialis also emphasizes installing the baffle on the pole before installing the nest box, and notes how coverage improvements can help prevent snakes from going around a baffle extension put the baffle onto the pole before you attach the nest box. Once the box is on, you often can't get a pipe-style guard over the mounting hardware. Do it in this order every time.
- Set your pole at the correct height. For most cavity nesters, the box entrance should be 4 to 6 feet off the ground. Mark the final mounting height of the bottom of the nest box before you install anything.
- Slide the pipe baffle or stovepipe section onto the pole from the top before attaching the box or any mounting bracket. This is non-negotiable for pipe-style guards.
- Mount the nest box to the top of the pole using your chosen hardware. Double-check that the box is secure and level.
- Slide the baffle upward so its top edge sits approximately 2 inches below the bottom of the nest box. The gap between guard and box should be minimal, no more than 2 to 3 inches.
- Secure the baffle in position. For stovepipe sections, use a hose clamp or sheet metal screw through the pipe into the pole. For PVC split sections, use two pipe clamps: one near the top and one near the bottom of the guard.
- Check the seam on any split or wrapped guard. Overlap the edges by at least 1 inch and secure with a clamp or pop rivet. There should be no visible gap when you look at the seam straight on.
- For collar-style sheet guards: after cutting the 60-degree wedge, wrap the disc around the post, overlap the cut edges to the marked line, and secure with a bolt or clamp. The cone or disc should slope slightly downward away from the pole so a climbing snake is deflected outward.
- Step back and look at every approach route to the box. Is there a nearby fence rail, tree branch, or shrub within 6 to 8 feet? Snakes can launch from adjacent structures and land above the guard. If so, trim back vegetation or reposition the pole.
Common mistakes that cause guard failures
- Installing the guard after the box is already up, which forces improvised fit and leaves gaps at the top of the guard
- Using a guard with a center hole too large for the pole, leaving a bypass gap at the pole-to-guard interface
- Mounting the guard too far below the box: a gap of 6 inches or more between guard top and box bottom gives a snake enough room to maneuver past the barrier
- Leaving the seam of a split or collar guard unsealed or loosely overlapped
- Placing the box near vegetation, fence lines, or wood structures that give snakes an above-guard entry point
- Using textured or rough-surfaced materials that provide grip
- Forgetting to account for pole wobble: a loose pole lets a baffle sag or rotate, opening gaps over time
DIY vs. buying a ready-made guard: how to decide
For most backyard birders with a standard 1/2-inch to 1-inch EMT conduit pole, buying a quality ready-made aluminum or galvanized stovepipe baffle is the faster, more reliable choice. Ready-made guards designed specifically for 3/4-inch poles come with correct center-hole sizing already done, and the better ones include mounting clamps. The main thing to verify on any commercial guard is the pole diameter compatibility listed on the packaging: if it says designed for a 3/4-inch round pole and your pole is 1-inch EMT, it will not fit correctly.
DIY makes more sense in three situations: you have a non-standard post size, you want a stovepipe guard as wide as your nest box (8 to 12 inches) and can't find one locally, or you're building and installing multiple boxes on a trail and need to keep costs low. For DIY stovepipe guards, buy a standard 8-inch or 10-inch diameter HVAC round duct section (26-gauge galvanized is fine) and a matching end cap or crimped reducer for the top. Cut to 24 inches, seal the seam with sheet metal screws, and clamp it onto the pole as described above.
What to look for on the spec sheet
- Pole diameter compatibility: must match your pole exactly or include adjustable clamp range
- Guard diameter: 8 inches minimum, 10 to 12 inches preferred for larger boxes
- Guard length: at least 24 inches
- Material: galvanized steel, aluminum, or UV-stabilized PVC
- Attachment method: clamp or bolt-through, not friction-only
- Seam construction: fully sealed or lockseam, not open-edge
- Weight: lightweight enough that it doesn't torque the pole over time
Testing the fit before nesting season
Once installed, do a physical shake test: grab the guard with both hands and push and pull in every direction. If it shifts more than a few millimeters or you can rotate it easily, tighten the clamps. Then run your fingers around the top gap between the guard and the box bottom. You should not be able to insert more than two fingers flat into that gap. If you can, lower the guard slightly or add a collar of sheet metal around the pole just above the guard top to close the space. Finally, check that birds can still approach and enter the hole without obstruction: stand back and watch the first few visits of the season to confirm normal entry behavior.
Maintenance and seasonal checks
A well-installed guard needs surprisingly little attention, but it does need a quick check at predictable intervals. Cold winters cause metal to contract and loosen fasteners. Hot summers cause PVC to expand slightly. Wind rocks poles. Clamps back off. A guard that was tight in April may have a meaningful gap by July if you don't check it.
Recommended inspection schedule
- Late winter (February to early March): do your full pre-season inspection before birds arrive. Check all clamp tightness, seam overlap, and the gap between guard top and box bottom. This is also when you clean out old nesting material and check for wasp or mouse nests inside the box.
- Mid-nesting season (May to June): do a quick visual check without disturbing the box. Look at the guard from 5 feet away: is it still vertical, still tight, still at the right height? Check for rust streaks that indicate a fastener is corroding.
- Post-season (August to September): after the last brood has fledged, do a full inspection again. Re-tighten all clamps, touch up any rust spots with a rust-inhibiting paint or primer, and note whether nearby vegetation has grown within striking distance of the box.
- After major storms: high winds can loosen clamps and shift baffles. After any storm with sustained winds over 40 mph, do a quick check.
What to record and why it helps
If you're monitoring more than one or two boxes, keep a simple log with the date of each check, the guard style on each box, and any adjustments made. NestWatch's nest monitoring forms include a field for predator guard presence, which is useful if you're submitting data. More practically, a quick written note from year to year tells you which guard styles are holding up and which boxes have had predation events, so you can make targeted improvements rather than guessing. If a box has repeated predation despite a guard being present, that's a signal to reassess the mounting geometry and nearby vegetation, not necessarily to change the guard style.
Your next steps: picking, installing, and verifying
Start by identifying your mounting setup: smooth metal pole, wooden post, fence mount, or tree mount. If you're on a smooth metal pole, go straight to a stovepipe or pipe-style baffle that matches your pole diameter, sized 8 to 12 inches in diameter and at least 24 inches long. If you're on a wooden post or non-standard mount, build or buy a collar-style sheet metal guard and pay close attention to seam overlap at installation. If your box is already hung from a tree or fence and a pole guard isn't feasible, that's the hardest situation: consider relocating to a freestanding pole setup to get full protection, since tree mounts leave too many alternate climbing routes for a guard alone to solve. The broader question of how to protect bird houses from predators includes raccoons, cats, and house sparrows alongside snakes, and a solid mounting strategy addresses all of them together. If you still need a broader birdhouse plan beyond snake-proofing, see what to consider for what birdhouse for what bird.
Once your guard is installed, do the shake test, check the gap above the guard, and watch for normal bird entry on the first few days of use. If birds are hesitating at the hole or not entering at all, check whether the guard is physically blocking their flight path to the entrance: a guard that sticks out too far horizontally below the hole can interfere with the birds' final approach angle. Adjust the mounting height so the guard sits clearly below the flight path. After that first season with no predation events, you'll have real confirmation the setup is working, and the maintenance routine above will keep it that way year after year.
FAQ
Can I use a snake guard on a bird house that’s mounted on a tree, or is it basically impossible?
A pole-style baffle will reduce risk, but tree mounts are harder to fully protect because snakes can approach from branches, bark ridges, and multiple angles. If you must keep the tree mount, add both layers (a pole-style barrier if you have any vertical member to cover, plus a hole guard over the entrance), and trim nearby climbing routes (low branches within reach).
What height should the bottom of the bird box be for best snake-guard results?
The article recommends keeping the box bottom at least 4 to 5 feet off the ground. In practice, if you have long grasses, stacked rocks, or other climbing access near the pole, raise the box an extra step (for example, closer to 6 feet) so a snake cannot use nearby footholds to reach the guard/box gap.
How tight is tight enough on clamp-on guards, and what’s the easiest way to confirm after installation?
After clamping, do the shake test, then also check alignment by looking for any visible daylight at the top gap between the guard and the box bottom. If you can see a consistent opening, tighten the clamps and re-check. Recheck 1 to 2 days after the first warm spell, since some metals and plastics settle slightly after initial tightening.
My stovepipe or PVC baffle has a seam, is that automatically a failure?
Not automatically. Seam-free designs are safest, but if you use a split-PVC or a DIY stovepipe with a seam, the critical point is eliminating an accessible path at the seam. Overlap or tightly seal the seam, ensure the ends fit close to the pole, and verify with fingers and a firm shake test that you cannot create a gap large enough for a snake to insert its head.
Do I need both a pole guard and an entrance (hole) guard?
If you have a properly mounted pole guard, a hole guard is usually a secondary layer rather than a requirement. Use the hole guard when you want extra insurance against a snake that already gets to the box face, or when your installation is less than ideal (like minor gaps you cannot eliminate). If you have no pole guard, rely on a pole or relocate rather than assuming a hole guard alone will stop snakes.
Can a snake bypass the guard by reaching from the side or from vegetation?
Yes. The article notes shorter baffles can sometimes be bypassed when snakes launch from nearby plants. Keep vegetation trimmed so there is no easy launch point within a few feet of the pole, and use the recommended baffle length (at least 24 inches) so the guard extends well above and below the entry area.
How do I prevent birds from being blocked if the guard is too far below the entrance hole?
Watch the first visits. If birds hesitate or cannot align their flight to the hole, the guard may be protruding into the approach path horizontally. Adjust the mounting height so the top of the guard sits about 2 inches below the box bottom (as recommended) and confirm birds still land and enter without scraping or detouring.
What’s the most common mistake that causes “guard installed, still had predation”?
The most frequent cause is poor geometry, especially a gap at the top between the guard and the box bottom, or a loose fit that allows rotation. Even if you bought the right style, half an inch of mismatch or a slightly oversized center hole can turn the guard into a guide for the snake. Re-measure pole diameter and center hole fit when predation is observed.
How often should I inspect the guard, and what should I look for specifically?
Do quick checks at predictable intervals, since heat, cold, wind, and fastener corrosion can change fit. Inspect for (1) loosened clamps or bolts, (2) any increase in the top gap above the guard, (3) new movement when you do the shake test, and (4) any new nearby vegetation that could become a launch point.
What fastener or clamp issue causes guards to fail over time?
Corrosion and creep. The article highlights that zinc-plated hardware often rusts in a few seasons. If you live in a wet or coastal climate, choose hot-dipped galvanized or stainless for screws/bolts, and if you use clamps, prefer stainless worm-drive clamps over standard zinc versions to reduce loosening.
How do I choose the right ready-made guard if my pole isn’t exactly the standard EMT size?
Confirm the actual outside diameter of your pole (measure it), then buy a guard explicitly rated for that diameter range. Don’t rely on naming alone (for example, “EMT” can vary). If the guard center hole is even slightly too large, it may not sit snug and can be rotated, which defeats the purpose.
If I’m relocating or expanding to multiple boxes, how do I decide whether to DIY or buy?
Buy ready-made stovepipe baffles when you can match the pole size, because correct center-hole sizing and mounting clamps are already handled. DIY makes more sense when you need a custom diameter or wider baffle to match an unusually wide nest box. For multiple boxes, cost savings are real only if you can maintain consistent measurements across all installations, since small differences lead to variable protection.
Next Articles
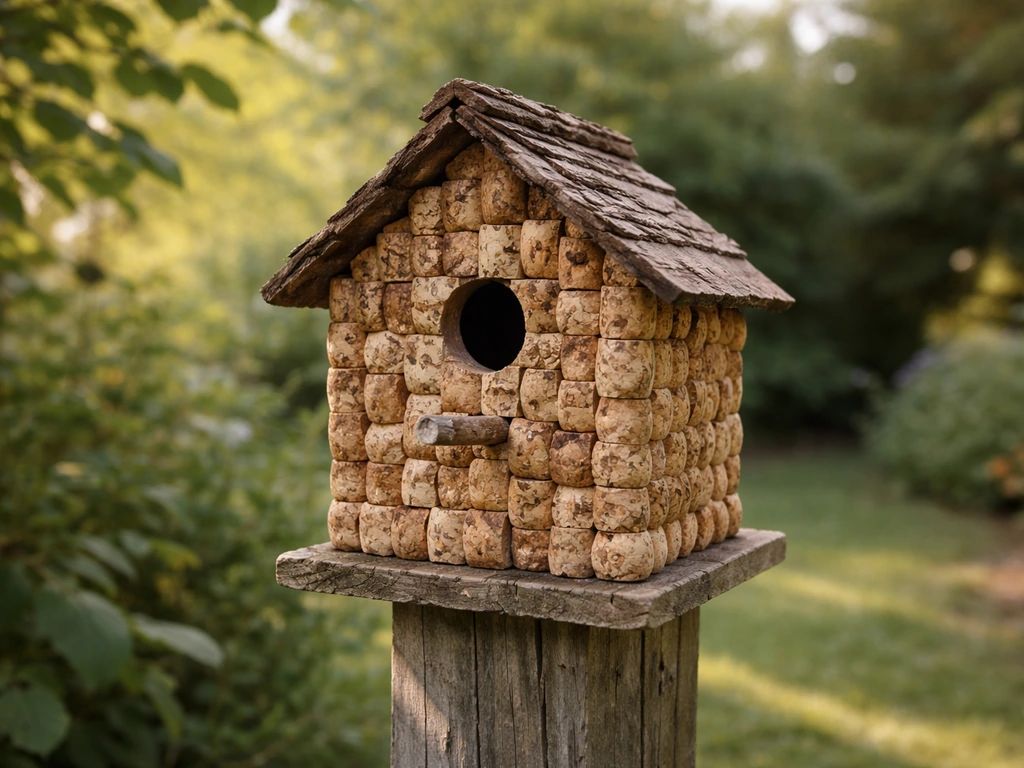
Wine Cork Bird House Instructions: DIY Steps and Bird-Safe Specs
Step-by-step wine cork mini birdhouse build with bird-safe dimensions, safe materials, mounting, cleaning, and weatherpr
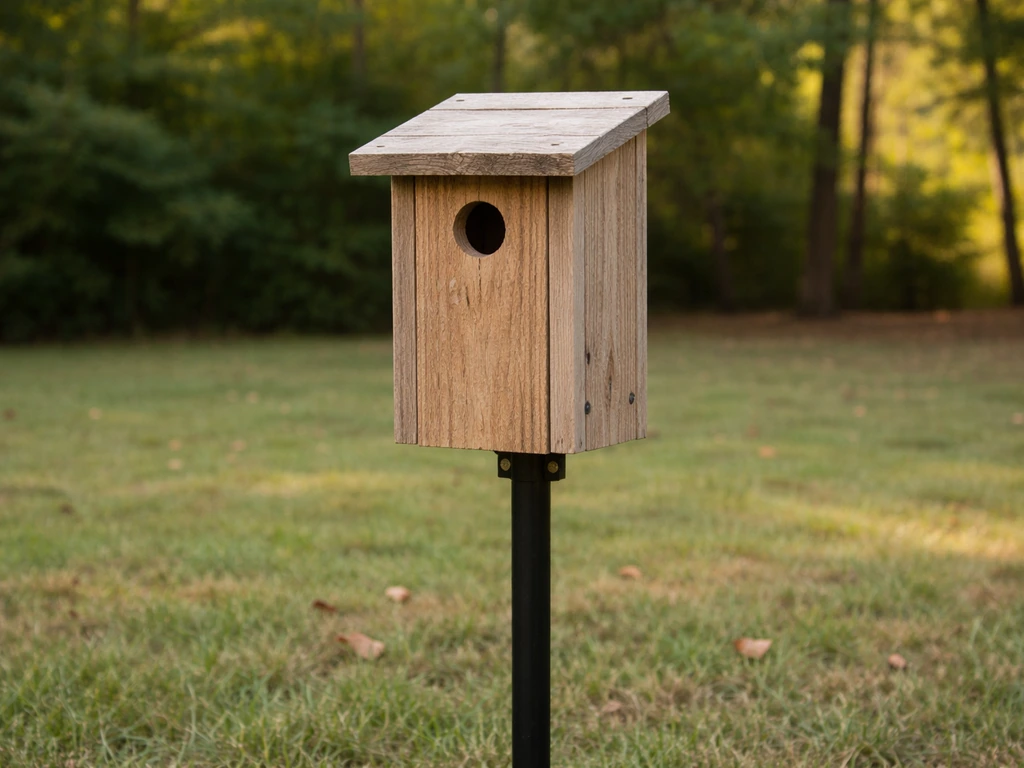
Best Bluebird House Guide: Choose, Build, Install
Pick and install the best bluebird house with species-specific hole size, mounting, predator guards, and safe seasonal c
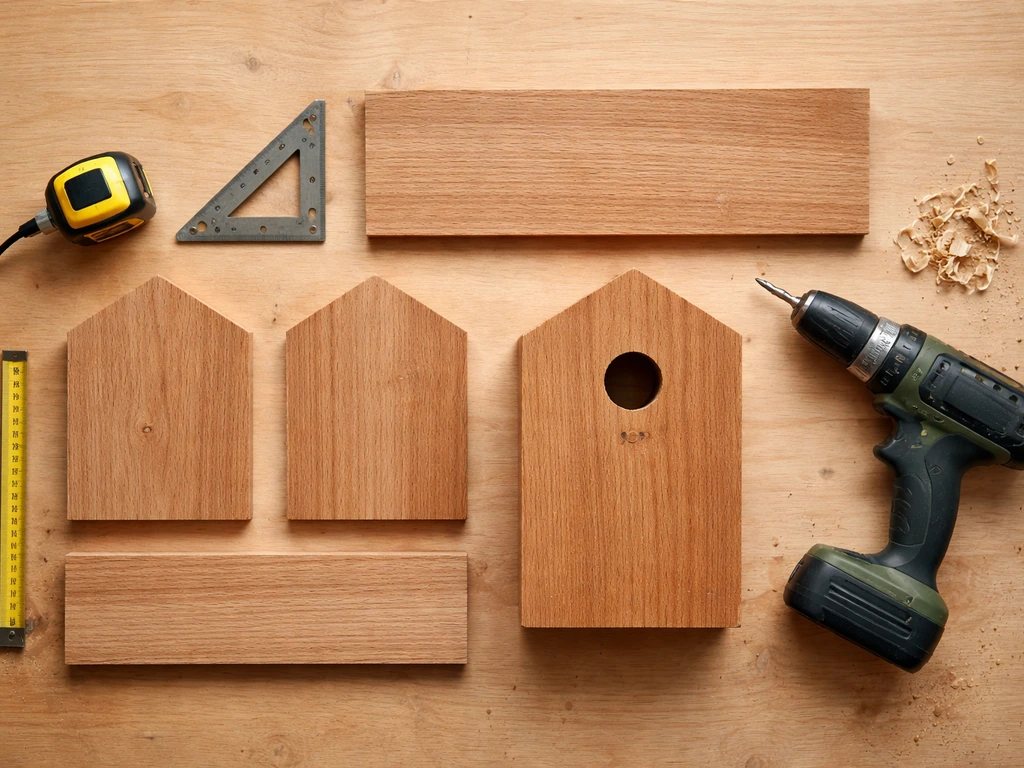
Simple Bird House Instructions: Beginner Build Guide
Beginner step-by-step bird house build: cut list, dimensions, mounting, predator-proofing, and safe maintenance.