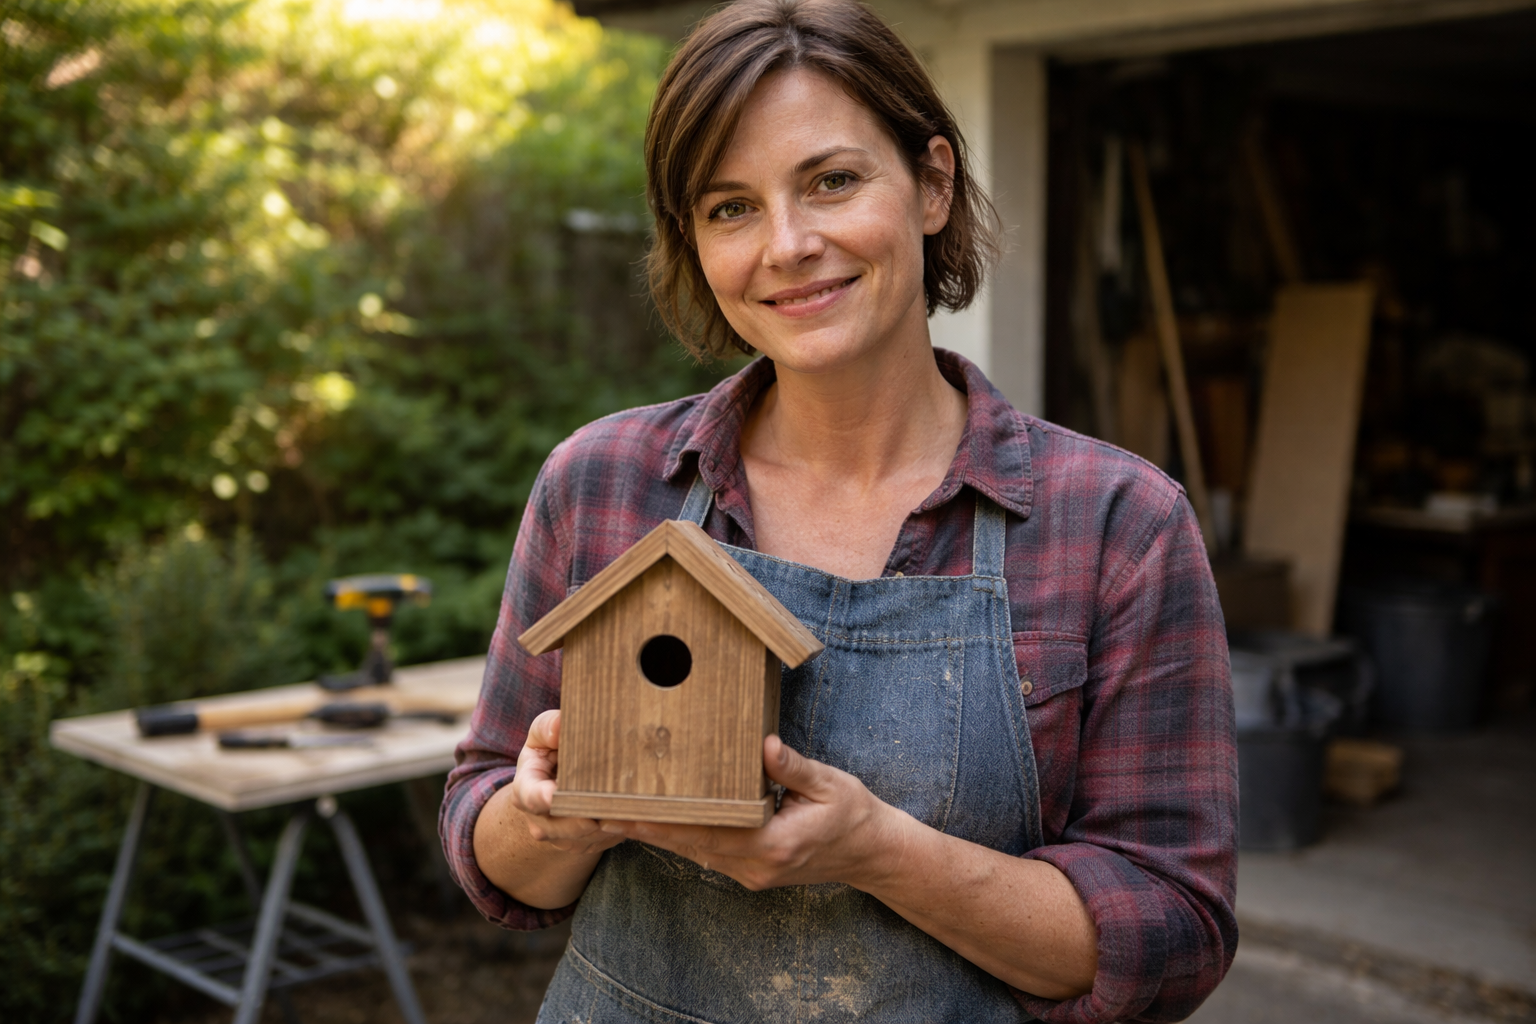
The best bird houses for winter are dedicated roosting boxes with a bottom-positioned entry hole, thick walls (at least 3/4-inch lumber), blank" rel="noopener noreferrer">no interior perch, and tight drainage and ventilation built into the base. That single sentence covers most of what matters. Everything below is the detail you need to get the right box, put it in the right spot, and keep it working season after season.
Best Bird Houses for Winter: How to Choose and Place Them
Maya Thompson
22 Mar 2026
How to choose a winter bird house
Winter bird houses serve a different purpose than spring nest boxes. During cold months, birds are roosting, not nesting. That means the design priorities shift toward heat retention, draft exclusion, and quick escape from predators, rather than ventilation for eggs and chicks. When you shop, look for these things specifically.
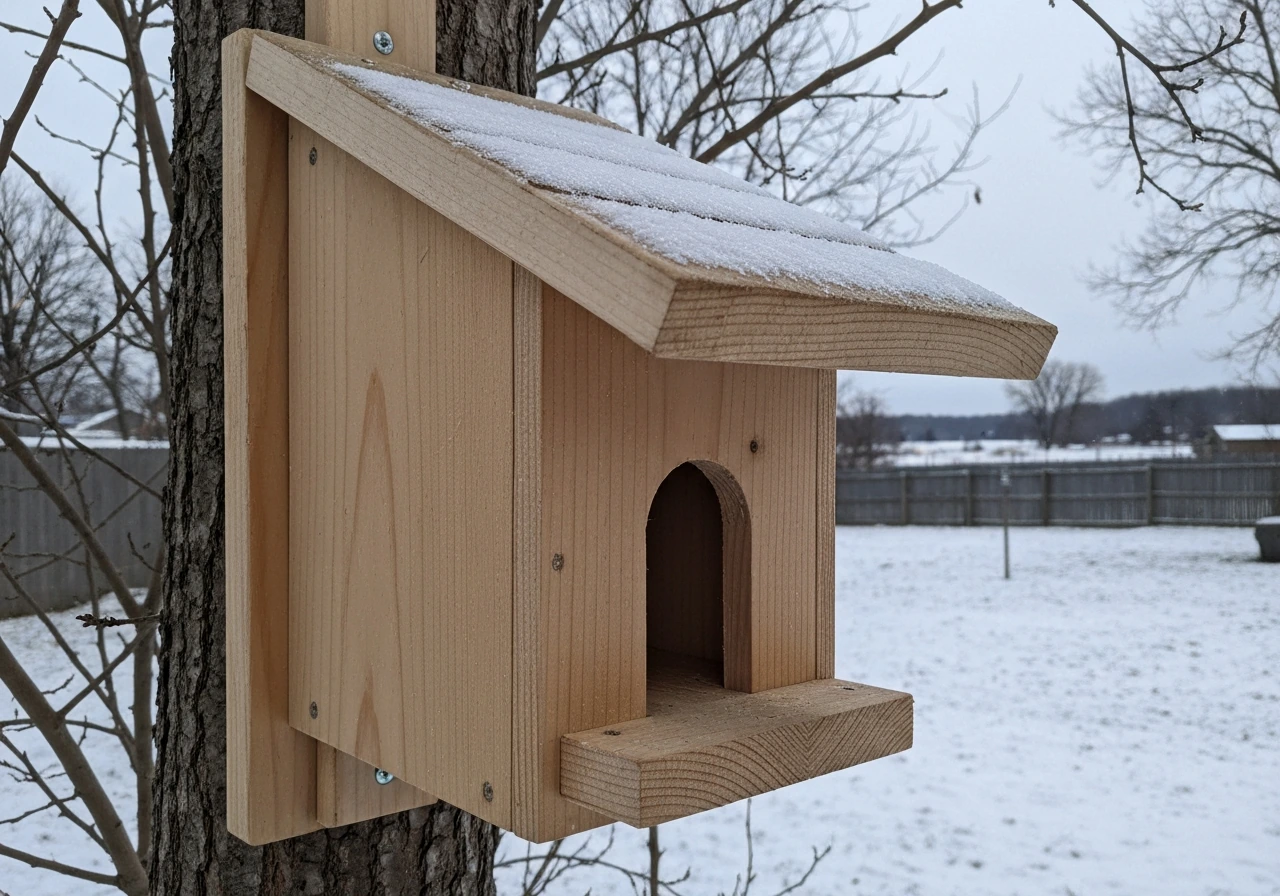
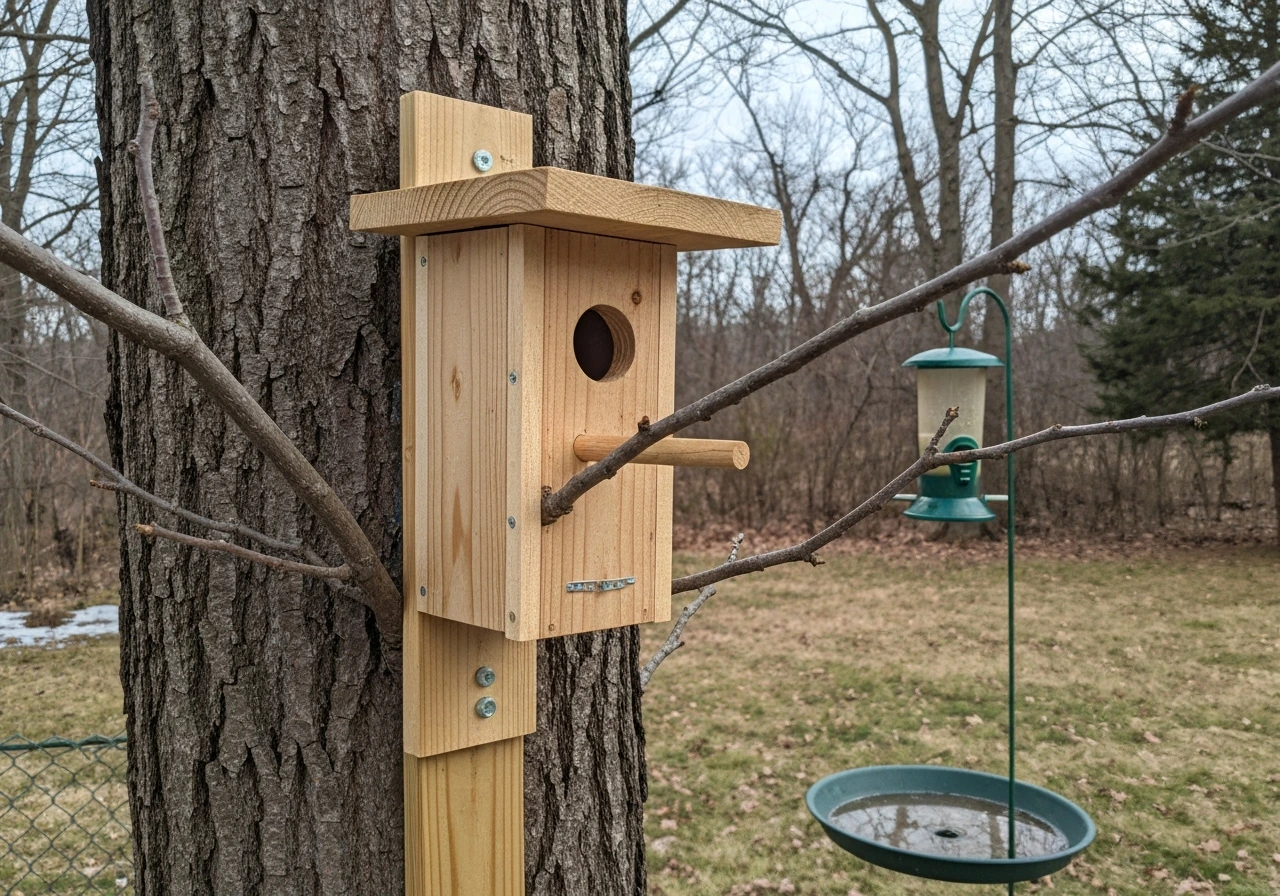
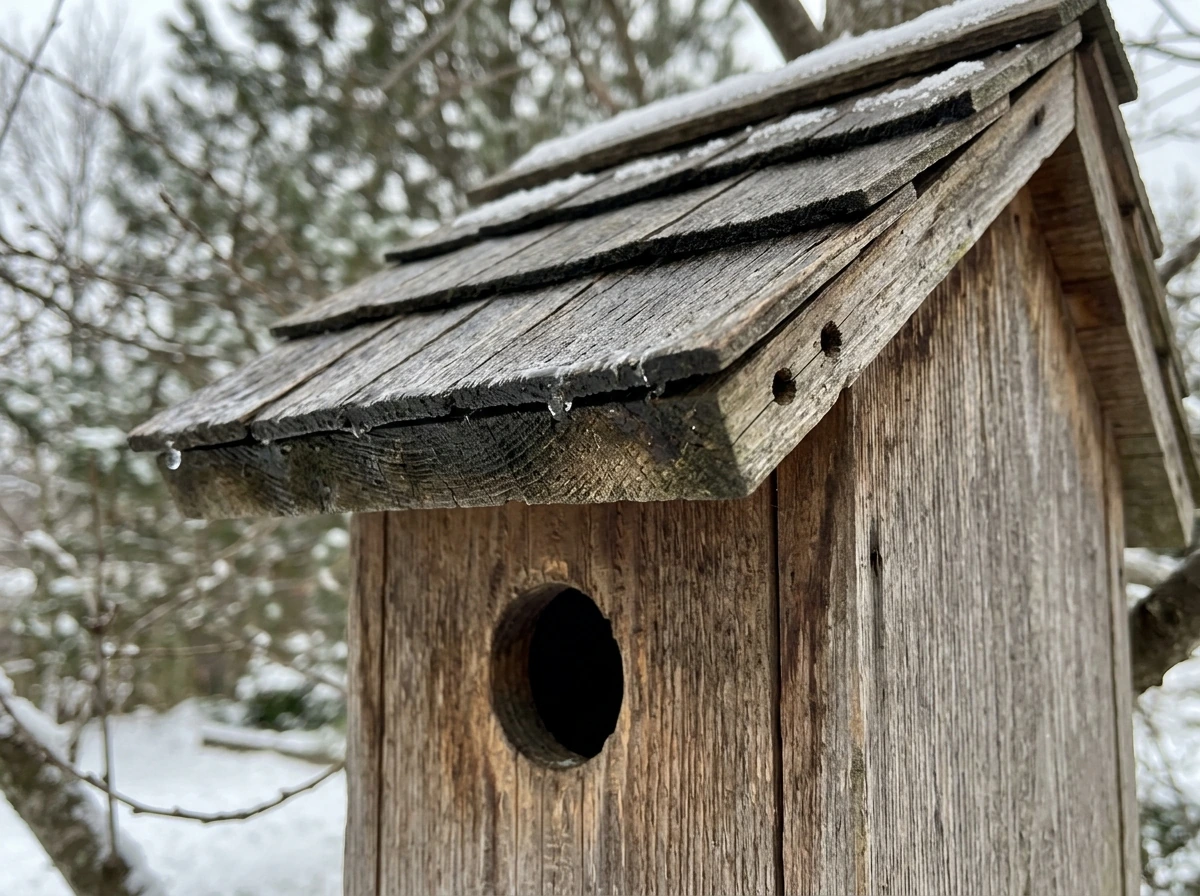
- Entry hole positioned near the bottom of the front panel, not the top. Heat rises, so a low entrance traps warm air inside the box where birds huddle.
- Wall thickness of at least 3/4 inch. Thinner wood conducts cold quickly and gives birds nothing to work with on frigid nights.
- No interior perch. Perches on the outside make it easier for predators to hang around the entrance. Birds don't need them.
- Hinged or removable panel for cleaning. Mass Audubon specifically highlights this feature as making annual cleanouts practical.
- Entrance hole sized to the species you're targeting (more on this below). Too large lets in cold air and predators; too small excludes the birds you want.
- Smooth interior walls or slight horizontal grooves. Birds need to grip the inside to climb out, especially in a bottom-entry design.
- No paint or stain on the interior. Exterior finish is fine; interior chemicals are not.
One thing worth knowing before you buy: there's a real difference between a winter roosting box and a standard nest box. A nest box is optimized for summer breeding, usually with the entry hole near the top and extra ventilation slots near the roof. A roosting box flips that logic. Some manufacturers sell a convertible design, sometimes called a slide-front or invert-for-winter style, where you can flip or rearrange the front panel to move the entrance from top (nesting mode) to bottom (roosting mode). That flexibility is genuinely useful if you want one box to do both jobs across the year.
Best bird house styles and sizes for cold weather
A purpose-built winter roosting box is the first choice. One well-known spec calls for a 1.5-inch entry hole near the base of the front panel, an interior designed to stay dry in harsh weather, and enough interior volume for multiple small birds to share body heat. That 1.5-inch opening works well for bluebirds and similarly sized cavity users. If you're targeting chickadees and wrens, you want to go smaller.
| Species | Entry Hole Diameter | Interior Floor Size | Notes |
|---|---|---|---|
| Chickadee | 1-1/8 inch | 4 x 4 inches | Tight hole excludes house sparrows |
| Wren | 1-1/8 to 1-1/4 inch | 4 x 4 inches | Smaller guard also limits predator reach |
| Bluebird | 1-1/2 inch | 5 x 5 inches | Needs predator guard at this size |
| Nuthatch | 1-1/4 inch | 4 x 4 inches | Prefers bark-lined or rough interior |
| Titmouse | 1-1/4 inch | 4 x 4 inches | Often shares roost with chickadees |
The hole height above the floor matters more in winter than people realize. In a roosting box, the entrance near the base means the hole-to-floor distance is short, sometimes just 1 to 2 inches. That's intentional: it forces birds to drop down into the warmest part of the box. In a standard nest box repurposed for winter, the hole sits higher and warm air escapes more readily. If you're working with a regular nest box this season, it will still provide some shelter, but a dedicated roosting box or a convertible design is noticeably better.
For multiple small birds roosting together (which is exactly what chickadees and nuthatches do on cold nights), a slightly larger interior floor, around 6 x 6 inches, with multiple rough perching dowels on the interior walls gives birds places to cluster without fighting over one spot. This is one area where roosting boxes and nest boxes genuinely diverge in design.
Placement for winter shelter and safety
Height and direction matter as much as the box itself. Mount the box at least 5 feet off the ground. Lower than that and cats, raccoons, and other ground-level predators have an easy approach. The entry hole should face east. That gives birds a morning warm-up from the sun and keeps the entrance away from the prevailing westerly winds that carry the worst winter weather in most of North America.
Keep the box at least 20 feet from your feeders and birdbaths. It sounds counterintuitive since you want birds to use both, but proximity to busy feeding stations means more traffic, more noise, and more predator attention near the roost. Birds are actually safer roosting away from the commotion. If you're thinking carefully about where to put your feeders and bird houses in relation to each other, that placement question is worth its own deep look.
- Mount on a smooth metal pole with a baffle when possible. Tree mounting works but gives squirrels and raccoons a climbing advantage.
- Face the entry east or southeast to catch morning sun and dodge prevailing winds.
- Position the box where it has some natural windbreak behind it, like a fence, dense shrub, or building wall, without blocking the entry.
- Don't cluster multiple roosting boxes. Space them at least 15 to 25 feet apart to reduce territorial conflicts.
- Keep the box away from low branches directly overhead, which give predators a drop point.
Materials, insulation, and ventilation in wind and snow
Wood is the right material for winter bird houses. Cedar, redwood, and pine all work. Cedar and redwood resist rot and weather naturally; pine is cheaper but needs an exterior finish to last more than a few seasons. Avoid plywood with interior-grade glues, which can off-gas and fail in repeated freeze-thaw cycles. Also skip metal and plastic: both conduct temperature extremes directly into the box and make the interior miserable on cold nights.
The 3/4-inch wall thickness recommendation isn't arbitrary. Thicker wood insulates meaningfully, slows condensation on interior surfaces, and gives the box structural integrity when screws are driven through it over many seasons. Some builders go to 1 inch on the north and west walls specifically, the sides that take the hardest weather hit. That's worth doing if you're building your own.
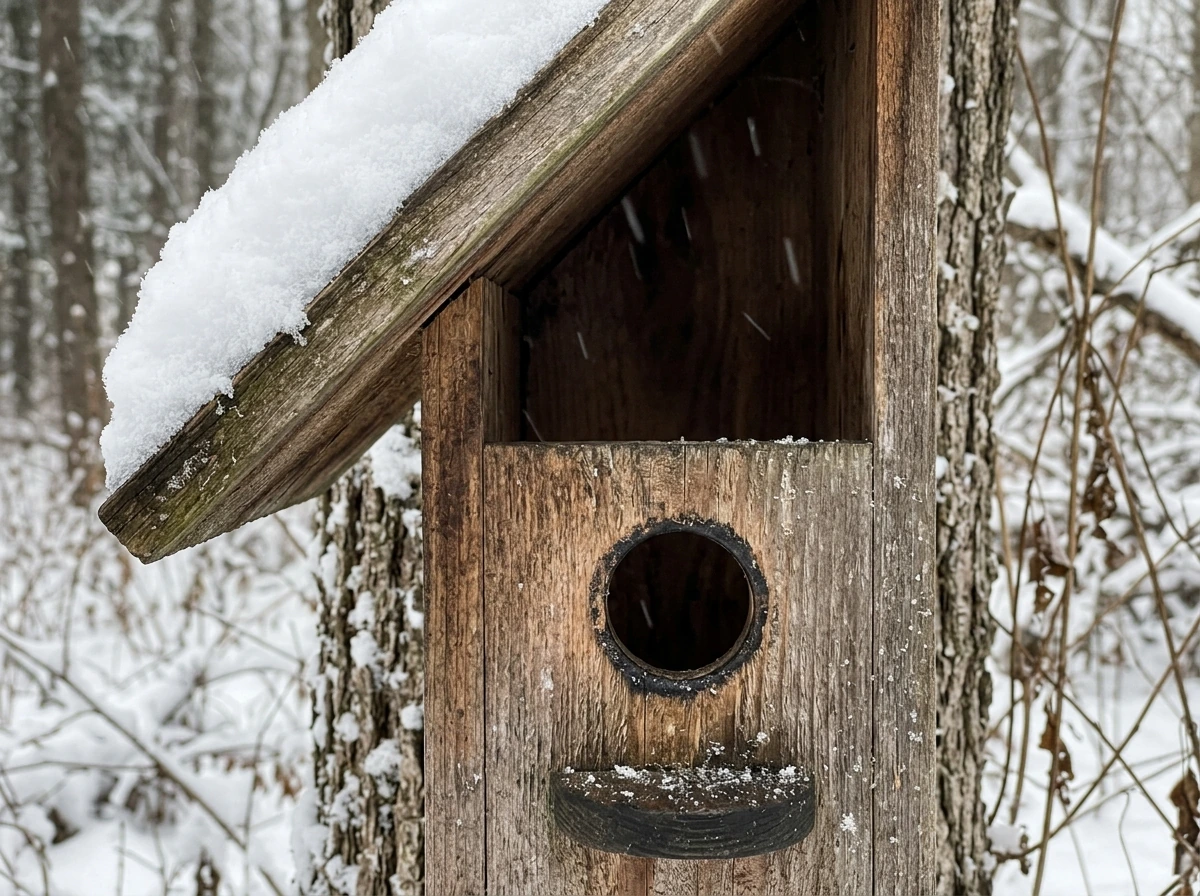
Ventilation in a winter roosting box is a genuine design tension. You need some air exchange to prevent dangerous moisture buildup from bird breath and droppings, but you don't want drafts that negate the whole point of the shelter. The right answer is ventilation at the base rather than the roof.
Small openings in the bottom corners, or drainage holes at the corners of the floor panel rather than the center, let moisture escape and allow gentle air movement without creating a cold draft across roosting birds. The U. S. Fish and Wildlife Service specifically calls out this bottom ventilation and drainage design in its guidance.
Avoid the common mistake of drilling a single drainage hole in the center of the floor: water pools around it rather than draining out the corners.
Don't add insulation materials yourself inside the box before birds move in. Loose material can trap moisture, harbor mites, and take up space birds need to cluster. Let the birds bring in what they want, which is usually not much in a roosting situation.
Roof design, drainage, and cleaning for year-round use
The roof should overhang the entry hole by at least 2 inches on the front and 1 inch on the sides. That keeps rain and snow from driving directly into the entrance and reduces the sun load on the front panel during summer. A sloped roof, higher at the back than the front, sheds water away from the entry. Flat roofs collect snow and eventually leak; avoid them.
For drainage, four small holes (roughly 1/4 inch each) at the corners of the floor panel are better than one central hole. Corner placement lets water flow out regardless of how the box is angled, and it keeps the drain points from being blocked by nesting material in spring.
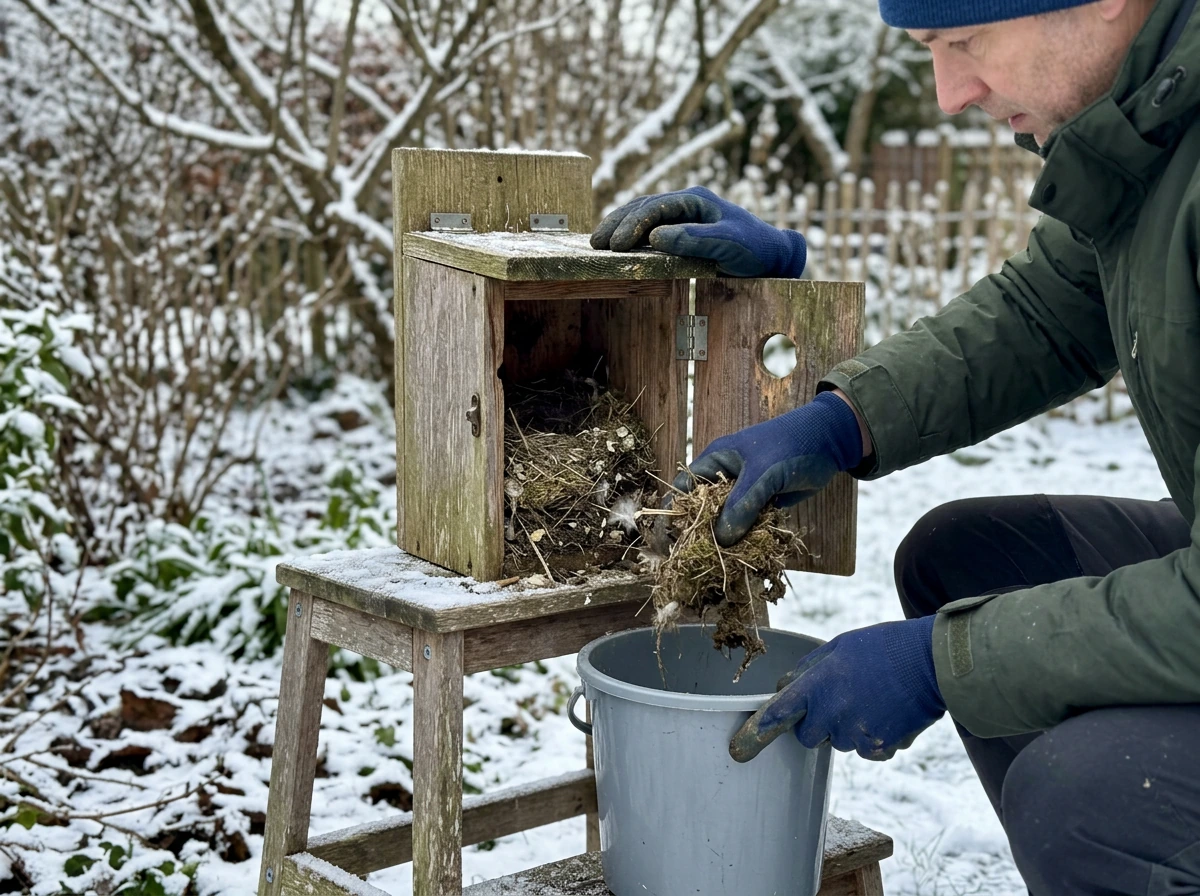
Cleaning is non-negotiable for year-round use. Old nesting material carries mites, bacteria, and parasites that will make the box hostile to future occupants. The standard cleaning solution recommended by NestWatch and multiple Audubon chapters is a 1:10 bleach-to-water mix. Scrub the interior, rinse thoroughly, and let the box dry completely in the sun before closing it back up. Don't clean while birds are actively using it. In winter, that means checking for roosting activity first: tap the box lightly before opening it to give any bird inside a moment to exit.
A hinged side or front panel makes this job fast enough that you'll actually do it. Boxes that require unscrewing the entire front are the ones that sit dirty for years. If you're buying rather than building, a hinged opening panel is one of the most practical features to look for, as Mass Audubon points out.
Which birds use winter bird houses and what to provide
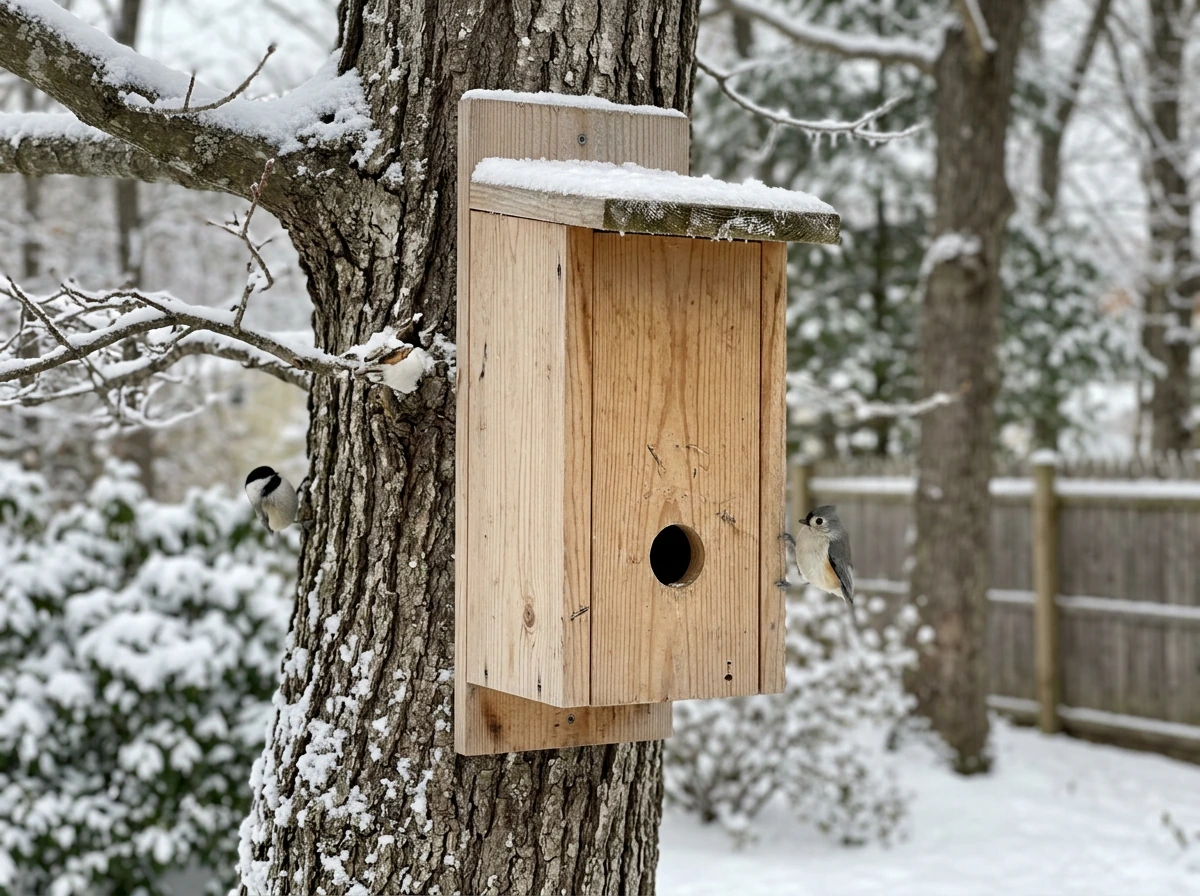
Not every backyard bird will use a box in winter. Cavity nesters are your audience, specifically species that are comfortable in enclosed spaces because they nest in tree cavities naturally. In most of North America, the likely winter roosting candidates are chickadees, tufted titmice, white-breasted nuthatches, Carolina wrens, bluebirds (especially in areas where they winter, which includes much of the southeastern and central U.S.), and downy woodpeckers. In colder northern states and Canada, black-capped chickadees and red-breasted nuthatches are the most common users.
The USDA notes specifically that nest boxes provide valuable roosting cover in areas where bluebirds spend the winter, which makes a properly sized bluebird box worth leaving up year-round rather than pulling it after the breeding season ends. That's a small effort with a meaningful impact for a species that struggles with winter shelter when natural tree cavities are scarce.
To support these birds beyond the box itself, pair your roosting setup with a reliable winter food source. High-fat foods like black-oil sunflower seeds, suet, and peanuts give small birds the caloric fuel they need to survive cold nights. Fresh water is also critical: birds need to stay hydrated in winter even when natural water sources are frozen. If you're running a heated birdbath, keep the water clean by changing it every day or two, as Audubon recommends. A bird that roosts safely in your box but can't find clean water nearby is only halfway supported.
Installation timeline, maintenance, and troubleshooting
When to install
Earlier is better. If it's already late winter or early spring, put the box up now. Birds begin scouting roosting and nesting sites earlier than most people expect, and having the box available increases the chance it gets adopted this season. If you're in Minnesota, choosing the best bird houses for Minnesota winters comes down to the same key specs: thick walls, a bottom entrance, and reliable drainage and ventilation. Ideally, you'd have a winter roosting box up by early November before the coldest weather arrives, but a box installed in March is still worth doing for the shoulder season and for establishing presence before spring nesting begins.
Seasonal maintenance schedule
- Late summer or early fall: clean out all nesting material from the previous season using a 1:10 bleach-to-water solution. Rinse well. Let dry completely.
- Early November: inspect the box for structural issues, loose screws, cracked wood, or gaps that have opened up. Seal any gaps that would create drafts. Confirm drainage holes are clear.
- Mid-winter: do a visual check from a distance. Look for entry and exit activity at dusk or dawn. Don't open the box unless you have a specific reason to think something is wrong.
- Late winter or early spring: once you're confident roosting activity has stopped, do a light inspection. If spring nesting is possible, leave any minor debris and let the birds decide. Clean thoroughly once the breeding season is clearly over.
- Annual: check mounting hardware, pole baffles, and the condition of any exterior finish. Tighten, repair, or refinish as needed.
Troubleshooting common problems
| Problem | Likely Cause | Fix |
|---|---|---|
| No birds using the box | Wrong location, wrong hole size, or box too new/unfamiliar | Reposition to face east, check hole size against target species, give it a full season before giving up |
| Wrong species using the box | Entry hole too large | Add a predator guard plate with a smaller hole diameter over the existing entrance |
| Condensation inside the box | Inadequate base drainage or ventilation | Drill corner drainage holes if absent; confirm base vents are not blocked by debris |
| Drafts or cold air inside | Gaps in wall joints or roof overhang too short | Seal gaps with exterior wood glue or caulk; add a roof extension if needed |
| Mites or parasites after season | Old nesting material left in box | Clean with 1:10 bleach-water solution, rinse, dry fully in sun before re-mounting |
| Squirrels or raccoons accessing box | No baffle on pole or box mounted on tree | Add a metal cone baffle at least 18 inches below the box on a smooth pole |
| House sparrows taking over | Entry hole too large for target species | Reduce hole size to 1-1/8 inch for chickadees; monitor and remove sparrow nests promptly |
Your buying and installation checklist
Before you buy or build, run through this short list to make sure you're getting the right setup for your situation. To make sure you select the right model, it's helpful to know what types of bird houses are there and how their designs differ.
- Identify the cavity-nesting birds in your area this winter and look up the correct entry hole diameter for your target species.
- Choose a box with walls at least 3/4-inch thick, a hinged or removable panel, and corner drainage holes at the base.
- For true winter roosting performance, look for a bottom-positioned entry hole or a convertible slide-front design.
- Pick a mounting location that faces east, sits at least 5 feet off the ground, and is at least 20 feet from your feeders.
- Add a predator baffle to the mounting pole before you install the box.
- Clean any existing boxes now with a 1: 10 bleach-water solution before roosting season ends.
- Set a calendar reminder for late summer to clean and inspect before the next winter season begins.
A good winter <a data-article-id="6BC01730-80D0-4B64-A99D-3E953A175073">best bird houses for southern california</a> is not complicated, but the details add up. Get the hole size right, mount it in the right direction with a baffle, build or buy with thick walls and proper drainage, and clean it once a year. Do those four things and you'll have birds using it.
If you're not sure which model to pick, checking the best bird houses guides can help you compare designs by hole placement, insulation, and drainage. When you are choosing the best bird houses for small birds, focus on the hole size, interior space, and ventilation details that match your target species. Skip any one of them and you'll wonder why the box sits empty.
FAQ
Can I leave a winter roosting box up year-round, or should I take it down after cold weather?
Leave it up if the entrance, drainage, and interior fit your cavity birds, since many species keep using covered roost sites into early spring. Clean it right before the nesting season starts, so it is not carrying winter moisture and debris into breeding time.
What if I want to attract a specific species, like chickadees versus bluebirds?
Use the entry size and interior space as your main match. Chickadees and nuthatches typically do better with a smaller opening and roost-friendly interior, while bluebirds often benefit from the larger roost box opening. If your box is sized for one species, the other may pass it by even if it is well made.
How do I know whether birds are actually roosting in the box versus just visiting?
After sundown on cold evenings, check from a distance and look for reduced movement at the opening, or listen for scratching or settling sounds inside. Avoid opening the box to “confirm,” because disturbing an occupant can cause it to abandon the safest spot that night.
Should I paint or stain my winter bird house to protect it from moisture?
Yes for exterior protection, but avoid coating interior surfaces. Use a breathable, weather-rated exterior finish over untreated wood, and make sure it is fully cured before birds use the box. Dark finishes can also increase heat on sunny winter days, so choose colors thoughtfully.
Is it okay to add a perching stick outside the entrance to help birds land?
In winter roosting boxes, avoid adding internal perches, but an external landing aid is usually not necessary if the opening is low and the entrance path is clear. Perches can also increase predator access near the hole, so prioritize safety by keeping the area around the entrance unobstructed.
Do I need a baffle or predator guard even if I mount the box high?
Yes, if you have climbing predators in your area. A 5-foot mounting height reduces risk, but a baffle or predator guard helps against raccoons and other climbers that can reach higher with help from nearby branches or fences.
How can I position the box so it drains well if my yard slopes or the wall is not perfectly vertical?
Mount the box so the floor stays level or slightly pitched, and still keep the drainage strategy that uses corner holes. Corner drains work better than a center drain when the box is not perfectly aligned, because water can find an exit point even if one side dips.
What should I do if rainwater collects inside the base area after storms?
First, confirm the ventilation and drainage holes are not blocked by debris or paint. Then check that the roof overhang is correct (front longer than sides) and that the box is not sealed against trapping moisture at the bottom seams. If water still pools, the box likely needs a design change, not just more cleaning.
How often should I clean a winter roosting box during the colder months?
Typically once per year is enough for roosting boxes, because frequent disturbance matters. If you see heavy buildup, you can clean sooner after birds leave, but do not clean during active roosting hours, and let the box dry completely before reclosing.
Can I use a different hole orientation, like facing south or west instead of east?
East-facing placement is a strong default because it warms the entrance earlier in the day and reduces exposure to worst prevailing winds. If east is impossible, prioritize minimal wind exposure and keep the entrance protected by surrounding structures or a location with less direct winter weather.
Are heated birdbaths or any heat source near the box ever a risk for roosting birds?
A heated birdbath is useful for hydration, but it can increase traffic and predator attention. Keep it at least the recommended distance from the roosting box, and keep the water clean with frequent changes so the birds are not forced to linger around messy or contaminated water.
What is the safest way to check the box during winter without abandoning birds inside?
Before opening, tap the side gently and pause, then open only if you do not hear active movement changes. If birds are present, wait longer for an exit attempt or reschedule. This reduces the chance of trapping occupants during a quick inspection.
Next Article
Best Bird Houses for Minnesota: Sizes, Placement, and Care
Best bird houses for Minnesota: sizes, placement, specs, and seasonal care for local cavity nesters, plus safety tips.
