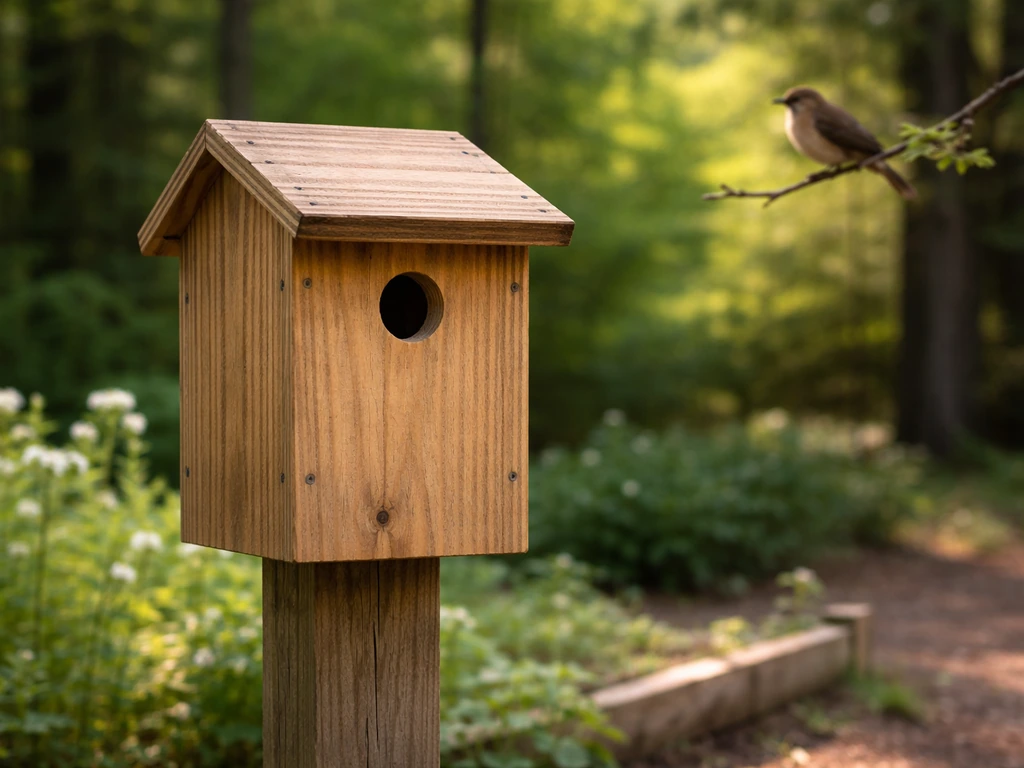
The best bird house kits give you a head start over building from scratch: the wood is already cut to species-appropriate dimensions, the entrance hole is sized correctly, and the joinery is designed to keep rain out and heat stable. For most backyard birders and beginner woodworkers, a well-made kit from a conservation-credentialed manufacturer will outperform anything assembled from big-box lumber and improvised measurements. This guide walks you through exactly what separates a kit worth buying from one that will warp, flood, or feed a predator, with separate guidance for North American and UK/European gardens, species-specific sizing tables, and honest assembly and placement steps you can follow on a weekend afternoon.
Best Bird House Kits: Top Picks, Sizes, Build & Mounting

Maya Thompson
5 Aug 2026
Who this guide is for
If you are a backyard birder who wants to skip the design work but still end up with a box that real birds will use, this is your starting point. It also covers the beginner woodworker who wants a guided first project with a known-good cut list, and the conservation-minded DIYer who cares whether box design actually serves the birds rather than just looking attractive on a fence post. I have tested and observed nesting success in a range of box types over many seasons, and the advice here is grounded in BTO, RSPB, and Cornell Lab/NestWatch research rather than marketing copy.
Quick decision checklist: choose a kit by species, site, and skill level
Run through these questions before you buy. They take about two minutes and will filter out 80 percent of unsuitable kits.
- Which species do you most want to attract? (Wren, Blue Tit, Great Tit, Chickadee, Bluebird, Sparrow, Starling?) — this sets your entrance-hole diameter and interior floor size before anything else.
- Where will the box go? Open lawn/post = pole-mounted kit. Tree branch or fence = hanging kit. Garden wall or shed = bracket-mounted kit.
- Is climbing-predator pressure high in your area? (Cats, squirrels, raccoons, martens?) If yes, prioritise kits with a metal entrance plate and a smooth-pole mounting option, or plan to add a baffle.
- What is your local climate? Hot summers and cold winters need thicker walls (minimum 18–20 mm for solid wood; woodcrete performs better still). UK gardens with persistent damp need a longer roof overhang and confirmed drainage holes.
- What is your woodworking experience? A flat-pack with pre-drilled holes and supplied screws suits a complete beginner. A more complex kit with mitre joints and no hardware is better suited to someone already comfortable with a drill.
- Do you want to clean the box easily each autumn? Check that the kit design includes a hinged side, removable front, or lift-off roof — this is non-negotiable for good box hygiene.
- Is the wood untreated or finished with a safe exterior coating on outside surfaces only? Avoid kits using pressure-treated or creosote-finished interior surfaces — UK REACH/BPR rules and conservation guidance both flag this risk.
- Does the kit include mounting hardware, or will you need to supply your own? Factor this into total cost and check that screws are corrosion-resistant (stainless or hot-dip galvanised).
What to look for in the best bird house kits: buying criteria
Material and wall thickness
Solid untreated wood (FSC-certified cedar, oak, or pine at 18–22 mm thickness) is the standard recommended by NestWatch and the RSPB. Thicker walls buffer temperature swings, resist warping, and hold fasteners longer. Woodcrete (a wood-fibre and concrete composite used by manufacturers such as Schwegler and Vivara Pro) goes further: field studies, including long-term work at Wytham Woods summarised in a 2023 MDPI review, show higher occupancy, lower predation losses, and service lives measured in decades rather than years. Thin decorative materials (under 12 mm, plywood, or MDF) should be ruled out immediately, they warp, conduct heat into the nest chamber, and split at screw holes within a season or two.
Ventilation and drainage
Every good kit must have ventilation gaps near the roofline and drainage holes (minimum 4 x 6 mm) in the floor corners. Without both, you get condensation-soaked nests and chilled eggs. Check that the roof overhangs the entrance hole by at least 50 mm to shed rain, and that the floor is recessed slightly inside the side walls rather than sitting flush at the bottom edge.
Predator resistance features
A metal entrance-hole plate is the single most cost-effective predator feature on any kit. Without one, squirrels and woodpeckers can enlarge a wood entrance in a single morning, exposing eggs and chicks. Look also for a deep nest chamber (a deeper box makes it harder for a cat's paw or a magpie's beak to reach the nest floor) and an absence of external perches, perches help nothing except nest-raiding corvids and sparrows competing for holes.
Cleaning access
A hinged side panel, lift-off roof, or pivoting front is essential. RSPB guidance recommends cleaning boxes from September onward; BTO guidance is similar. RSPB guidance recommends cleaning out nestboxes from September onward, wearing gloves and avoiding insecticidal treatments; they advise briefly rinsing internal surfaces with boiling water and allowing the box to dry fully before re‑hanging blank" rel="noopener noreferrer">RSPB guidance recommends cleaning out nestboxes from September onward, wearing gloves and avoiding insecticidal treatments; they advise briefly rinsing internal surfaces with boiling water and allowing the box to dry fully before re‑hanging.. See blank" rel="noopener noreferrer">Buying a nest box | BTO (used to derive buyer criteria) for official guidance on timing and maintenance of nest boxes, which informed the buyer‑evaluation checklist above. The RSPB specifically recommends rinsing internal surfaces with boiling water to kill parasites, then allowing the box to dry fully before re-hanging. You cannot do any of this properly if the box does not open.
Mounting options and supplied hardware
Check whether the kit is designed for pole mounting, tree mounting, hanging, or wall bracket. North American bluebird and swallow boxes are typically pole-mounted on smooth metal conduit with a cone baffle, following North American Bluebird Society (NABS) guidance. UK garden kits are more often screwed to a tree or wall at 2–4 m height, or hung from a bracket. The best kits supply corrosion-resistant screws and a clear mounting diagram; budget kits often leave this to you, which matters when you are new to the hobby.
UK-specific notes
UK and EU regulations under REACH/BPR restrict or control hazardous wood preservatives including creosote. For nest boxes, UK HSE guidance and conservation organisations advise using untreated timber or timber finished only with safe exterior coatings applied to outer surfaces only, never the interior. If a kit arrives smelling strongly of preservative or has a pressure-treated interior, do not use it for nesting birds. Woodcrete alternatives sidestep this issue entirely, which partly explains why they dominate the UK conservation market.
Top bird house kit recommendations by category
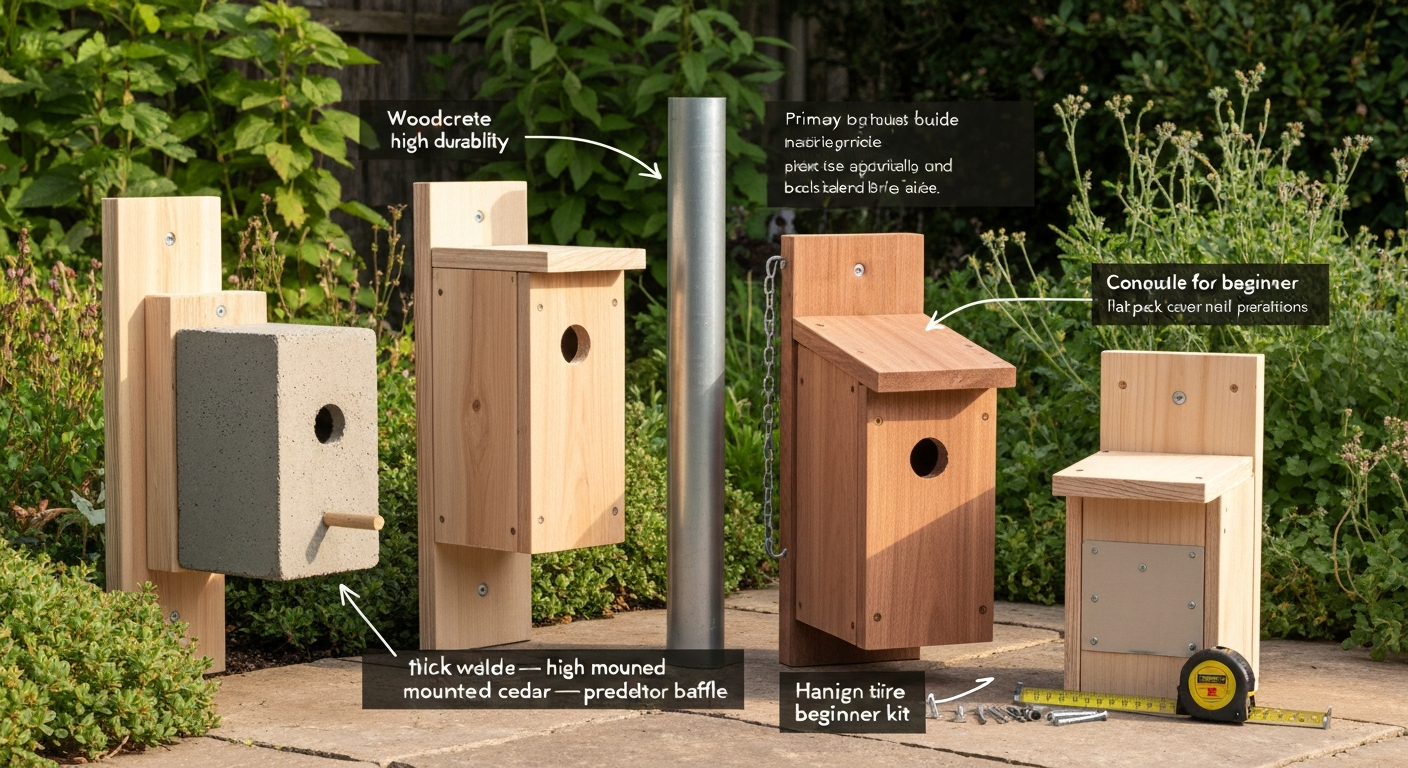
Rather than ranking by brand score, I have grouped kits by the situation they solve best. For readers wanting a quick shortlist, see our roundup of the best selling bird houses for tested, ready-to-buy options. These summaries are based on design criteria, materials, and reported nesting outcomes, not advertising relationships. Specific brands mentioned have long conservation pedigrees or strong evidence bases. If you are in the UK, see our guide to the best bird houses UK for curated kit picks and placement advice tailored to British gardens. For ready-made options that meet these criteria, see our roundup of high quality bird houses that combine durable materials, predator-proofing, and good ventilation.
| Category | Key features to look for | Best for | Watch out for |
|---|---|---|---|
| Best overall | 18-20 mm solid cedar or oak; metal entrance plate; hinged side; drainage + ventilation; supplied hardware | Tits, sparrows, chickadees; most garden habitats | Make sure internal dimensions match your target species before ordering |
| Best for beginners | Pre-drilled, flat-pack with step-by-step instructions; 3-4 components; supplied screws; single species target | First-time builders; children's projects with supervision | Check wood thickness — beginner kits sometimes use thin pine that warps quickly |
| Best hanging kit | Pre-formed loop or chain mount; baffle or cage option; lightweight but thick-walled (woodcrete or 18 mm wood) | Gardens without suitable posts; trees and wall brackets; UK gardens | Hanging kits that swing freely in wind can deter some species — look for designs with a stabilising back bracket |
| Best for wrens and small species | Entrance hole 28-32 mm (UK); 28-32 mm (NA wrens); very small floor footprint (10 x 10 cm); rough interior for grip | Wrens, Blue Tits, Carolina/House Wrens | Do not use kits with smooth interior walls — fledglings need grip to climb to the entrance |
| Best high-durability/UK weather kit | Woodcrete (Schwegler 1B type or equivalent); integrated predator protection; 25+ year service life; no painting needed | UK gardens with high rainfall; long-term conservation projects; sites hard to access for replacement | Higher upfront cost; heavier to mount — use two fixings and check wall/branch load capacity |
Hanging vs mounted kits: which should you choose?
This is one of the most common questions I get, and the honest answer is that both work well when matched to the right site and species. The differences come down to predator management, stability, and what your garden physically offers.
| Factor | Hanging kit | Pole/wall-mounted kit |
|---|---|---|
| Predator resistance | Suspended boxes can reduce climbing-predator access in some studies (e.g., Wytham Woods data in 2023 MDPI review) | Smooth metal pole + cone baffle is the gold standard against cats, raccoons, squirrels (NABS guidance) |
| Stability | Can sway in wind; some species (bluebirds, flickers) prefer a firm surface | Fixed; preferred by open-country cavity nesters like bluebirds and tree swallows |
| Site flexibility | High — any tree, fence, bracket, or pergola will do | Needs a post, wall, or tree trunk with space for a baffle below |
| Installation difficulty | Low — hook or screw a bracket; 15 minutes | Moderate to high if using conduit and a ground-set T-post; easier for wall mounting |
| Maintenance access | Easy to lift down for autumn cleaning | May need a ladder; fixed boxes should have a ground-level release mechanism |
| Best species match | Tits, wrens, sparrows, nuthatches (UK); chickadees, nuthatches, house wrens (NA) | Bluebirds, tree swallows, flickers, kestrels; starlings where boxes are wall-mounted |
| UK suitability | Excellent — hanging boxes suit the UK garden structure and align with woodcrete product designs | Good for wall mounting; free-standing poles less common in UK suburban gardens |
If you are shopping specifically for hanging options, the range of designs is broader than many people expect. If you want boxes that stay up year-round without a post, a well-constructed hanging kit with a stabilising back plate is the most practical choice for a typical UK or suburban North American garden.
Kit assembly: step-by-step instructions
Most flat-pack bird house kits follow the same basic sequence. Here is how to assemble them correctly the first time, with the tolerances and checks that make the difference between a box that lasts one season and one that lasts a decade.
Tools and materials you will need
- Cordless drill/driver with a PZ2 bit
- Pilot drill bit matching your screw diameter (usually 2.5–3 mm) — prevents splitting
- Tape measure and pencil
- Waterproof exterior wood glue (PVA exterior grade or Titebond III) — applied to joints before screwing for a waterproof seal
- Supplied corrosion-resistant screws (stainless or hot-dip galvanised; if not supplied, 40 mm x 4 mm stainless are a good substitute)
- Fine sandpaper (120 grit) for any rough entry-hole edges that could injure adults
- Safety glasses for drilling
Assembly steps
- Lay all panels out and identify them against the supplied diagram before doing anything else. Common kit failure: assembling the floor panel as the roof, which reverses drainage and ventilation.
- Sand the inner edges of the entrance hole smooth — rough splinters can trap adult feathers and injure chicks during fledging. Aim for a consistent circle with no sharp edges.
- Apply a thin bead of exterior wood glue to all mating surfaces before driving any screws. Glue-only joints fail in outdoor use; screws-only joints allow water ingress along the grain. Both together is what keeps a box dry for 10 or more years.
- Drill pilot holes before driving screws into any panel closer than 20 mm from an edge. This is the most common beginner mistake — skipping pilot holes splits the side walls and destroys the weathertight seal.
- Assemble in this order: floor to back panel first, then attach side panels, then the front panel. Leave the roof until last so you can check internal dimensions before closing the box.
- Before fixing the roof, measure the internal floor (check the table in the species section below) and verify the entrance hole diameter with a caliper or a printed hole-size gauge — a 1 mm error on a 28 mm hole is the difference between Blue Tit access and Blue Tit exclusion.
- Fix the roof with the overhang positioned at the front (over the entrance hole), minimum 50 mm overhang. If the kit gives you a choice, go longer rather than shorter.
- If the kit includes a metal entrance plate, fit it now with the supplied pins or small screws. The plate should sit flush with no gap between plate and wood — gaps allow woodpeckers to get purchase.
- Do not paint or treat the interior. If the exterior is bare wood and your climate is wet, apply one coat of exterior-safe linseed oil or a water-based fence paint to the outside only, avoiding the entrance hole area. Allow to cure for at least 48 hours before hanging.
- Check the clean-out mechanism (hinged side, removable front, etc.) opens and closes smoothly before mounting. It is far harder to fix this once the box is at height.
Species guide and sizing tables
Getting the dimensions right is not pedantry, a floor that is too large makes the nest vulnerable to temperature drops; an entrance hole even 2 mm too small means the species you want simply cannot get in. Use these tables as a hard reference when evaluating any kit.
North American species
| Species | Floor (cm) | Internal depth (cm) | Entrance hole (mm) | Mounting height (m) | Brief note |
|---|---|---|---|---|---|
| Black-capped Chickadee | 10 x 10 | 20–25 | 28–30 | 1.5–4.5 | Breeds April–June; prefers woodland edge; fills box with moss and plant fibres |
| House Wren | 10 x 10 | 15–20 | 28–32 | 1.5–3 | Aggressive cavity competitor; male builds dummy nests in nearby boxes |
| Eastern Bluebird | 13 x 13 | 25–30 | 38–40 | 1.2–2 | Open grassland; pole-mount essential; monitor weekly during breeding season |
| Tree Swallow | 13 x 13 | 20–25 | 38–45 | 1.5–3 | Needs open water nearby; March–July breeding window; benefits from paired boxes |
| House Sparrow | 15 x 15 | 25 | 32 | 2–5 | Aggressive nest competitor; monitor boxes to remove sparrow nests if protecting bluebirds/swallows |
| Northern Flicker | 18 x 18 | 40–50 | 60–65 | 3–6 | Large woodpecker; fill box base with sawdust — flickers excavate their natural sites |
UK and common European species
| Species | Floor (cm) | Internal depth (cm) | Entrance hole (mm) | Mounting height (m) | Brief note |
|---|---|---|---|---|---|
| Blue Tit | 10 x 10 | 15–20 | 25–26 | 2–4 | BTO/RSPB: use 25 mm to exclude larger competitors; site-searching begins February |
| Great Tit | 12 x 12 | 20–25 | 28–29 | 2–4 | BTO general recommendation: 28–29 mm; egg-laying mainly March–May |
| House Sparrow | 15 x 15 | 20–25 | 32 | 2–5 | BTO: 32 mm entrance; declining UK species — active encouragement now recommended |
| Tree Sparrow | 12 x 12 | 20–25 | 28 | 2–4 | RSPB: 28 mm; strongly declining — targeted monitoring boxes in farm/hedgerow settings |
| Common Starling | 15 x 15 | 25–30 | 45 | 3–5 | BTO: 45 mm; needs deeper, more robust box; Red-listed UK species, actively encourage |
| Nuthatch | 12 x 12 | 20–25 | 32 (plastered down to ~28 by bird) | 2–5 | Nuthatches plaster entrance with mud to their preferred size — do not pre-drill to 28 mm |
| Wren | 10 x 10 | 15 | 28–32 | 1–2 | Low placement in dense cover; wrens rarely use open sites; rough interior essential |
A note on BTO guidance worth keeping in mind: BTO recommends a 32 mm hole as the general standard for small-hole boxes targeting a range of garden species. Dropping to 28 mm specifically favours Blue Tits and excludes larger competitors. The RSPB goes further, listing Blue Tit at 25–26 mm. If you want to target a specific species rather than whoever arrives first, match the hole to the smallest species you are trying to attract.
Entrance-hole guidance and customisation
The entrance hole is the most consequential single measurement on any nest box. A 2 mm difference can mean the difference between attracting your target species and being colonised by a competitor. Here is how to get it right, and how to modify a kit if the supplied hole is not quite correct.
Reducer plates and hole enlargement
If your kit arrives with a 32 mm hole and you want to target Blue Tits, a wooden reducer plate with a 25–26 mm aperture screwed over the entrance is the cleanest solution. Make one from 6 mm exterior-grade ply, cut to the same footprint as the metal entrance plate, and drill the smaller hole through both layers. Going the other direction, enlarging a hole, is straightforward with a drill and a hole-saw bit, but always fit a metal plate after enlarging to prevent further widening by woodpeckers or squirrels.
Metal entrance plates
A 1.5–2 mm thick steel or aluminium plate over the entrance hole is the most evidence-supported single predator-proofing measure available for a nest box. The 2023 MDPI review of predator-proofing interventions confirms metal plates reduce hole enlargement by squirrels and woodpeckers in most study contexts. Stainless steel is preferable in high-humidity or coastal UK settings; anodised aluminium is lighter and easier to work with a hand drill.
Anti-squirrel and woodpecker measures
- Metal entrance plate (minimum 1.5 mm steel or aluminium): prevents hole enlargement — fit this on every wooden box as standard.
- Deep entrance tunnel (50–80 mm depth protruding from the front panel, sometimes called a Noel guard or entrance tunnel guard): makes it very difficult for a reaching predator paw to contact the nest floor. Field evidence in the 2023 MDPI review supports this design for reducing reach-in predation.
- Avoid placing the box within jumping distance of a fence, roof edge, or overhanging branch — squirrels approach from above and reduce the effectiveness of any ground-level baffle.
- Pileated and other large woodpeckers can damage even metal-plated holes in some regions — in high-woodpecker-pressure sites, a cage guard (hardware cloth cylinder around the box front) is the most robust solution, though it adds bulk and changes the box aesthetics.
Predator-proofing your bird house kit
Predator pressure is the most common reason nest boxes fail to produce fledglings, and it is almost entirely preventable with the right mounting and hardware. The 2023 MDPI systematic review of nestbox predator-proofing is the most comprehensive evidence summary available, and its key finding is this: no single intervention works in all contexts, but combining good placement with a metal entrance plate and a physical barrier on the mounting pole or branch covers the vast majority of risk.
Against cats and raccoons (North America)
- Mount on a smooth metal conduit pole (19 mm EMT electrical conduit or equivalent) rather than a wooden post or tree trunk. Smooth metal is genuinely difficult for cats and raccoons to grip.
- Fit a cone or stovepipe baffle on the pole, centred at 1.2–1.5 m above ground. The baffle should be at least 45 cm in diameter. NABS recommends a stovepipe baffle (15 cm diameter, 60 cm long) as particularly effective against raccoons.
- Clear any branches, fence lines, or structures within a 3 m horizontal radius of the box — these are the launch points that bypass your pole baffle entirely.
- Position the box at least 1.5 m above the highest point a cat can reach when standing on a nearby surface.
Against squirrels (both regions)
- Fit a metal entrance plate as a first step — this alone prevents hole enlargement.
- Use a pole baffle as described above. Squirrels can climb any wooden or rough surface and will bypass a flat disk baffle by jumping from above.
- Consider a hanging installation from a wire or smooth cable suspended between two poles — squirrels struggle to traverse smooth wire, and the 2023 review notes some evidence that suspended boxes reduce squirrel predation in woodland settings.
- Remove any feeders within 3 m of the box during nesting season, as squirrels following a food trail will inevitably investigate the box.
Against avian predators (magpies, jays, martens in UK/Europe)
- Use a deeper box design — a nest floor 25–30 cm below the entrance hole means an adult magpie's beak cannot reach eggs or small chicks.
- Fit an entrance tunnel guard (Noel guard type) extending 60–80 mm from the front face — this physically blocks a magpie's head from entering the hole.
- Remove external perches from any box — they serve no nesting function and give corvids a stable platform from which to work at the entrance.
- In areas with pine martens (Scotland, parts of Wales and Ireland), suspended woodcrete boxes away from trunk-mounted positions show the most promise based on available UK monitoring data — trunk mounting gives martens a stable climbing surface directly to the box.
Recommended materials for predator-resistant components
- Entrance plate: 1.5–2 mm 304 stainless steel (UK/wet climates) or anodised 6061 aluminium
- Pole: 19 mm EMT conduit (NA) or equivalent smooth galvanised steel tube (UK); avoid wood or vinyl — both are climbable
- Baffle: 15 cm diameter stovepipe galvanised steel, 60 cm long (NA); for UK wall-mount boxes, a cone baffle in 1 mm galvanised sheet is effective
- Cage guard (high-pressure sites): 12 mm galvanised hardware cloth formed into a cylinder around the box front; do not use plastic mesh — squirrels cut through it readily
- Woodcrete or thick hardwood walls (minimum 30 mm): resists gnawing — thin softwood walls can be breached in a single visit
Mounting and placement: practical steps for yards and habitats
Where you put the box matters as much as what is in it. Most failed nest box attempts I have seen come down to placement errors: too much direct sun, too close to a busy path, or mounted on a surface that vibrates whenever someone opens a nearby door.
Orientation and aspect
Face the entrance hole between north and east where possible. This keeps direct midday and afternoon sun off the entrance, prevents overheating of the nest chamber, and in the UK shelters the hole from the prevailing south-west wind and rain. Avoid south-facing in any climate with warm summers, nest temperatures in south-facing thin-walled boxes have been measured at damaging levels during heatwaves.
Height and habitat by species
- Tits and small hole-nesters (UK): 2–4 m on a tree, wall, or shed; dappled shade preferred; near woodland or garden with mature trees
- Bluebirds and tree swallows (NA): 1.2–2 m on a smooth pole in open grassland or meadow with mowed areas for foraging; at least 100 m from woodland edge for bluebirds
- Wrens: 1–2 m in dense low cover — a hedge, thick shrub, or climbing plant; wrens strongly dislike open, exposed sites
- Starlings (UK): 3–5 m on a wall, tree, or under the eaves of a building; starlings are comfortable with human proximity and urban/suburban settings
- House sparrows (UK): 2–5 m on a building wall or eave, ideally in a cluster of 2–3 boxes — sparrows are colonial and competing pairs near one box is more disruptive than giving them a second box
- General rule for all species: avoid mounting near feeders (conflict and predator attraction), busy pedestrian routes within 3 m, and surfaces that vibrate or flex in wind
When to install
Install by autumn if you can, boxes in place through winter are more likely to be investigated and claimed by early-prospecting pairs. BTO and RSPB both recommend having boxes up by mid-February at the latest for UK spring breeders, because Blue Tits and Great Tits begin site-searching in February with egg-laying primarily from March to May. In North America, Cornell Lab and NestWatch advice is similarly to put boxes up before your local breeding season begins, which means January or February installation for most temperate regions. A box installed in April when birds are already incubating elsewhere is mostly useful only for the following year.
Sanitation and seasonal maintenance
Annual cleaning is the single most important thing you can do to keep a nest box productive year after year. RSPB guidance recommends cleaning from September onward; BTO timing is similar. Wear nitrile or rubber gloves, old nests can carry fleas, blow-fly larvae, mites, and occasionally mouse hantavirus. Remove all old nesting material and dispose of it in a sealed bag in the bin, not the compost. Then rinse the interior with boiling water, which kills most ectoparasites without the chemical hazards of insecticide sprays. Allow the box to dry completely, ideally several days in autumn sunshine, before re-hanging.
NestWatch research notes that the evidence on whether to clean boxes is genuinely mixed: some species re-use material from previous nests, and removal is not always beneficial. The practical recommendation that covers most situations is: always remove the nest after the last brood of the year has fledged, because the risk of heavy parasite loads and rodent occupation in a left-in nest outweighs the modest benefit of retained material for most garden species. If you find a mouse nest over winter, clean it out completely before the spring breeding season, the smell of rodents can deter cavity-nesting birds.
Common kit failure modes and how to avoid them
Having seen a lot of nest boxes fail, here are the problems that come up most reliably, and what to do about each one.
- Water ingress through the roof: insufficient overhang (less than 50 mm) or a glued-only butt joint at the roof-wall junction. Fix: add a strip of exterior caulk along the rear roof joint and check that the front overhang covers the entrance hole.
- Damp nest chamber: missing or blocked drainage holes. Fix: drill four 6 mm holes in the floor corners if the kit does not supply them.
- Warped side panels after one winter: wood thickness under 15 mm, or kit assembled without glue at the joints. Fix: use only kits with 18 mm minimum walls; always glue before screwing.
- Entrance hole enlarged by squirrel or woodpecker: no metal plate fitted. Fix: fit a 1.5 mm steel or aluminium plate immediately — this is the most common and most preventable failure.
- Box never occupied: entrance faces south or south-west, direct sun, near a busy path, or mounted too close to a bird feeder. Fix: re-orient to face north-east, or relocate to a quieter spot.
- Screws corroding and box falling: zinc-plated screws used outdoors. Fix: always use stainless or hot-dip galvanised fasteners — standard zinc plating is not rated for permanent outdoor use.
DIY alternatives to kits: simple plans for common species
A bird house kit is essentially a cut list with pre-measured panels. If you have a circular saw or a hand saw and are comfortable with basic measurements, you can produce the same result from a single 150 mm x 22 mm x 1.8 m planed softwood board for small species like tits and wrens. Use the dimensions from the species tables above, cut five panels (back, two sides, floor, front), and follow the assembly steps in this guide. The only custom tool you need is a hole-saw bit in the correct diameter for your target species. See our roundup of the best wren bird houses for species-specific dimensions and entrance-hole recommendations. The benefit of this route is full control over wood choice, entrance size, and mounting design; the trade-off is that you carry all the measurement responsibility.
For anyone interested in building a wider range of nest boxes from scratch, including open-fronted designs for robins and spotted flycatchers, the planning and dimensioning process follows the same evidence base used here. The same species-appropriate dimensions and predator-proofing principles apply regardless of whether you start from a kit or a raw board.
A brief guide to selling or reselling bird houses
If you have built more kits than you can use, or want to recoup some material cost by selling at a local market or online, there are a few conservation-minded rules worth following. For a step-by-step checklist on pricing, listing, and local-sales best practices, see our short guide on how to sell bird houses. Only sell boxes that meet the species-appropriate dimensions in this guide, a box sold with an incorrect hole size will either fail to attract birds or attract the wrong species, which undermines the buyer's effort and does nothing for conservation. Label each box clearly with the target species and the entrance-hole diameter. If you are reselling used boxes, clean them thoroughly using the boiling-water method described above before passing them on, and be honest that they are second-hand.
Pricing is most straightforwardly based on material cost plus time. Solid cedar or oak kits with metal entrance plates and corrosion-resistant hardware justify a higher price than thin-pine equivalents; buyers who understand nest box quality will pay accordingly. Avoid making conservation claims (such as 'RSPB-approved' or 'BTO-recommended design') unless you have direct evidence, these are specific endorsements, not general marketing terms.
FAQ
What are the top buying criteria when choosing a bird house kit?
Checklist-style criteria: material & durability (solid softwood ≥18 mm or woodcrete preferred); correct internal dimensions for target species; entrance-hole diameter & placement; ventilation and drainage holes; predator-proof features (metal entrance plate, deep internal depth or tunnel, baffles); easy cleaning access (hinged/removable panel or front); secure, weatherproof joins and roof overhang (to reduce water ingress); mounting options and hardware included (pole, bracket, hanging kit); thermal performance (insulation, thicker walls or woodcrete); non-toxic finishes (outside only) and UK REACH/BPR compliance; maker reputation/warranty and conservation credentials. Prioritise kits that match your target species and include cleaning access and predator protection.
Which bird house kit types are recommended (brief top-kit recommendations)?
Evidence-based top types: woodcrete/woodstone kits — high thermal stability and long life (best if budget allows); thick, untreated softwood kits (pine/larch) with 18–24 mm walls — good balance of cost and performance; pre-cut plywood kits are budget-friendly for beginner builders if made from exterior-grade, thick ply and sealed outside only. Look for kits from conservation-minded manufacturers (e.g., established nestbox makers) or community‑recommended woodcrete brands. Avoid thin decorative craft kits without ventilation/drainage or glued-only assemblies.
Hanging vs mounted boxes: pros, cons and when to choose which?
Hanging (suspended) boxes: Pros — can reduce climbing mammal predation if suspended from smooth branches/cord with baffles; flexible placement; easier to move. Cons — can swing in wind, potentially destabilising nesting; may expose box to greater cold/draft if thin-walled. Mounted (pole or tree/bracket): Pole mounting with smooth metal conduit + baffle is best in predator-prone areas (reduces mammal access). Tree mounting is easier but increases risk from climbing predators and woodpeckers and may damage trees. Choose hanging in wooded/shrubby habitats where branches provide shelter and predators are mainly terrestrial; choose pole mounting in open yards with climbing predators or when a stable, permanent site is desired.
What are the species-appropriate internal dimensions and entrance-hole diameters for common garden species (UK and similar)?
Key species table (concise): - Blue Tit: internal floor ~12×12 cm, depth 25–30 cm, entrance 25–26 mm. - Great Tit: internal floor ~12×12 cm, depth 30–35 cm, entrance 28–29 mm. - House/Tree Sparrow: internal floor ~15×15 cm, depth 30–35 cm, entrance 32 mm (or open-front terrace-style). - Starling: internal floor ~20×20 cm, depth 35–40 cm, entrance 45 mm. - Wren: internal floor ~10×10 cm, depth 12–20 cm, entrance 25 mm (they may use very small boxes or open-fronted cavities). - Robin/Trushes/Songbirds (open-front): open-fronted box with shelf, entrance 6–10 cm opening. Notes: place entrance height 12–20 cm above floor for tits; these sizes are general guidance (RSPB/BTO recommended ranges). Use BTO/RSPB species pages for exact local variants.
What materials and build-quality features should I look for, including UK-specific notes?
Materials & build-quality: prefer untreated, thick natural wood (softwoods like pine, larch) or woodcrete for longevity; walls ≥18 mm for insulation; dovetailed or screwed joints (avoid glued-only); generous roof overhang and sloped roof with waterproofing; pre-drilled ventilation and drainage; metal entrance plates to prevent hole enlargement by predators; easy-clean access panel with secure fastener. UK-specific: avoid using freshly pressure-treated or chemically treated timber for nest cavities (REACH/BPR rules); if finishing, use only exterior, wildlife-safe coatings on outside surfaces once cured; follow HSE guidance when handling treated wood and prefer untreated or factory-finished safe products.
Step-by-step assembly instructions for a typical pre-cut bird house kit
Basic assembly steps: 1) Unpack & inventory parts/hardware; read manufacturer instructions. 2) Sand rough edges; identify front/back/roof/floor. 3) Pre-fit without glue to check alignment. 4) Glue joints sparingly with exterior PVA (optional) and use exterior-grade screws or galvanised nails to secure panels — screw from outside through roof/top to avoid loosening. 5) Fit metal entrance plate if provided. 6) Drill/confirm ventilation (near top) and drainage holes (floor, several small holes). 7) Fit hinged/ removable cleaning panel and test closure with predator-proof fastener (wing nut or captive screw). 8) Apply exterior-only waterproofing to roof and outside verticals if desired; avoid painting inside. 9) Weather-test and attach mounting hardware per kit (bracket, hanger, pole adaptor). Tools/materials list: cordless drill, screwdriver, hammer, exterior PVA, galvanised screws (30–50 mm), sandpaper, metal entrance plate, silicone sealant (roof seams), gloves, measuring tape. Time: 1–2 hours for most kits.
Next Article
Best Wren Bird Houses: How to Choose, Build, and Install
Choose and build the best wren bird houses with correct hole size, dimensions, placement, predator-proofing, and cleanin