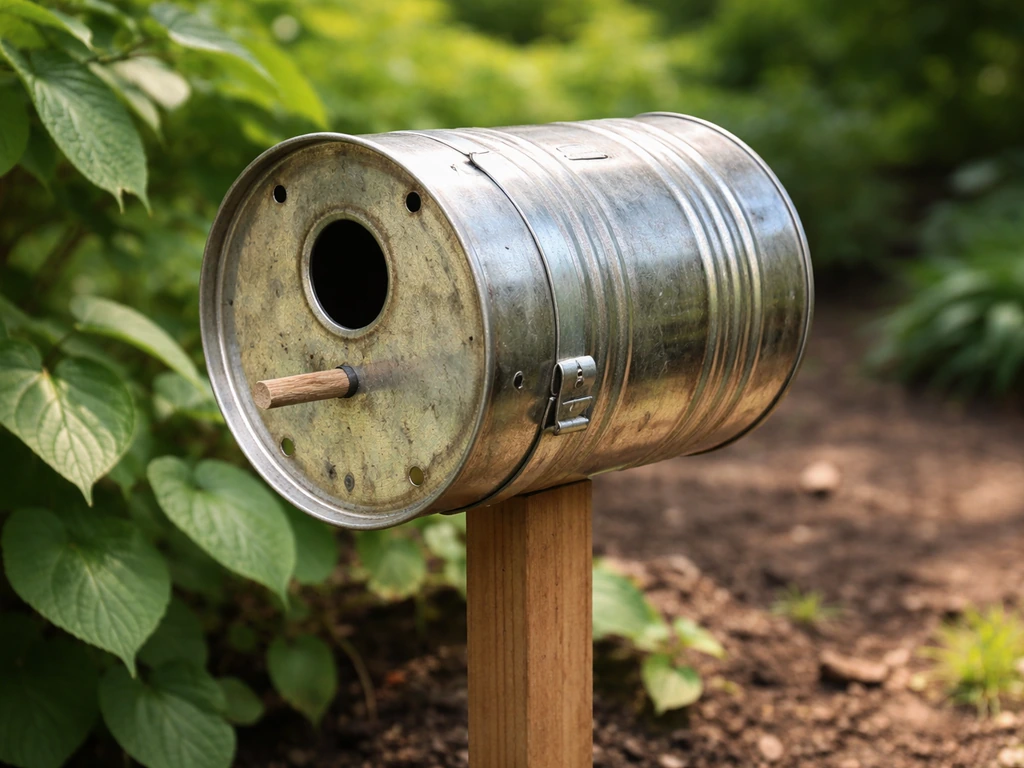
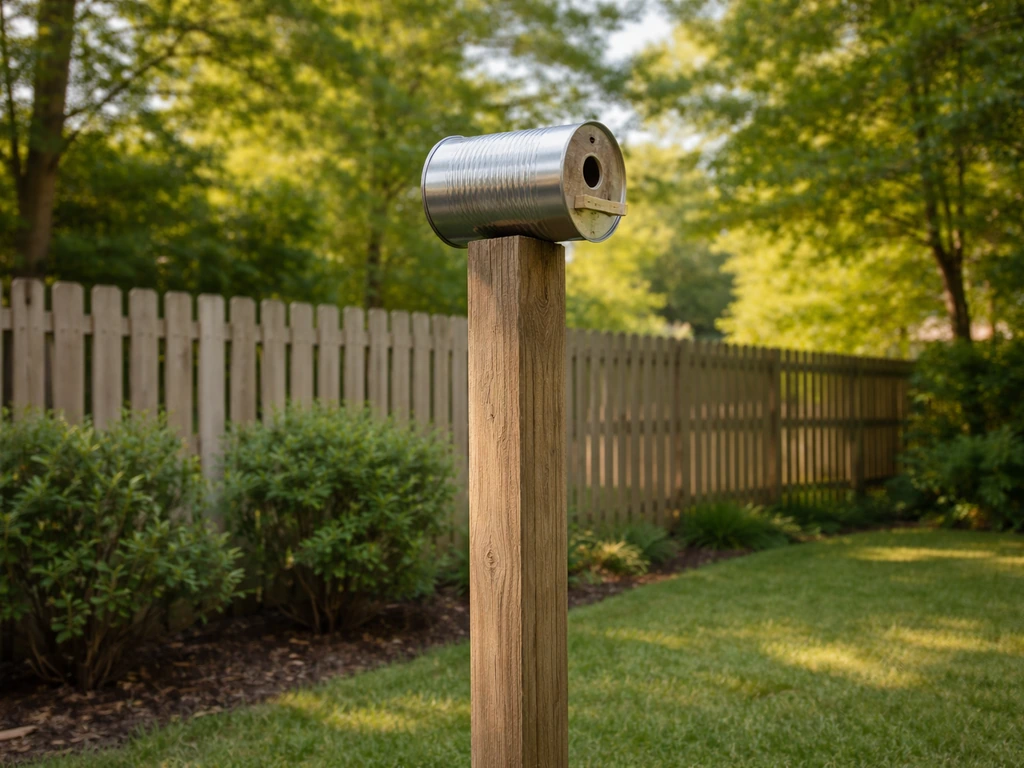
You can build a functional tin can bird house that real birds will use, but only if you treat the metal as a liability to manage, not just a free material. The biggest risks are overheating, sharp cut edges, rust, and a cavity that traps moisture. Handle those four things correctly and a large food tin makes a perfectly serviceable nest box for small cavity nesters like house wrens, chickadees, and nuthatches. If you have a coffee-style can on hand, this related option on plastic coffee can bird houses can help you compare materials and decide what to use coffee-style tin. Skip even one of them and you end up with a trap instead of a shelter.
Tin Can Bird Houses: Step-by-Step Safe DIY Guide

Maya Thompson
24 Apr 2026
What counts as a safe tin can bird house (and when it's a bad idea)
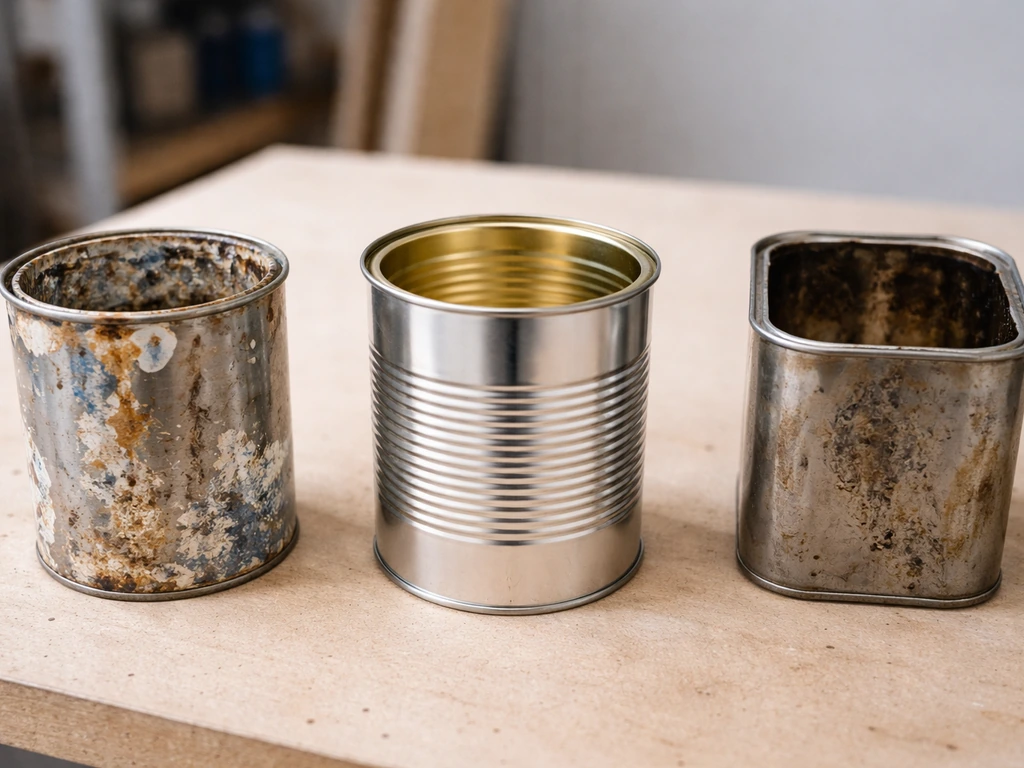
A safe tin can bird house starts with the right kind of can. You want a plain steel food tin with a food-grade interior lining that is still intact after cutting. The lining matters because an unbroken coating prevents any residual chemicals from migrating into nest material. If the interior enamel or lacquer is chipped, flaking, or scratched through during fabrication, that can is not worth using for a bird house. Toss it and grab another one.
Decorative tins, paint cans, chemical or solvent containers, and anything with an unknown interior coating are all off the table. So are small cans. A tuna or soup can is far too cramped and too thin to buffer heat. The minimum workable size for a house wren is roughly a one-pound coffee-style tin (about 4 inches in diameter and 5 to 6 inches tall), and larger is better for any other species. If you are choosing a size, remember that a coffee-style tin is considered roughly the minimum workable option for a house wren. If you are thinking about using a coffee can specifically, that topic has its own deep dive worth reading alongside this guide. If you are set on using a coffee can bird house, follow the deeper guidance so you pick the right can and manage heat and safety correctly coffee can specifically.
The honest caveat: a tin can is not the best nest box material. Wood is better because it insulates, breathes, and does not radiate heat the way metal does. If you live somewhere with hot summers (above 85°F for extended periods during nesting season), a tin can house in full sun can become lethal to nestlings even with ventilation. In those climates, use a wooden box or mount the tin can where it gets shade for the hottest part of the afternoon. If you want another easy, small-format option beyond the basic tin can approach, a soda can bird house is a related consideration for size and material handling. This is a genuine welfare concern, not a technicality.
Materials and tools: choosing the right tin can size
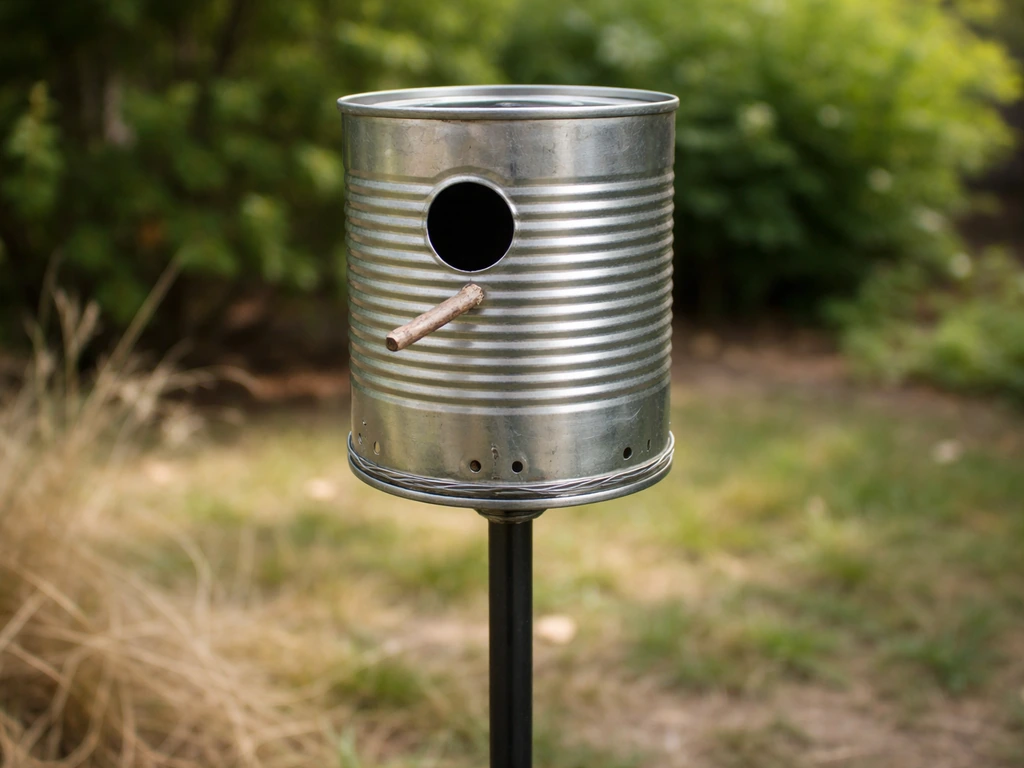
The can itself is the most important material decision. A standard 28-ounce tomato or vegetable can (approximately 4 inches in diameter, 4.5 to 5 inches tall) is the practical minimum and works for house wrens. A large institutional-size can, the kind sold as a No. 10 can (about 6 inches in diameter and 7 inches tall), works for chickadees, nuthatches, and downy woodpeckers and gives you much more room to add ventilation and drainage without compromising structural integrity. Bigger cans also heat up more slowly because of the greater air volume inside.
| Can Size | Approx. Diameter | Approx. Height | Best For |
|---|---|---|---|
| 28-oz food tin | 4 inches | 4.5–5 inches | House wren |
| 46-oz juice/tomato tin | 4.5 inches | 6.5 inches | House wren, Carolina wren |
| No. 10 institutional can | 6 inches | 7 inches | Chickadee, nuthatch, downy woodpecker |
Beyond the can, here is everything you need to build one:
- Clean, dry food-grade steel tin with intact interior coating
- Power drill with metal step-bit or standard HSS twist bits (1/8 inch for drainage/ventilation, sized entrance bit for the species)
- Round metal file or rotary tool with a sanding drum (for deburring cut edges)
- Can opener or tin snips (if cutting a side entrance rather than using the lid end)
- Exterior-grade, water-based latex paint in a light or medium color (white, tan, gray, or sage green) for the outside only
- Small piece of hardware cloth or galvanized mesh (optional predator guard)
- Galvanized or stainless steel wire (16 gauge) or a hose clamp for mounting
- Wooden dowel or screw-in cup hook (optional, for a perch—though perches are not required and can actually help predators)
- Safety glasses and leather work gloves (non-negotiable when drilling metal)
Design rules: entrance size, ventilation, drainage, and sharp-edge safety
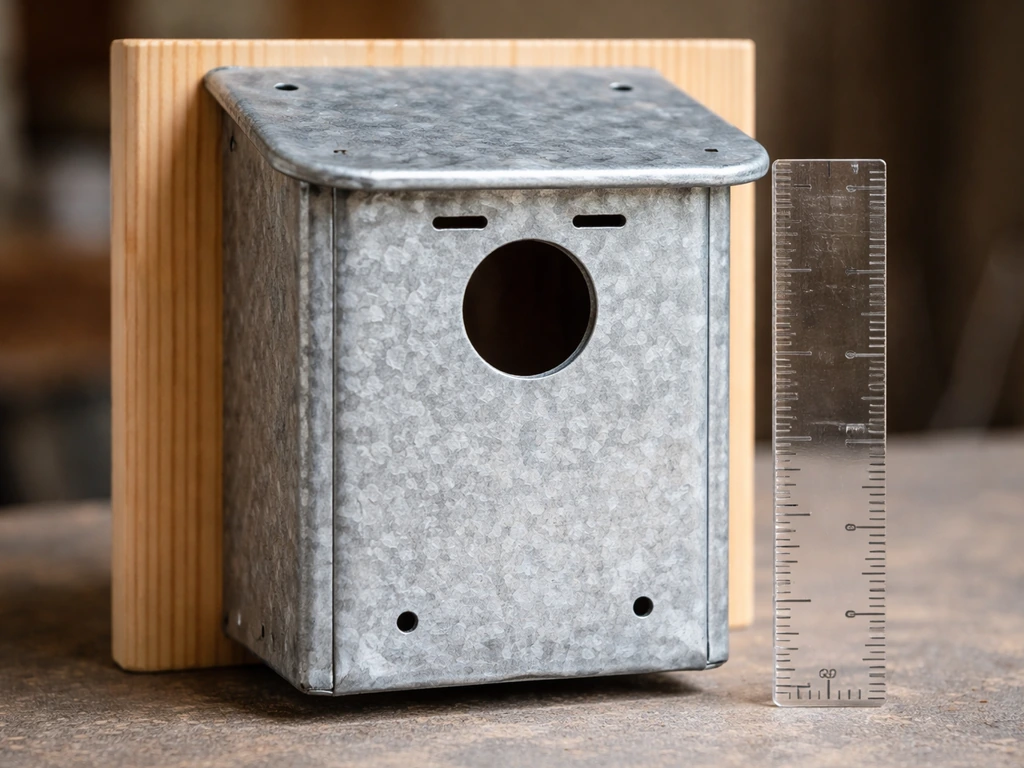
Entrance hole diameter is the single most important dimension in any nest box because it controls which species can enter and whether predators can reach in. Use these targets and stick to them within about 1/16 inch:
| Species | Entrance Hole Diameter | Hole Height from Floor |
|---|---|---|
| House wren | 1 to 1-1/8 inches | 4–6 inches |
| Carolina wren | 1-1/2 inches | 4–6 inches |
| Black-capped or Carolina chickadee | 1-1/8 inches | 6–8 inches |
| White-breasted nuthatch | 1-1/4 to 1-3/8 inches | 6–8 inches |
| Downy woodpecker | 1-1/4 inches | 6–8 inches |
Ventilation is not optional in a metal can. Drill at least four 1/4-inch holes near the top of the can (just below the rim) spaced evenly around the circumference. These allow hot air to escape. If you are using a can that still has a lid, drill two additional 1/4-inch holes in the lid itself. In hot climates, go up to six to eight ventilation holes. More airflow equals lower internal temperature, which directly affects chick survival.
blank" rel="noopener noreferrer">Drainage is equally critical. blank" rel="noopener noreferrer">Drill four 1/4-inch holes in the bottom of the can, one near each corner if the can is round (think of them at the four compass points). Water that pools inside a nest box soaks nesting material, chills eggs, and promotes mold. The floor holes also give you a place to add a thin layer of wood shavings if you want to encourage occupancy.
Sharp edges are the other major metal-specific hazard. Every hole you drill in a tin can produces a burr on the exit side. Run a round metal file around every hole edge for at least 30 seconds, then run your gloved finger around it to check. The entrance hole especially must be completely smooth because birds brush against it every time they enter and exit. A small rotary tool with a sanding drum makes this faster and gives a cleaner result than a file alone. Do not skip this step.
Step-by-step build instructions
Work through these steps in order. Steps 1 through 3 are preparation; steps 4 through 7 are assembly and finishing. The whole build takes about 45 minutes once you have your materials together.
- Clean and inspect the can. Wash with warm soapy water, rinse thoroughly, and dry completely. Inspect the interior coating under good light. Any visible chipping, flaking, or rust on the inside disqualifies the can.
- Mark all hole positions with a permanent marker before drilling. Mark the entrance hole centered on the side of the can at the correct height for your target species (see table above). Mark four drainage holes on the bottom. Mark four ventilation holes just below the rim, evenly spaced.
- Punch a starter dimple at each mark with a nail and hammer. This stops the drill bit from skating across the metal surface and gives you a clean, accurate hole.
- Put on safety glasses and gloves, then drill all holes. Use a step bit for the entrance hole to get a clean, round cut without cracking the metal. Use a standard 1/4-inch twist bit for drainage and ventilation. Drill slowly with moderate pressure—forcing the bit through metal bends the can wall.
- Deburr every hole thoroughly with a round metal file. Work around the inside and outside edge of each hole. The entrance hole should feel as smooth as a drilled wood hole. Check all edges with a bare fingertip (carefully) after filing.
- Paint the exterior only. Apply two thin coats of exterior-grade, water-based latex paint in a light or medium color. Light colors reflect radiant heat; this is the single most effective way to lower internal temperature in a metal can. Do not paint the interior. Let each coat dry fully before adding the next.
- Add a mounting attachment. The cleanest method is to drill two small holes near the back rim of the can (opposite the entrance) and thread heavy-gauge galvanized wire through them, twisting the ends tightly so the can hangs or mounts securely without wobbling. Alternatively, use a hose clamp around the back of the can to attach it to a post or conduit. The can should tilt very slightly forward (a few degrees) so any water that gets in drains out the front drainage holes rather than pooling at the back.
Mounting and placement: height, orientation, and habitat fit
Mount the finished can house between 5 and 10 feet above the ground for wrens and chickadees. Nuthatches and woodpeckers prefer 10 to 15 feet. Avoid mounting below 5 feet if cats are present in your yard, because low boxes make it easy for a cat to watch and ambush birds at the entrance.
Orient the entrance hole so it faces between north and east. This keeps the morning sun from hitting the entrance (which drives up interior temperature fast) and keeps the prevailing afternoon sun off the face of the can. In warm climates that rule is especially important. If your yard forces you to face the entrance south or west, make sure the can is shaded by foliage or a building overhang for at least the afternoon hours.
Keep the bird house at least 75 to 100 feet away from your feeders. Feeders draw a crowd, and a busy feeder location creates stress for nesting birds who want a quiet, defended territory. Mount the house on a smooth metal pole if possible rather than directly on a tree, which makes predator baffles much more effective. If you attach to a fence post or tree, accept that squirrels and raccoons will have easier access.
Timing matters. Have your houses up by late February or early March in the southern US, by late March in the Midwest and mid-Atlantic, and by early to mid-April in the northern US and Canada. House wrens in particular scout territories before the female arrives, so the box needs to be in place before the males show up. If you are reading this in late April, put it up today anyway: late arrivals and second broods often happen into June.
Predator protection and bird safety checks
A tin can has one major predator vulnerability: the entrance hole. Raccoons and squirrels can reach through a standard 1.5-inch or larger hole and pull out eggs or nestlings. The most effective fix is a metal entrance hole guard, a small plate with a hole the same diameter as your entrance, screwed or pop-riveted flush over the existing hole. This creates a deeper tunnel that limits how far a predator can reach. You can buy pre-made metal hole guards or cut one from a small piece of sheet aluminum.
Mount the can on a smooth steel pole (electrical conduit works well) with a cone-style or stovepipe baffle installed below the box. A baffle positioned 4 to 5 feet off the ground and at least 8 inches in diameter stops most climbing predators. This is genuinely one of the highest-impact things you can do: studies of nest box programs show that baffled boxes have dramatically better fledging success than unbaffled ones.
Skip the perch. A small wooden dowel below the entrance hole is a classic decorative touch but it actually helps house sparrows and starlings hang on while they investigate, and it gives predators a grip point. Cavity-nesting birds do not need a perch to enter; they cling to the rim and drop straight in.
Do a quick safety check after any significant wind or rain event, especially in the first season. Make sure the mounting wire or clamp has not loosened, the can has not rotated so the entrance now faces into the rain, and there is no pooling water visible inside when you tip the can slightly. If the can has shifted or is showing rust at the cut edges, address it before nesting activity begins.
Cleaning, maintenance, and troubleshooting for new shelters
Clean the can house at the end of every nesting season, typically in October or November in most of North America. Remove all old nesting material completely; it harbors parasites like blowfly larvae and mites that can harm the next clutch. Rinse the interior with a diluted bleach solution (one part household bleach to nine parts water), let it soak for a few minutes, then rinse thoroughly with plain water and allow to dry fully in the sun before rehanging. Never hang a damp box.
Inspect the can for rust at the cut edges and drainage holes each time you clean it. Light surface rust on the exterior can be treated with a rust-inhibiting primer and repainted. Rust that has pitted through the metal wall, or interior rust that is flaking, means the can has reached the end of its useful life. Replace it. A tin can bird house typically lasts two to four seasons with proper care, less in very wet climates. This is the main reason wood boxes are a better long-term investment, though a well-maintained tin can serves its purpose in the meantime.
Troubleshooting: why birds are not using it
If no birds investigate the box after two to three weeks during peak nesting season, run through this checklist:
- Entrance hole size: recheck the diameter with a ruler. A hole even 1/8 inch too small will be ignored by the target species.
- Location: is the box within 75 feet of a busy feeder or another nest box? Move it at least 25 feet away from both.
- Height: is it below 5 feet? That is too low for most species to feel safe. Raise it.
- Paint color: is the exterior a dark color that absorbs heat? Repaint it in a lighter shade.
- Entrance orientation: is it facing south or west with no shade? Rotate the mount so the entrance faces northeast.
- Interior debris or moisture: tip the can and look inside. Wet or moldy interiors deter birds instantly. Clean and redry.
- Predator activity: if you see claw marks near the entrance or the can has been bumped or rotated, add a baffle and an entrance hole guard.
- House sparrow activity: if house sparrows are investigating but you want wrens or chickadees, monitor closely and remove sparrow nest starts promptly. House sparrows are invasive and not protected; their nests can legally be removed.
If moisture keeps accumulating inside even with drainage holes, check that the can is tilted slightly forward and that the drainage holes have not been blocked by nesting material. A thin layer of dry wood shavings (not sawdust, which packs and holds moisture) on the floor absorbs minor condensation and gives arriving birds a dry surface to build on.
One final note: a tin can is a legitimate starting point, especially if you want to get something up fast or introduce kids to DIY birding. For a quick comparison, you may also like a post top bird house that’s designed for different mounting and entry considerations. But as you get more comfortable with the hobby, a simple wooden box built to the same species-specific dimensions will outperform a tin can on heat management, longevity, and overall fledging success every season. Think of the tin can house as a great first project that teaches you all the right design principles, many of which apply directly when you move up to wood.
FAQ
Can I use a tin can with a pull-top lid or a tab, even if the coating looks intact?
It is risky. The tab and lid area are hard to cut cleanly and often leave thin, uneven metal edges. If you choose that can, remove the tab completely, file every cut edge, and ensure the interior lining around the cut is not scratched through or flaking. If you see any exposed bare metal at the work area, switch to a plain food can.
What size entrance hole should I drill if I am targeting a specific species (like house wren versus chickadee)?
Match the hole size to the bird species you want, not just the can size. The article gives target spacing tolerance, but the key decision is the entrance diameter. Measure your can opening area, then select the correct entrance diameter for your target species and keep your hole within about 1/16 inch of that size, because small oversizing can allow larger, more aggressive cavity nesters or predators.
Do I need to add a floor layer, and if so what exactly should I use and how thick?
Use a thin, dry layer of wood shavings only if you want extra cushioning and moisture buffering. Keep it light, roughly a few millimeters deep, and avoid sawdust, which packs and holds water. Also avoid adding material if you notice standing water inside, because that means you need to fix drainage or tilt before the birds move in.
How do I stop nesting material from blocking the ventilation or drainage holes?
Design for it, then monitor early. Position ventilation holes near the top as instructed, and drill drainage holes so they are not directly covered by the typical build area. After the birds start arranging material, do a quick visual check from a distance (without handling the can) to make sure the holes are still open. If you repeatedly see blockage, reduce the floor depth next time.
Should I tilt the tin can forward, or is level fine?
Tilt helps. A slight forward tilt encourages any incidental condensation or rain that gets inside to move toward the bottom and out through the drainage holes. If you tip the can slightly during inspection and still see pooling water, your tilt is too little, your holes are obstructed, or the can may need drainage holes repositioned.
Is painting the outside okay, and what kind of finish should I avoid?
Exterior paint is usually fine as long as it stays on the outside. Do not paint or seal the interior, and do not use coatings that could off-gas when warmed in the sun. If you repaint rust-prone cut edges, use a rust-inhibiting primer only on exterior metal and keep the entrance area smooth and uncoated.
How can I tell if my tin can is overheating before birds move in?
Use a simple pre-check. On a hot afternoon, carefully touch the area near the entrance from a safe distance using a cloth or back of your hand, and observe whether the can becomes too hot to comfortably handle. Also pay attention to shading and entrance orientation. If it stays scorching, mount it in deeper shade or switch to a wooden box.
Is a baffle truly necessary if the can is high up and has no perch?
Yes, especially for raccoons and squirrels. The higher mounting helps, but baffling is the higher-impact prevention because many climbers can reach surprisingly high. If you already mounted on a pole, add a cone or stovepipe baffle 4 to 5 feet off the ground with a diameter large enough to block climbing. Skip the perch, but do not skip the baffle.
Can I use magnets or glue to hold the hole guard in place?
Avoid magnets and glues. Use mechanical fastening like screws or pop rivets so the guard cannot shift from heat, vibration, or weather. A guard that loosens can leave gaps predators can exploit.
How often should I inspect the box during nesting season?
Do a light inspection about once every couple of weeks, and always after major wind or rain. Look for rotation (entrance facing into rain), loose mounting, and visible water pooling. Avoid disturbing nest contents, because repeated handling can cause abandonment.
What should I do if I see rust only at the cut edges but the inside lining still looks intact?
Surface rust on exterior cut edges can be managed with primer and repaint if it is not pitted through the metal wall. If rust has spread, pits are forming, or any rust flakes appear at drainage or interior edges, replace the can. Rust that is flaking or interior indicates metal breakdown that will shorten safe life quickly.
Can I leave the box up year-round and clean it less often?
Better not. Parasites can build up in old nesting material, and leaving it up delays cleanup. Clean and disinfect at the end of the nesting season (often October or November), remove all old material, rinse thoroughly, and dry fully in the sun before rehanging.
What if no birds use the box after two to three weeks during peak season, even though it looks correct?
Re-check the two biggest limiting factors, placement and entrance accessibility. Confirm the entrance faces the right direction, the box is in the correct height range, and it is far enough from feeders (75 to 100 feet). Also ensure the entrance hole is not too large or smoothness was not compromised by burrs. If everything is right and there is still no interest, try a different location rather than changing species-specific design dimensions mid-season.
Next Article
Coffee Can Bird House Plans and Step-by-Step DIY Guide
Step-by-step coffee can bird house plans with cut-drill measurements, safe materials, mounting, placement, and maintenan