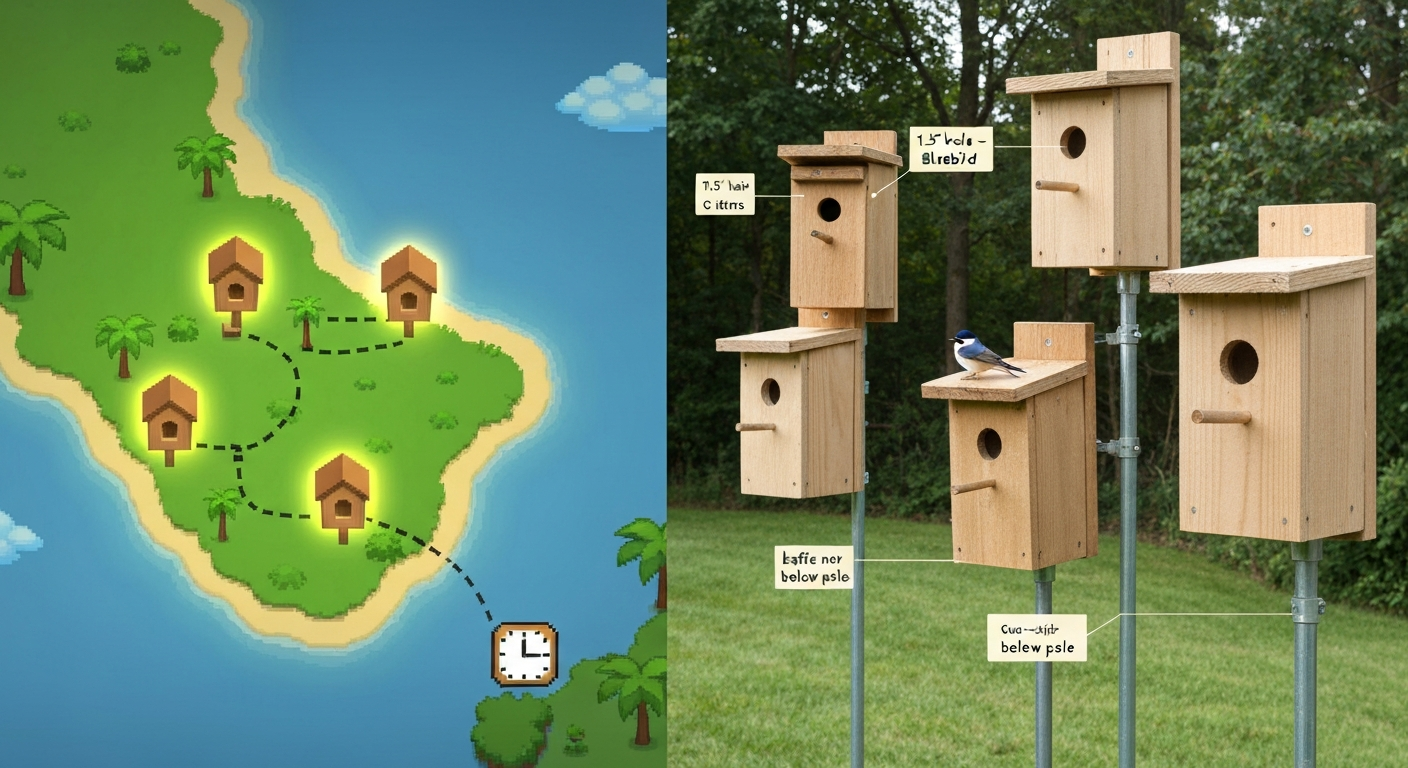
Bird house basics come down to four things: picking the right dimensions for the species you want to attract, using safe untreated wood, mounting the box at the correct height and orientation, and cleaning it out every season. Get those four things right and you will have healthy, occupied nest boxes year after year. This guide walks you through every step, from choosing lumber at the hardware store to scrubbing out a box after fledglings have left, with exact measurements, simple diagrams, and practical advice drawn from Cornell Lab NestWatch protocols and Audubon field-tested plans.
Bird House Basics: Build, Mount & Maintain Safe Nest Boxes Guide

Maya Thompson
11 Aug 2026
What This Guide Covers and Who It's For
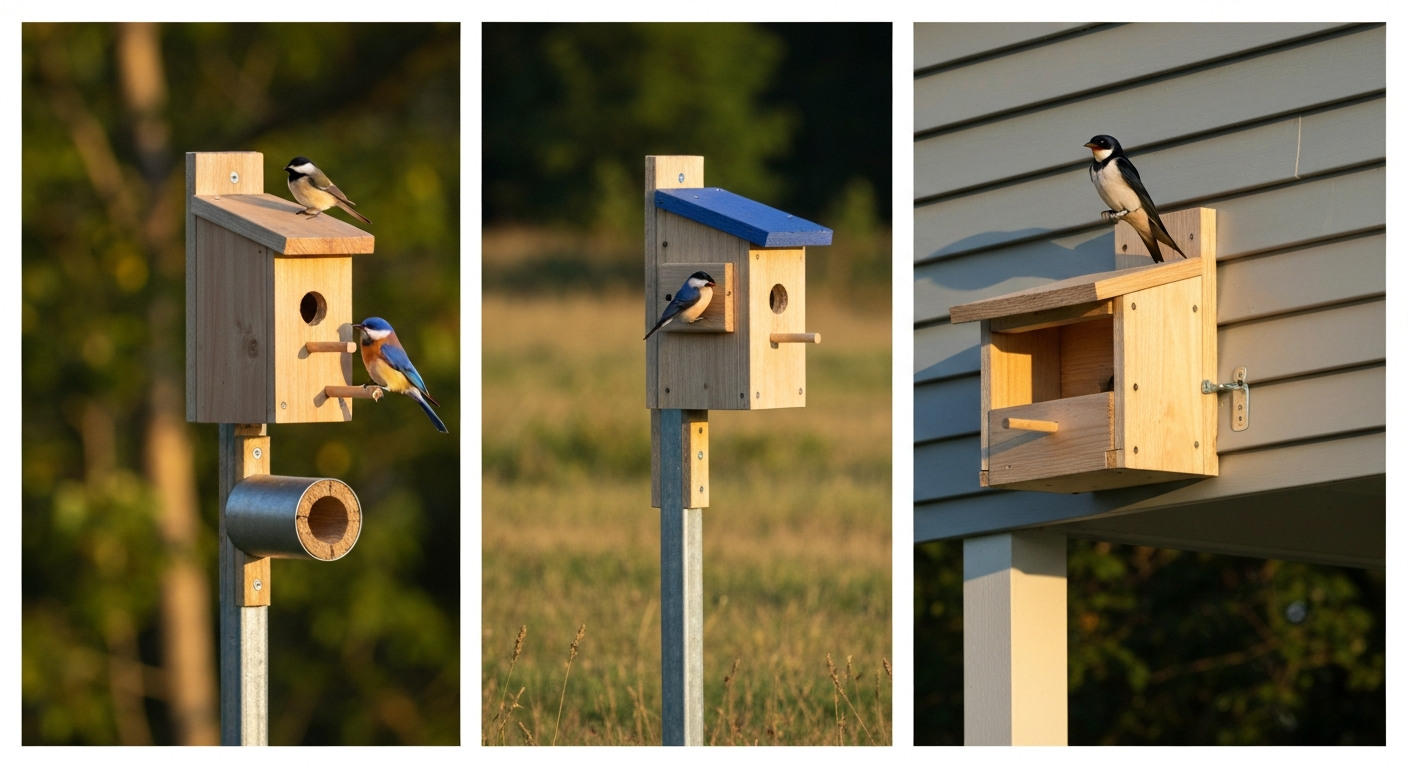
This is a start-to-finish resource for backyard birders and beginner DIYers who want to build and maintain safe, species-appropriate nest boxes. You do not need previous woodworking experience. If you can make straight cuts with a handsaw and drive screws without splitting wood, you can build every box in this guide. We cover materials and tools, three beginner-friendly build plans, how to read cutting diagrams, species-specific dimensions and hole sizes for the most common North American backyard species, habitat-specific mounting and placement guidance, predator-proofing techniques backed by current evidence, sanitation schedules, and a short note on legal protections you need to know about. Gaming questions about bird house runs in OSRS are outside the scope of this guide. For gaming queries such as "how many bird houses OSRS", see our OSRS and gaming FAQ for game-specific guidance. Everything here is about real nest boxes for real birds.
Safety, Conservation, and Humane Principles First
Before you cut a single board, it helps to understand why the details matter. Cavity-nesting birds like bluebirds, chickadees, and tree swallows are protected under the U.S. Migratory Bird Treaty Act (50 CFR 21). Once eggs or chicks are present, disturbing or removing an active nest generally requires federal authorization. That means you want to clean boxes only when they are confirmed inactive, which is typically after fledglings have left in late summer or early fall, or before the breeding season begins in late winter. Cornell NestWatch's Code of Conduct asks monitors to keep nest checks brief, avoid lingering near an occupied box, and use a 1:10 bleach-to-water solution only on soiled, inactive boxes. Beyond legal compliance, a well-built box is a conservation tool. Nest-site availability genuinely limits cavity-nesting bird populations in fragmented landscapes, so a properly designed and maintained box can make a real difference.
- Never disturb an active nest with eggs or live young without a federal permit.
- Clean boxes only when confirmed inactive, before breeding season or after fledglings leave.
- Use only non-toxic, untreated wood and exterior finishes on outside surfaces only.
- Do not add nest material, perches, or decorative elements inside the box.
- Monitor from a respectful distance; limit inspection visits to once every 4 to 7 days during active nesting.
- Remove house sparrow and European starling nests promptly, as both are unprotected invasive species that compete aggressively with native cavity nesters.
- Check your state's regulations in addition to federal law, as some states extend added protections.
Materials and Tools: Exactly What You Need
The single most important material decision is your lumber. Audubon and RSPB guidance is consistent: use untreated, rot-resistant wood. Western red cedar and cypress are the two best choices because they resist decay naturally without chemical treatment. If budget is a concern, untreated pine works and costs less, though it will need replacing sooner. Avoid any lumber stamped 'CCA' or 'pressure treated.' Chromated copper arsenate was phased out for most residential uses in 2003, but recycled treated lumber still turns up at salvage yards. Do not use it. Creosote-treated railroad ties and utility poles are also off the table. For thickness, use 3/4-inch (19 mm) boards. Thinner wood offers poor insulation, warps faster, and is more likely to split when screwing. Nominal 1x6 and 1x8 cedar boards cover every plan in this guide.
Materials List (for one standard bluebird-size box)
- One 1x6 cedar or cypress board, 6 feet long (covers front, back, two sides, floor, and roof for a standard box).
- One 1x8 cedar board, 18 inches long (alternative wider roof for better rain overhang).
- Twelve 1-5/8-inch (41 mm) exterior-grade deck screws, coarse thread (alternatives: galvanized nails 1-3/4 inch, though screws are preferred for easy disassembly and cleaning).
- Two 1-1/4-inch (32 mm) screws for the pivoting side-door latch.
- One 1/2-inch (12 mm) hole saw or spade bit for ventilation holes (or drill a 1/4-inch pilot hole and widen with a rasp for tool-minimal builds).
- Exterior-grade wood glue, small amount for optional joint reinforcement.
- Non-toxic exterior paint or raw linseed oil, applied to outside surfaces only (light earth tones or natural wood finish; avoid black or very dark colors that overheat the interior in direct sun).
- One metal entrance-hole protector plate, sized to match your species hole diameter (galvanized steel or aluminum; resists squirrel and woodpecker enlargement).
Tools List
- Handsaw or circular saw for straight cuts (a miter box improves accuracy for beginners).
- Drill/driver with 1/8-inch pilot bit and appropriate driver bit for your screws.
- Hole saw or spade bit in the correct diameter for your target species (see dimensions table below).
- Tape measure and pencil.
- Sandpaper, 80-grit, to smooth entry-hole edges and reduce splinter hazard for entering birds.
- Clamps (two small bar or C-clamps help hold pieces while driving screws).
- Safety glasses and hearing protection if using power tools.
Three Beginner Build Plans, Step by Step
The three plans below progress from simplest to most predator-resistant. All use standard 1x6 cedar and the same basic tool set. Choose your plan based on your target species and the predator pressure in your yard. All measurements are in inches unless noted.
Plan 1: Simple Single-Chamber Box (Chickadee / Nuthatch)
This is the classic beginner box. The interior floor is 4 inches by 4 inches, the interior depth from floor to entry hole is 8 inches, and the entry hole is 1-1/8 inches for chickadees or 1-1/4 inches for nuthatches. Cut all six pieces from a single 6-foot 1x6 board using the cutting diagram below. The roof piece overhangs the front by at least 2 inches to shed rain away from the entry hole.
| Piece | Cut Dimensions (inches) | Quantity | Notes |
|---|---|---|---|
| Floor | 4 x 4 | 1 | Bevel or clip corners 3/8 in. for drainage |
| Front | 5-1/2 x 10 | 1 | Entry hole centered 1-1/2 in. from top edge |
| Back | 5-1/2 x 13 | 1 | Extra length allows mounting screws top and bottom |
| Side (left) | 4 x 9 | 1 | Top cut at 5-degree bevel to match roof slope |
| Side (right, pivoting door) | 4 x 9 | 1 | Pivot screw at top; latch screw at bottom for access |
| Roof | 7 x 8 | 1 | Overhangs front by 2 in., sides by 3/4 in. |
- Cut all six pieces to the dimensions in the table. Mark and cut the entry hole on the front piece before assembly: measure 1-1/2 inches down from the top edge, center the hole left-to-right, and drill with a hole saw or spade bit. Sand the hole edge smooth with 80-grit paper, working from both faces to avoid tear-out.
- Drill four 1/4-inch drainage holes in the floor corners, and two 1/4-inch ventilation holes on each side piece near the top, just below where the roof will sit.
- Attach the floor to the back piece first: apply a thin bead of exterior glue to the mating edge, then drive two screws through the back into the floor edge. Keep the floor flush with the back's bottom edge.
- Attach the left (fixed) side to the floor and back using two screws per joint. The top of the side should be flush with the top of the back.
- Attach the front piece to the floor and fixed side. Two screws into the floor and two into the side.
- Install the pivoting right side as the clean-out door: drive one screw through the top into the front piece as a pivot point. Drive a second screw through the bottom of the front piece to act as a latch. Leave both slightly loose so the door swings freely but stays closed.
- Set the roof on top and attach it with two screws into the back and one into each side. Do not glue the roof; you want the box serviceable for years.
- Photo callout: Check that the entry hole is clear and that no screw tips protrude inside. Run your finger around the interior — there should be no sharp edges. Rough up the interior wall below the entry hole with a saw kerf or rasp grooves so fledglings can grip when exiting.
Plan 2: Predator-Resistant Box (Eastern Bluebird)
This box uses a 5-inch by 5-inch interior floor, a 1-1/2-inch entry hole, and an extended roof overhang of 3 inches. The key predator-resistant addition is a 3/4-inch thick wooden extension (a 'portal block') glued and screwed around the entry hole on the exterior. This increases the tunnel depth from the outside face to the interior to a minimum of 1-1/2 inches, which makes it harder for a raccoon to reach inside. The back board is 16 inches tall, allowing the box to be mounted to a metal pole or post without a separate cleat.
| Piece | Cut Dimensions (inches) | Quantity | Notes |
|---|---|---|---|
| Floor | 5 x 5 | 1 | Clip corners 3/8 in. for drainage |
| Front | 5-1/2 x 11 | 1 | Entry hole 1-1/2 in., centered 2 in. from top |
| Back | 5-1/2 x 16 | 1 | Extra length for mounting above box body |
| Side (left, fixed) | 5 x 10 | 1 | Bevel top edge 5 degrees |
| Side (right, pivoting) | 5 x 10 | 1 | Pivot at top, latch at bottom |
| Roof | 8 x 9 | 1 | 3-in. front overhang, 1-in. side overhang |
| Portal block | 4 x 4 with 1-1/2-in. hole centered | 1 | Glue and screw to exterior front over entry hole |
- Follow the same assembly sequence as Plan 1 through step 5.
- Cut the portal block from a scrap of 3/4-inch cedar: a 4-inch square piece with the entry hole drilled in the center. Sand the hole smooth on both faces.
- Apply exterior glue to the back face of the portal block and align the hole with the entry hole on the front board. Clamp it in place and drive two 1-inch screws from inside the box through the front into the portal block.
- Install the pivoting clean-out door and roof as in Plan 1 steps 6 and 7.
- Optional: install a metal entrance-hole protector plate over the portal block face. Use the plate sized for a 1-1/2-inch hole, fasten with four small screws.
- Photo callout: From inside the box, the entry tunnel should now be at least 1-1/2 inches deep. This added depth reduces predator reach and discourages house sparrows from hovering at the hole.
Plan 3: Open-Front Shelf Box (American Robin / Barn Swallow / Phoebe)
Robins, phoebes, and barn swallows do not use enclosed boxes. They need an open-front shelf mounted under a roof overhang or on a barn wall, sheltered from rain and direct sun. This is the simplest build: a flat floor, two short sides, a back board, and a roof. There is no entry hole. The front is completely open. The interior floor should be at least 6 inches by 6 inches for robins or 6 inches by 7 inches for barn swallows.
- Cut the floor to 6 x 6 inches. Drill four 1/4-inch drainage holes near the corners.
- Cut the back to 6 x 8 inches. Cut two side pieces to 6 x 8 inches with the top front edge cut at a 45-degree angle so the roof slopes forward and sheds rain.
- Assemble back to floor, then sides to back and floor using two screws per joint.
- Cut the roof to 7 x 7 inches. Attach with two screws into the back and one per side. The roof should overhang the open front by at least 2 inches.
- Mount under an existing roof overhang, on a building wall, or under a porch ceiling at a height of 6 to 15 feet. Robins prefer 6 to 10 feet; barn swallows and phoebes often use heights of 8 to 15 feet.
- Photo callout: The open front should face away from prevailing weather. In most of North America, that means facing southeast to east, avoiding the southwest where afternoon storms typically arrive.
How to Read These Plans and Diagrams
All dimensions in these plans are interior measurements unless the piece label says 'cut dimensions.' When a table says '5 x 5' for a floor, that means the finished floor piece is 5 inches by 5 inches. The interior floor area and interior depth from floor to entry hole center are the two most critical measurements for species fit. A tolerance of plus or minus 1/4 inch on floor dimensions is acceptable. Entry-hole diameter is less forgiving: stay within 1/16 inch of the specified size. An oversized hole lets competing species in. An undersized hole forces birds to enlarge it or abandon the box.
Joint notes: where two pieces meet at a right angle, the face of one piece covers the end grain of the other. For example, the sides cover the end grain of the floor, not the other way around. This keeps screws going into face grain rather than end grain, which holds much better. A 5-degree bevel on the top edges of the side pieces is enough to create a slight roof pitch. If you do not have a bevel gauge, a 1/2-inch rip along the top edge of a 9-inch side piece creates a close-enough slope. Common adaptations: if you cannot source cedar, untreated Douglas fir or redwood work well. If you need to skip the pivoting door for simplicity, attach the roof with two screws only on one side so the whole roof lifts for cleaning. Always pre-drill pilot holes 1/16 inch smaller than your screw shank to prevent splitting thin cedar.
Species-by-Species Dimensions and Hole Sizes
The table below draws on Henderson's nest-box dimension chart (widely referenced by Audubon and Cornell NestWatch) and published natural history accounts. 'Floor' is interior floor area. 'Depth' is the interior distance from the floor to the center of the entry hole. All hole diameters are in inches. Mounting height is the recommended range above ground to the box floor. For site-wide standards and terminology, see the bird house rules. For detailed behavioral and habitat notes on individual species, the bird house guide and species-specific pages on this site go into more depth. For more detailed plans and species pages, see a guide to bird homes. Birds of the World (Cornell Lab), subscription reference is the comprehensive, authoritative species account resource for exact nesting requirements where available blank" rel="noopener noreferrer">Birds of the World (Cornell Lab) — subscription reference.
| Species | Floor (in.) | Interior Depth (in.) | Entry Hole Diameter (in.) | Mounting Height (ft.) | Notes |
|---|---|---|---|---|---|
| Black-capped / Carolina Chickadee | 4 x 4 | 8–10 | 1-1/8 | 4–8 | Pack box loosely with wood shavings; chickadees excavate their own cavity feel |
| White-breasted / Red-breasted Nuthatch | 4 x 4 | 8–10 | 1-1/4 | 5–10 | Mount on a tree trunk facing north or east in mixed woodland |
| House Wren | 4 x 4 | 6–8 | 1-1/8 | 5–10 | Will accept smaller holes down to 1 in.; place near brushy edges |
| Carolina Wren | 4 x 4 | 6–8 | 1-1/2 | 5–10 | Slightly larger hole than house wren; prefers low dense cover nearby |
| Eastern / Western / Mountain Bluebird | 5 x 5 | 8–12 | 1-1/2 (Eastern/Western) / 1-9/16 (Mountain) | 4–7 | Mount on open fence post or pole; bluebird trail spacing 100–150 yards apart |
| Tree Swallow / Violet-green Swallow | 5 x 5 | 6–8 | 1-1/2 | 4–8 | Open field or meadow near water; pair boxes 15–25 feet apart for swallows, farther for other species |
| Downy Woodpecker | 4 x 4 | 8–10 | 1-1/4 | 6–20 | Fill box with wood shavings; mount on dead snag or live tree |
| Hairy Woodpecker | 6 x 6 | 12–15 | 1-1/2 | 8–20 | Larger box, deeper cavity; mount on large-diameter trunk |
| Northern Flicker | 7 x 7 | 16–18 | 2-1/2 | 6–20 | Fill with 4 in. of wood shavings; mount on tree or post in open woodland |
| American Kestrel | 8 x 8 | 12–15 | 3 | 10–30 | Open farmland or grassland; mount on post facing open area |
| Screech Owl (Eastern / Western) | 8 x 8 | 12–15 | 3 | 10–30 | Woodland edges; line bottom with 2–3 in. wood shavings |
| House Sparrow (exclude) | — | — | Avoid 1-3/4 in. or larger on small boxes | — | House sparrows are non-native and unprotected; use 1-1/8-in. holes to exclude them from chickadee/wren boxes |
A quick note on house sparrows and European starlings: both are introduced, non-native species in North America and are not protected under the MBTA. You are legally permitted to remove their nests and eggs from your boxes. Doing so consistently and promptly is one of the most effective steps you can take to support native cavity nesters. Starlings cannot enter a hole smaller than 1-1/2 inches, so sizing holes for chickadees, wrens, and nuthatches automatically excludes them. House sparrow exclusion requires more vigilance because they can squeeze through a 1-1/8-inch hole; monitoring frequently during early spring helps catch their nesting attempts early.
Mounting and Placement: Habitat-by-Habitat Guide
Where you put a box matters as much as how you build it. Research on nest-site selection consistently shows that cavity-nesting birds respond to habitat structure around the box: distance to cover, surrounding vegetation, sun exposure, and proximity to water all influence occupancy rates. The good news is that the recommended practices are straightforward and do not require specialized equipment. Orientation, height, and mounting method are the three variables you control most easily.
Orientation and Sun Exposure
Face the entry hole between north and east as a general rule. This keeps the hottest afternoon sun off the entrance and reduces interior temperatures, which is critical in warm climates where overheating is a documented cause of nestling mortality. In cooler northern regions, a slight tilt toward the south or southeast extends the warming effect of morning sun, which benefits early-season nesters like bluebirds. Tilt the box very slightly forward, 5 degrees, so rainwater runs off the roof rather than dripping in the hole. Never face the entry hole directly into prevailing storm winds.
Tree Mounts
Screw a box to a tree trunk using two lag screws driven through the back board extension into the tree. Use a 1/4-inch lag screw, 2-1/2 inches long, with a large washer to avoid bark damage. Do not use wire or rope around the trunk, which girdles the tree over time. Tree mounting works well for woodpeckers, nuthatches, and screech owls, which naturally nest in tree cavities. For most other species, a baffle-equipped pole mount offers better predator protection than a tree, because raccoons, squirrels, and snakes can climb tree trunks easily.
Pole Mounts
A smooth metal conduit pole (1/2-inch or 3/4-inch EMT electrical conduit, available at hardware stores in 10-foot lengths) with a raccoon baffle is the most effective mounting system for open-country species like bluebirds and tree swallows. Drive the pole 18 to 24 inches into the ground. Mount the box at the specified height for your target species. Install a cylindrical metal baffle 4 to 5 inches in diameter and at least 24 inches tall, positioned so its bottom is at least 18 inches off the ground. The baffle should be smooth and slippery; a commercial PVC or aluminum stovepipe baffle works well. Grease is not recommended because it can soil birds' feathers. A baffle on a smooth metal pole eliminates most mammalian predator access, which is the single most evidence-supported predator-proofing intervention for open-country nest boxes.
Building and Eave Mounts
Open-front shelf boxes for robins, phoebes, and barn swallows mount directly to building walls or under overhangs using two lag screws or heavy exterior screws into studs or blocking. Position them under a roof overhang where possible to provide additional rain protection. Ensure they are placed away from high foot-traffic areas that would disturb nesting birds. Heights of 6 to 15 feet work for most shelf-nesting species.
Urban vs. Rural Placement
In urban and suburban yards, house wrens, chickadees, and Carolina wrens are your most likely tenants. Place boxes 5 to 10 feet high on fence posts, trees, or dedicated poles, near but not inside dense shrubs (2 to 10 feet of clear flight path to the entry hole is ideal). In rural or semi-rural areas with open fields and fence lines, bluebird trails are highly effective: mount 1-1/2-inch hole boxes on fence posts or dedicated poles every 100 to 150 yards along a field edge or hedgerow. Tree swallows will compete for bluebird boxes; placing two boxes 15 to 25 feet apart allows one pair of each to coexist. Keep all boxes at least 300 feet from occupied house sparrow colonies (near grain storage, barns, or dense human habitation) to reduce competition pressure.
Regional Timing: When to Put Boxes Up
The safest rule is to have boxes clean, mounted, and ready by late February in the southern U.S. and no later than early April in the northern states and Canada. Bluebirds in the Southeast begin prospecting for nest sites in late January. Chickadees and nuthatches start in March in the mid-Atlantic and Midwest. Tree swallows arrive from migration in the northern states from late March through April. eBird's Status and Trends data and your local Audubon chapter's regional calendars are the most reliable tools for dialing in exact timing for your county. The key point: boxes should be up before birds are actively looking, not after you see them prospecting.
Predator-Proofing: What the Evidence Actually Says
A 2023/2024 systematic review (Marcus, Hart and Goodenough, published in MDPI) evaluated the evidence for common predator-proofing interventions and found that pole-mounted baffles on smooth poles have the strongest documented effectiveness for mammalian predators. Metal entrance-hole plates reduce hole enlargement by woodpeckers and squirrels. Extended portal blocks (the tunnel entry in Plan 2) reduce reach-in predation by raccoons. However, the same review flagged that some interventions have unintended consequences: very deep portal tunnels can increase interior temperatures and humidity, potentially stressing nestlings in hot climates. Heavy-duty baffles on isolated poles can sometimes increase snake predation if snakes find alternative routes. The practical takeaways are as follows.
- Use a smooth metal pole with a correctly sized cylindrical baffle as your primary defense against raccoons, squirrels, and cats. This is the most evidence-supported single intervention.
- Add a metal entrance-hole plate to resist squirrel and woodpecker enlargement of the hole.
- Use a portal block (depth extender) for bluebird boxes in areas with high raccoon pressure, but keep the tunnel depth to no more than 1-1/2 inches to avoid overheating.
- Do not apply grease, petroleum jelly, or WD-40 to poles or baffles. These substances foul bird plumage.
- Avoid mounting boxes on wooden fence posts in high-raccoon areas. Raccoons climb rough wooden surfaces easily.
- Check for and remove wasp nests from boxes during mid-season inspections. Wasps are a secondary competitor that baffles do nothing to address.
- Monitor your boxes every 4 to 7 days during the breeding season. Early detection of predation events lets you identify and address the predator before a second clutch is lost.
Cleaning and Sanitation: The Annual Maintenance Schedule
Nest boxes accumulate parasites, mites, bacteria, and fungi over a breeding season. Research on nest microbiomes confirms that reduced ventilation and accumulated nest material increase pathogenic organisms, which is why both proper ventilation gaps during construction and annual cleaning matter. Cornell NestWatch recommends removing old nest material and cleaning the box once per year, at minimum. Many experienced monitors clean after each completed brood within a season if they know the nest is no longer active, which gives arriving second-clutch pairs a clean box.
- Confirm the nest is inactive: no eggs, no live young, and no adult activity observed over several days. For bluebirds and tree swallows, fledglings typically leave 16 to 21 days after hatching.
- Open the clean-out door or lift the roof. Remove all nest material and debris by hand into a trash bag. Do not compost nest material that shows signs of parasites or disease.
- Inspect the box interior for cracks, rot, insect damage, and wasp nests. Note any repairs needed.
- If the box is heavily soiled or shows evidence of mites or blowfly larvae, scrub the interior surfaces with a 1:10 bleach-to-water solution (1 part household bleach to 9 parts water). Use a stiff brush.
- Allow the box to air-dry completely, at least 24 hours, before closing it. Residual moisture encourages mold growth.
- Check that ventilation holes and drainage holes are clear and unobstructed.
- Close the clean-out door and re-latch. If doing a post-season clean in fall, leave the door slightly ajar or drill a small ventilation notch at the base of the door to prevent moisture buildup over winter.
- In late winter, close the box, check all mounting hardware for security, and confirm the baffle is intact before the breeding season begins.
How Many Boxes in Your Yard? Spacing and Territory Notes
The answer depends entirely on the species and your yard size. Most cavity nesters are territorial and will not tolerate another pair of the same species nesting within their territory. Bluebirds defend territories of roughly 2 to 3 acres during nesting, so placing two bluebird boxes closer than 100 yards usually means one will go unused or be fought over. House wrens defend territories of less than an acre in dense cover, so two wren boxes can coexist in a large suburban yard if they are on opposite sides. Tree swallows are an exception: pairs will nest close together if plenty of airspace and foraging habitat is available, and the paired-box strategy (two boxes 15 to 25 feet apart) exploits this by allowing one swallow pair and one bluebird pair to each claim a box. For most suburban yards of 1/4 acre or less, one or two boxes of different species targets is the practical maximum before competition defeats the purpose.
A Quick Note on Legal Protections
Under the U.S. Migratory Bird Treaty Act (MBTA), it is illegal to take, possess, import, export, transport, sell, purchase, barter, or offer for sale the nests or eggs of any migratory bird without a federal permit. 'Take' includes disturbing or destroying an active nest. The U.S. Fish and Wildlife Service's Migratory Bird Permit Memorandum series (particularly MBPM-2) clarifies that removing an active nest of a native species generally requires authorization. In practice, this means you should plan your box cleaning and installation around the nesting calendar so you are never in the position of needing to disturb an active nest. State regulations may add additional protections. If you find an active nest in a place that poses a safety hazard, contact your state wildlife agency or a licensed wildlife rehabilitator for guidance before doing anything.
Quick Dos and Don'ts
| Do | Don't |
|---|---|
| Use untreated cedar or cypress, 3/4-inch thick | Use pressure-treated, CCA, or creosote lumber |
| Match entry-hole diameter precisely to your target species | Drill a bigger hole and assume birds will figure it out |
| Mount on smooth metal poles with baffles where possible | Nail boxes to rough wooden posts in raccoon-heavy areas |
| Face entry holes north to east | Face entry holes directly into afternoon sun or prevailing wind |
| Clean boxes once per year, minimum, when inactive | Open or disturb an active nest with eggs or live young |
| Remove house sparrow and starling nests promptly | Ignore invasive species competition hoping it resolves itself |
| Put boxes up before birds begin prospecting (late winter) | Install boxes after you see birds already looking |
| Apply exterior finish only to outside surfaces | Paint or varnish the interior of the box |
Troubleshooting: Why Isn't My Box Being Used?
If your box sits empty for a full breeding season, run through this checklist before concluding the location is wrong. First, check the entry hole size: even 1/4 inch too small or too large can deter the species you are targeting. Second, check the interior depth: a box that is too shallow feels exposed to prospecting birds. Third, look at the surroundings: is the flight path to the entry hole clear, or is it blocked by branches within 2 feet of the entrance? Fourth, check for insects or wasps inside. Fifth, confirm the box is not in direct competition with an existing natural cavity nearby, such as a rotted fence post or hollow tree snag, which birds will often prefer. Finally, if house sparrows have claimed the box repeatedly, relocate it at least 300 feet away from structures where house sparrows congregate. For species-by-species placement guidance and more detailed troubleshooting, the broader bird houses guide on this site covers habitat-specific strategies in greater depth. For another relevant comparison, see bird house guide.
FAQ
What types of authoritative sources are essential for an evidence-based 'bird house basics' article?
Combine primary scientific literature (peer‑reviewed studies on cavity nesting, predation, microclimate, nest microbiomes), trusted ornithological databases (Cornell Lab's NestWatch, All About Birds, Birds of the World), conservation NGO technical sheets (Audubon, RSPB), government/regulatory documents (USFWS/MBTA, state wildlife agencies), and extension/university publications. Use commercial SEO tools (Google Keyword Planner, SEMrush/Ahrefs) only for title/meta and search intent work.
Which peer‑reviewed topics should I consult and cite?
Key topics: nest‑site selection and limiting resources, experimental tests of predator‑proofing, microclimate effects of box design, nest microbiome and disease risk, and studies on spacing/competition. Cite recent reviews and representative empirical papers (e.g., Wiebe 2011, Li & Martin 1991) and any systematic reviews (e.g., Marcus et al. 2023/24) that synthesize interventions and trade‑offs.
What species‑level references are recommended for exact dimensions and hole sizes?
Use authoritative species accounts and nestbox charts from Cornell Lab (All About Birds, Birds of the World where available), Audubon’s nestbox dimension charts (Henderson’s chart), and RSPB species guides for regional (UK/Europe) species. Cross‑check these NGO charts against primary literature for any species with variable requirements.
Which sources inform regional timing and phenology for mounting and monitoring schedules?
Use eBird Status & Trends for spatially explicit breeding phenology and abundance maps, plus local state extension or Audubon chapter recommendations for regionally tailored timing. Combine these with NestWatch monitoring protocols for safe monitoring windows.
Where should I get predator‑proofing guidance and evidence of effectiveness?
Start with systematic or review literature on nestbox predator interventions (e.g., Marcus et al. 2023/24) and complement with practical technical sheets from RSPB, Audubon, and university extensions. Highlight evidence of unintended consequences (microclimate, parasite loads) from peer‑reviewed studies before recommending specific hardware (baffles, metal plates, hole collars).
What sanitation and maintenance authority should I follow?
Follow Cornell Lab’s NestWatch protocols for cleaning and disinfection (remove soiled nests after fledging; disinfect with 1:10 bleach solution when boxes are inactive), and cite peer‑reviewed studies linking ventilation/drainage with nest microbial risks to justify design features (vent holes, drainage). University extension guides also give seasonal maintenance checklists.
Next Article
How Many Bird Houses OSRS, Real Nest Box Guide for Yards
OSRS bird houses answer + practical DIY nest‑box plans: counts, sizes, spacing, predator proofing, and maintenance.