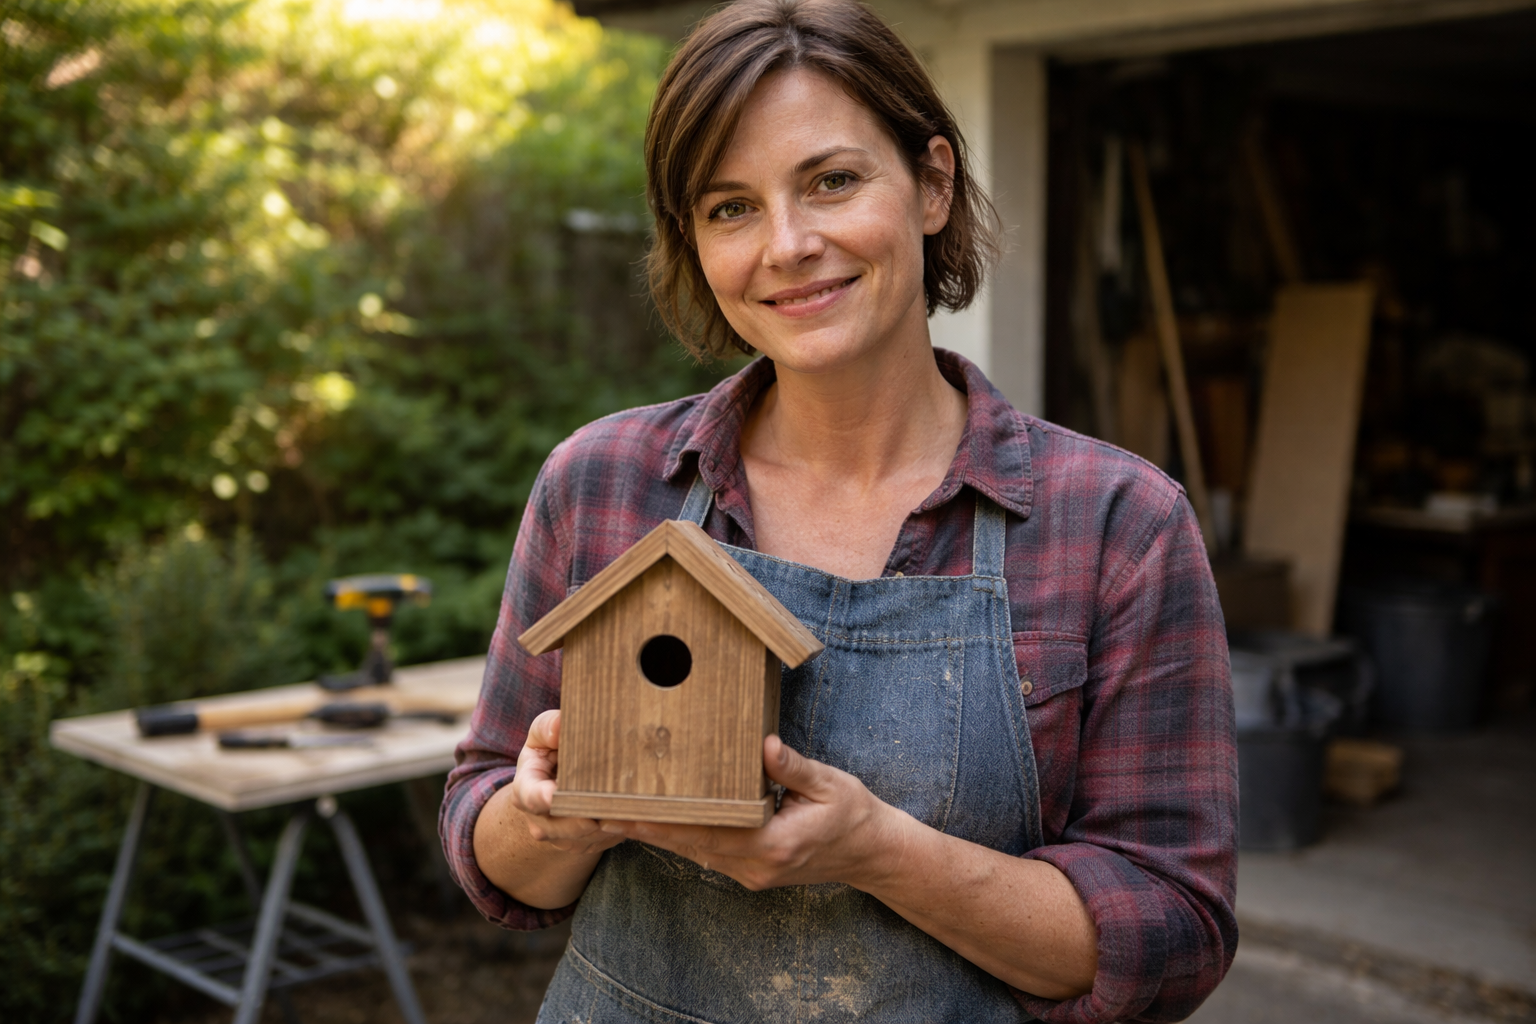
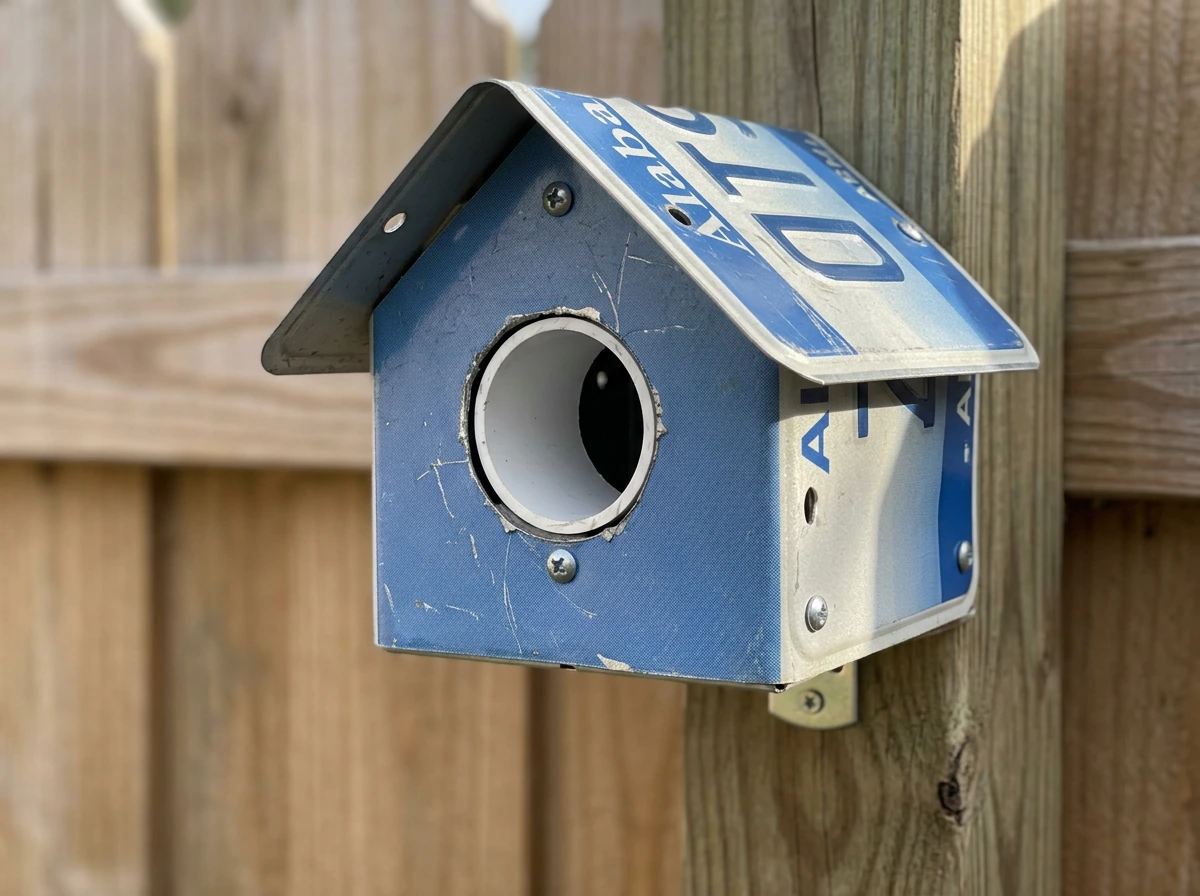
A license plate bird house is exactly what it sounds like: a small wooden birdhouse that incorporates a real (or decorative) license plate as part of its structure, most commonly as the roof panel or front face. The plate adds weather resistance, a pop of color, and a recycled-material charm that makes these houses a favorite for backyard crafters and bird lovers alike. If you want to build one this weekend or buy a finished version online, this guide covers everything you need to make a smart choice, get the dimensions right, and end up with a house that birds actually use. This bird houses how to build guide will walk you through the key steps and measurements so your finished project actually functions for local cavity nesters.
License Plate Bird Houses: DIY Plans and for Sale Guide
Maya Thompson
22 Mar 2026
What a License Plate Bird House Is and Why People Make Them
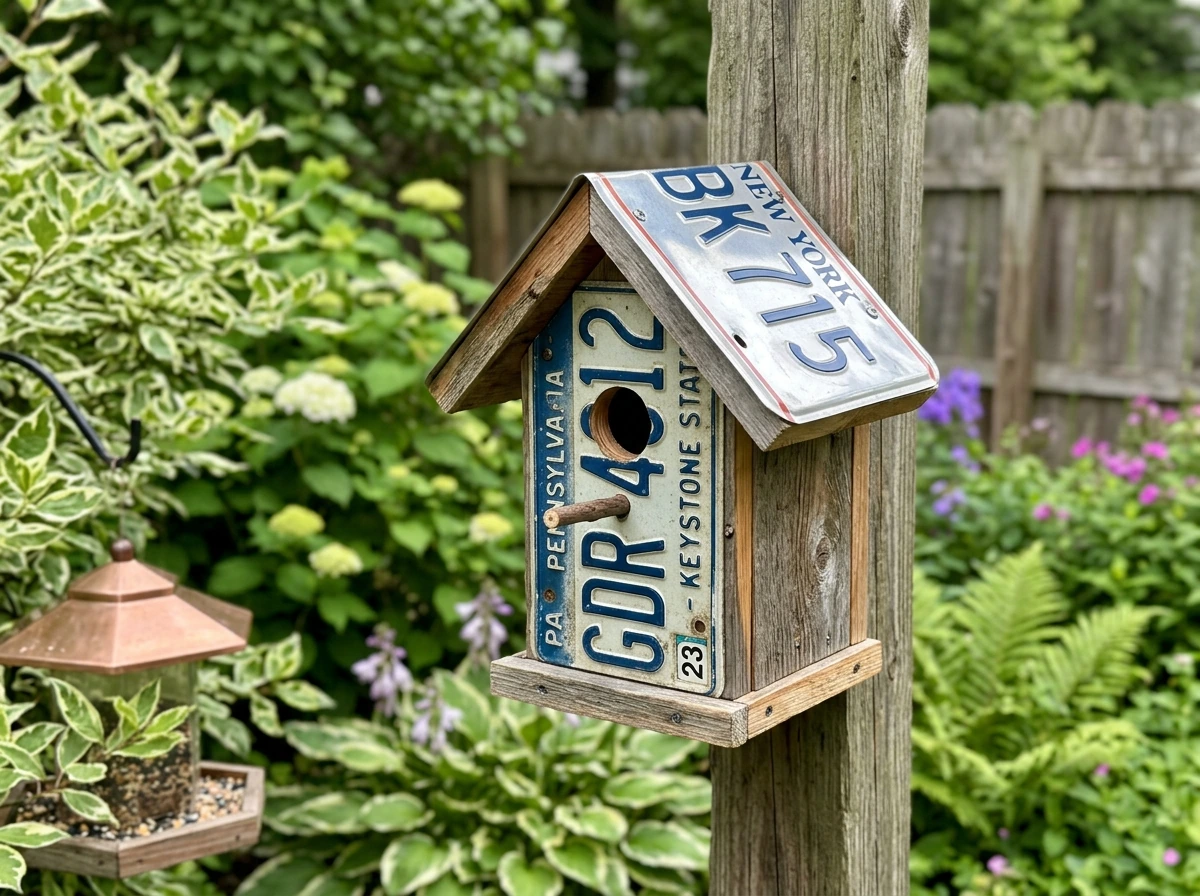
The appeal is simple. A standard license plate is roughly 12 inches wide by 6 inches tall, made from aluminum or steel, and already painted and finished at the factory. That makes it a ready-made, weatherproof panel that fits neatly over a birdhouse roof without any additional painting or sealing on the plate itself. People build them as upcycling projects using old plates from junkyards, estate sales, or their own garage. Collectors build them with vintage state plates for the aesthetic. Others just want a tough, distinctive roof that won't rot or warp.
The functional case is equally strong. Metal roofs shed water better than bare wood, and when the seam between the plate and the wood body is sealed with silicone caulk, you get a virtually waterproof roof that costs almost nothing. The wood body handles the structural load, insulation, and entry hole geometry, while the plate handles weather. It's a genuinely practical combination, not just a novelty.
These houses attract the same cavity-nesting birds that use any well-built wooden box: chickadees, wrens, titmice, nuthatches, and bluebirds (if sized correctly). The license plate doesn't change the bird's experience inside the box at all. What matters to the bird is the interior floor size, the cavity depth, the entrance hole diameter, and whether the box stays dry and well-ventilated. An entry hole diameter tailored to the target species matters, and a dedicated downloadable hole-size table can help you match diameters such as chickadee at 1 1/8 inches or house wren at about 1 inch. Get those right and the plate is just a roof.
Choosing the Right Materials and Tools
The License Plate
Any standard North American license plate works. They're typically aluminum (lighter, won't rust) or steel (slightly heavier, can rust at cut edges or scratches). If you're using a steel plate, inspect it for deep rust pits. Surface oxidation is fine and easy to treat, but a plate that's corroded through is structurally weak and will shed flakes into the nest. Vintage aluminum plates are ideal. Check flea markets, auto salvage yards, or online marketplaces. Expect to pay $1 to $5 for a used plate.
Wood for the Body
Cedar is the best all-around choice for the birdhouse body. It's naturally rot-resistant, lightweight, and holds screws well. Rough-cut cedar (with one unfinished face turned inward) gives nestlings something to grip when they're climbing toward the entrance hole. Pine works fine if you seal it well. Avoid pressure-treated lumber entirely since the preservatives are toxic to birds. Avoid plywood for the main walls unless you use exterior-grade and seal all edges, because interior plywood delaminates from moisture quickly. A standard fence board (5/8 inch or 3/4 inch thick cedar) from any home center is perfect and inexpensive.
Fasteners and Hardware
Use exterior-grade screws, not nails. Nails work loose over time as wood expands and contracts through seasons. Stainless steel or coated deck screws (1. Fasteners Plus notes that stainless steel deck screws are suited for outdoor, moisture-exposed use because they resist corrosion Stainless steel or coated deck screws. 5 to 2 inch length) are ideal. For attaching the license plate to the roof, use small stainless steel or galvanized sheet metal screws (No. 6 or No. 8, pan head, 3/4 inch long) through the plate's existing bolt holes or through new holes you drill. Do not use standard drywall screws outdoors; they rust quickly and stain the wood.
Mounting Hardware
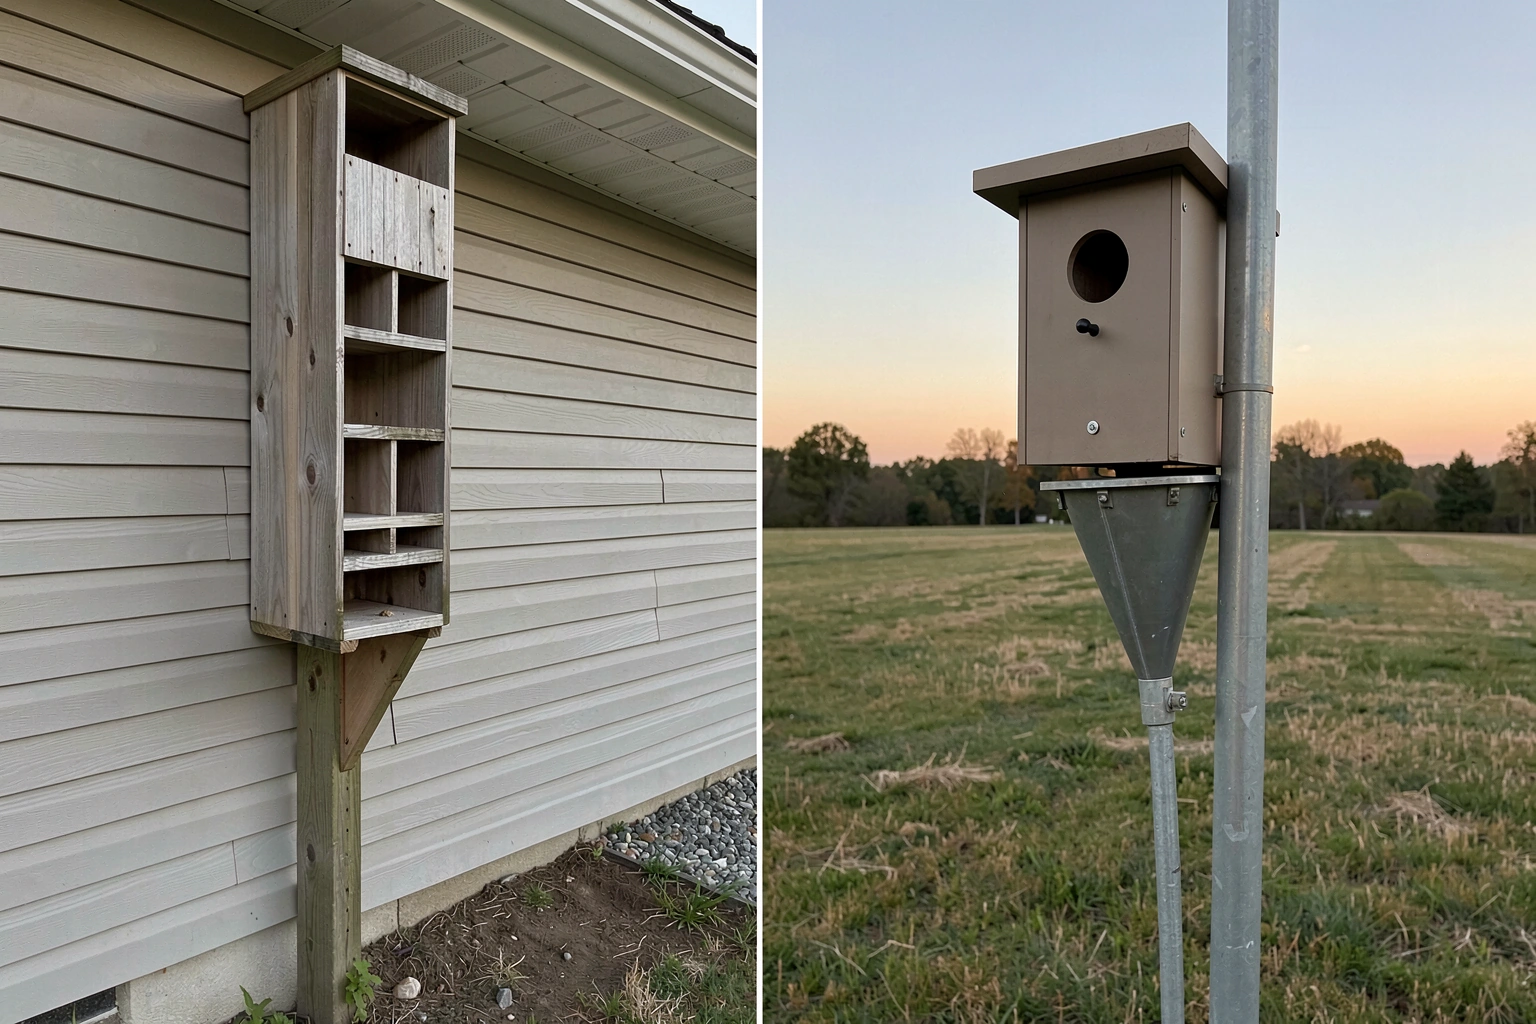
A post-mount setup works well for most backyards. Use a 1-inch galvanized conduit or a 4x4 cedar post set 18 to 24 inches into the ground. Attach the house with a hanger bolt and wing nut so you can remove it easily for annual cleaning. Alternatively, a wood screw through a back panel into a fence post or tree (on the shaded side) works fine for smaller houses.
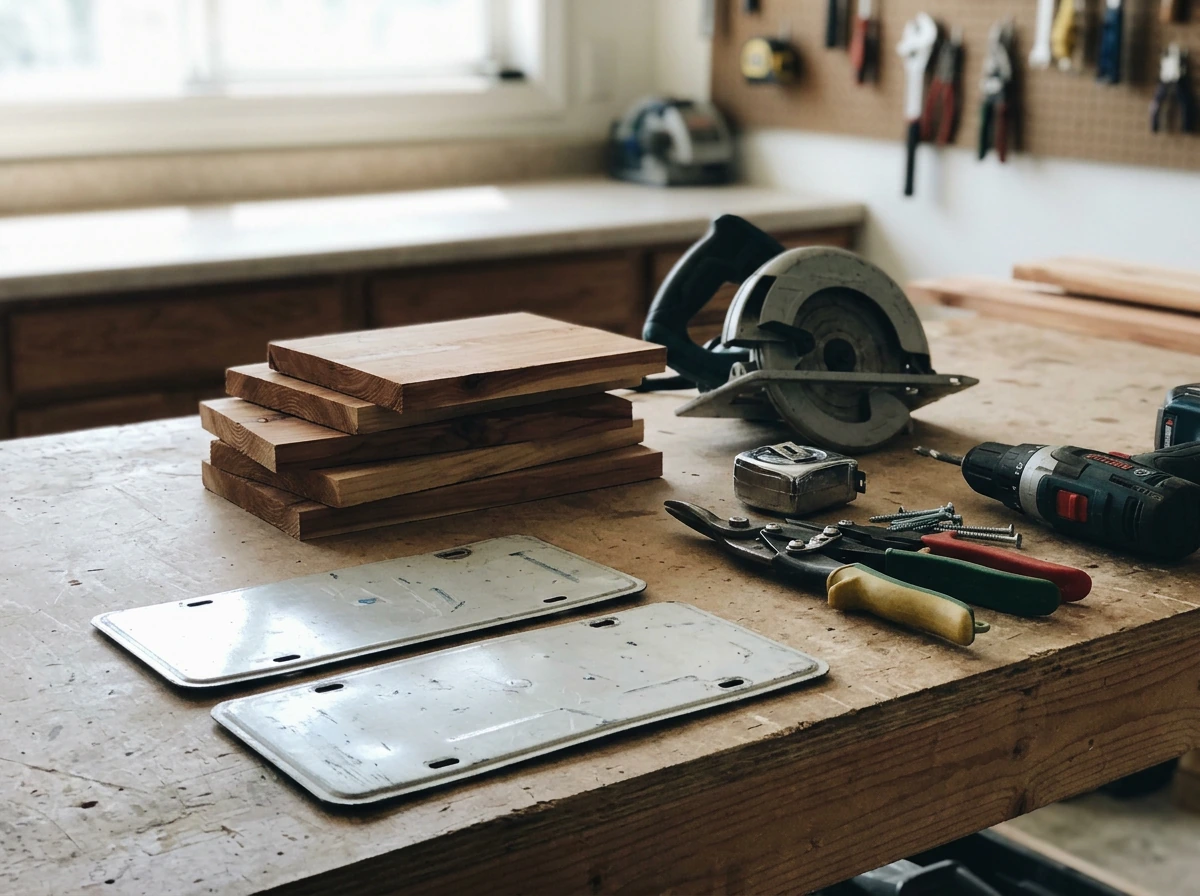
Tools You'll Need
- Drill with a spade bit or Forstner bit (sized for your target species entrance hole)
- Jigsaw or circular saw for cutting wood panels
- Tin snips if you need to trim the license plate (optional)
- Measuring tape and pencil
- Clamps to hold pieces while driving screws
- Caulk gun with a tube of clear or white exterior silicone caulk
- Sandpaper (80 and 120 grit)
- Safety glasses and gloves (cut metal edges are sharp)
Plans and Dimensions for Common Backyard Birds
The most important dimension is the entrance hole diameter. Get it wrong and either the target species can't get in, or a larger unwanted species moves in instead. The second most important dimension is the interior floor size and cavity depth, which determines whether a pair can actually raise a clutch comfortably. Here's a practical reference table covering the most common backyard cavity nesters you're likely to attract.
| Bird Species | Entrance Hole Diameter | Interior Floor Size | Cavity Depth (floor to hole) | Mounting Height |
|---|---|---|---|---|
| House Wren | 1 1/8 inch | 4" x 4" | 6 to 8 inches | 5 to 10 feet |
| Black-capped Chickadee | 1 1/8 inch | 4" x 4" | 8 to 10 inches | 4 to 15 feet |
| Carolina Chickadee | 1 1/8 inch | 4" x 4" | 8 to 10 inches | 4 to 15 feet |
| Tufted Titmouse | 1 1/4 inch | 4" x 4" | 10 to 12 inches | 5 to 15 feet |
| White-breasted Nuthatch | 1 3/8 inch | 4" x 4" | 10 to 12 inches | 5 to 20 feet |
| Eastern Bluebird | 1 1/2 inch | 5" x 5" | 8 to 10 inches | 4 to 6 feet |
| Tree Swallow | 1 1/2 inch | 5" x 5" | 6 to 8 inches | 4 to 8 feet |
For a standard DIY license plate roof house, the most versatile design is built around a 4x4 inch interior floor with a 1 1/8 inch entrance hole. This hits the sweet spot for wrens and chickadees, the two most willing cavity nesters in North American suburbs. If you're in bluebird territory (open fields, meadow edges), bump the floor to 5x5 and the hole to 1.5 inches.
Recommended Cut List for a Standard Chickadee/Wren House
All dimensions use 3/4 inch thick cedar fence board stock.
| Panel | Width | Length | Notes |
|---|---|---|---|
| Front | 5.5 inches | 10 inches | Drill 1 1/8" entrance hole, center, 7" from floor |
| Back | 5.5 inches | 13 inches | Extra length for mounting tab |
| Two Side Panels | 4 inches | 10 inches | Angled top cut at 10-15 degrees to pitch roof |
| Floor | 4 inches | 4 inches | Drill four 1/4" drainage holes in corners |
| Roof (wood base) | 7 inches | 8 inches | License plate lays over this |
| License Plate (roof cover) | 6 inches x 12 inches (standard plate) | Spans over wood roof | Overhang front and sides by 1 inch |
The overall assembled house will be approximately 5.5 inches wide, 10 inches tall (front face), and 8 to 9 inches deep. The license plate roof overhangs the front and sides to direct rain away from the entrance hole and wall seams. This is close to commercial examples like the HSN-style license plate birdhouse that runs about 7.75 inches high, 14 inches long, and 5.5 inches wide at retail, so your DIY version will be in a familiar range.
Step-by-Step Build Instructions
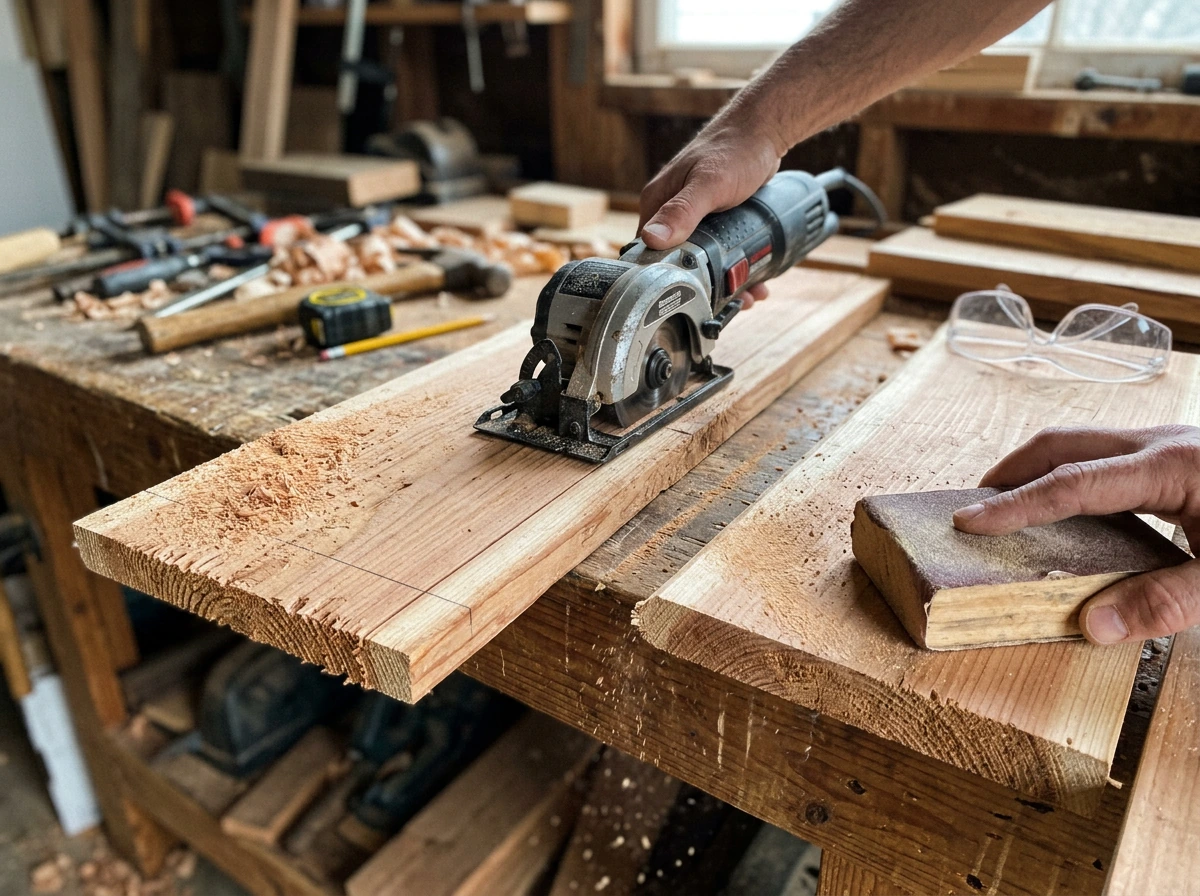
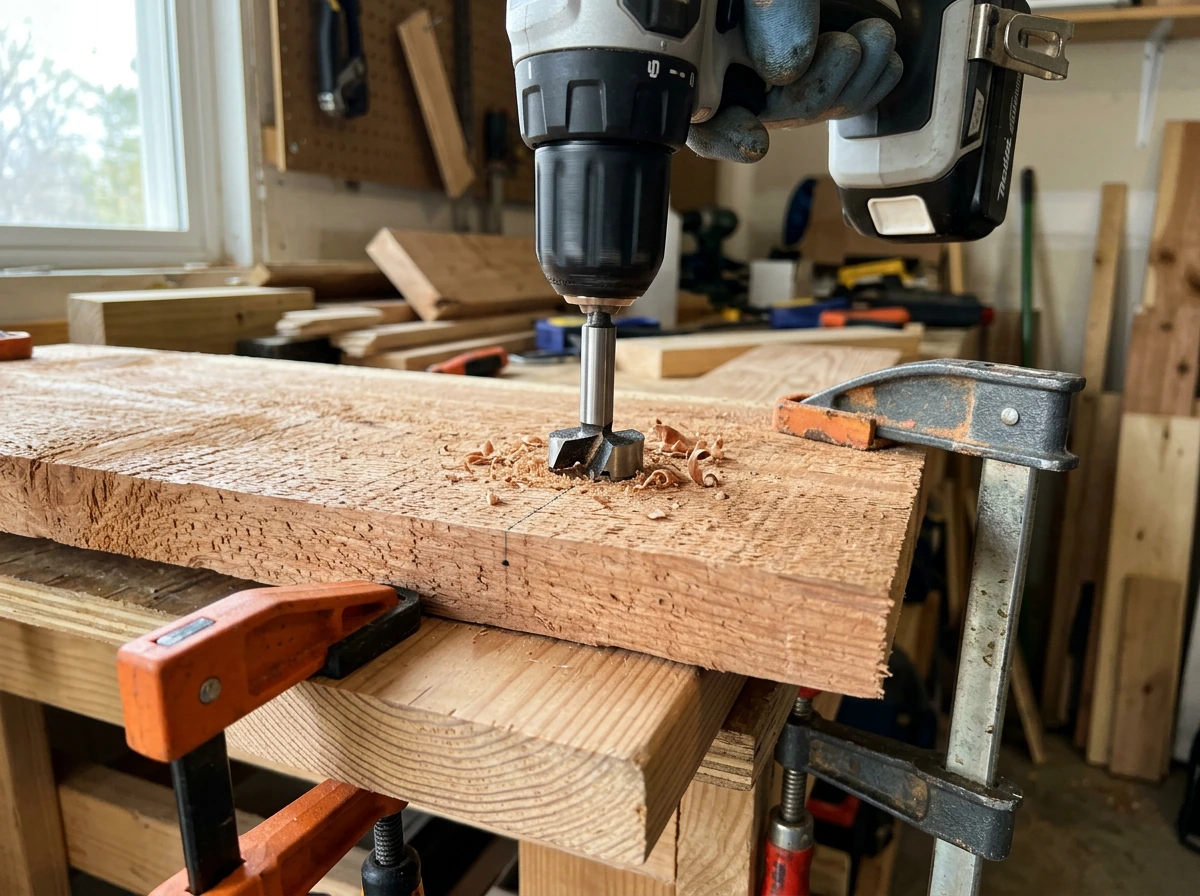
- Cut all wood panels according to the cut list above. Use a circular saw or jigsaw. Sand all cut edges with 80 grit to remove splinters, then finish with 120 grit. The interior faces should stay rough (don't sand the inside walls smooth) so nestlings can grip the wood when leaving the nest.
- Cut the entrance hole in the front panel. Use a Forstner bit or spade bit at the correct diameter for your target species. Drill slowly at low speed to avoid tear-out. The center of the hole should be approximately 7 inches up from the bottom edge of the front panel for a 10-inch-tall front. Smooth the inside edge of the hole with a round file or sandpaper wrapped around a dowel.
- Cut the angled tops on the two side panels. A 10 to 15 degree pitch is enough to shed water. Mark the angle on both side panels identically so the roof sits evenly. A jigsaw handles this cut easily.
- Drill drainage holes in the floor panel. Put four 1/4 inch holes in the corners of the 4x4 floor piece. These are non-negotiable: without drainage, a single rainstorm can flood a nest and kill eggs or hatchlings.
- Drill ventilation gaps. On each side panel, drill two 1/4 inch holes near the top (just below the roof line) on the interior side. Alternatively, leave a 1/4 inch gap between the top of the front/back panels and the underside of the roof. Ventilation prevents heat buildup in summer, which is lethal to nestlings.
- Assemble the box. Attach the floor between the two side panels first using two exterior screws per side. Then attach the front panel, driving screws through the side panels into the front panel edges. Attach the back panel the same way. Pre-drill all screw holes to prevent splitting in cedar.
- Make the clean-out door. The easiest approach is to leave the front panel as a hinged or pivoting clean-out: use a single screw at the top and bottom of the front panel (not all four corners) so the front can pivot open for annual cleaning. Alternatively, make the floor removable by using one screw through the side into the floor panel so it swings out.
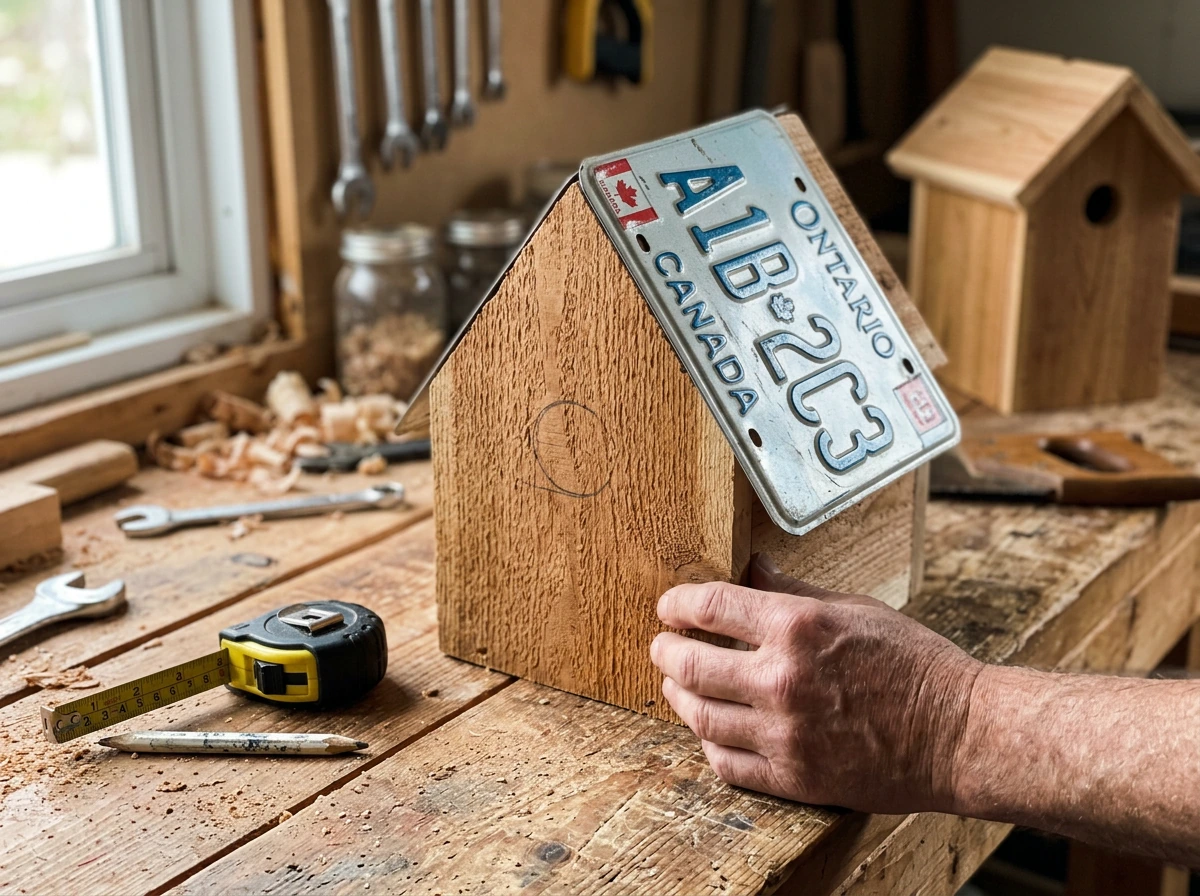
- Attach the wood roof base. Screw the 7x8 inch roof panel onto the angled tops of the side panels. Make sure it overhangs the front of the house by at least 1 inch. This overhanging wood base is what the license plate will lay over.
- Run a continuous bead of clear exterior silicone caulk along all four edges of the wood roof base (the top surface, where the plate will contact it). Also run a bead along the seam where the roof base meets the top of the front and back panels.
- Position the license plate over the wood roof base. The plate should overhang the front edge and both sides by about 1 inch. Press it firmly into the wet caulk. Drive small sheet metal screws (No. 6 pan head, 3/4 inch) through the plate's existing bolt holes or through new holes you drill, into the wood roof below. Tighten snugly but don't strip the holes. Wipe away any caulk that squeezes out from the edges.
- Check all edges where the plate overhangs. If there are any sharp cut edges (usually only if you trimmed the plate with tin snips), fold them down slightly with pliers or cover them with a thin bead of caulk to protect both birds and your hands.
- Mount the house at the appropriate height for your target species (see the dimensions table above). Orient the entrance hole away from the prevailing wind and direct afternoon sun. Slightly tilting the house forward (5 degrees) helps rain drain away from the entrance hole.
Weatherproofing, Finishing, and Safe Design Details
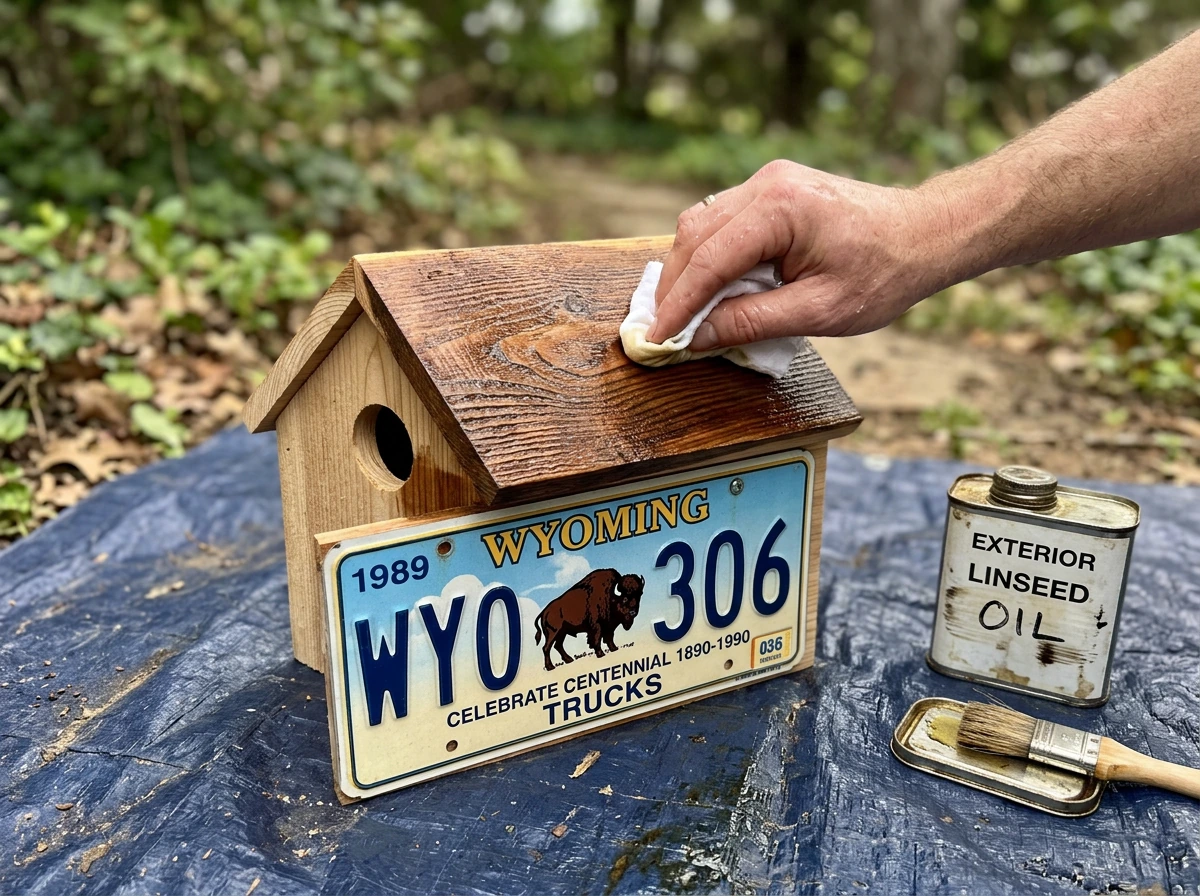
The license plate handles most of the roof weatherproofing on its own, but the wood body needs attention. For cedar, an annual wipe-down with exterior linseed oil or a clear water-repellent wood sealer is enough. For pine, you need a more thorough sealant on all exterior surfaces before the first season. Use an exterior latex paint or solid stain only on the outside of the box. Never paint, stain, or treat the interior walls, the floor, or the area immediately around the entrance hole on the inside. Chemical fumes concentrate in the small cavity and can harm eggs and chicks.
For the license plate itself, aluminum plates need no treatment. Steel plates that show surface rust can be lightly sanded with 120 grit wet/dry sandpaper, wiped clean, and then sealed with a clear exterior metal primer spray before mounting. This stops rust progression without adding toxic compounds near the nest. Once the plate is mounted and caulked, the caulk seal at the perimeter also helps lock out moisture that would accelerate rusting.
One design detail that's easy to overlook: the entrance hole should have no perch attached below it. Perches are a marketing feature, not a bird safety feature. Native cavity-nesting birds don't need them and they actually give predators and nuisance species (like house sparrows) an easier foothold. If your house already has a perch dowel, remove it and fill the hole with exterior wood filler.
For predator protection at the entrance hole, consider adding a 3/4 inch thick wood block (called a predator guard or entrance block) around the hole on the outside of the front panel. If you are deciding between a bird house and a bird feeder, the best choice depends on whether you want nesting support or just seasonal food bird house vs bird feeder. This extends the depth of the tunnel from the outside to the interior, making it much harder for a raccoon or squirrel to reach in and grab nestlings. Cut the block to the same width as the front panel, drill a matching-diameter hole through it, and attach it flush over the existing entrance hole with screws and exterior wood glue. A 1.5 inch thick block is even better.
Buying vs. Building: What to Look for in a License Plate Bird House for Sale
If you're leaning toward buying a finished house rather than building from scratch (which is a totally reasonable choice), the market has a wide range: well-made wooden houses with proper dimensions at one end, and decorative-only novelty items that no bird will ever use at the other. Here's how to tell them apart quickly.
| Feature | What Good Looks Like | Red Flag |
|---|---|---|
| Entrance hole size | Listed in inches and matches a real species spec (e.g., 1 1/8" or 1.5") | No hole size listed, or a decorative slot that's not circular |
| Ventilation | Vent holes or gaps near the roof, mentioned in product description | Completely sealed box with no airflow |
| Drainage | Drainage holes in the floor or slotted floor corners | Solid floor with no drainage |
| Clean-out access | Removable panel, pivoting side, or hinged front | Permanently glued or nailed shut with no access |
| Wood type | Cedar, redwood, or exterior-grade pine specified | No wood type listed, or MDF/particle board |
| License plate material | Real aluminum or steel plate, or sealed metal reproduction | Printed paper or plastic laminate styled to look like a plate |
| Interior finish | Unfinished or rough interior walls | Painted or glossy interior |
| Mounting hardware | Includes hanging bracket, hanger bolt, or pre-drilled mounting holes | No mounting solution included or described |
The HSN-style commercial license plate birdhouse is a reasonable benchmark: proper exterior dimensions (around 7.75 inches high, 14 inches long, 5.5 inches wide), a listed entrance hole (1.38 inches), and a removable clean-out panel. Look for those same features in any product you're considering. If the listing doesn't mention entrance hole diameter, ventilation, or drainage, email the seller before buying. A seller who can't answer those questions is selling art, not a functioning birdhouse.
Price-wise, a well-made license plate birdhouse with correct specs typically runs $25 to $60. Below $15, you're almost certainly looking at a decorative piece. Above $80, you should be getting premium cedar, hand-crafted joinery, and a name-brand plate or custom state plate. Etsy and local craft fairs are good sources for mid-range handmade versions where you can ask the maker directly about dimensions and materials.
Keeping It Running: Maintenance, Cleaning, and Troubleshooting
Annual Cleaning Schedule
Clean the house once per year, ideally in late winter (February or early March in most of North America) before birds begin scouting nest sites. Remove all old nesting material completely. Old nests harbor mites, blowfly larvae, and bacteria that can harm the next clutch. Scrub the interior with a stiff brush. A diluted solution of 1 part bleach to 9 parts water is effective for sanitizing, but rinse thoroughly and let the box air-dry completely before closing it back up. Never leave cleaning solution residue inside a closed box.
If you're in a region with two or more nesting seasons (common in the South and along the Pacific Coast), you can do a mid-season clean between broods. Wait until you're certain the first brood has fully fledged before opening the house.
Common Issues and How to Fix Them
- Water pooling inside the box: Check that the four corner drainage holes haven't been plugged by debris or mud. Clear them with a small screwdriver or drill bit. If the house is pitched backward, reposition it so the entrance faces slightly downward (5 degrees forward tilt).
- License plate lifting or rattling: The silicone caulk seal has failed. Remove the plate screws, peel back any loose caulk, clean the surface, and reapply a fresh bead of exterior silicone. Re-screw the plate and let it cure 24 hours before putting the house back up.
- Fading or peeling on the wood body: Lightly sand the affected areas and reapply exterior latex paint or wood sealer to the outside only. Check that the license plate overhangs are still directing water away from the wood seams.
- Loose screws or joints: Drill out stripped screw holes, fill with a wooden toothpick dipped in exterior wood glue, let dry, and re-drive the screw into the filled hole. This technique works almost every time.
- House sparrows or starlings taking over: These non-native, invasive species will evict native birds. If your entrance hole is 1 1/8 inch, sparrows can still enter, but starlings cannot. Monitor the box during nesting season. If sparrows are nesting, you're within your rights to remove the nest repeatedly (house sparrows and European starlings are not protected under the Migratory Bird Treaty Act in the U.S.). Relocating the house to a more open area, farther from structures, can also reduce sparrow pressure.
- Ants or wasps colonizing the box: Rub petroleum jelly on the mounting pole below the house (this stops ants from climbing). For wasps, scrape out the nest after the season and dust the interior with a light coat of non-toxic diatomaceous earth before re-hanging.
- Rust bleeding from the license plate onto the wood: Treat the plate with a clear metal primer or rust converter, let it cure fully, then reattach. Wipe the stained wood with a diluted oxalic acid solution (wood deck brightener) and rinse well.
Predator Protection Beyond the Entrance Block
The entrance hole is the single most important boundary between your nesting birds and predators. A properly sized hole is your first line of defense. Your second line is a baffle on the mounting pole: a cone-shaped or cylinder-style squirrel baffle mounted 4 to 5 feet off the ground blocks raccoons, cats, and squirrels from climbing the post. If you're mounting on a fence or tree, use a 24-inch wide metal sheet wrapped around the mount below the house. It sounds like a lot of effort, but a single raccoon visit can empty a nest in seconds, so the baffle is worth it.
Position also matters. Houses mounted in the open (not directly against a fence or tree trunk) are harder for predators to approach from above. Keep the house at least 5 feet from any surface a cat or raccoon could jump from. These are the same best practices that apply to any well-designed birdhouse, and they hold just as true for a license plate version. If you are also considering a bat house, use the same kind of focus on ventilation, drainage, and correct dimensions for the animal you want to host. If you're exploring other birdhouse designs, comparisons between bird house of cape may, or specialty structures like bat houses, the principles of predator protection, drainage, and ventilation carry across all of them.
Done right, a license plate birdhouse is genuinely tough, genuinely useful to birds, and genuinely fun to build or display. The key is treating the license plate as a functional roofing material rather than just a decoration, and making sure the wood body underneath meets real species requirements for size, entry hole diameter, drainage, and ventilation. Get those fundamentals right and you'll have a birdhouse that lasts for years and earns its place in your yard.
FAQ
Can I use a license plate from any country or does it have to be a North American one?
For birds, the plate’s origin does not matter. What matters is the plate’s dimensions and metal condition, so it can form a properly overhanging roof and still let you cut the correct entrance size and interior depth. If the plate is much smaller than typical US or Canadian sizes, you’ll likely need a different interior floor and hole diameter to fit your target species.
How do I know if a finished license plate bird house is actually “bird safe” and not a decorative piece?
Check that the entrance hole diameter is stated (and not just the overall look), and confirm there is a way for water to drain (or at least no sealed bottom trapping moisture). Also look for ventilation gaps near the top, and a removable clean-out that allows you to fully remove nesting debris.
Do I need to drill drainage holes in the wood box if the roof is already weatherproof?
Yes, usually. The plate roof blocks rain, but condensation and spilled water still happen. Drill small drainage holes through the bottom and keep the interior dry, while still using the correct cavity depth so nestlings are not in pooled moisture.
Is it safe to leave the license plate’s factory paint on both aluminum and steel?
Aluminum plates can generally stay as-is. For steel, the factory coating is fine until rust starts at scratches or cut edges; if you see pitting or flaking, lightly sand, prime, and then mount so rust flakes do not fall into the nest later.
Should I seal the seam between the plate and the wood body with silicone caulk every time?
Do it on the outside seam during assembly, and avoid getting caulk anywhere that would contact the interior cavity. If you ever remove and remount the plate later, reapply caulk because a pinhole gap can let water track into the wood over time.
Can I add insulation or extra lining inside to make the box warmer?
Avoid foam or chemical-treated liners inside the cavity. If you want to improve weather performance, focus on proper wood thickness and ventilation, and keep the entrance area clear so airflow and humidity management are natural for the species you’re targeting.
What should I do if my entrance hole is the right size but the birds still ignore the house?
First verify the floor size and cavity depth match the species you want, then check placement. Many birds reject boxes that face heavy, constant rain, are too close to predator access points, or are mounted at an unfavorable height for local preferences.
How high should I mount license plate bird houses?
A common starting point is 4 to 5 feet for many small cavity nesters, but use your target species in place of a generic number. Taller can be better for predator risk, yet too high can reduce use for birds that prefer easier access. If you mount near structures, make sure there is at least 5 feet from climbable surfaces.
Do I really need to remove the perch, even if the hole looks unfinished without it?
Yes for safety and nuisance control. A perch increases predation risk and helps larger nuisance birds and predators get leverage. If your birdhouse arrives with a perch, remove it and fill the opening area cleanly so the interior boundary around the entrance stays smooth.
What cleaning method should I use if I’m worried about using bleach?
You can use bleach safely if you rinse thoroughly and let the box air-dry completely before reassembly. If you prefer an alternative, mechanical cleaning (stiff brush removal of material and scrubbing) plus drying is the minimum, but it may not sanitize as effectively as a diluted bleach rinse for parasite and bacteria reduction.
Can I paint the outside of the wood box to match my yard?
Yes on the exterior only, but choose exterior-rated paint or solid stain and keep it off the interior walls and anywhere near the entrance hole from the inside. Also avoid dark colors if your region gets intense summer sun, since overheating the cavity can reduce nesting success.
Next Articles
Bat House vs Bird House: How to Choose and Place One
Choose bat or bird house by wildlife goals. Learn placement, sizing, mounting, and fix issues so it gets used.
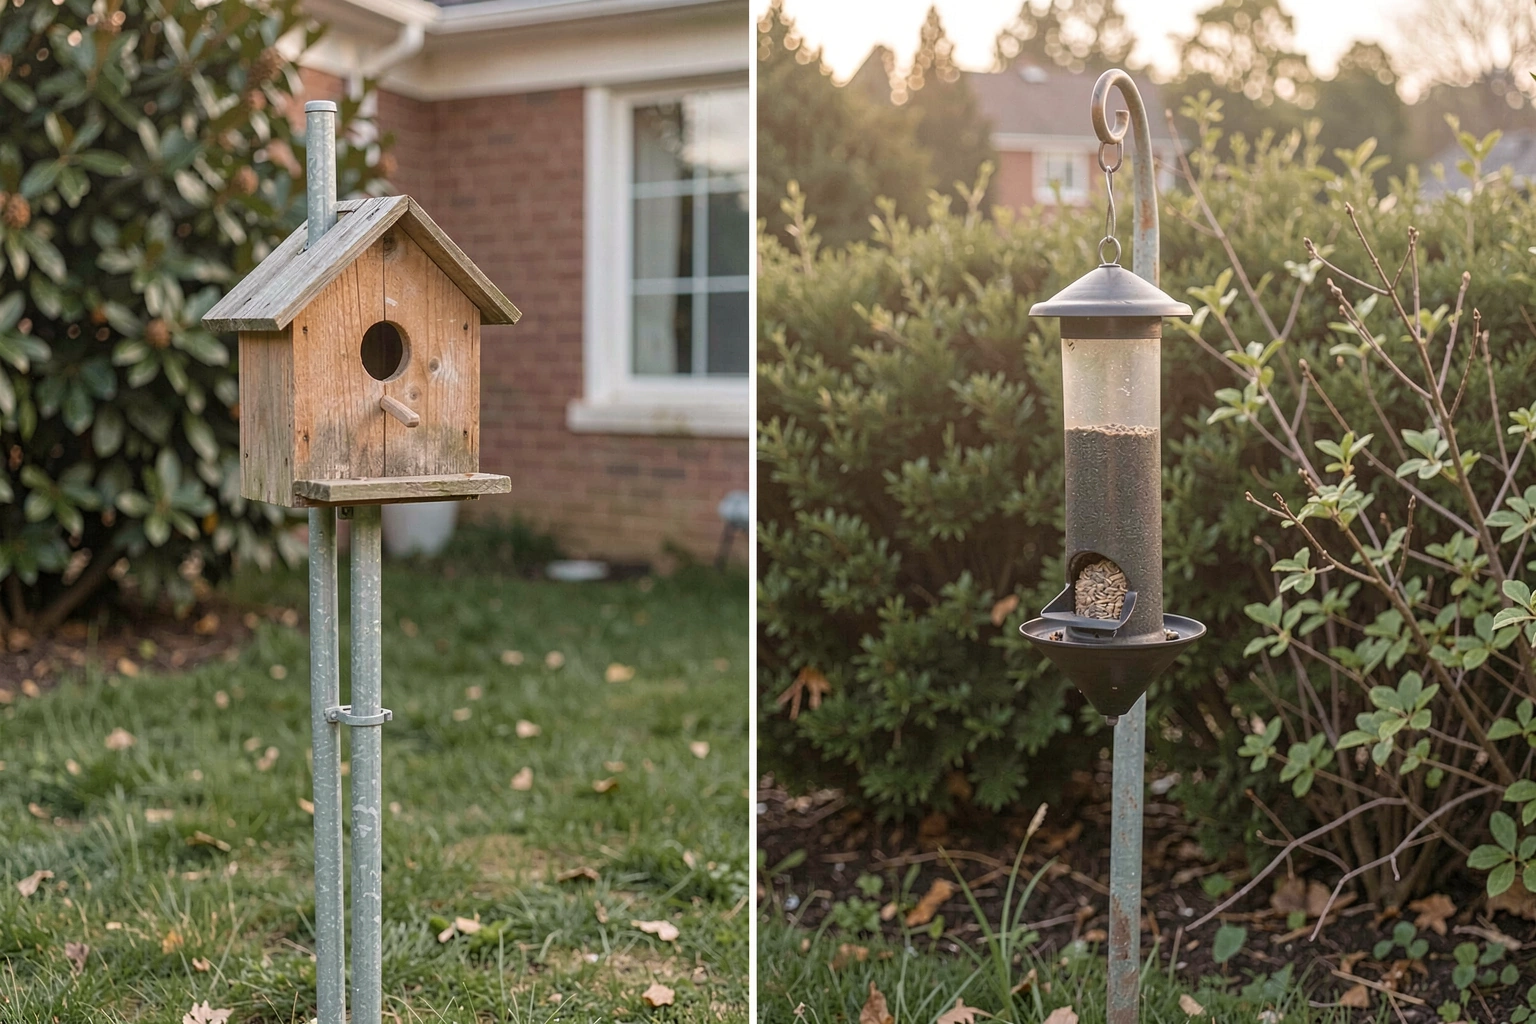
Bird House vs Bird Feeder: Differences and What to Install
Bird house vs bird feeder explained with placement, materials, pros cons and a quick checklist to choose what to install
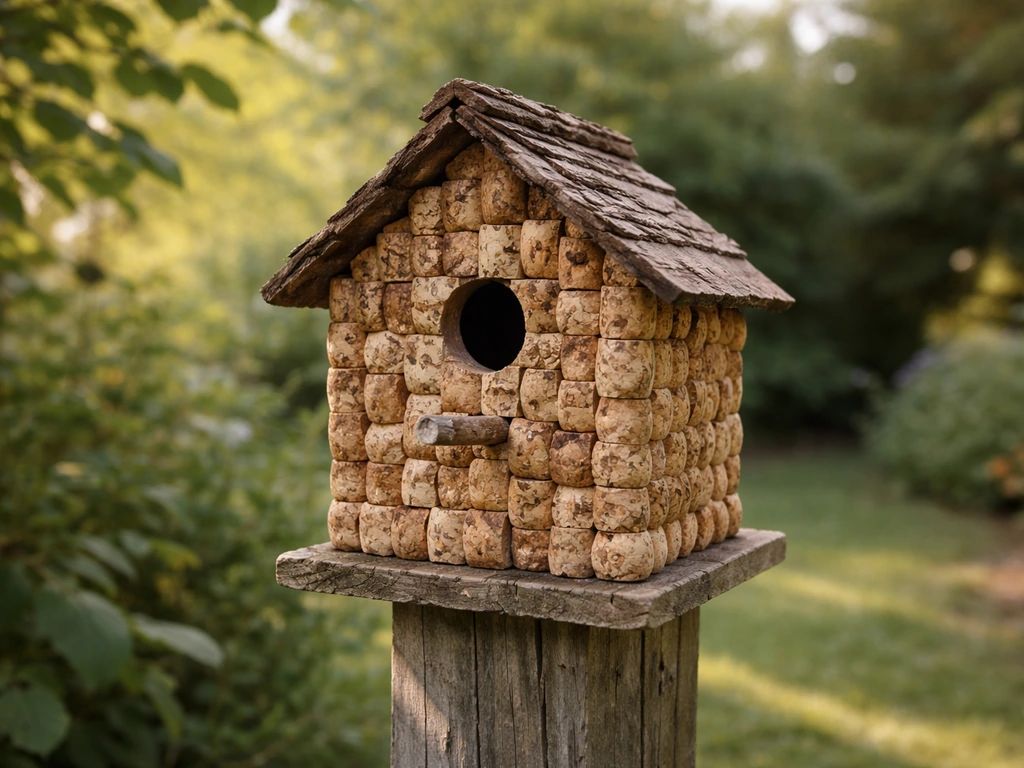
Wine Cork Bird House Instructions: DIY Steps and Bird-Safe Specs
Step-by-step wine cork mini birdhouse build with bird-safe dimensions, safe materials, mounting, cleaning, and weatherpr