Quick answer: best placement basics
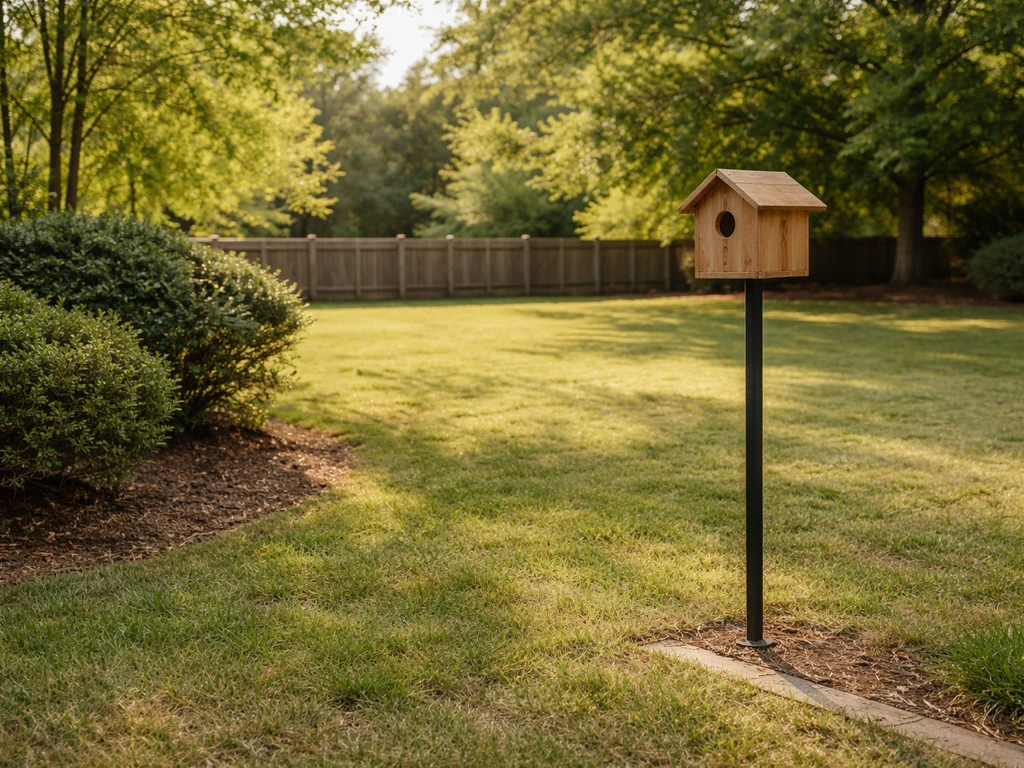
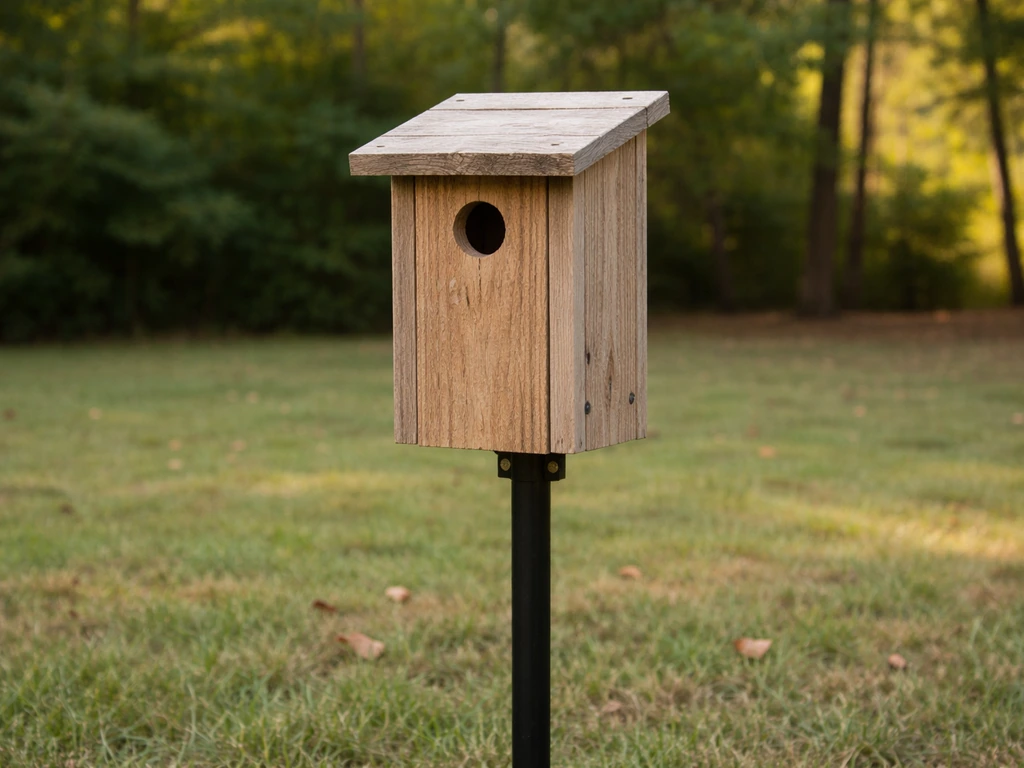
Mount your bird house on a freestanding metal pole, 5 to 10 feet off the ground, facing roughly northeast, in a spot with morning sun and afternoon shade, at least 50 feet from your main activity areas and away from dense shrubs that give predators easy cover. That single setup works for the most common backyard cavity nesters: bluebirds, wrens, chickadees, and nuthatches. Everything else in this article is about fine-tuning that starting point for your specific yard, species, or situation.
Choosing a location based on your yard setup
The single most important siting rule is habitat match. A bird house placed in the wrong habitat type simply won't attract the birds you're hoping for, no matter how well-built it is. The vegetation around the box matters as much as the box itself, because different species look for very different nesting environments.
In an open lawn or garden with scattered shrubs, bluebirds and tree swallows are your best bets. Place the box on a post in the open, away from tree lines. If you have a more wooded backyard with mature trees, chickadees and nuthatches are more likely candidates. For a heavily vegetated garden with dense plantings, wrens are comfortable nesting close to cover and near human activity. If you're wondering about species-specific siting, the article on bird houses and where to put them breaks this down by common backyard species.
For fence lines, walls, and trees, there's a quick hierarchy to keep in mind:
- Freestanding pole: best choice overall because you can add a predator baffle and position the box freely without obstacles.
- Fence post or wooden fence: acceptable if the fence is sturdy and you can still achieve the right height and direction; avoid chain-link that vibrates in wind.
- Tree trunk: usable but harder to baffle against climbing predators; choose a tree with no low branches near the entrance hole.
- Building wall or eave: works for house sparrows and swallows; less ideal for most cavity nesters because walls retain heat and limit drainage options.
- Garden beds: placing a post directly in a garden is fine as long as the entrance hole clears any tall vegetation by at least 3 feet.
If your yard is small, a single well-placed box on a post near the perimeter gives birds a clear flight path without putting them in the middle of foot traffic. Avoid placing a bird house directly over a vegetable garden or compost area where you'll be working regularly.
Height, direction, and distance rules for safe nesting
How high off the ground?
For most common cavity nesters, blank" rel="noopener noreferrer">a mounting height of 6 to 10 feet above ground is the practical sweet spot. TPWD recommends this range specifically, and it also happens to put the box high enough to discourage casual interference while keeping it accessible for cleaning and monitoring. Bluebirds are flexible, capable of using boxes anywhere from 2 to 50 feet high, but 5 to 6 feet is the standard recommendation because it makes monitoring easy and baffles effective. Wrens are comfortable lower, around 5 to 6 feet. Chickadees prefer 6 to 10 feet depending on the surrounding tree canopy. If you want to go deeper on chickadee-specific height and placement, the guide on where to hang a chickadee bird house covers the details.
Which direction should it face?
Face the entrance hole between north and east as a general rule. This gives the box morning sun (which warms the interior after cool nights) without exposing it to harsh afternoon heat or prevailing storm winds, which typically come from the west and south in most of North America. Both the RSPB and Exmoor National Park guidance (applicable globally as a climate principle) recommend north-to-east as the ideal range. The article on which direction a bird house should face goes further into regional adjustments. If your yard forces you to choose between east and southeast, east is the safer pick.
For a more thorough look at orientation decisions based on yard layout and local climate, the guide covering which way to face bird houses is worth reading alongside this one.
Distance from windows, feeders, and activity zones
Keep nest boxes at least 30 feet from windows to avoid collision risk, or within 3 feet if a close placement is unavoidable (both the Washington DFW and TPWD note this window-distance rule specifically for feeders, but it applies equally to nest boxes near glass). Position boxes at least 50 feet from your main feeding station to reduce competition and disturbance at the nest. If you're near water, try to stay within 100 feet of a water source, which NestWatch identifies as a useful habitat proximity rule for many cavity nesters.
Sun, shade, wind, and weather
A bird house that overheats kills nestlings. In most climates, the northeast-facing rule handles this automatically, but there are a few extra checks worth doing before you drill your first mounting hole.
In hot southern climates (zones 8 and above), prioritize afternoon shade. An oak canopy or building shadow that blocks the box from roughly 1 p.m. onward can drop interior temperatures by 10 to 15 degrees Fahrenheit on a hot day. In cooler northern climates, a bit more direct sun is fine, but avoid full south or west exposure where the box will bake all afternoon.
For wind, the northeast-facing rule also works as a basic windbreak strategy. Most North American storms roll in from the west or southwest, so a west- or south-facing entrance takes the brunt of driving rain. Tilt the box very slightly forward (5 degrees or so) so that rain hitting the entrance hole runs off the front rather than into the cavity. Pair this with proper ventilation gaps at the top of the side walls and drainage holes in the floor, both standard in quality nest box designs.
Make sure the box has a clear flight path, meaning no branches, wires, or fence rails crossing directly in front of the entrance hole within about 3 feet. Birds are cautious approaching the nest and will abandon a box that feels like an ambush point, and overhanging branches give squirrels and cats a launch pad.
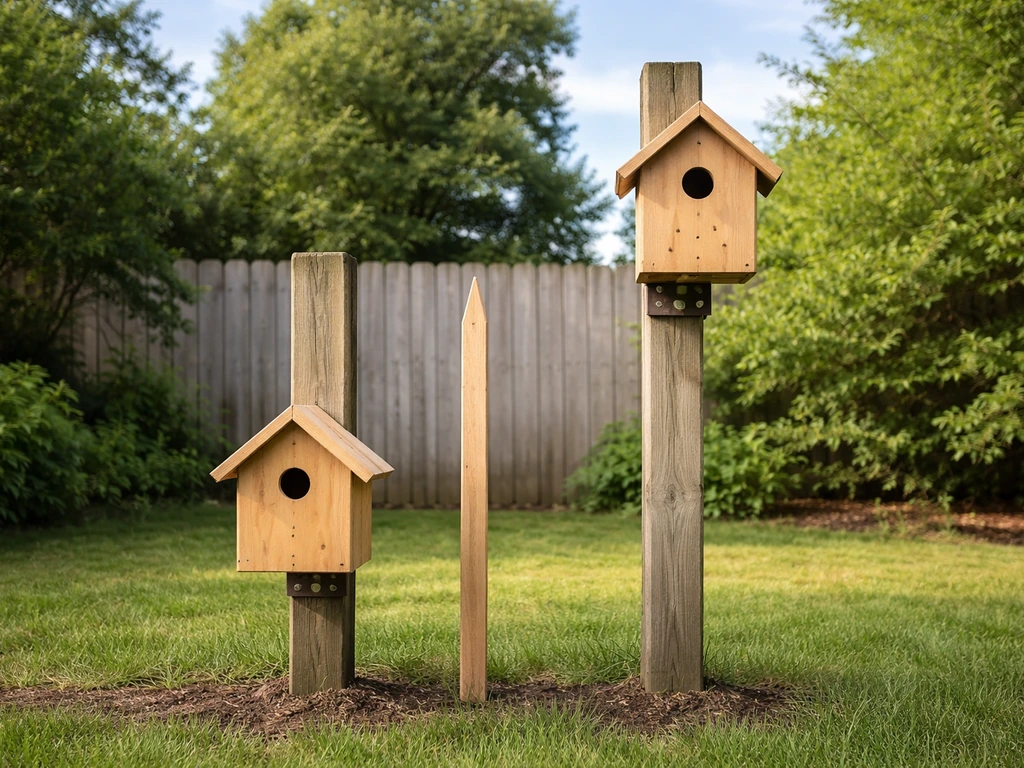
Spacing when you're putting up more than one bird house
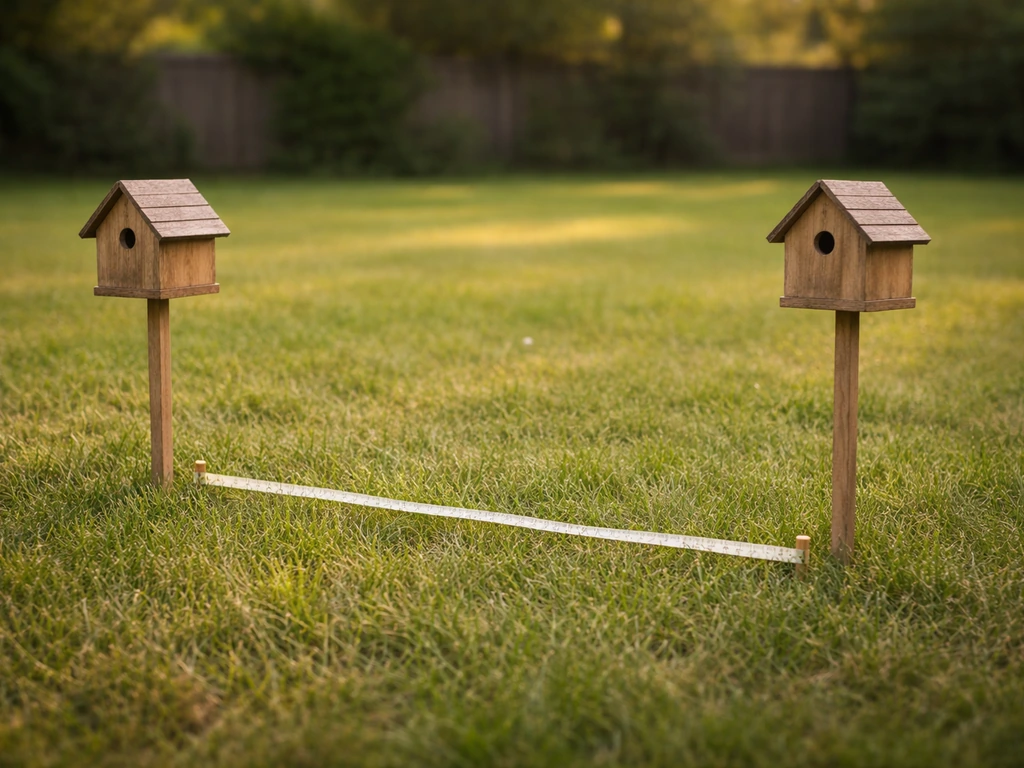
Most cavity nesters are territorial about their nesting sites, so you can't just cluster several boxes in one corner of the yard and expect them all to fill up. The rules differ significantly depending on whether you're targeting solitary nesters or colonial species like purple martins.
Solitary nesters (bluebirds, wrens, chickadees)
For bluebirds, Audubon recommends spacing boxes at least 300 feet apart, or placing them out of sight of each other to avoid territorial competition. Wrens are less strict but still benefit from 50 to 100 feet of separation. If you want to attract both wrens and bluebirds in the same yard, the guide on where to hang a wren bird house explains how to position a wren box so it doesn't interfere with other cavity nesters nearby. A useful technique is to pair bluebird boxes (two boxes placed 5 to 15 feet apart) so that tree swallows can occupy one without displacing bluebirds from the other, a practice called the bluebird trail pairing method. For the placement of a finch bird house, similar spacing logic applies, since finches also defend a nesting territory and won't typically tolerate another box of the same species in close view.
Colonial nesters (purple martins)
Purple martins are a completely different case. They actively want to nest with other martins and use multi-compartment houses or gourd clusters rather than individual boxes. The Purple Martin Conservation Association recommends at least 15 feet between housing or gourd systems for ease of management, though spacing them farther apart is fine. If you're setting up a martin colony, the article on where to place a purple martin bird house covers the colony-specific rules, including the critical point that martin housing must stay fixed in orientation during the nesting season. Spinning or rotating the housing disorients returning martins and can lead to nest abandonment.
| Species | Min. spacing from same-species box | Preferred height | Habitat type |
|---|
| Bluebird | 300 ft (or out of sight) | 5–6 ft | Open lawn, meadow, fence line |
| Wren | 50–100 ft | 5–6 ft | Garden edge, shrubby areas |
| Chickadee | 100+ ft | 6–10 ft | Wooded yard, tree canopy edge |
| Tree swallow | 15–30 ft (can share with bluebird) | 5–6 ft | Open areas near water |
| Purple martin | 15 ft between housing units | 15–20 ft on pole | Open sky, near water, 40+ ft from trees |
How to actually install and hang the bird house
The mounting method you choose affects stability, predator resistance, and how easy the box is to monitor and clean. For the full range of options including hardware specifics, the article on where to mount a bird house is the most detailed reference. Here's a practical rundown of the main approaches:
- Smooth metal conduit or EMT pole: Drill or drive a 1/2-inch to 3/4-inch diameter metal conduit 12 to 18 inches into the ground. Attach the box to the top using a mounting bracket or a wooden block that fits inside the conduit. This is the easiest setup for adding a cone or stovepipe baffle below the box.
- Wooden T-post or fence post: Lag-bolt the box directly to the post. Use two lag screws at different heights to prevent spinning. If you use a wooden post, coat it with linseed oil or exterior paint below the box to prevent rot and slow climbing by predators.
- Tree mounting: Use two lag screws into the trunk, never wire that can girdle the tree. Accept that predator-proofing is harder here, since squirrels and raccoons can reach any branch near the box. Remove low branches within 8 feet of the entrance.
- Wall mounting: Use two 3-inch exterior screws with wall anchors appropriate for brick or siding. Tilt the box forward 5 degrees using a small shim behind the mounting plate to aid drainage and rain runoff.
- Hanging from a branch or hook: This works for wrens and chickadees, but always verify the box doesn't swing excessively in wind. Use a rigid arm bracket rather than a swinging wire if stability is a concern. Avoid hanging where the box will spin, especially for martins.
Regardless of method, check that the box doesn't wobble after installation. Grip the box and push it sideways. If it moves more than half an inch, tighten the hardware or add a second anchor point. A wobbling nest box stresses incubating birds and can dislodge eggs.
Keeping birds safe: predators, cleaning, and monitoring
Predator-proofing your placement
A predator baffle is not optional if you want consistent nesting success. Raccoons, cats, snakes, and squirrels can reach any box without one. NestWatch and NC State Extension both recommend installing on a pole precisely because it makes baffling easier. The most effective design is a cone or stovepipe metal baffle attached to the pole below the box, with the cone's open end facing downward and the baffle positioned at least 4 feet off the ground. Oregon State University Extension adds that the baffle should be placed around the tree or post either above or below the box to cut off the climbing route. Maryland DNR makes the smart point that you should install the predator guard on the pole before you put the box up, not as an afterthought, because retrofitting a baffle on an already-occupied pole is much harder and risks disturbing active nesters.
Beyond baffles, the entrance hole itself is your second line of defense. A hole sized correctly for your target species physically excludes larger predators and competing birds. Keep the entrance hole at least 6 to 8 inches above the floor of the box (per TPWD guidance) so chicks can't be reached from outside by a raccoon reaching in. Avoid adding a perch below the entrance hole, it gives predatory birds a landing platform.
Cleaning and when to do it
Clean out the nest box after each brood fledges, and at minimum once per year in early fall. The Wildlife Trust for Bedfordshire, Cambridgeshire and Northamptonshire (WCT) recommends this schedule as the baseline. Use gloves and a stiff brush to remove old nesting material, then rinse with a diluted bleach solution (one part bleach to nine parts water) and let it dry completely before replacing the lid. Old nesting material harbors mites and parasites that reduce nesting success the following season.
Don't disturb the box when young are close to fledging, roughly the last 5 to 7 days of the nestling period. WCT specifically flags this: premature disturbance can trigger early fledging before the chicks can fly, which is usually fatal. If you're not sure whether young are near fledging, look for faces peering out of the entrance hole. If you see that, leave it alone until you see the box is empty.
Monitoring without disturbing
Check your boxes every 7 to 10 days during the nesting season by gently opening the side or top panel (do not shake or tap the box first). If an adult flushes out, close the box and note what you saw. Keep visits brief, under 30 seconds, and avoid monitoring in rain or very cold weather when the eggs need constant incubation. Record what you observe: egg count, hatch date, number of chicks. This data is useful for programs like NestWatch and helps you notice problems like parasites or house sparrow takeover early enough to act.
Your pre-installation checklist
Before you drill a single hole or drive a single post, walk your yard with this checklist. It takes about five minutes and prevents most common placement mistakes.
- Confirm the spot matches the habitat preference of your target species (open lawn, wooded edge, garden, etc.).
- Mark the mounting point and check that the entrance hole will face between north and east when installed.
- Verify the box will be between 5 and 10 feet off the ground for most cavity nesters (15 to 20 feet for purple martins).
- Check for branches, wires, or rails within 3 feet of the planned entrance hole location and remove or relocate if needed.
- Confirm you have at least 300 feet of separation from any other bluebird box, or appropriate spacing for your target species.
- Plan where the predator baffle will go on the pole before you sink the post.
- Check sun exposure: morning sun reaching the box by 9 a.m. and shade from roughly 1 p.m. onward is the ideal.
- Verify the location is at least 30 feet from windows or within 3 feet if unavoidable.
- Make sure you can physically reach the box for monitoring and cleaning without a ladder if possible, a step stool at most.
- Drive the post, install the baffle, attach the box, and confirm it has no side-to-side wobble before walking away.