
Most backyard bird houses should be mounted 5 to 10 feet off the ground, but the right height depends heavily on the species you are targeting. For a focused summary of recommended mounting elevations by species, see the best height for bird house guide. For species-specific mounting heights and practical installation tips, see how high should a bird house be. Bluebirds do best at 4 to 6 feet in open fields. Chickadees and nuthatches prefer 5 to 15 feet in wooded edges. Tree swallows are comfortable anywhere from 4 to 15 feet near water. Kestrels need 10 to 30 feet on a pole or tree in open country. Purple martins are the outlier: their colony housing should go up at 12 to 18 feet, well above surrounding structures. Get the height roughly right for your target species, add a predator baffle to a smooth metal pole, and you will have done the two things that matter most.
Bird Houses: How High Off the Ground, Heights & Placement Tips

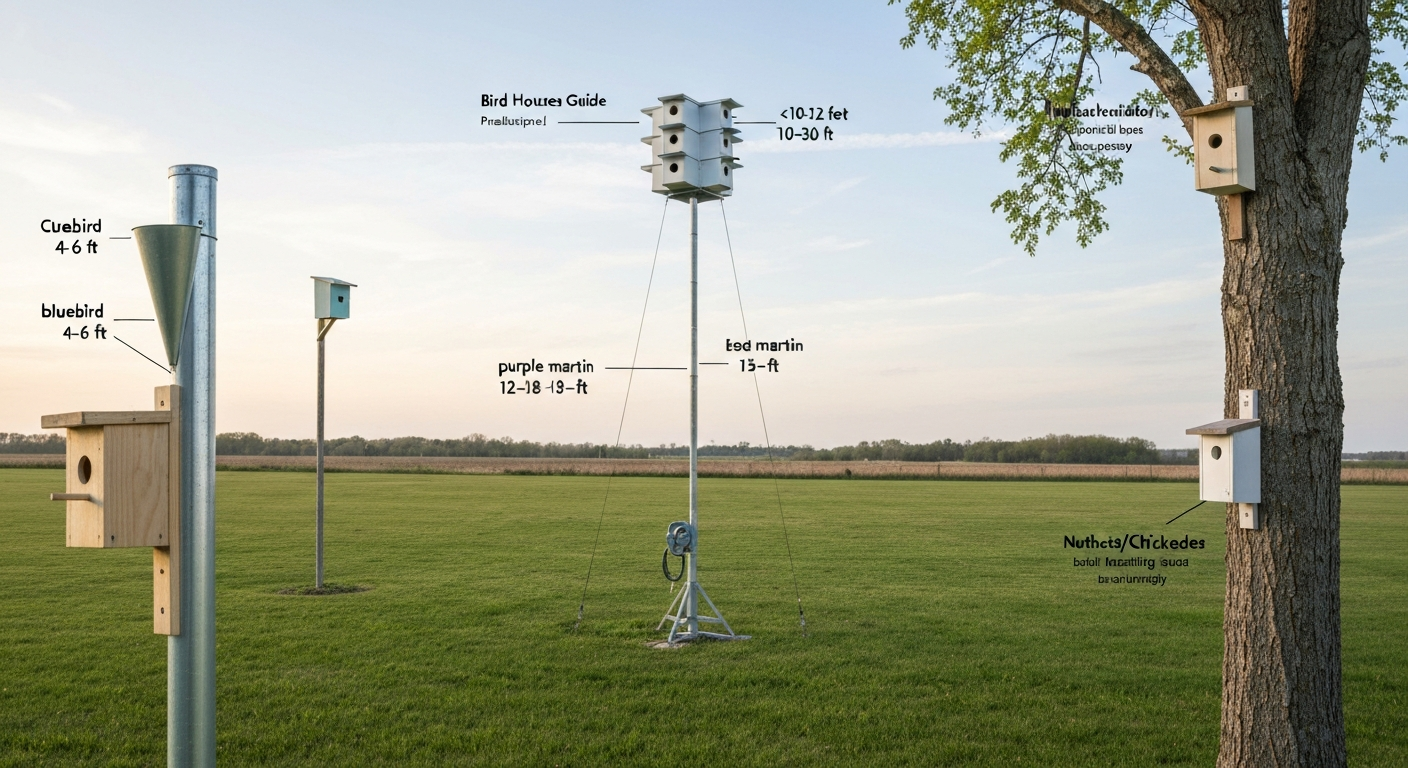
Quick rules of thumb
Before diving into species specifics and mounting details, a few practical rules cover the vast majority of backyard situations.
- 5 to 10 feet covers most small cavity nesters: wrens, chickadees, nuthatches, bluebirds, and tree swallows all fall within or overlap this window.
- Higher is not automatically better. Too high makes monitoring and cleaning difficult and can expose boxes to more wind.
- Metal poles with baffles outperform trees and wooden posts for predator protection at any height.
- Height is one variable. Entrance-hole diameter, habitat type, and orientation matter just as much.
- Purple martins are the exception: they require 12 to 18 feet and open sky, with no trees within 40 feet of the colony.
- Kestrels are the other exception on the high end: 10 to 30 feet works, but they need a clear view of open hunting ground below.
How to choose the right height
Height is not arbitrary. Four factors should shape every decision you make about how high to mount a bird house: the species you are targeting, the predator pressure at your site, the cover and vegetation nearby, and your regional climate.
Species preferences
Different birds nest at different heights in nature, and they carry those preferences into artificial cavities. A house wren will cheerfully nest in a box at 5 feet strapped to a fence post; an American kestrel needs to see open sky and a hunting field below it, so anything under 10 feet is wasted effort. Match the height to the bird's natural nesting window and you immediately improve your odds of attracting a tenant.
Predator pressure
Height alone does not deter predators. Raccoons, snakes, squirrels, and cats are all capable climbers, and a box mounted at 6 feet on a wooden fence post or tree is fully accessible to them. What matters more than extra feet is the mounting surface and any baffles you add. That said, keeping boxes at a manageable height (5 to 10 feet) makes it practical to install and maintain a baffle, which is where the real protection comes from. A large citizen-science analysis published in the Wildlife Society Bulletin (Bailey and Bonter 2017) found that predator guards on nest boxes were associated with roughly a 6.7 percent increase in nest success overall.
Nearby cover and vegetation
A box mounted at 5 feet on an open metal pole in the middle of a lawn is far safer than a box at 12 feet on a tree trunk draped with vines. Dense cover, low shrubs, and fence lines give predators a launch point. Keep the box at least 6 to 10 feet horizontally from any climbing surface, regardless of how high you mount it.
Regional climate
In hot southern climates, boxes mounted in exposed south or west-facing positions can overheat, so a slightly lower mount in light shade (not deep shade) can help moderate interior temperatures. In northern regions with cold springs, a south-facing or east-facing box in full sun warms faster and encourages earlier nesting. Neither situation changes height drastically, but it is worth considering when you are picking your pole location.
Species-by-species height and entrance-hole guide
The table below consolidates recommended mounting heights and entrance-hole diameters from Cornell Lab NestWatch, PMCA, and state wildlife agency nest-box guides. Use these as your starting targets. Tolerances of a few inches on hole diameter and a foot or two on height are generally acceptable, but stay as close to the recommended hole size as possible because it is your most effective filter for unwanted species.
| Species | Recommended Height (ft) | Entrance Hole Diameter | Habitat Notes |
|---|---|---|---|
| Eastern/Western Bluebird | 4–6 | 1½" (1.5") | Open fields, pastures, bluebird trails; face east or southeast |
| Black-capped / Carolina Chickadee | 5–15 | 1⅛" (1.125") | Wooded edges, shrubby areas; fill box halfway with wood shavings |
| House Wren | 5–10 | 1¼" (1.25") | Shrubby yards and woodland edges; monitor for competition |
| Tree Swallow | 4–15 (commonly 5–8) | 1⅜" (1.375") | Open areas near water; space boxes 30–100 ft apart |
| White-breasted Nuthatch | 5–15 | 1⅜" (1.375") | Deciduous woodland; mount on tree or wooded-edge pole |
| Red-breasted Nuthatch | 5–15 | 1¼" (1.25") | Conifer or mixed forest; higher in denser canopy areas |
| Purple Martin | 12–18 | 2⅛" round (2.125") or SREH crescent | Open areas, at least 40 ft from trees; colony housing only |
| American Kestrel | 10–30 | 3" (3.0") | Open country near fields or water; clear sightlines required |
A note on tolerances: the entrance hole is non-negotiable to within about 1/16 of an inch. A hole even slightly too large can let house sparrows or European starlings take over a bluebird box. A metal hole guard or entrance-plate extender (discussed in the predator-proofing section below) lets you lock in the exact diameter even if the wood wears or warps over time.
Purple martin specifics: colony setup, heights, spacing, and housing types
Purple martins are the most demanding species on this list and deserve their own section. For recommendations on the best martin bird houses, see our detailed guide on selecting martin-specific housing. They are obligate colony nesters in North America east of the Rockies, and they will not use a single isolated box the way a bluebird or wren will. You need a minimum of about 4 cavities to start, though 6 to 12 compartments gives a better foundation for a new colony.
Height and pole setup
The Purple Martin Conservation Association recommends housing heights of 12 to 18 feet above ground. For detailed guidance on mounting heights, see how high should martin bird houses be. Lower than 12 feet and martins tend to reject the site; higher than 18 feet starts to make management difficult. The pole itself should be set securely, with 18 to 25 inches sunk into the ground (or use a ground socket rated for the load). More importantly, the housing must be raisable and lowerable, either via a telescoping pole, a winch system, or a tilt mechanism. You will need to access the compartments regularly to monitor for house sparrows and starlings, remove their nests, and check on martin eggs and young.
Site requirements
- No trees, tall shrubs, or structures within 40 feet of the housing (martins need open flight approaches from all directions).
- Ideally within 100 feet of open water, though this is a preference rather than a requirement.
- Clear sky overhead: martins hunt on the wing and need unobstructed approach lanes.
- Away from human foot-traffic noise during the active nesting season (April through August in most of the US).
Traditional houses vs. gourds
Both multi-compartment aluminum or plastic houses and natural or artificial gourds work well. Traditional houses with individual compartments should have a floor of at least 6 by 6 inches per cavity, with 7 by 12 inches being the PMCA-recommended ideal for comfort and productivity. Round entrance holes should be 2-1/8 inches in diameter; the PMCA also endorses the Starling Resistant Entrance Hole (SREH), a crescent-shaped opening that martins navigate easily but European starlings cannot. All martin housing should be white or a light color: white reflects solar heat and keeps interior temperatures from reaching lethal levels in summer. If you use plastic or metal housing, pay close attention to ventilation and consider adding supplemental shade or insulation to avoid a greenhouse effect in hot weather.
Spacing between compartments and between colonies
Within a single housing unit, compartments are typically spaced according to the manufacturer's design. If you are running multiple poles, space them at least 15 to 20 feet apart. Two or three poles in a loose cluster is a common and effective layout. Avoid placing martin housing near other species' nest boxes: the activity and noise of a martin colony can discourage bluebirds or swallows in adjacent boxes.
Hanging vs. mounting: which approach is right for your situation
Most bird houses should be firmly mounted rather than hanging freely. For guidance on optimal hanging heights, see how high to hang bird houses. Hanging setups swing in wind, making it harder for birds to enter and exit, and they are almost impossible to fit with an effective predator baffle. That said, there are situations where hanging is a reasonable choice.
| Method | Pros | Cons | Best For |
|---|---|---|---|
| Pole mount (metal) | Best predator protection with baffle, stable, adjustable height | Requires hardware, digging or driving a stake | Bluebirds, swallows, wrens, chickadees, martins |
| Tree mount | Natural look, no digging, easy in wooded areas | High predator access from bark; damages tree with hardware over time | Nuthatches, chickadees in low-pressure suburban yards |
| Eave or wall mount (bracket) | Convenient for wrens and chickadees near the house | Fixed position, hard to baffle, predator risk if near downspouts/vines | House wrens, chickadees in beginner setups |
| Hanging (hook or wire) | Simple, portable, no tools required | Swings in wind, no baffle possible, not suitable for most cavity nesters | Decorative use; wrens will sometimes accept a gently swaying box |
The Cornell Lab and multiple university extension programs are consistent on this point: a smooth metal pole with a predator baffle is the default recommendation for any box targeting bluebirds, swallows, or other open-country nesters. Tree and eave mounts are acceptable in lower-predator-pressure situations or for species like nuthatches that naturally nest in tree cavities, but they require extra vigilance.
Best mounting methods: poles, trees, eaves, and brackets
Metal pole mounting
A smooth galvanized or powder-coated metal pole (1/2-inch to 3/4-inch EMT conduit or a purpose-made nest-box pole) combined with a cone or stovepipe baffle is the gold standard. Climbing predators including raccoons, cats, and snakes cannot grip smooth metal, and even if they manage it, a correctly sized baffle stops them entirely. Drive the pole at least 12 to 18 inches into firm ground (deeper in sandy or wet soil), check that it is plumb, and mount the box securely at the top. Predator pressure: lowest of all methods when the baffle is in place.
Tree mounting
Use a lag bolt or a strap system to avoid girdling the tree. Position the box on the trunk, angled very slightly downward (5 to 10 degrees) so rainwater does not pool in the entrance hole. The big drawback is predator access: bark provides grip for raccoons and snakes, and any nearby branches are a highway to the box. University extension guidance (e.g., Nesting Structures for Beneficial Songbirds on the Farm, UC ANR) similarly warns that tree‑mounted boxes allow easier access to climbing predators and recommends pole mounting with baffles University extension guidance (e.g., Nesting Structures for Beneficial Songbirds on the Farm — UC ANR) similarly warns that tree‑mounted boxes allow easier access to climbing predators and recommends pole mounting with baffles.. If you must tree-mount, choose a trunk with no low branches within 6 feet of the box, and consider wrapping the trunk below the box with a sheet-metal or PVC baffle collar. Predator pressure: highest of all methods without additional protection.
Eave and wall bracket mounting
Screwing a box or bracket directly to a building fascia or soffit is quick and popular for wrens and chickadees, and it puts the box where you can see it from indoors. The limitation is that downspouts, lattice, and nearby shrubs touching the building all become predator ladders. Keep at least 5 feet of clear space between the box and any climbable surface. A metal entrance-hole extender is a practical and affordable addition for eave-mounted boxes. Predator pressure: moderate, strongly influenced by building features.
Hanging setups
If you are hanging a box from a wire stretched between two poles, or on a hook under a porch eave, keep the hang point tight enough that the box does not swing more than a few degrees. A box that rocks in the breeze discourages most cavity nesters. Hanging on a horizontal wire between two smooth poles, with a baffle on each pole below the wire, is one creative solution that provides some protection. Predator pressure: variable, generally moderate to high without supplemental baffling.
What each mounting setup looks like and when to use it
Visualizing the final installation before you buy hardware saves a lot of trips to the hardware store. Here is a plain-language description of each setup so you can picture what you are building.
- Pole with cone baffle: a single metal pole driven into open lawn, with a cone-shaped metal or plastic baffle about 3 feet up the pole, and the nest box at the top. Clean lines, nothing to grab. Classic bluebird trail setup.
- Pole with stovepipe baffle: same as above but with a 6-inch diameter metal stovepipe section, about 18 inches long, centered on the pole. Equally effective, often homemade from hardware-store supplies.
- Tree mount with collar baffle: box lag-bolted to a trunk, with a smooth sheet-metal collar 18 to 24 inches wide wrapped around the trunk below the box. Used in wooded gardens where pole mounting is impractical.
- Eave bracket mount: a simple L-bracket or purpose-made mounting arm screwed into solid wood under an overhang, holding the box 6 to 12 inches out from the wall. Used for house wrens or chickadees near the home.
- Hanging from a horizontal wire: the box is suspended by a short wire or chain from a horizontal cable stretched tightly between two posts. Each post has a baffle. Less stable than pole mounting but workable for wrens.
- Martin colony pole: a heavy-duty steel pole in an open yard, set with a ground socket or in concrete, with the telescoping or winch mechanism visible below the housing. Multiple-compartment house or gourd rack at the top at 12 to 18 feet.
Step-by-step mounting instructions
These general steps apply to any box. Method-specific notes follow.
- Confirm the target species, then look up the recommended height range and entrance-hole diameter for that bird (use the table above).
- Select a location with the correct habitat: open lawn for bluebirds and swallows, wooded edge for chickadees and nuthatches, completely open sky for martins.
- Check the entrance-hole diameter on the box with a drill gauge or ruler. If it is too large, fit a metal entrance-plate extender with the correct hole before mounting.
- Gather all hardware: pole or mount, lag screws or conduit clamps, predator baffle components, a level, and (for poles) a post driver or auger.
- Install the pole or mounting surface first, before attaching the box. Check plumb with a level.
- Attach the predator baffle to the pole before raising the box, positioning it at least 3 feet above the ground and at least 18 inches below the box entrance.
- Mount the box at the target height, angled very slightly forward (5 to 10 degrees) so rain runs off. Do not let it tilt more than that or eggs can roll.
- Stand back and confirm: clear flight approach, no branches or perches within 6 to 10 feet horizontally, correct orientation (see orientation section below).
- Record the installation date, height, species target, and location in a notebook or a free NestWatch account so you can track occupancy and success over time.
Quick how-to for a pole installation
- Drive a 1/2-inch or 3/4-inch EMT conduit pole 12 to 18 inches into the ground using a post driver, or dig a narrow hole and tamp the soil firmly around it.
- Slide the cone baffle up the pole and temporarily secure it at the 3-foot mark.
- Thread any conduit clamp or mounting bracket onto the pole before setting the box.
- Attach the box to the top of the pole or mounting bracket with galvanized screws, ensuring a snug fit with no wobble.
- Finalize the baffle position so it sits 3 feet above ground and at least 18 inches below the entrance hole, then secure it.
Quick how-to for a tree mount
- Select a straight section of trunk away from low branches. Use a single 3/8-inch lag bolt (not multiple nails) to minimize damage to the tree.
- Angle the box slightly outward and downward at the entrance (5 to 10 degrees). Do not let it angle inward, which traps moisture.
- Wrap a 24-inch-wide smooth sheet-metal collar around the trunk below the box, secured with hose clamps, to slow climbing predators.
Quick how-to for an eave or wall mount
- Find a solid wood fascia or stud to screw into. Use 2.5-inch galvanized or stainless screws so the bracket does not pull free in wind.
- Position the box at least 5 feet from any downspout, vine, or other climbable structure.
- Face the entrance away from prevailing afternoon sun (typically facing east or north in most US climates).
- Fit a metal entrance-plate extender with the correct diameter hole for the target species.
Quick how-to for a hanging installation
- Stretch a smooth metal wire tightly between two anchor points (two poles, two trees) so the box hangs with minimal sway.
- Hang the box on a short, rigid wire or S-hook, not a long chain that allows the box to spin.
- If using poles as anchors, fit a baffle on each pole below the wire attachment point.
- Check the box periodically: a swinging box accumulates more moisture and may deter all but the boldest wrens.
Materials and tools checklist
Gather these before your install day so you are not stopping halfway through with a half-mounted pole.
- Nest box built to species-specific dimensions (untreated pine, cedar, or fir, walls at least 3/4 inch thick)
- Metal mounting pole: 1/2-inch or 3/4-inch EMT conduit, 6 to 10 feet for most species; heavier steel pole for martin housing
- Predator baffle: cone type or stovepipe type (commercial or homemade from galvanized sheet metal)
- Metal entrance-plate extender with species-correct hole diameter
- Galvanized or stainless screws and lag bolts (2-inch and 3-inch lengths cover most needs)
- Conduit clamps or purpose-made nest-box mounting bracket
- Post driver or narrow-blade spade for setting the pole
- 4-foot or 6-foot spirit level
- Drill with drill bits (1/4-inch pilot bit, plus a bit matching your lag bolt size)
- Tape measure
- Work gloves and safety glasses
- Optional: concrete mix for martin colony poles that need extra stability
Predator-proofing: baffles, entrance plates, spacing, and distance from cover
Predator-proofing is the most impactful single upgrade you can make to any nest box installation. The Bailey and Bonter 2017 study, drawing on thousands of nest records from the NestWatch citizen-science database, found that predator guards were associated with a 6.7 percent improvement in nest success overall. Over multiple seasons, that compounds into significantly more fledglings.
Baffles
A cone baffle flares outward from the pole, creating an overhang that animals cannot climb around. A stovepipe baffle works differently: the animal climbs into the smooth metal tube and cannot grip the inside surface. Both are effective. Position the baffle at least 3 feet above the ground (so a jumping cat cannot reach above it) and at least 18 inches below the entrance hole (so a climbing raccoon reaching over the baffle cannot stretch to the hole). Commercial baffles are widely available; a stovepipe baffle made from a 6-inch galvanized stovepipe section is an easy DIY alternative for under $10.
Metal entrance-hole plates and extenders
A thin metal plate screwed over the entrance hole does two jobs: it reinforces the correct hole diameter (preventing squirrels from gnawing the hole larger) and it extends the hole depth slightly (making it harder for a raccoon's paw to reach down to eggs or nestlings). Drill the metal plate to the exact target diameter. This is one of the cheapest and most effective additions to any nest box.
Spacing and distance from cover
- Keep the box at least 6 to 10 feet horizontally from any tree trunk, fence post, shrub, or climbable surface.
- Do not mount boxes on wooden fence posts: squirrels, raccoons, and snakes use them readily.
- Avoid placing boxes directly above or near bird feeders, which attract squirrels and competing birds to the same location.
- For martin housing, maintain 40 feet of open clearance from any tree or structure in all directions.
Additional deterrents
Noel wire guards, which are small wire-mesh cylinders placed around the entrance hole, are an option sometimes used for smaller cavity nesters in areas with high domestic-cat or snake pressure. They can slightly reduce the appeal of the box to some birds, so monitor occupancy after adding one. Never use sticky substances, traps, or poisons near a nest box: these are inhumane and may harm the target birds or protected species.
Orientation and distance from human activity
Facing your bird house in the right direction makes a meaningful difference in both occupancy rates and nest success, particularly in climates with strong prevailing winds or intense afternoon sun.
- East or southeast is the most widely recommended facing for most species in North America: morning sun warms the box early and the entrance avoids the hot afternoon sun and prevailing west or southwest winds.
- For bluebirds, the Cornell Lab specifically recommends facing the box toward open foraging habitat, often east or east-southeast.
- In very hot climates (Florida, Texas, the Desert Southwest), face the box north or east and provide some late-afternoon shade to prevent overheating. Interior temperatures above 107°F (42°C) can kill nestlings.
- Keep boxes at least 50 to 100 feet from loud, regular human activity (busy driveways, power tools, play structures used daily). Occasional garden foot traffic nearby is acceptable and often unavoidable.
- Avoid mounting boxes where dogs or outdoor cats roam beneath them: even if a predator cannot reach the box, constant disturbance at the base causes adults to abandon the nest.
- A clear flight path to the entrance hole matters: there should be open air for at least 10 to 15 feet in front of the entrance so birds can approach and depart without weaving through dense vegetation.
Regional and urban vs. rural placement adjustments
Optimal bird house placement is not one-size-fits-all across the country. Where you live changes what species are available, what predators you face, how hot or cold it gets inside a box, and what nearby habitat is available.
Urban and suburban yards
Urban sites typically have higher house sparrow and European starling pressure. Both are non-native, invasive species that aggressively take over cavities intended for native birds. Use the smallest entrance hole appropriate for your target species and monitor the box weekly during nesting season. A metal entrance extender is almost non-negotiable in urban areas. Predator pressure from cats and raccoons is also higher, so a pole-and-baffle setup is especially important. A slightly higher mount (6 to 8 feet rather than 4 to 5 feet) in an urban backyard can discourage casual interference from children and off-leash dogs.
Rural and agricultural sites
Rural bluebird trail boxes are typically mounted at 4 to 5 feet on metal conduit poles, which makes them easy to monitor from a vehicle or on foot without a ladder. Snake pressure is higher in rural and agricultural areas, making the stovepipe baffle a particularly good choice, as it is effective against both mammals and snakes. Kestrel boxes in open farming country can go higher (15 to 30 feet) on wooden utility poles or the sides of barns, where they also serve an agricultural benefit by controlling rodent populations.
Northern vs. southern climates
In the northern US and Canada, boxes can face south to capture maximum spring warmth, and a slightly lower mount (5 to 6 feet) is fine because snow, not heat, is the main challenge. In the Deep South and Southwest, prioritize shade and ventilation over sun exposure, choose lighter wood colors for exterior surfaces, and consider 1/4-inch ventilation holes near the top of the box if they are not already included in the design.
Timing: when to put boxes up, seasonal notes, and when to take them down
Getting the timing right means the box is ready and weathered before your target species starts scouting for nest sites.
When to install
- For bluebirds, chickadees, nuthatches, and wrens in most of the US: late winter (January through February) is ideal so boxes are in place before the early spring scouting window.
- For tree swallows: early March in the South, mid to late March in the Midwest and Northeast.
- For purple martins: install or uncover housing 1 to 2 weeks before the first arrival date for your region (check local martin arrival maps from the PMCA). In Florida, this can be late January; in the northern US and Canada, early May.
- For kestrels: autumn or very early spring, well before March in most of the US, when males begin investigating potential nest sites.
- A box installed in the previous autumn is also perfectly acceptable and will give wood time to weather and off-gas any wood treatments.
Seasonal considerations and year-round use
Leaving clean, maintained boxes up year-round has real conservation value. Many species roost in cavities during cold winter nights, including bluebirds, chickadees, and nuthatches. A clean box can shelter several birds at once in a winter roost, which is a genuine survival benefit.
When to take boxes down or plug them
If you are in an area with heavy house sparrow pressure and cannot monitor boxes regularly, plugging entrance holes with a wine cork or a soft material during the off-season prevents sparrows from establishing year-round residency. For martin housing, PMCA guidance is to close compartments after the last birds have departed (typically August or September in most of the US) and reopen them 1 to 2 weeks before the following year's expected arrival date.
Sanitation and maintenance: cleaning, nest removal, repairs, and disinfecting
A clean nest box is a used nest box. Many beginner birders worry about cleaning out old nests, thinking it might disturb the birds. In fact, removing old nesting material after a brood has fledged actively encourages birds to re-nest in the same box and prevents a buildup of parasites including mites, blowfly larvae, and bacteria.
Annual end-of-season cleaning
- Wait until you are confident the box is inactive for the season (all fledglings have left and no new nesting behavior is observed for at least two weeks).
- Open the clean-out panel and remove all old nesting material. Dispose of it away from the box in a yard waste bin, not directly below where parasites can re-infest.
- Scrub the interior with a stiff brush and a 10 percent bleach solution (1 part unscented household bleach to 9 parts water). Rinse thoroughly with clean water.
- Let the box air-dry completely, ideally in the sun for a full day, before closing it up.
- Inspect the interior for cracks, splinters, or sharp hardware. Sand any rough areas and replace corroded screws with galvanized or stainless equivalents.
- Check the entrance hole for signs of gnawing or enlargement. Fit a metal entrance-plate extender if the hole has been expanded beyond the target diameter.
- Recheck that the mounting pole is still plumb and the baffle is secure.
Between-brood nest checks
Many small birds (bluebirds, tree swallows, wrens) attempt two or even three broods per season. After the first brood fledges, remove the old nest promptly. This removes parasites and creates space and clean material for the second nesting attempt. Do this quickly (within a day or two of confirmed fledging) to allow the female time to rebuild. Wear disposable gloves when handling old nesting material.
What to do with house sparrow nests
House sparrows (Passer domesticus) are a non-native, invasive species in North America and are not protected under the Migratory Bird Treaty Act. If you find a house sparrow nest in a box intended for native birds, it is legal and ecologically appropriate to remove it. Remove their nesting material promptly and repeatedly. Persistent monitoring and nest removal, combined with the correct entrance-hole size, is the most effective long-term management approach.
Safety tips for installation
Most bird house installations are straightforward, but working with ladders, poles, and power tools deserves a moment's thought before you start.
- Wear safety glasses whenever drilling into wood or metal, and when driving poles into hard soil where debris can fly back.
- Use a stable 4-foot or 6-foot stepladder for boxes in the 5 to 10 foot range. Never stand on the top two rungs. Have a second person hold the ladder on uneven ground.
- For kestrel boxes or martin housing above 10 feet, use an extension ladder rated for your weight plus tools, or better yet, plan your hardware so the pole can be raised and lowered rather than requiring ladder access for every check.
- Check for buried utilities before driving any pole into the ground. In the US, call 811 (the national Call Before You Dig number) at least two business days before any ground-disturbing work.
- Galvanized metal edges (cut sheet metal for baffles, EMT conduit cut ends) are very sharp. Wear heavy work gloves and deburr all cut edges with a metal file before handling.
- If mounting on a building, use a stud finder to locate solid wood before screwing in brackets. A bracket that pulls out under wind load can damage the box and injure whoever is below it.
- After installation, give the box a firm tug in every direction to confirm it is secure before walking away.
Installation day checklist
Use this list on the day you put the box up. It covers the sequence from arriving at the site to walking away with confidence.
- Confirm site: correct habitat, clear flight approach, no climbable surfaces within 6 to 10 feet horizontally.
- Verify entrance-hole diameter against the target species. Fit metal entrance plate if needed.
- Check all hardware: screws, pole, baffle, bracket, and any tools are on site.
- Set pole or mount: plumb, secure, driven to correct depth.
- Attach baffle: minimum 3 feet above ground, minimum 18 inches below entrance hole.
- Mount box at target height: slight forward tilt (5 to 10 degrees), no wobble.
- Orient entrance correctly: east or southeast facing as a default, adjusted for local conditions.
- Confirm no branches, perches, or climbable surfaces are newly visible from the mounted position.
- Give the box a firm tug in three directions to confirm security.
- Record the date, species target, height, and GPS coordinates or sketch map.
- Check back in two weeks to confirm occupancy interest or identify problems early.
Troubleshooting common problems
No birds are using the box
Give a new box at least a full nesting season (March through July for most species) before concluding it is not working. The most common reasons a box goes unoccupied are: wrong habitat (a bluebird box in a dense wooded backyard will rarely be used), entrance hole too large or too small, box positioned too close to cover or in too much shade, or the target species is not present locally at that time of year. Check all four factors before moving the box.
Evidence of predator attacks
Signs include scratch marks on the pole below the box, the entrance hole enlarged by gnawing, eggs or nestlings missing, or a nest pulled out of the box. Add or upgrade the baffle immediately. If the entrance hole is enlarged, add a metal plate. Check that the pole is smooth and free of climbing aids like rough patches, zip ties, or nearby vegetation touching it.
House sparrows or starlings taking over
This is the most common management challenge in urban and suburban yards. For starlings: a 1.5-inch entrance hole physically excludes them from bluebird and swallow boxes. For house sparrows: the correct hole size helps but does not fully exclude them since they can fit through a 1.5-inch hole. Persistent nest removal (daily if necessary during peak season), combined with monitoring, is the most effective approach. In some situations, temporarily closing the box for a week or two discourages sparrow pairs that have already selected the site.
Moisture and wet nests
If nests are repeatedly wet, check: drainage holes in the floor (typically four 1/4-inch holes in the corners), roof overhang adequate to shelter the entrance (minimum 2 to 3 inches), and box tilt angle (a slight forward lean sheds rain from the entrance). A wet box interior can also indicate a crack or gap in the roof joint, which should be sealed with exterior caulk or replaced.
Competition between species at adjacent boxes
Tree swallows will defend a large territory around a single box, which can prevent bluebirds from using a neighboring box placed too close. The solution is to pair boxes: place two boxes 5 to 15 feet apart on separate poles. Two different species will often accept paired boxes side by side while refusing to tolerate a competitor at a box 50 to 100 feet away. This is sometimes called the paired or twin-box method and is widely used on bluebird trails.
Purple martins not arriving or not returning
New martin colonies can take two to four years to become established, especially in areas without nearby existing colonies. Be patient, keep housing open and accessible on the correct schedule (timing to your local arrival date), and consider playing PMCA-approved dawn song recordings at the housing site in the first few years to attract scouts. If an established colony disappears, investigate for possible predator access to the housing (particularly owls or snakes) and ensure that no new trees or structures have grown into the 40-foot clearance zone.
Where to go next
Height and mounting are two of the most critical factors in bird house success, but they work hand in hand with the dimensions of the box itself and the exact entrance-hole diameter for each species. If you are building your own box from scratch, the step-by-step DIY plans on this site walk you through floor, wall, and roof dimensions for each species, including cutting diagrams and drill-bit size recommendations. If you want to go deeper on entrance holes specifically, the detailed hole-size guide covers exact diameters, tolerances, and recommended metal entrance-plate options for every common cavity nester. Both resources pair directly with what you have read here to give you a complete picture from box design through final installation and ongoing maintenance.
FAQ
Search-friendly title and meta description
Title: Bird Houses: How High Off the Ground (Species-by-Species Heights, Holes & Mounting) Meta description (≤160 chars): Evidence-based placement for bird houses: species heights, entrance sizes, mounting methods, predator-proofing, and purple martin advice.
Quick answer (concise rule of thumb)
Rule of thumb: match height to the target species and use a smooth metal pole with a predator baffle whenever possible. Most small songbirds nest 4–15 ft; purple martins prefer 12–18 ft on a pole; kestrels 10–30 ft. Use the species table below for exact ranges and entrance sizes.
Species-by-species recommended heights and entrance diameters (table)
Bluebirds (Eastern/Western): height 4–6 ft; entrance 1.5 in Chickadees (Black-capped/Carolina): height 5–15 ft; entrance 1⅛ in (≈28 mm) Wrens (House Wren): height 5–10 ft; entrance 1¼ in Tree Swallow: height 4–15 ft (commonly 5–15 ft); entrance 1⅜ in (≈35 mm) Nuthatches (White-breasted/Red-breasted): height 5–15 ft; entrance 1¼–1⅜ in Purple Martins (colony): height 12–18 ft preferred; compartment min ~6×6 in (7×12 in recommended); entrance (traditional gourds/colonies) ≈2⅛ in, acceptable 1¾–2¼ in; white exterior recommended American Kestrel: height 10–30 ft (open country); entrance/opening ≈3 in; floor ~8×8 in; depth 12–15 in Notes: Use the smaller hole size for small-cavity specialists to exclude house sparrows and starlings. Follow local species guides for minor regional variation.
Mounting: hanging vs mounting on pole, tree, eave, or bracket
Best default: mount on a smooth metal pole with a predator baffle — poles reduce climbing predators and work for bluebirds, chickadees, swallows, and kestrels. Tree mounting is acceptable in low-predator, wooded sites but increases risk from raccoons, snakes and squirrels. Eaves/house brackets are fine for wrens, chickadees and some martins (but martins prefer pole systems). Hanging (cord or chain) is simplest but makes predator-proofing harder; hanging is best for short-term or temporary placements (e.g., swallows over water) with a properly spaced predator guard and metal entrance plate.
Step-by-step mounting instructions (pole installation)
1) Choose location: match species, clear flight path, keep 10–20 ft from heavy human activity, avoid low dense cover right next to box. 2) Dig hole and set pole: use a metal pole; set 18–24 in below ground or install a mounting socket for removable poles. 3) Attach predator baffle: slide cone or stovepipe baffle onto pole 2–4 ft below box level (height depends on predator types). 4) Mount box securely: attach box with corrosion-resistant hardware; ensure ventilation and drainage. 5) Check orientation: face entrance away from prevailing winds and strong afternoon sun (east to southeast is common). 6) Add entrance guard if needed: metal hole protector or extender to reduce pecking or enlargement. 7) Inspect: ensure box is level and 4–6 ft of clear flight approach for bluebirds or 10–20 ft for martins, and that nearby perches are limited. 8) Lock or secure removable systems (martin winch) to prevent theft or disturbance.
Step-by-step mounting instructions (tree, eave, hanging, bracket)
Tree-mounted: fasten with wide straps or lag screws (minimal tree injury), place on trunk or large limb at recommended height, use metal predator shield on trunk between box and ground, and avoid attaching to small branches. Eave/bracket mounting: use L-brackets or heavy-duty metal straps on building eaves; ensure box is securely fastened and insulated from building heat; maintain ventilation. Hanging: use galvanized chain or stainless cable; add a predator guard on the hanging cable/pole below the box; avoid rope (chewed by rodents) and keep box away from easy perches.
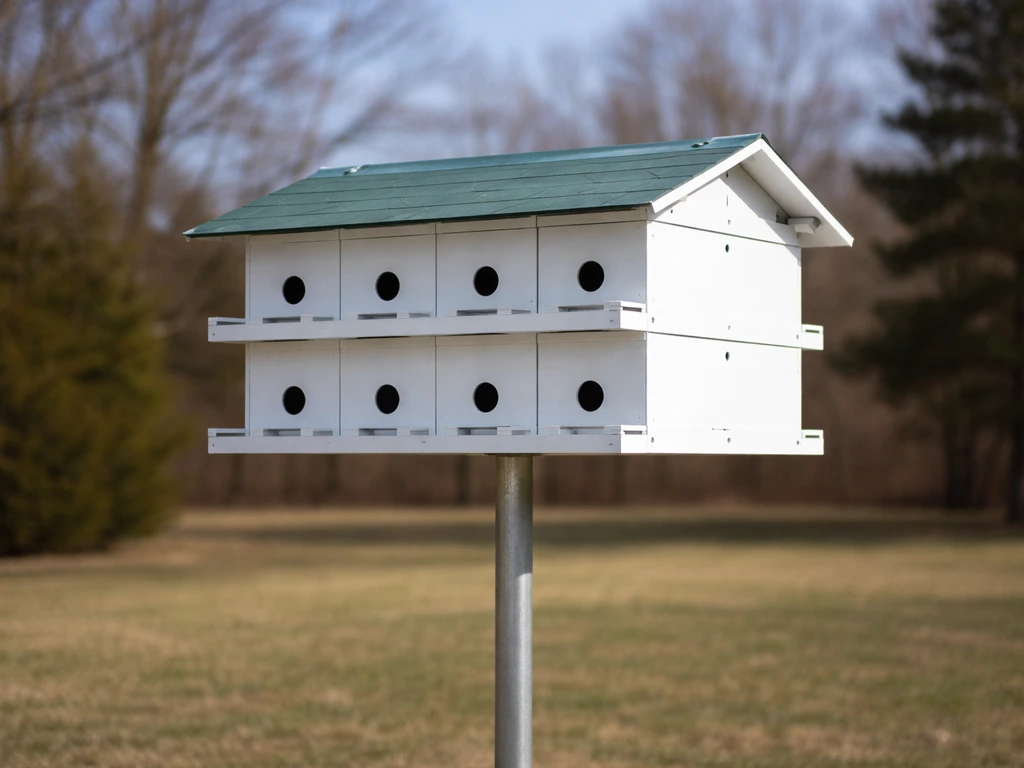
Choose, install, and maintain a purple martin house with correct size, entrances, placement, predator protection, and cl
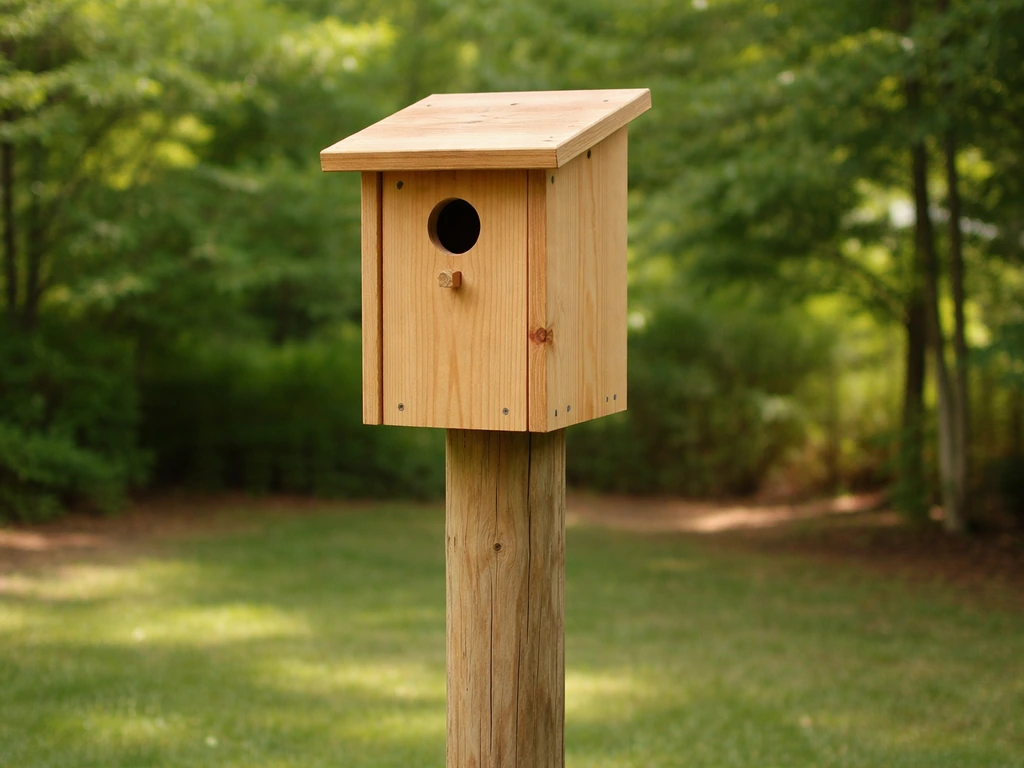
Species specific mounting heights, how to measure, install options, and troubleshooting for safe bird house placement.
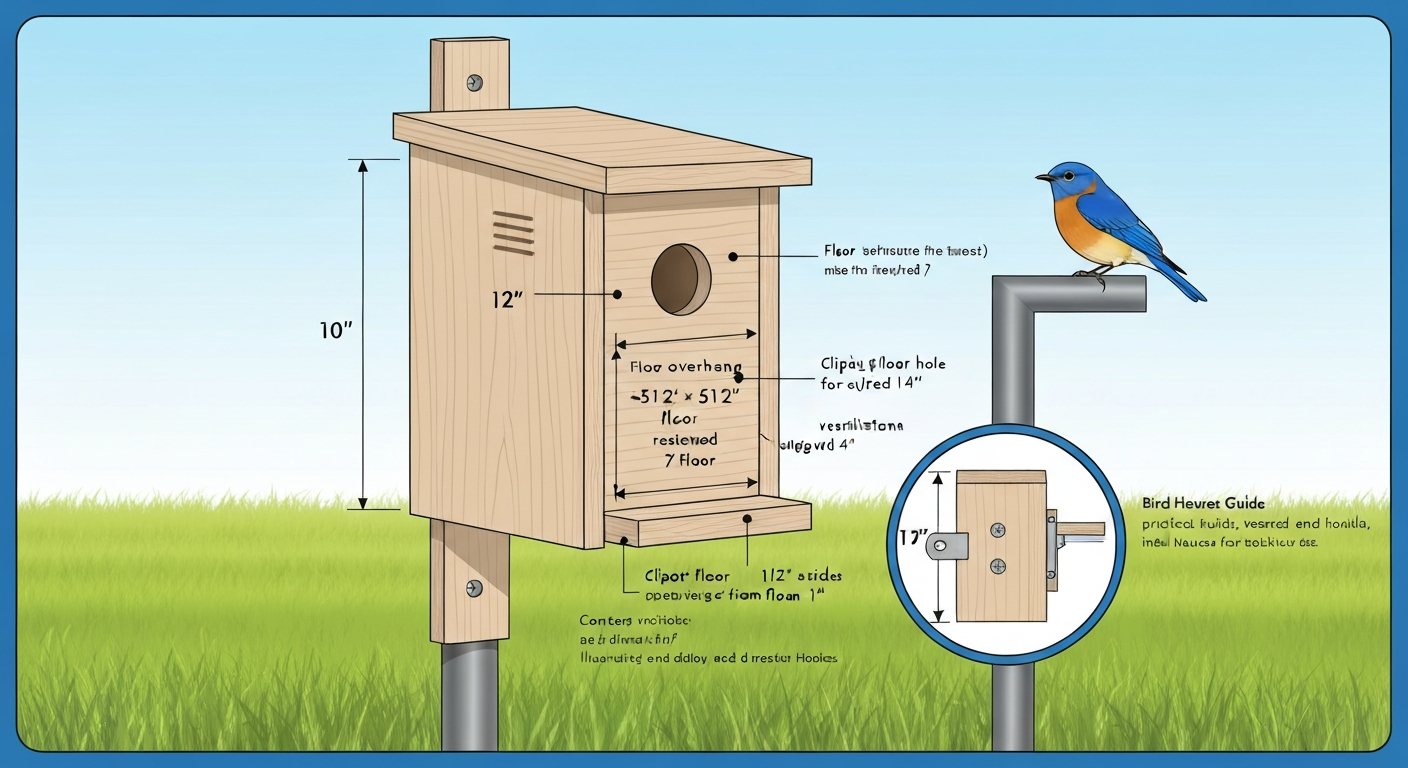
DIY bluebird house: step-by-step build, exact cuts and hole sizes, mounting, predator guards, cleaning, and care.