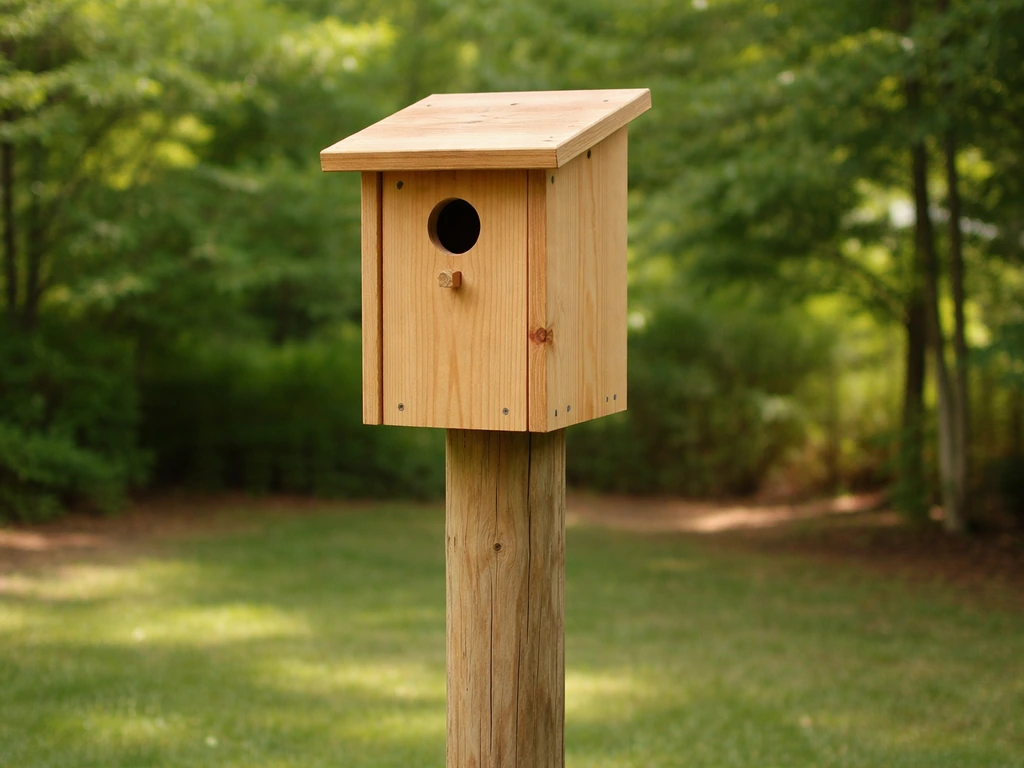
The best martin bird house setup today is a white, multi-compartment aluminum or gourd-rack system mounted on a telescoping pole 10 to 20 feet high, with 2-1/8" entrance holes (or crescent-shaped starling-resistant openings), compartments at least 6"x6" (ideally 7"x12"), a predator baffle at least 4 feet off the ground, and a cleaning routine each fall using a 10% bleach solution. That combination, backed by the Purple Martin Conservation Association's published housing standards, gives you the best realistic shot at attracting and successfully fledging purple martins in your backyard.
Best Martin Bird Houses: How to Choose, Install, and Care

Maya Thompson
4 Jul 2026
What a martin bird house actually is
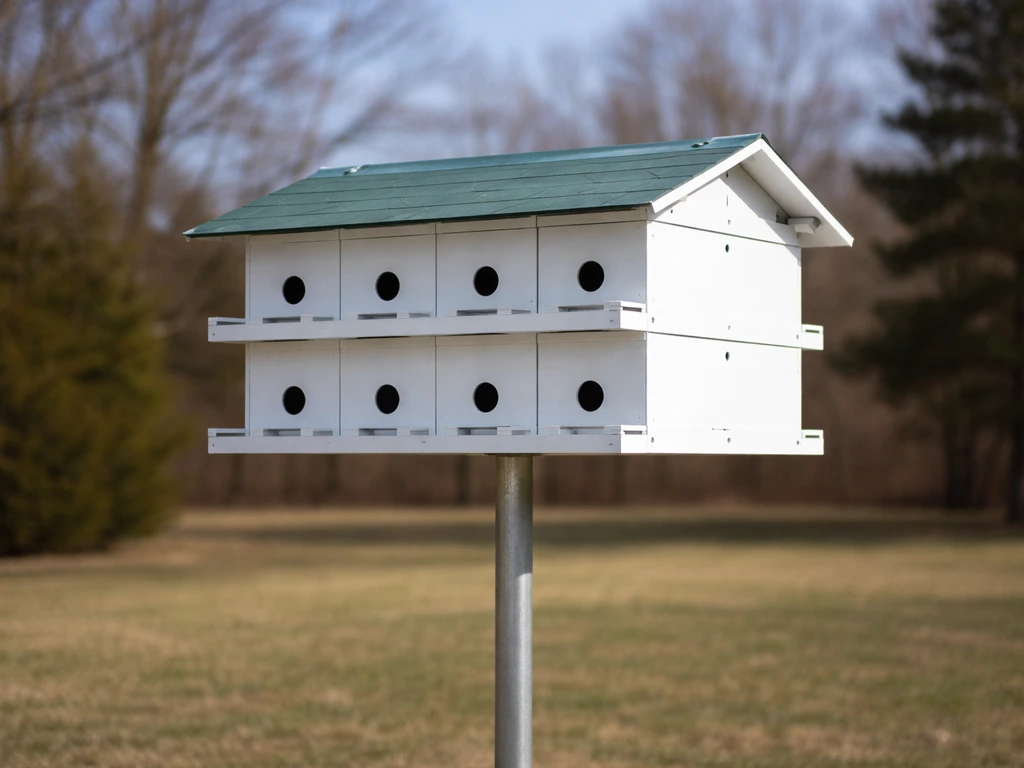
A martin bird house is specialized multi-compartment housing designed specifically for purple martins (Progne subis), North America's largest swallow. Unlike the single-cavity boxes you'd build for a bluebird or chickadee, martin housing works more like a small apartment building: it offers multiple nesting rooms inside a single structure, or a rack of individual gourds hanging from a central pole. Martins are colonial nesters, meaning they prefer to live in groups rather than alone, and they flat-out won't use a single-room box the way other species will.
Purple martins are fully migratory. They winter in South America and return to North American breeding sites each spring, often as early as late January in the Deep South and April in northern states. Importantly, once martins find and use a colony site, they tend to come back year after year, and even young birds fledged at a site will return to roost there the following season. That loyalty is your biggest asset as a martin landlord, but it also means the housing needs to be up, clean, and ready before the scouts arrive.
What a martin bird house looks like
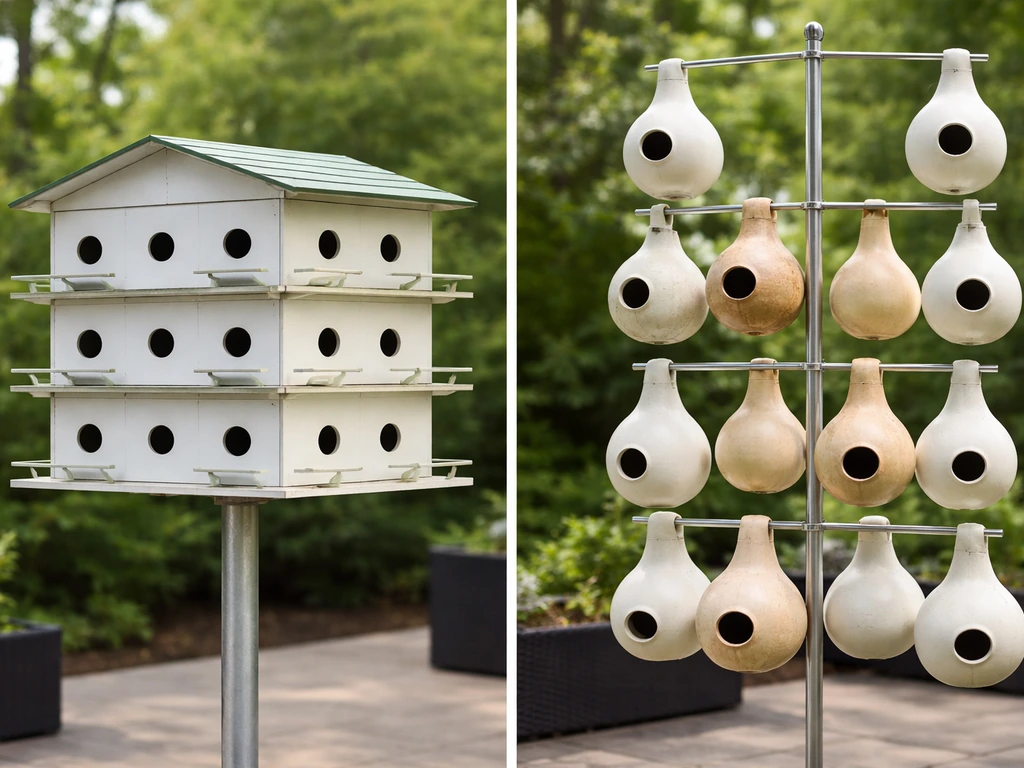
Martin housing comes in two main forms: the classic multi-compartment house (think a boxy, white multi-story birdhouse with rows of entry holes on each side) and the gourd rack (a horizontal arm or rotating rack hung with individual gourd-shaped cavities). Both sit atop a tall pole or tower. Aim for the best height for bird house placement by mounting a martin house high enough that it is protected from predators and stays visible for the colony. If you've seen a tall white birdhouse in someone's open backyard on a single pole, it was almost certainly a martin house.
Compartment size
The minimum acceptable compartment size per PMCA housing standards is 6" wide by 6" deep. That's the floor. Larger is meaningfully better: a 7"x12" compartment offers extra protection against weather and gives nesting pairs more room, which research shows correlates with better fledgling success. If you're buying a pre-made house, check the spec sheet and skip anything smaller than 6"x6".
Entrance holes
Standard round entrance holes should be exactly 2-1/8" in diameter. The acceptable range is 1-3/4" to 2-1/4", but 2-1/8" is the target. A better option for new landlords is the Starling-Resistant Entrance Hole (SREH), a crescent-shaped opening that is 3" wide and only 1-3/16" tall. That horizontal slot allows martins (who are agile fliers) to enter easily while blocking the larger, less aerobatic European starling. If invasive species pressure is high in your area, the crescent hole is the smarter default.
Ventilation and drainage
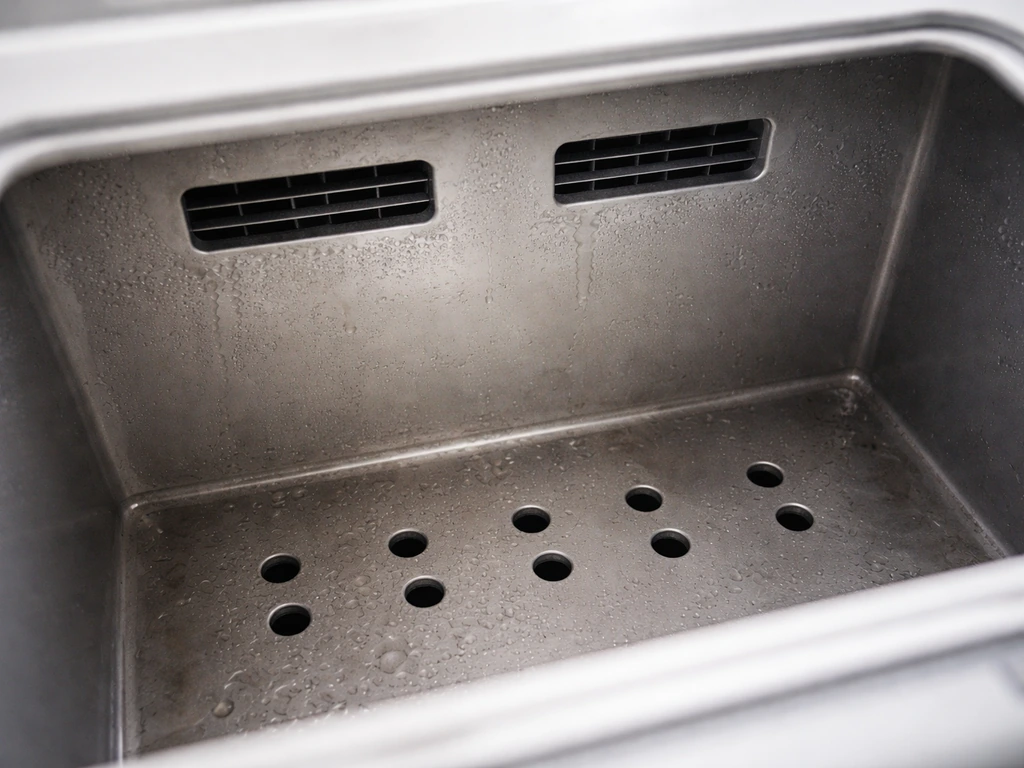
Good martin housing includes ventilation slots or holes near the top of each compartment and drainage holes in the floor so wet nests can dry out. Without drainage, a heavy rain event can leave nestlings sitting in pooled water, which is a serious welfare and disease risk. Check that any housing you buy or build includes both features before you mount it.
Choosing the best design and materials
PMCA's housing guidelines are clear on one critical point: the exterior must be white. White reflects solar heat, which keeps interior temperatures from becoming lethal on hot summer days. Beyond color, the main material choices are aluminum, thick UV-resistant plastic, wood, and natural gourds. Here's how they compare:
| Material | Durability | Heat Management | Ease of Cleaning | Cost |
|---|---|---|---|---|
| Aluminum (white-painted) | Excellent, 20+ years | Good with white finish | Easy, smooth surfaces | Moderate to high |
| Thick UV plastic (white) | Good, 10-15 years | Good with white finish | Easy | Moderate |
| Wood (painted white) | Fair, needs upkeep | Good with white paint | Moderate, can crack | Low to moderate |
| Natural gourds | Fair, 3-5 years per gourd | Excellent (thick walls insulate) | Moderate, hand-clean each gourd | Low (DIY) to moderate |
Aluminum is the top practical choice for most people: it doesn't rot, it cleans up fast, and a quality aluminum house on a good pole system can last decades. Natural gourds are beloved by experienced martin landlords because the thick gourd walls provide natural insulation, and martins show a strong preference for them in many regions. The trade-off is that individual gourds need more hands-on inspection and replacement over time. Avoid cheap thin-plastic houses with small (under 6"x6") compartments. The PMCA specifically flags these as inadequate.
Telescoping pole systems
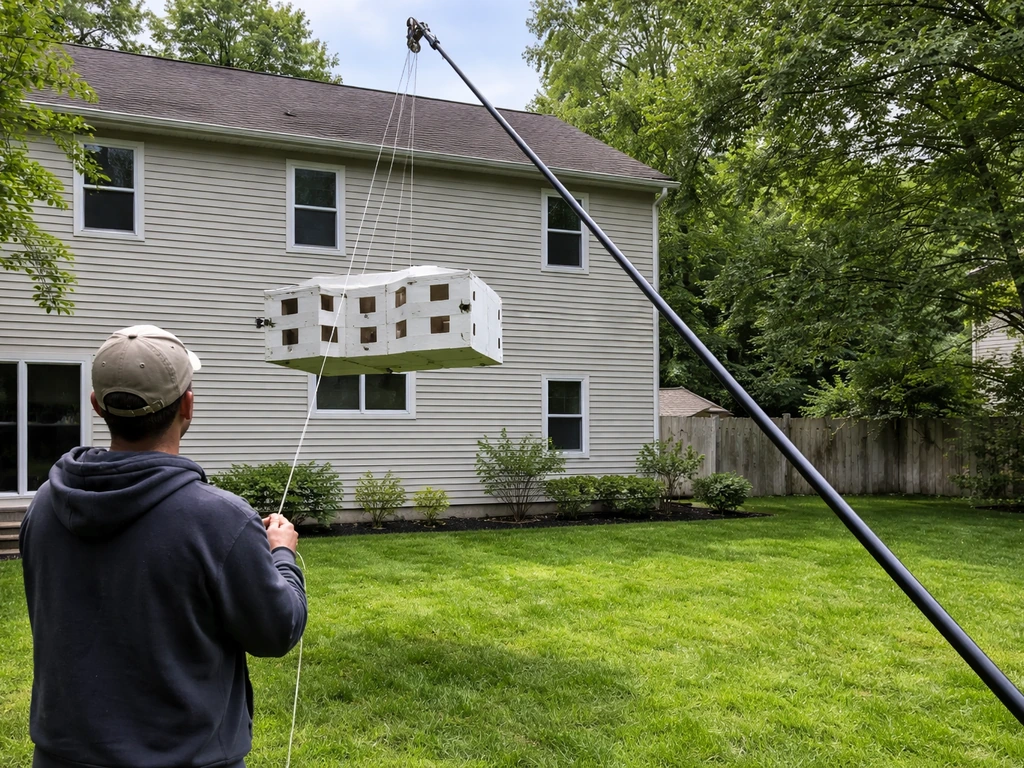
One of the most important design features isn't the house itself: it's the pole. A telescoping or winch-operated pole lets you lower the housing to ground level for nest checks and cleaning. If you want to make the most of your setup, it also helps to know how high to hang the housing and why that height affects predator access and safety lower the housing to ground level. This is not a luxury. PMCA nest-check guidance is built around the assumption that you can lower your housing regularly. If your house is fixed at 15 feet with no way to access it, you can't manage competitors, can't check on nestlings, and can't clean it properly. Make the lowering mechanism a non-negotiable part of your setup.
Where and how to mount it
Purple martins are open-habitat birds. They forage by flying fast over open ground and water, catching insects in mid-air. Their housing needs to reflect that: place your pole in the most open spot in your yard, at least 40 feet away from any trees or large shrubs. A practical rule of thumb is to mount your bird house high off the ground so predators have a harder time reaching the entrance bird houses how high off the ground. Closer than that, and perching predators like hawks and owls have an easy ambush point, plus the martins themselves feel unsafe and may avoid the site. The more open sky visible from the house entrance, the better.
Mounting height should be in the 10 to 20 foot range. Within that window, aim for the higher end, around 14 to 18 feet, for established colony sites. Martins can be attracted to housing at the lower end of that range too, especially in areas with strong existing martin populations nearby. Height guidance for martin houses differs from smaller species, so the rules you'd apply to a chickadee box don't apply here. Mounting height for martin houses is often recommended roughly in the 10, 20 feet range as a practical non-authoritative guideline blank" rel="noopener noreferrer">mounting height for martin houses is often recommended roughly in the 10–20 feet range.
Proximity to water is a bonus but not a requirement. Martins drink and bathe on the wing, skimming the surface of ponds and lakes, so placing your housing within sight of open water increases its appeal. If you're near a lake or large pond, position the house so the entrance faces the water where possible.
Predator-proofing: the part most people skip
Predator control is not optional for a martin colony. Snakes, raccoons, and raptors are the primary threats, and without a baffle, a snake can clean out an entire martin house in one night. The PMCA is direct: install a predator guard on every martin pole, full stop.
Stovepipe baffles
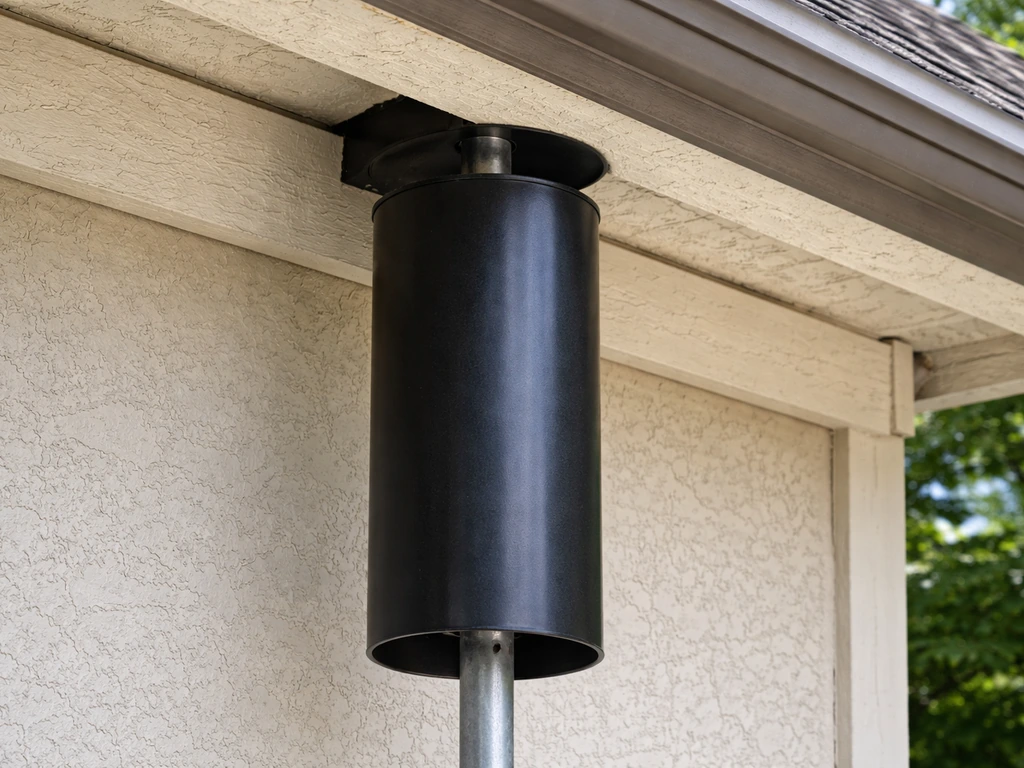
The standard guard is a stovepipe-style cylindrical baffle, roughly 8 inches in diameter and 2 feet long, mounted on the pole below the housing. The top of the baffle must be at least 4 feet off the ground. The NC Purple Martin Society recommends mounting it as high on the pole as you can comfortably reach, with the 4-foot minimum as the floor. The baffle works by being too wide for a climbing snake or raccoon to get a grip around while also being too smooth to grip onto.
For extra protection against snakes specifically, some experienced landlords add a layer of netting above the baffle with no gaps, creating a layered defense. This is particularly useful in areas with high black rat snake activity, which are the most common martin predator in the eastern U.S.
Managing house sparrows and starlings
Invasive cavity competitors are as big a threat as climbing predators. House sparrows and European starlings will take over martin compartments if given the chance, destroying martin eggs and killing nestlings. The crescent SREH entrance hole is your first line of defense against starlings. For house sparrows, the entrance hole size alone won't help since sparrows can fit through martin-sized openings. The best practice is active monitoring: do your nest checks, and humanely remove house sparrow nests (which you're legally permitted to do since they are non-native species) before they get established. Plugging unused compartments with foam inserts or wooden plugs until the martins are actively using them reduces the window of opportunity for competitors.
Nest checks: routine management during the season
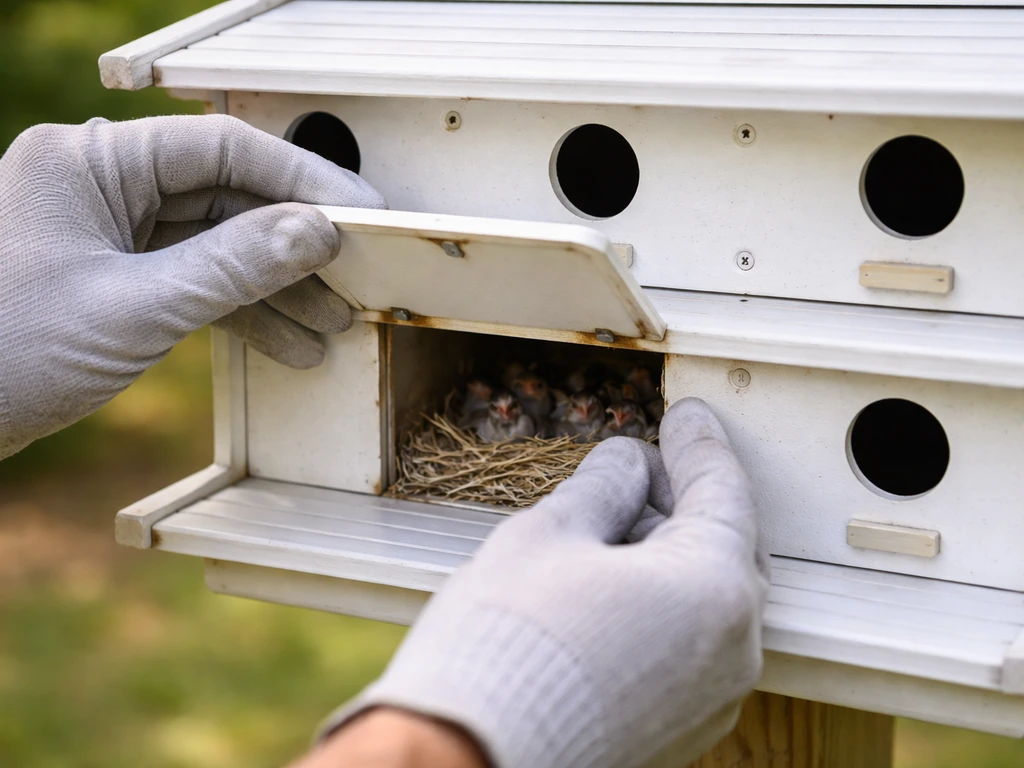
Once your martins have moved in, regular nest checks are part of the job. The PMCA recommends checking often enough that you never go more than 10 to 14 days between inspections. Lower the housing, open each cavity, record what you find (number of eggs, nestlings, age estimate), and note any competitor nests. The whole process takes 15 to 20 minutes once you get into a rhythm.
One important caveat: when nestlings are approximately 22 days old or older, plug those specific cavities before you lower the housing. At that age, chicks can and will fledge early if disturbed, and a premature fledge at ground level is usually fatal. Plug the opening, lower the housing, check the other compartments, then raise it back up and unplug. It sounds fiddly, but it becomes second nature after one season.
During nest checks, do not spray insecticide or cleaning products inside the cavities. You can remove debris or parasites by hand, but chemical products during the active breeding season are off the table.
Cleaning, winterizing, and seasonal timing
After your martins depart in late summer (typically August in most of the U.S.), it's time to winterize. Don't skip this step: old nesting material harbors parasites, bacteria, and mold that can affect returning birds the following year.
- Lower the housing to ground level after the martins have left (no activity for at least a week).
- Remove all old nesting material from every compartment.
- Scrub each cavity thoroughly with a 10% bleach solution (1 part bleach, 9 parts water). A bottle brush works well for round gourd openings.
- Rinse with clean water and allow everything to dry completely before storage or covering.
- Plug or cover all entrance holes to prevent house sparrows and starlings from claiming the cavities over winter.
- Inspect the pole, hardware, and baffle for rust, cracks, or wobble. Make repairs in the fall so you're not scrambling in spring.
- Re-open entrance holes and raise the housing 1 to 2 weeks before your expected first-arrival date for your region.
Timing the spring opening correctly matters. Open too early and you're just handing house sparrows and starlings a head start. Open too late and the martin scouts, who may have been passing through your area, will move on. Check local martin arrival data for your region, which the PMCA tracks on its Purple Martin Migration Map, and use that to dial in your timing year by year.
Quick-reference specs for a martin-ready setup
| Feature | Minimum / Standard | Recommended / Better |
|---|---|---|
| Compartment floor size | 6" x 6" | 7" x 12" |
| Round entrance hole diameter | 1-3/4" to 2-1/4" | 2-1/8" (exact target) |
| Crescent (SREH) entrance | 3" wide x 1-3/16" tall | Same (use where starlings are present) |
| Mounting height | 10 feet | 14 to 18 feet |
| Distance from trees/structures | 40 feet minimum | Further is better |
| Predator baffle height (top of baffle) | 4 feet off ground | As high as you can reach comfortably |
| Baffle dimensions | 8" diameter, 2 ft long | Same or larger diameter |
| Exterior color | White only | White only |
| Seasonal cleaning solution | 10% bleach (1:9 ratio) | Same, plus full rinse and dry |
Getting started with purple martins takes a little more setup than hanging a basic birdhouse, but the payoff is a thriving colony of birds that returns to your yard every year. Once you have the right housing on a proper pole with a working baffle and a clean-and-open routine locked in, the annual management is genuinely enjoyable. The martins do the rest.
FAQ
Do I need multiple martin houses, or is one best setup enough for a colony?
One well-designed house on a good pole is usually enough to start, but if your colony grows large, plan for additional compartments or a second rack. More capacity reduces crowding and can help you manage nest checks without having to leave intervals longer than 10 to 14 days.
What should I do if I get little or no interest from martins after installing the best martin bird houses?
First, confirm the basics you cannot fix later: open yard spacing (about 40 feet from shrubs/trees), white exterior, correct entrance size, and predator baffles on every pole. Then wait for scouts, and keep the housing ready before local arrival dates, since early openings attract competitors and late openings miss the scout window.
Can I place the martin house under eaves, a porch, or near buildings?
Avoid enclosed or partially enclosed locations. Martins need open-flight access and enough sky visibility from the entrance. If you must mount near a structure, keep the entrance facing the more open side and ensure predators cannot ambush from nearby ledges or dense vegetation.
How many compartments should a “best” martin house include?
More compartments generally help once martins start using the site, because they are colonial and distribute pairs. If you are choosing between models, prioritize compliant compartment size (not just total number), and ensure each compartment has the ventilation and drainage you need.
Are ventilation holes and drainage holes required, or can I just keep the house clean?
They are required for reliable outcomes. Even with good cleaning, heavy rain can wet nests and increase disease risk if water cannot drain and air cannot circulate. Look for drainage in the floor and ventilation near the top of each compartment before you mount it.
What is the correct way to clean during fall, and can I use more bleach than recommended?
Follow the standard dilution routine you use for fall cleaning, do not increase concentration. Stronger solutions can leave residue that irritates birds and can degrade some materials faster. After cleaning, allow the housing to fully dry before returning it to storage or leaving it in place over winter.
How often should I remove competitor nests, and what if I find starlings in occupied compartments?
Use nest checks to catch competitors early rather than waiting for full establishment. When you remove non-native house sparrow nests, do it before they fledge, and for starlings you should rely on the entrance design plus removal during your inspections to minimize egg and nestling loss.
Is it safe to lower the housing while there are eggs or nestlings inside?
Yes, if you do it as part of routine inspections and keep the disruption brief. The key caveat is timing for plugging specific cavities (around 22 days old or older) to prevent premature fledging at ground level. Lower carefully, open only what you need, and raise promptly after checks.
Do I plug unused compartments year-round, or only during part of the season?
Plugging unused compartments should be a season-long strategy until martins begin actively using them. Once you see martins occupying a cavity, remove plugs for that space and keep the rest protected to reduce entry opportunities for competitors.
What if my martins start using only a few compartments, can I switch entrances or redesign mid-season?
Avoid changing entrances or layout once martins are established. Mid-season modifications can cause abandonment and attract competitors. Instead, stick to the proven entrance type (like the SREH when starlings are a problem) and focus on timely nest checks and competitor control.
Can I add extra predator protection beyond a single baffle, like layered netting?
Yes, layered defenses can be beneficial in snake-heavy areas. If you add netting above the baffle, ensure it has no gaps that would allow entry and that it does not create a new climbing route or snag point. Keep the core requirement, the baffle must meet the height minimum for safety.
When should I open the system in spring if I want the highest chance of attracting martins?
Open based on your region’s martin arrival timing, not on a fixed calendar date. Opening too early gives house sparrows and starlings a head start, while opening too late can miss the period when scouts decide whether to commit to your site.
What should I do if a nestling fledge happens early or a bird drops to the ground?
Prevent it by following the plugging rule for cavities when nestlings are about 22 days old or older. If a bird is down despite precautions, prioritize immediate humane care and contact local wildlife professionals, because a ground-level premature fledge is often fatal.
Next Article
How High Should a Bird House Be Mounted? Exact Tips
Species specific mounting heights, how to measure, install options, and troubleshooting for safe bird house placement.