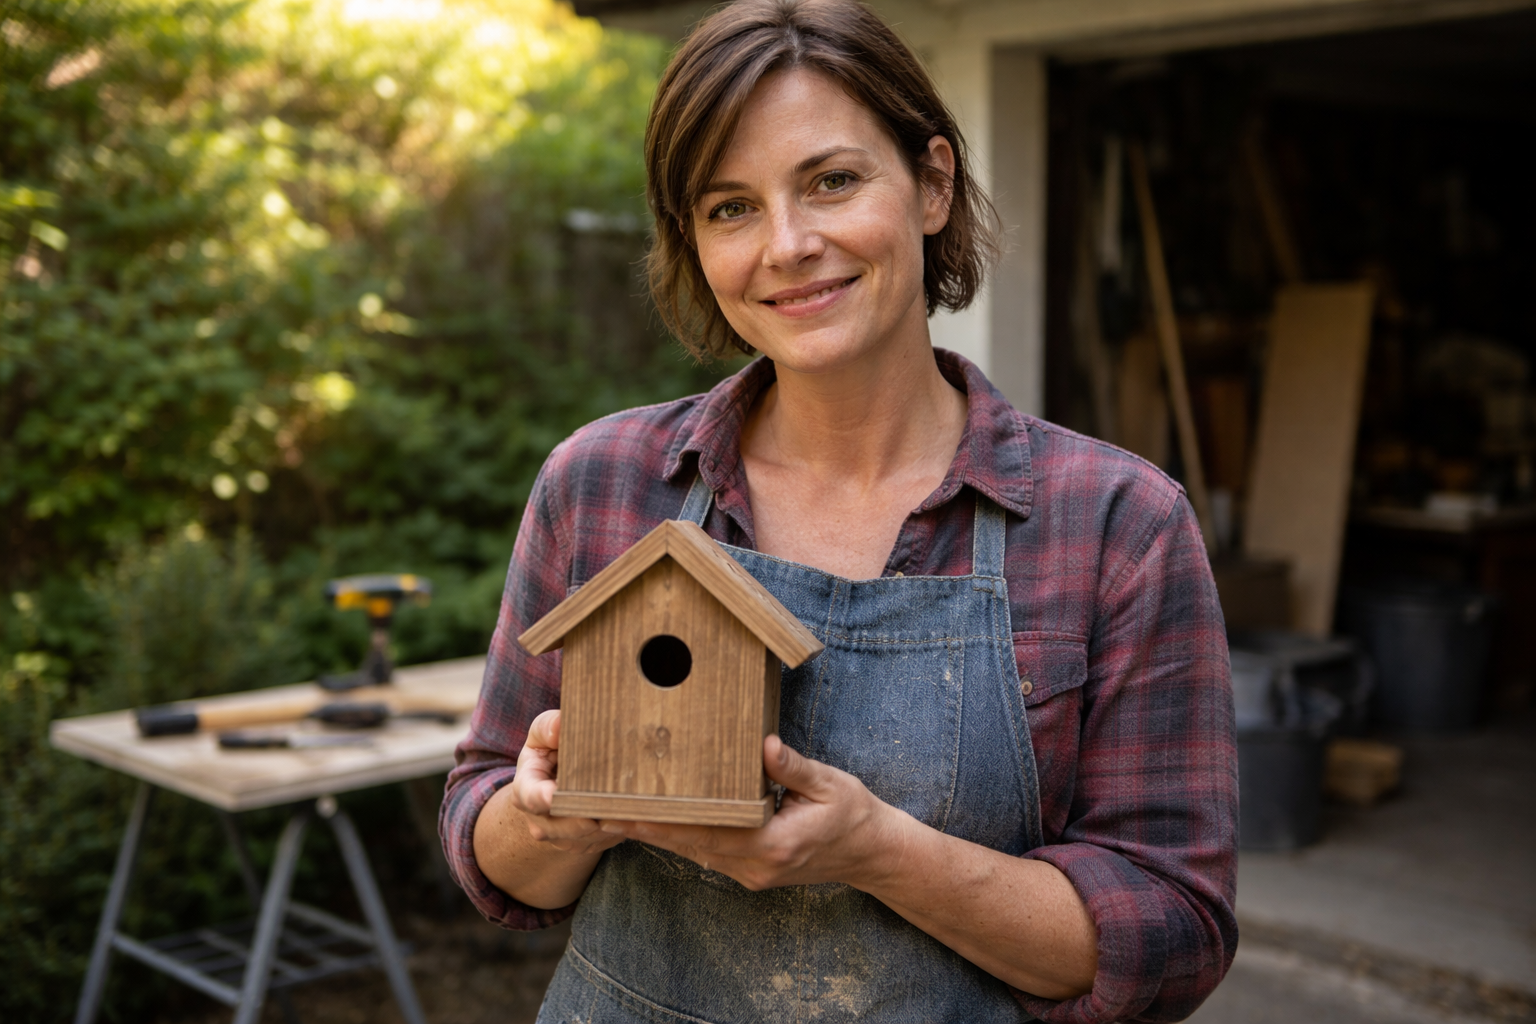
Building a bird house is one of the most rewarding afternoon projects you can do, and it does not require advanced woodworking skills. You need a few basic tools, a single board of untreated wood, and about two to four hours. This guide gives you exact dimensions, a cut list, assembly order, and placement tips so you can start and finish your bird house today, whether you want a simple bluebird box or a smaller chickadee house.
Bird Houses How to Build: Plans, Cut List, and Steps
Maya Thompson
22 Mar 2026
Choosing the Right Bird House Design
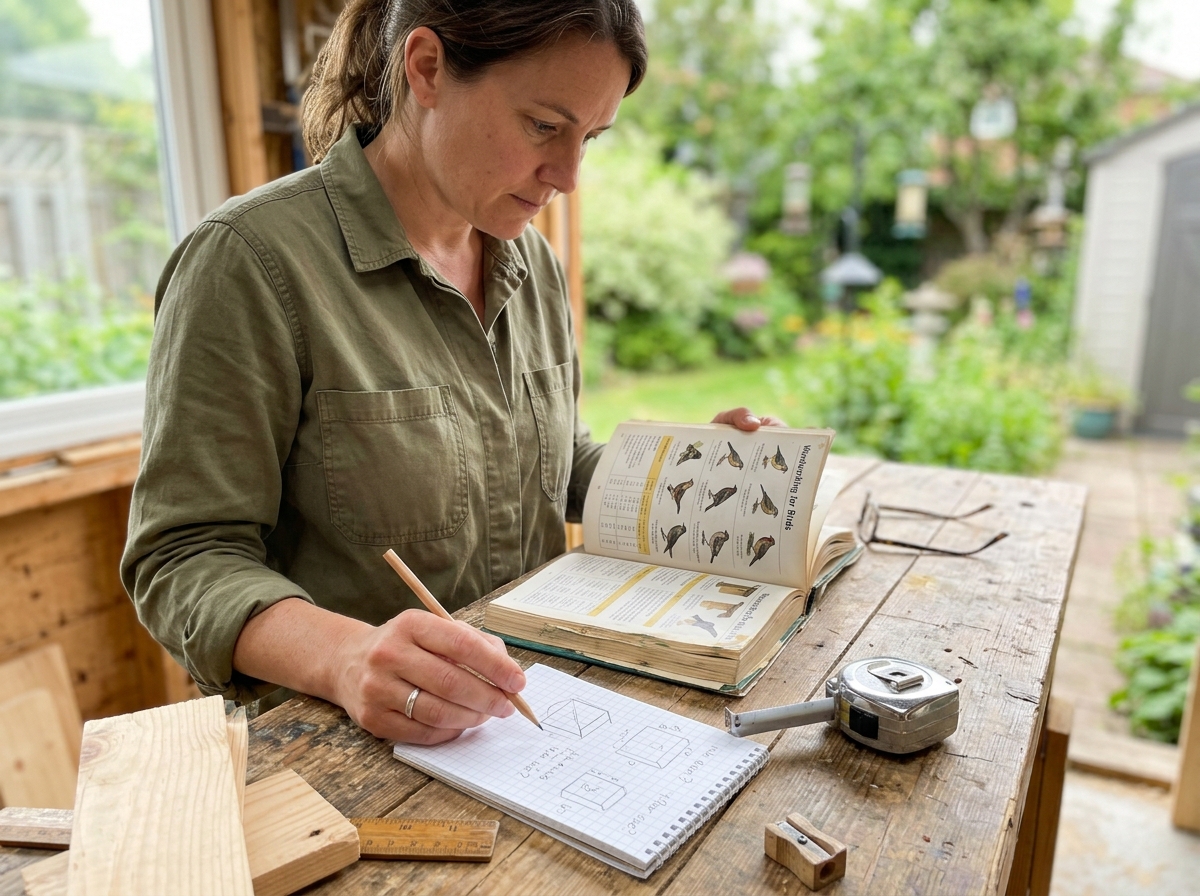
Before you cut a single piece of wood, decide which bird you are building for. That choice drives every dimension: the box size, the floor area, the entrance hole diameter, and how high you mount it. Building a box with the wrong entrance hole is the single most common beginner mistake, and it either keeps target birds out or lets starlings and house sparrows take over.
The table below covers the most popular backyard species and the key numbers you need. If you are not sure which birds are in your area, start with the Eastern Bluebird or Carolina Wren spec, because those are the most forgiving and widely distributed across North America.
| Species | Floor Size (in) | Box Depth (in) | Entrance Hole Diameter (in) | Hole Height Above Floor (in) | Mounting Height (ft) |
|---|---|---|---|---|---|
| Eastern Bluebird | 5 x 5 | 8 | 1.5 | 6 | 5–10 |
| Tree Swallow | 5 x 5 | 6–8 | 1.5 | 4–6 | 5–10 |
| Carolina Wren | 4 x 4 | 6–8 | 1.25–1.5 | 4–6 | 5–10 |
| Black-capped Chickadee | 4 x 4 | 8–10 | 1.125 | 6–8 | 5–15 |
| House Wren | 4 x 4 | 6–8 | 1.0–1.25 | 4–6 | 5–10 |
| Downy Woodpecker | 4 x 4 | 8–10 | 1.25 | 6–8 | 8–20 |
| Wood Duck | 10 x 18 | 24 | 3 x 4 (oval) | 20 | 5–20 over water |
One design rule that surprises a lot of beginners: do not add a perch below the entrance hole. It feels like a nice finishing touch, but both NestWatch and the U.S. Fish and Wildlife Service explicitly warn against it. A perch gives predators like raccoons and cats a platform to work from, which puts nesting birds at serious risk. Leave it off entirely.
Entrance hole placement matters more than box color
Center the entrance hole horizontally on the front panel. The vertical position depends on your target species (see the table above), but it should always be high enough that a parent bird cannot be grabbed from outside. Rough up the interior surface below the hole with a rasp or drill a few horizontal grooves so nestlings can grip the wood and climb out when they are ready to fledge.
Materials and Tools Checklist
You do not need a full workshop for this. A circular saw or jigsaw, a drill, and a handful of screws will get you there. Here is what to gather before you start.
Wood
Use untreated, rough-sawn lumber. Cedar and redwood are the best choices because they resist rot and regulate temperature well. Pine and fir work fine if you seal the exterior later. Never use pressure-treated lumber, plywood with exterior glue, or painted scrap wood inside the box. The off-gassing from treated wood is toxic to eggs and chicks. One standard 1x6 or 1x8 board, 6 feet long, is enough for a basic bluebird or wren house.
Tools
- Circular saw, jigsaw, or hand saw for straight cuts
- Drill with bits: 1/8-inch pilot bit, 1/4-inch ventilation bit, and a spade or hole-saw bit in your target entrance diameter
- Tape measure and pencil
- Square or speed square
- Clamps (two are enough)
- Sandpaper, 80 and 120 grit
- Safety glasses and hearing protection
Hardware
- 1-5/8-inch exterior deck screws (about 20 for one box)
- One stainless steel hinge or two 3-inch carriage bolts with wing nuts for a cleanout door
- Optional: galvanized metal predator guard for the mounting pole
Step-by-Step Instructions: Standard Bluebird Box
This plan builds a 5x5-inch floor, 8-inch-deep box with a 1.5-inch entrance hole, sized for Eastern Bluebirds and Tree Swallows. All dimensions are for nominal 1x6 lumber (actual thickness 0.75 inch, actual width 5.5 inch). Adjust using the table above if you are targeting a different species.
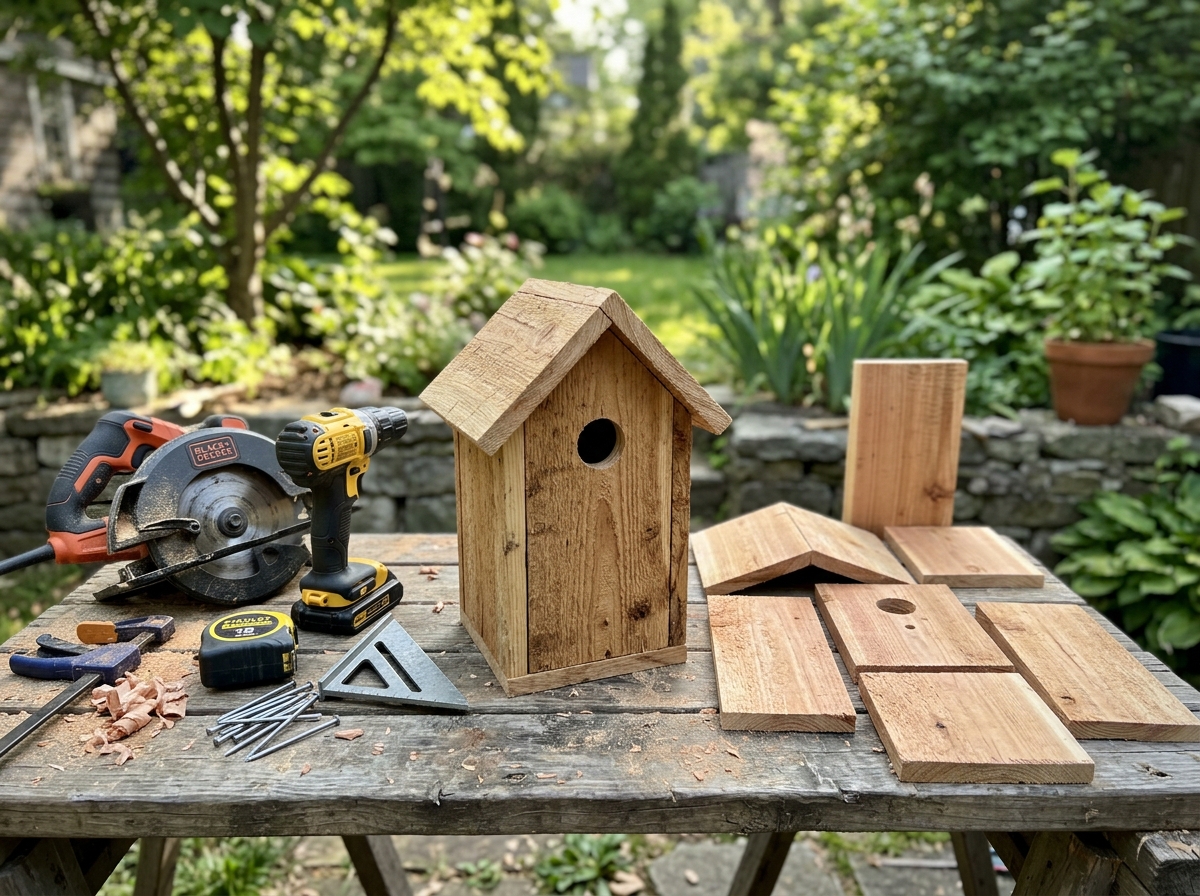
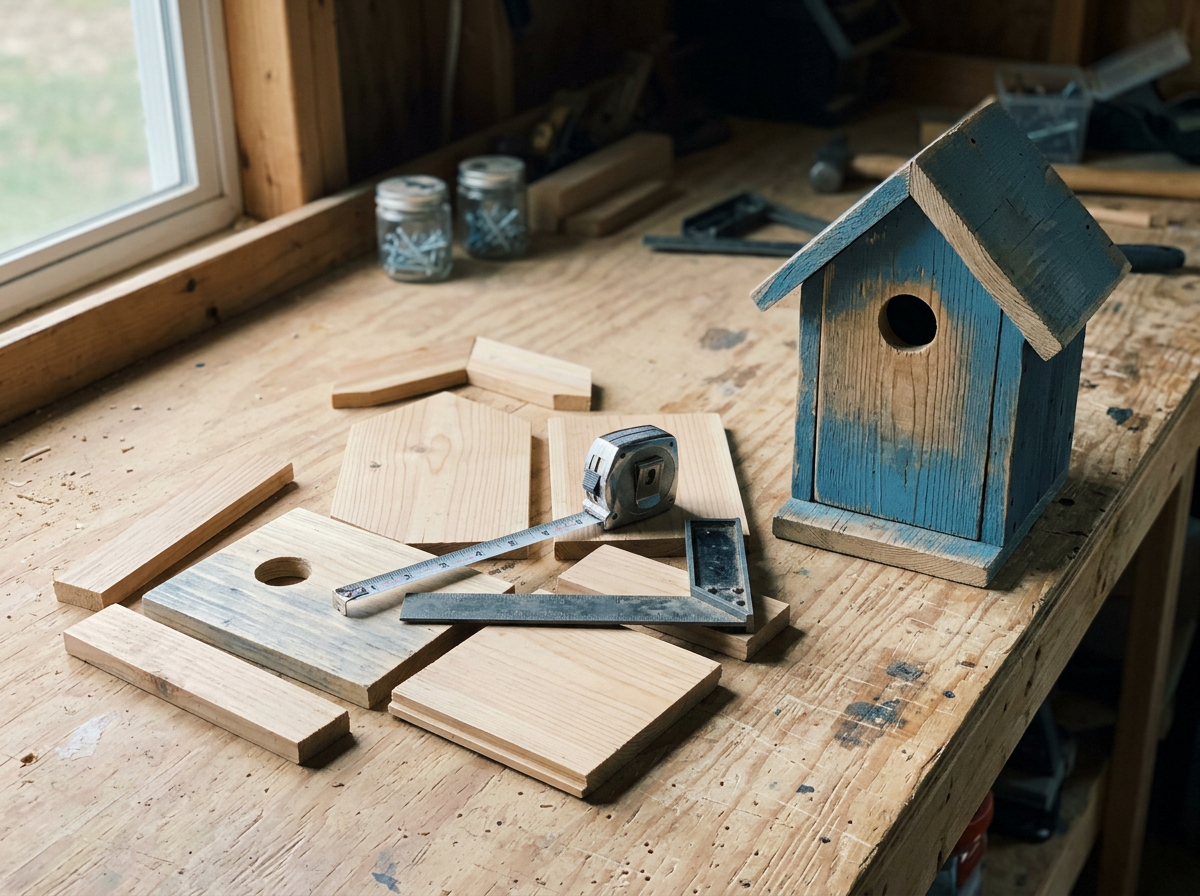
Cut list
| Part | Dimensions (inches) | Quantity | Notes |
|---|---|---|---|
| Front panel | 5.5 wide x 9.25 tall | 1 | Entrance hole drilled here |
| Back panel | 5.5 wide x 14 tall | 1 | Extra length used for mounting |
| Side panels | 4.5 wide x 10 tall | 2 | Angled top cut at 15° for roof slope |
| Floor | 4.5 x 4.5 | 1 | Corners clipped 3/8 in for drainage |
| Roof | 7 wide x 8 deep | 1 | Overhang protects entrance |
The back panel runs longer than the box height so you can mount the whole unit to a post or tree without a separate mounting bracket. Leave the bottom 5.5 inches of the back panel exposed below the box floor, and drill two mounting holes through it.
Assembly steps
- Cut all pieces according to the cut list. Label each piece with pencil as you go.
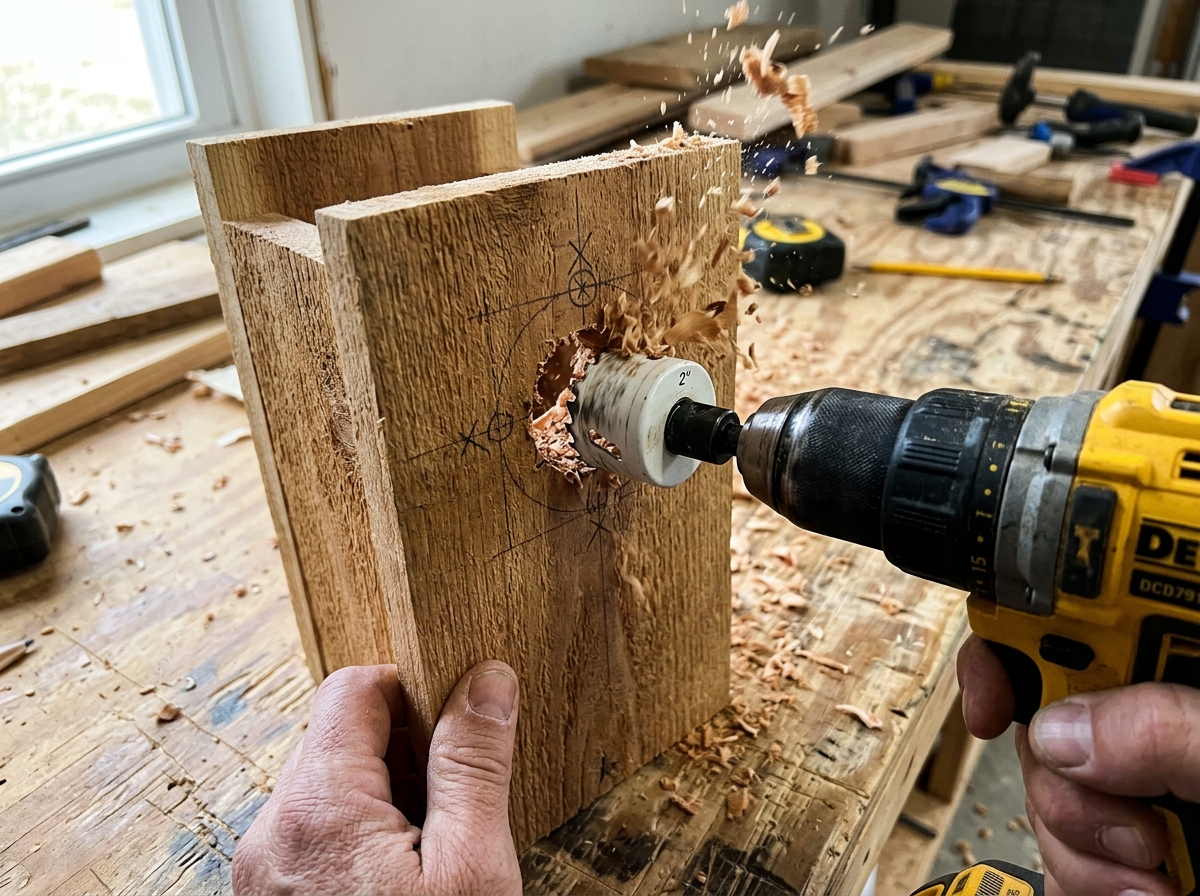
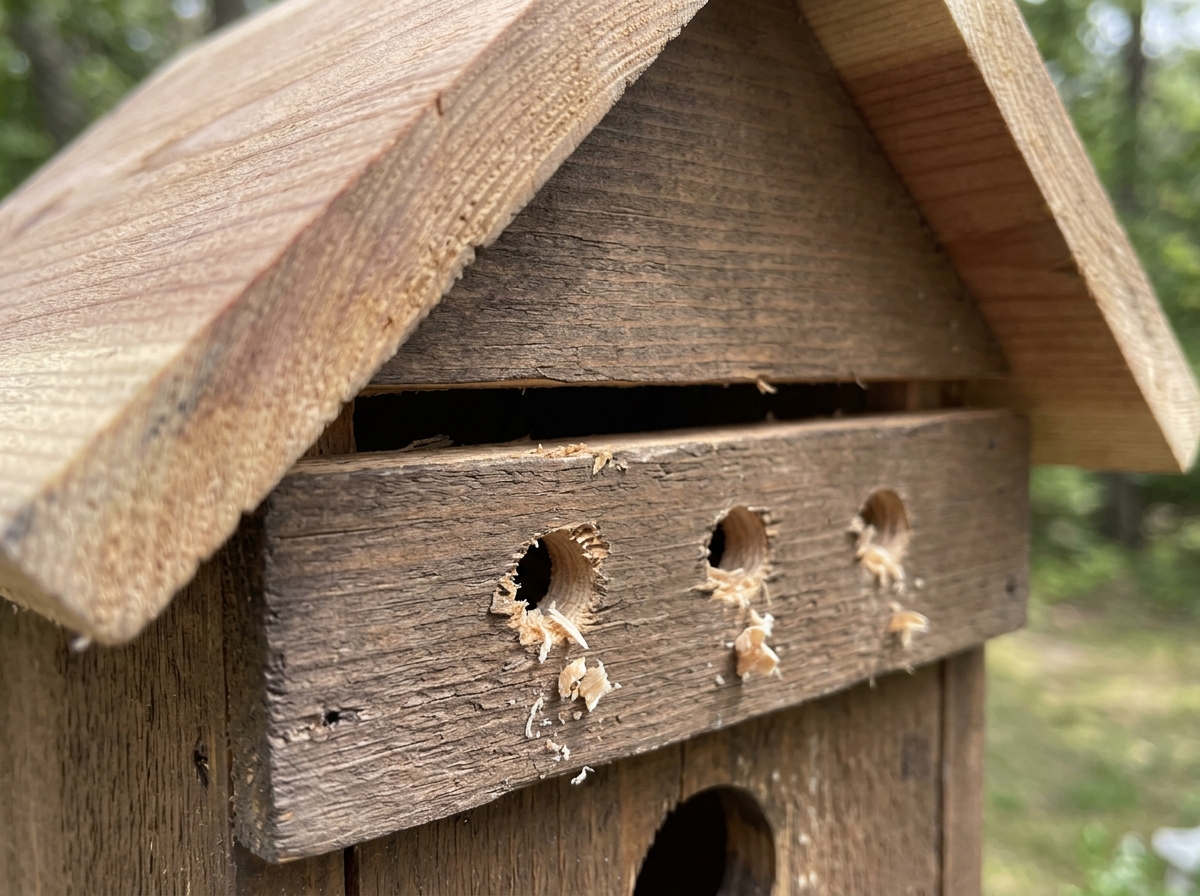
- Drill the entrance hole centered on the front panel, positioned 6 inches above where the floor will sit. Use a sharp spade or hole-saw bit and back the wood with a scrap piece to prevent blowout.
- Drill four 1/4-inch ventilation holes in each side panel, spaced evenly near the top edge just below where the roof will sit.
- Clip the four corners of the floor panel at 45 degrees, removing about 3/8 inch from each corner. This creates drainage gaps so rainwater cannot pool inside.
- Attach the floor to the back panel first, flush with the bottom of the box section. Use two pilot-drilled screws from the back into the floor edge.
- Attach the two side panels to the back panel using two screws per side, flush with the outer face of the back.
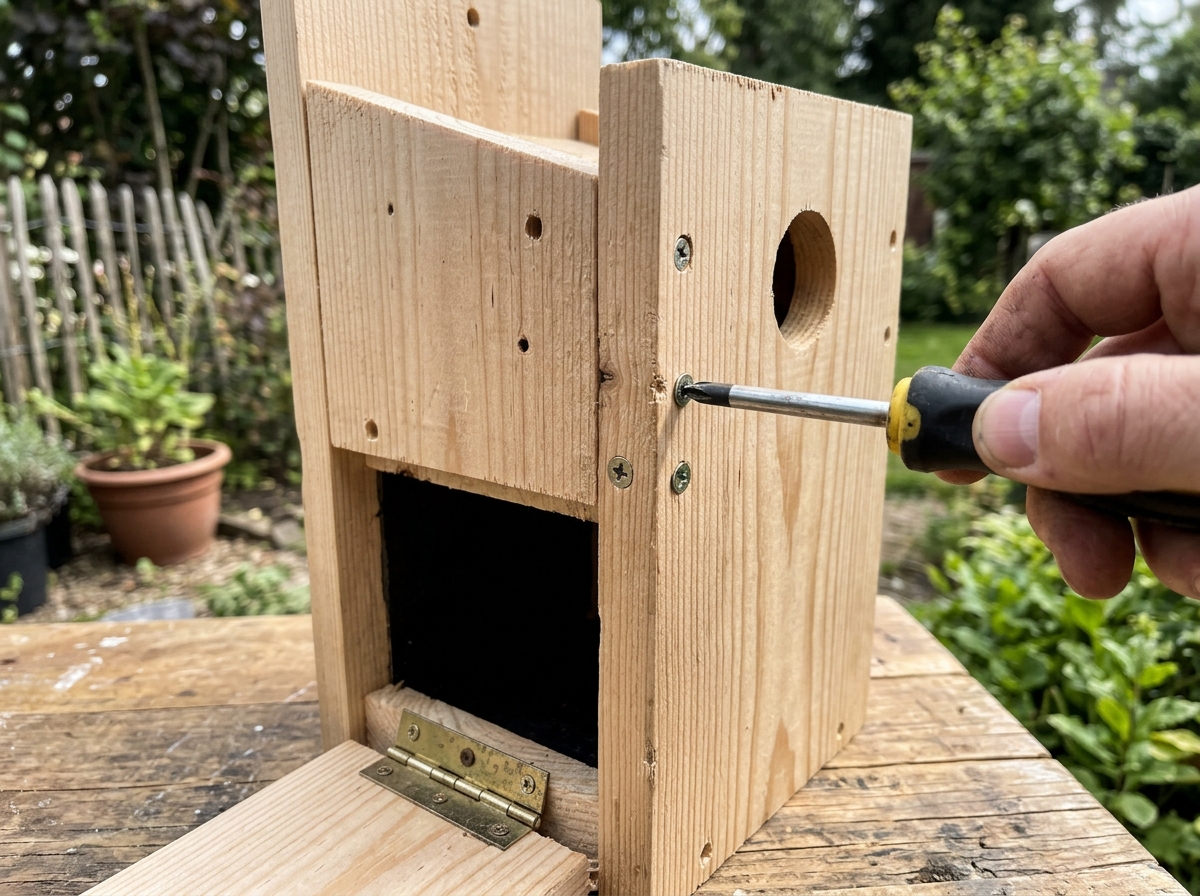
- Slide the front panel into position. Before screwing it permanently, decide if you want a cleanout door. If yes, attach only the top screw on each side of the front and add a single screw through the bottom that can be removed each fall for cleaning. Alternatively, hinge one side panel for easy access.
- Set the roof on top with a 1.5-inch overhang past the front panel. Angle the back edge flush with the back panel. Secure with two screws from above into each side panel, and two into the front panel top edge.
- Sand all exterior edges lightly with 80-grit paper to remove splinters. Do not sand the interior.
- Do a final check: confirm no exposed nail tips inside the box, confirm the floor clips are open, and confirm the entrance hole has no sharp edges.
Build One in a Day: A Streamlined Workflow
If you want to go from raw lumber to mounted box in a single Saturday morning, this is how you do it without cutting corners on safety or quality.
- Buy a pre-dimensioned 1x6 cedar board, 6 feet long, and ask the hardware store to rip it to 5.5 inches if needed. Many stores will make two or three cuts for free.
- At home, mark all cuts on the board at once before touching the saw. You can fit all five pieces on one 6-foot board with careful layout.
- Make all your saw cuts in one session, then set the saw aside. Switch to the drill and do all hole-boring: entrance hole, ventilation holes, pilot holes, and mounting holes in sequence.
- Assemble using clamps to hold pieces while you drive screws. Working in the order: back, floor, sides, front, roof takes about 20 minutes if pieces are prepped.
- Mount the box the same day. A 4x4 fence post or metal EMT conduit pipe works perfectly. Mounting while the motivation is high beats leaving it in the garage for weeks.
If you want to build several boxes at once, which is a great idea for attracting multiple pairs of swallows or bluebirds, batch your cuts. Cut all fronts first, then all backs, then all sides. This is called gang-cutting and it is much faster than building one box start to finish before moving to the next.
Assembly Details That Actually Matter
Ventilation
Nestlings die from heat as often as from cold. The U.S. Fish and Wildlife Service recommends either leaving a small gap between the roof and the side walls, or drilling 1/4-inch holes just below the roofline on both side panels. Do both if you are building in a climate with hot summers. Four holes per side is enough air movement without making the box a wind tunnel in spring.
Drainage
The clipped floor corners handle most drainage, but you can also drill two 3/8-inch holes through the floor itself if you want extra insurance. Keep nesting material dry and the chicks survive bad weather far better. A wet nest is one of the leading causes of nest failure.
Safe fastening
Screws are always better than nails for a bird house. Nails loosen over freeze-thaw cycles and the box can literally fall apart mid-season. Use exterior-grade deck screws and always drill pilot holes in cedar or pine to avoid splitting. Do not use staples anywhere near the interior. Check every screw tip is not poking through into the interior cavity before you mount the box.
Finishing, Mounting, and Placement for Attracting Birds
Finishing the exterior
Leave the interior raw and unfinished. On the exterior, you have a few good options. Cedar and redwood can go up bare and weather naturally. Pine should get one coat of exterior latex paint or a water-based stain on the outside surfaces only, never inside. Stick to earth tones: tan, gray, or bark-brown. White works for Tree Swallows and Purple Martins, which are known to prefer it. Avoid dark colors in sunny climates because a black or dark-brown box in direct sun can exceed 100 degrees Fahrenheit inside, which is lethal to eggs and chicks.
Where and how to mount
Mount bluebird and swallow boxes on smooth metal poles 5 to 10 feet high in open areas with short grass, facing east or southeast to catch morning sun without overheating in the afternoon. Chickadee and wren boxes can go on fence posts, tree trunks, or poles in lightly wooded areas at similar heights. Keep boxes at least 100 yards apart if you are putting up multiple bluebird boxes, because pairs are territorial. Wren boxes can go closer together.
A stovepipe-style predator baffle mounted on the pole below the box is one of the best investments you can make. Without it, raccoons and snakes will find the nest. Slide a 6-inch-diameter, 24-inch-long section of smooth metal stovepipe over the mounting pole below the box. Nothing climbs past it reliably.
Timing your installation
Get boxes up by late February or early March in most of the U.S. and southern Canada. Bluebirds scout nest sites early, and you will miss the first nesting attempt if you wait until April. In warmer southern states, some bluebirds start scouting in January. Since today is March 22, 2026, your boxes are just in time for peak scouting in most regions. Put them up this week.
Troubleshooting Beginner Mistakes and Keeping Things Running
No birds are using the box
Give a new box at least one full season before you move it. If birds are still ignoring it after that, check three things: entrance hole size, location, and competition from house sparrows. A box in a heavily wooded backyard will not attract bluebirds no matter how well it is built. House sparrows are aggressive nesters and will evict bluebirds. If you see a house sparrow nest (a messy pile of grass and debris rather than a neat cup), remove it promptly and repeatedly until they give up. This is legal and encouraged under the Migratory Bird Treaty Act, which does not protect house sparrows or European starlings.
Box was used but chicks did not survive
Check for wet nesting material, evidence of predator visits (scratch marks around the entrance, displaced roof), or mites and blowfly larvae in the old nest. After each nesting attempt, remove the old nest entirely. This reduces parasites and may allow the pair to attempt a second brood in a cleaner box. Use gloves and a small plastic bag. Clean thoroughly in fall.
Box is falling apart after one season
This almost always means nails instead of screws, untreated pine that was not sealed, or a roof with no overhang. Rebuild using the cut list above, use exterior screws, and make sure the roof projects at least 1.5 inches past the front panel. Cedar boxes built this way routinely last 10 or more years with minimal maintenance.
Annual maintenance checklist
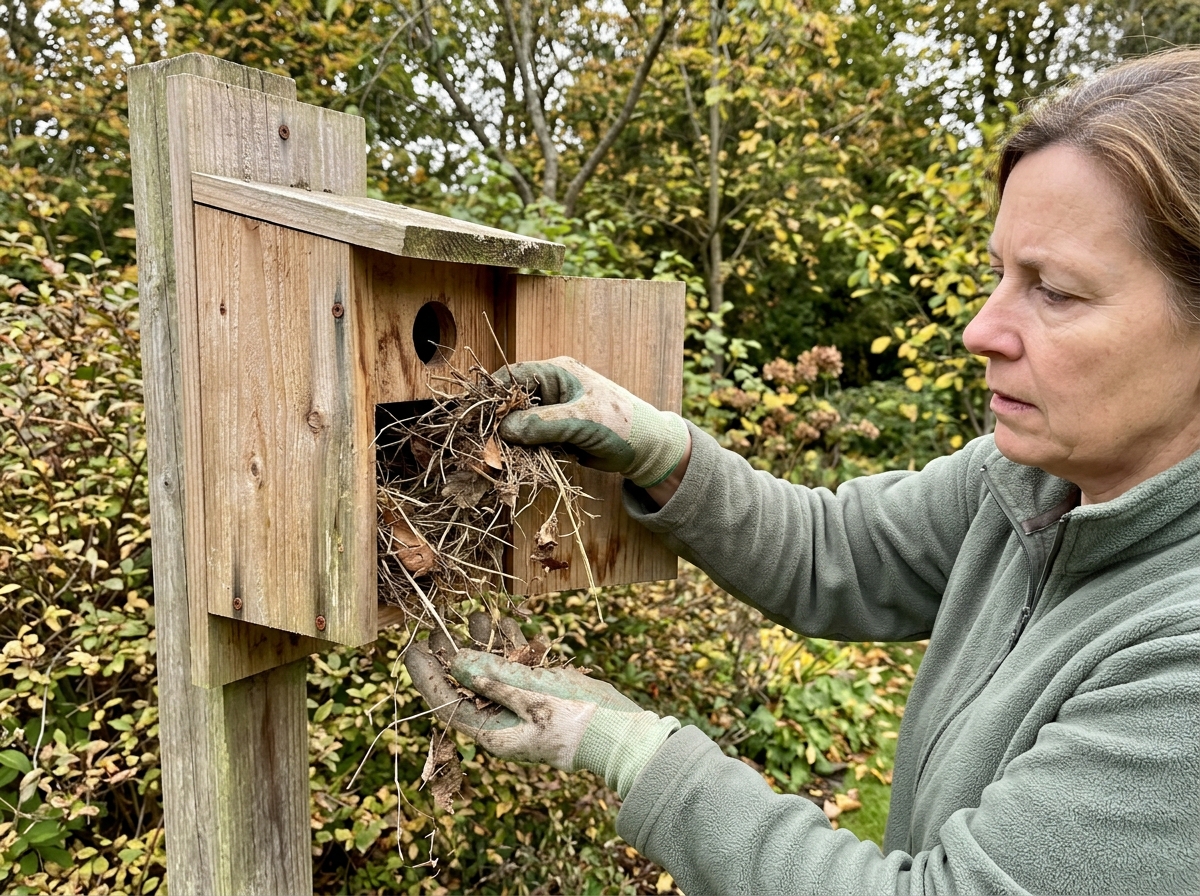
- Remove old nesting material after the breeding season ends (late August to September in most areas)
- Inspect for cracks, loose screws, and rot every fall
- Re-tighten or replace screws as needed
- Check that drainage holes and ventilation holes are clear and not blocked by debris
- Repaint or restain exterior surfaces every two to three years
- Inspect and clear predator baffles of debris each spring before birds arrive
Once you have one bird house built and placed, you will almost certainly want to build more. From there it is a short step to experimenting with different species specs, trying creative materials like reclaimed license plates for the roof (a fun variation worth exploring), or comparing whether a feeder nearby helps or hurts occupancy. The core skills you used here scale directly to every project that comes after.
FAQ
How do I know if my entrance hole is the right size before I mount the bird house?
Most nest failures from a “right bird, wrong box” happen because the hole is off size or too high. Re-check the entrance hole diameter against your target species, and confirm the hole is centered side-to-side and positioned so the bottom of the hole is not reachable from the ground or adjacent branches. If you cannot verify height precisely, mount higher than your first instinct, then adjust later using the same box as a learning reference.
What should I do if I already added a perch under the entrance hole?
If you accidentally put a perch on the front, remove it. Even a small perch can increase predation and can change how predators approach the box. If the perch is part of the board you cannot remove cleanly, replace the front panel rather than leaving the perch in place.
My box seems drafty. Can I add extra ventilation holes to fix that?
A common fix for drafts without risking overheating is to control leakage through the roofline and side walls, not by enlarging the entrance. If your box feels too “drafty,” ensure the roof overhang is correct and that roof joints are tight. For ventilation, follow the plan’s gap or small drain/vent hole approach, then avoid adding extra holes near the entrance.
Can I paint or stain the inside to make it smoother or easier to clean?
Yes, but do it cautiously. For pine or fir, only seal or finish the exterior surfaces after assembly, and keep the interior completely unfinished. Use one breathable exterior coat, avoid sealing seams with anything that can trap fumes, and let the box fully cure outdoors before installing so odors do not linger inside.
What’s the best way to prepare the inside so chicks can leave safely, without making it too slippery?
Avoid “decorating” the interior or adding anything that can snag nestlings. Smooth up rough spots gently, but do not sand deeply enough to remove grip features near the entrance area. For climbing, the plan’s approach is to add texture below the hole, not to polish the entire cavity.
How should I adjust mounting if I move a bird house to a new location?
If you plan to move a finished box between seasons, don’t treat it like a free-standing object outdoors. Re-check the pole stability, and confirm the mounting pole is smooth where it meets the baffle area. After moving, look again for predator access routes such as nearby branches, fences, or climbing surfaces leading to the box.
How can I keep the inside cooler in very hot summers?
Yes, but you need more than just “shade.” In hot climates, prioritize lighter exterior colors, add the roof overhang correctly, and use ventilation options near the roofline. If you see the interior getting uncomfortably hot in mid-afternoon, relocate to east or morning-facing exposure or a more shaded area rather than trying to cool it with extra holes.
No birds are using my new box. What should I troubleshoot first?
If you see early interest but no nesting, use a quick diagnostic. First, verify entrance size and placement. Second, check for house sparrows nearby, including hidden cavities around the same height. Third, confirm the habitat context, for bluebirds, open areas with short grass are important, and a box placed in dense shade often stays unused.
When and how should I clean out an old nest and deal with pests?
You should remove old nests after each nesting attempt and clean in the fall. Wear gloves, place debris in a sealed bag, and avoid blowing dust into your face. If mites or fly larvae are present, clean thoroughly and let the box dry completely before reusing in the next season.
How long should I leave a bird house up if it doesn’t get used right away?
In most regions, “one full season” means you keep it up for at least one nesting cycle after mounting. Only then decide it is truly ignored. Even if birds don’t use it the first year, leave it in place, because site fidelity and competition can change year to year.
How close can I put multiple bird houses to each other?
Don’t add a landing pad, and don’t place it too close to other boxes for the species you are targeting. Spacing matters most for territorial bluebirds, and wren boxes can tolerate closer spacing. If you are unsure, start wider spacing for bluebirds and swallows and increase monitoring for sparrow conflict.
Will a predator baffle work if there are trees or fences near the pole?
A predator baffle helps most when it is smooth, properly positioned, and mounted on the same pole the box uses. Confirm the baffle’s diameter is correct, and that nothing provides an alternate route, like a fence, nearby tree trunk, or angled branch that bridges over the baffle.
Next Article
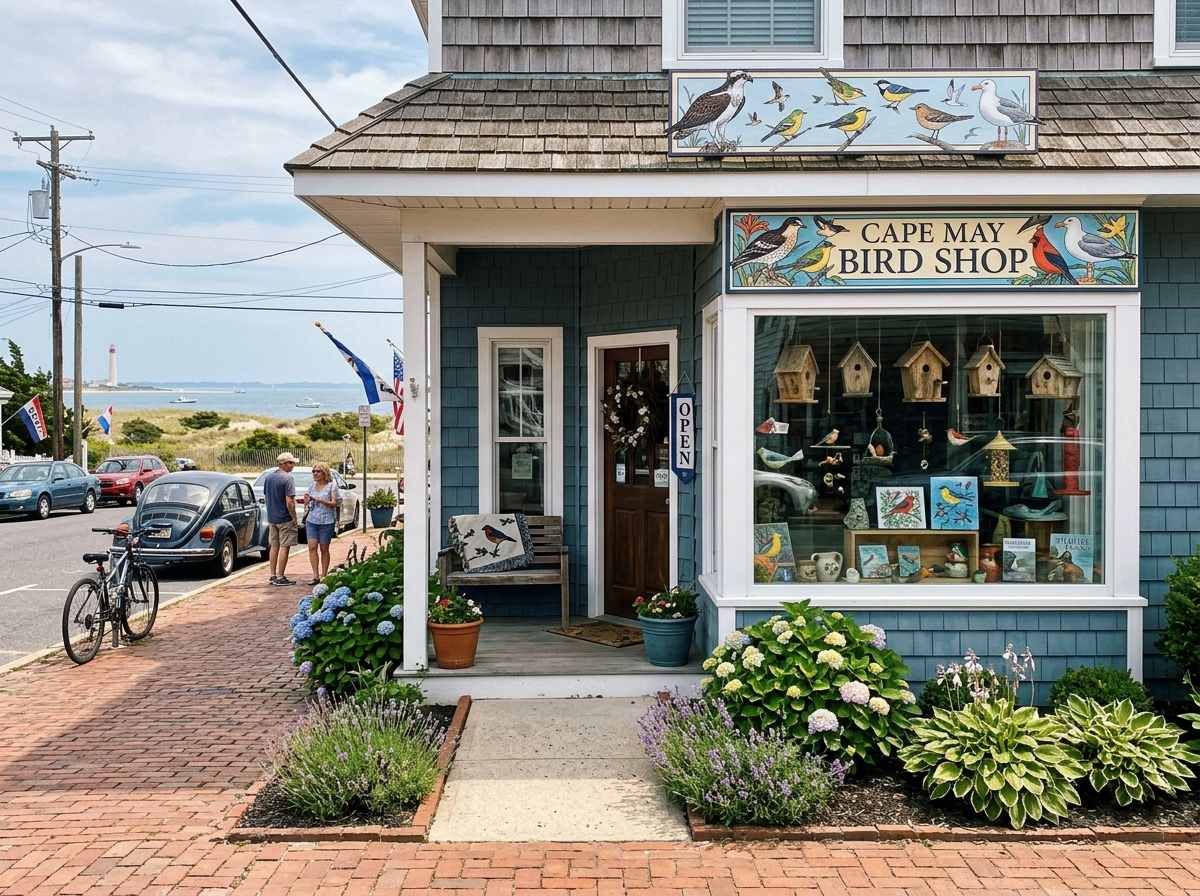
Bird House of Cape May Guide: Find It, Plan Your Visit
Discover the bird house of Cape May, where it is, what to see, and step-by-step directions and visit tips.